Have you tried “diets” claiming to help you lose that last ten pounds just in time for summer, or a social event, or because you’re worth it? Have you taken diet pills, done crazy exercises, or eaten just one type of food (I’m looking at you, cabbage diet and grapefruit juice cleanse) for a set amount of time in the hopes of a miracle?
.
Do you know what diet means? The primary definition is: “the kinds of food that a person, animal, or community habitually eats”. I’ve always been of the view that a “Diet” is just that, the things that you eat. A diet is not meant to be a 3-day or 2-week affair just to get you into your wedding dress or bikini then quickly discarded and replaced with drive-through lines. Diets of that sort never last and never give lasting results.
.
Any diet which is high in whole foods and grains is bound to improve your health. Any diet which is heavy in processed foods with added sugars, sweeteners, salt, fat, and preservatives is bound to harm your health. The most successful dieters long-term also do not focus solely on food alone, but rather on the entire lifestyle.
The Mediterranean way of life, specifically the way of life in Greece, Spain, and other countries bordering the Mediterranean Sea, is just that. It focuses on staying active, eating whole foods that your body loves, lowering stress, increasing relationship bonds, and generally living as wholly and healthily as possible.
.
If you haven’t heard yet, there is some evidence claiming the Mediterranean diet is the healthiest “fad” diet to ever come along.
.
According to the Mayo Clinic website, a leading source for health information, “Research has shown that the traditional Mediterranean diet reduces the risk of heart disease…an analysis of more than 1.5 million healthy adults demonstrated that following a Mediterranean diet was associated with a reduced risk of death from heart disease and cancer, as well as a reduced incidence of Parkinson’s and Alzheimer’s diseases.”
Eating primarily plant-based foods, such as fruits and vegetables, whole grains, legumes and nuts
Replacing butter with healthy fats, such as olive oil
Using herbs and spices instead of salt to flavor foods
Limiting red meat to no more than a few times a month
Eating fish and poultry at least twice a week
Drinking red wine in moderation (optional)
The diet also recognizes the importance of being physically active, and enjoying meals with family and friends. Go for a walk after dinner, play with your kids or dog in the yard. Walk to the store, the grocery, the restaurant. Take a long bike ride on the weekend. Go up and down the steps seven times to finish the laundry. Tell stories, share food, love, and laughter.
If you follow this diet and lifestyle, you are sure to experience a plethora of health benefits. Your internal organs and skin will thank you for all the wonderful vitamins and minerals you are eating. The antioxidants in the vegetables, healthy fats, and red wine will help keep your body and brain young. And unwanted fat will have a harder time finding a resting place on your hips or gut if you are always in motion.
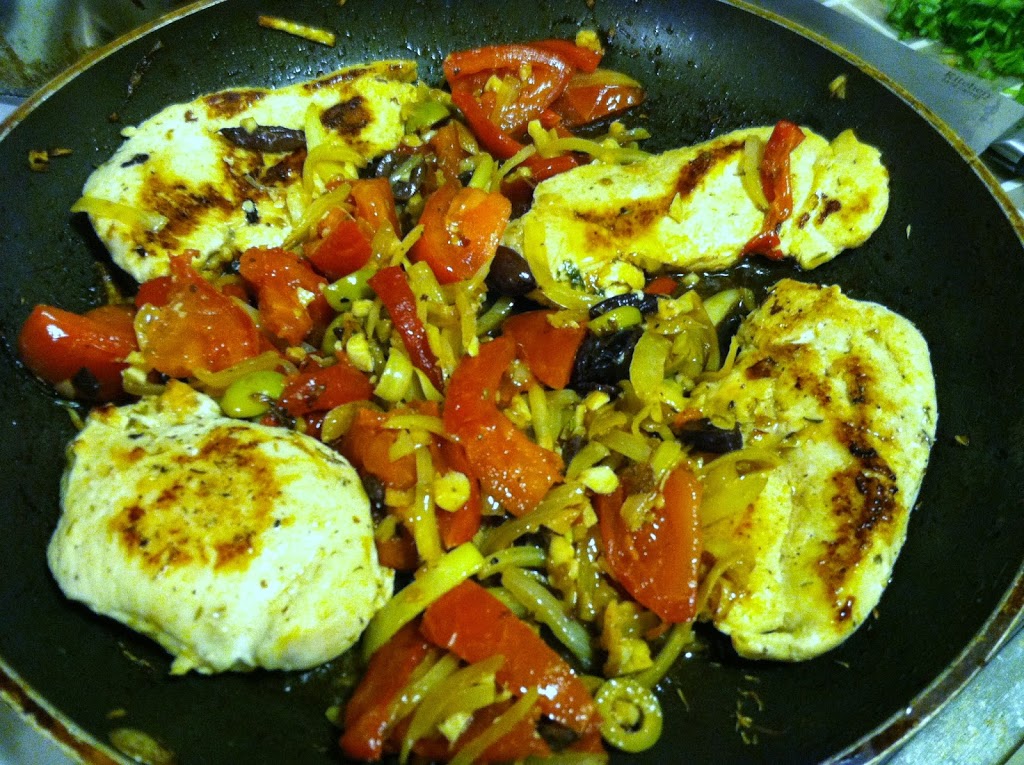
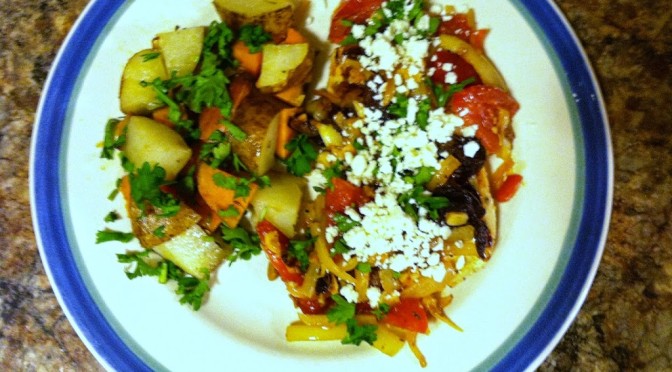
This is a simple recipe you can try to work extra Mediterranean-inspired flavors into your weekly meals. Start-to-finish only takes about 30 minutes, and dinner for four can be on the table. Serve with a healthy whole grain side like quinoa, couscous, or rice, or a potato medley and fresh green salad.
Ingredients:
4 boneless, skinless chicken breasts or tenders
1 whole yellow onion, slivered
1 large beefsteak tomato (or 1 can diced, drained)
1/2 cup diced red pepper
2 tbsp olive oil
3-5 garlic cloves
1 cup chopped olives (try kalamata and/or pimiento)
Optional: 1/4 cup feta cheese, seasonings to taste
Step 1: In a frying pan on medium heat, add the sliced onion and garlic cloves. Cook, stirring occasionally, about 7-10 minutes. Onions should become translucent and begin to caramelize and garlic becomes fragrant.
Step 2: Add the olives, sliced, and the tomato to the pan and continue to cook vegetables another 5-10 minutes, until tomatoes release their juice.
Step 3: Remove the vegetables to a separate plate and keep warm. Season the chicken, I used sea salt and white peppercorns. Cook the chicken breasts for 10-15 minutes on both sides, ensuring there is no more pink in the center.
Step 4: Add the veggies back into the skillet, and heat everything throughout.
Serve hot as is, or over your choice of grain or with a side dish. If you like, sprinkle with a tbsp or two of feta cheese or avocado. This dish could also be made with tempeh or pressed tofu instead of the chicken for a vegetarian/vegan option.
Word on the street is that this super important football game is happening this weekend. News to me. Glad my mom cares as much as I do (read; not at all) since she is in town!
However, Tyson Crispy Chicken Strips is sponsoring a recipe contest, and of course when she is in town, we have to cook together! So this worked out great.
After much brainstorming and asking friends for ideas, we settled on one of the most versatile bases we know: biscuit cups. The base of all these following combinations is the humble buttermilk biscuit. Then they can be topped with all manner of mouth-watering concoctions.
The top three: chicken-bacon-ranch, Buffalo chicken dip, and chicken-barbeque-tater tots.
The Buffalo dip can be served on its own, it is so stinking addictive! Seriously people. Spoons.
Chicken Nests
Ingredients:
1 can biscuits
1/2-1 cups filling
Sprinkle of cheese
Buffalo Chicken Dip
Ingredients:
2 Tyson fully cooked chicken breasts
Biscuit dough
1/2 c sour cream
1/2 c cream cheese
1/2 c ranch dressing
1/2 c shredded cheddar
Hot sauce to taste
Step 1: In a bowl, mix the sour cream, cream cheese, ranch, and hot sauce. Thaw and chop or shred the chicken breasts, and mix in.
Step 2: Mix the cheese in well. Use later to fill biscuit cups. Alternatively, you can heat this dip in the microwave or the oven, and serve with chips. Or spoons.
Step 3: Spread biscuit dough in the bottom of a sprayed muffin or tart tin. Put about 1 mounded tablespoon into the center. Sprinkle a little cheddar on top.
Step 4: Bake in a 400 degree oven for 8-11 minutes, until biscuit dough is puffed and slightly browned on top.
Chicken Bacon Ranch
Ingredients:
Biscuit dough
1-2 Tyson fully cooked chicken breasts
3-4 pieces bacon
2-3 tablespoons Ranch dressing
Shredded cheddar cheese
Step 1: Chop up or shred the chicken. Spread the biscuit dough in the bottom of a sprayed pan.
Step 2: Cook and drain the bacon, and crunch it up. On top of the biscuit dough, add 1 tbsp chicken, 1 1/2 tsp ranch, and a sprinkle of bacon. Top with a pinch of cheddar.
Step 3: Bake in a 400 degree oven for 8-11 minutes.
BBQ Chicken Tater Bites
Ingredients:
Biscuit dough
1-2 Tyson fully cooked chicken breasts
2-3 tbsp BBQ sauce
Handful of tater tots
Sprinkle of shredded cheddar cheese
Step 1: Spread biscuit dough in the bottom of muffin or tart pans. Chop the chicken and layer 1 tbsp in the dough.
Step 2: Pour 1 1/2 tsp BBQ sauce on top of the chicken. Plop a tater tot on top, and cover with shredded cheddar cheese.
Step 3: Bake in a 400 degree oven for 8-11 minutes. If using a muffin tin rather than a tart tin, bake an extra 4-5 minutes.
These are the muffin-tin sized cups, same recipes but add about three times as much of each filling. The size makes for a great dinner, especially if served with extra sauces on the side. These can also be frozen, and re-heated for lunches and snacks later.
Muffin sized and tart sized
These are the hot tarts right from the oven. Cheese is all bubbly, and they all smell amazing.
Served on a vaguely football-shaped serving tray
I can’t even tell you how fantastic these things turn out!!!
Every one of these flavor combinations is totally delightful.
They are super delightful, and very customizable. You could top with just about any combination you prefer. Add spinach, or caramelized onions, use other meats or just cheeses.
The larger muffin sized ones are very filling, with a larger filling-to-dough ratio if that’s what you’re looking for.
They also make for a very nice presentation.
Serve with extra dipping sauces. Ranch, BBQ sauce, and hot sauce.
Add some carrots and celery to your ranch, or make some extra Buffalo Dip on the side as well. Great finger foods, I guarantee these will not last long!
Diced tomatoes, olives, or green onions can also be a nice topper.
This recipe inspiration came from one of the several food magazines I regularly read. I absolutely love easy, one-dish recipes, especially if they look like you took hours to plan and create this masterpiece, but in reality all you had to do was creatively layer several ingredients and give it some time.
Mexican food is a great place to start for simple yet flavor-packed recipes. Pretty much anything involving beans, rice, and veggies will end up becoming a hit, and there are literally thousands of ways to get creative and make dishes your own. You can customize everything from the spices to the meat or lack thereof to the type and amount of vegetable and carb.
For this recipe, I had chicken breast in the freezer, as well as some corn, and canned necessities (beans and diced tomatoes) coupled with a few fresh ingredients like avocado and shredded cheese, and we got ourselves a multi-layered chicken enchilada casserole!
Ingredients:
1 boneless, skinless chicken breast, diced
1 can black beans, drained
1 can diced tomatoes with chilies or 1/2 cup salsa
1 cup frozen corn
1 cup shredded cheese
1/2 cup guacamole or 1 mashed avocado
1/2 red onion, sliced
1 bell pepper, sliced
1 tsp cumin
1 tbsp butter or margerine
2 tortillas (flour or corn, 10 or 12 inch)
Step 1: In a skillet, cook the onion, corn, peppers, and cumin in butter until all vegetables are soft and corn is lightly charred, about 5 minutes.
Step 2: In the same or a different skillet, cook the diced chicken until completely white and hot throughout.
Step 3: In a large round pie pan, cover with aluminum foil and place a tortilla on the bottom of the pan. Spoon on half of the cooked chicken, and then half of the veggie mixture. It is super easy to make this vegetarian by leaving out the chicken, or you can switch it up with flank steak or chorizo.
Step 4: Spread on half of the drained diced tomatoes with chili and/or salsa.
Step 5: Sprinkle on half the can of drained beans.
Step 6: Spread on half of the guacamole, or sprinkle around slices or chunks of avocado.
Step 7: Put down another tortilla, and repeat the layers. Top it all off with a hearty sprinkle of shredded cheese.
Step 8: Bake at 350 for 30-45 minutes, until cheese is bubbly and browned on top.
Then simply slice up your casserole into as big a slice as you want, and enjoy!
This is an amazing flavor combination, and the tortilla layers hold it together mostly well. You can add a third, top layer of tortilla, or just do one layer of filling like a pot pie. Feel free to layer it in whatever order you want, and change around the ingredients to suit your tastes. Hope you like it!
It’s fragrant, delicious, brightly colored, and has SO many vegetables packed into one serving, yet even kids and picky eaters will likely go back for seconds!
.
It’s no secret that I love all Mexican foods. I’ve written about how I made the perfect refried beans, many variations on tacos, and the simple pizza-like toastadas. I’ve been meaning to tackle a particularly intimidating recipe for a while: enchiladas.
.
You may not think enchiladas are intimidating, but for whatever reason I kept thinking it would be hard to make these. Then the s.o. requested it, I had a big stack of tortillas in the fridge, and so I was like, ok it’s time.
Turns out, they weren’t so scary after all. And damn delicious.
.
Ingredients:
2 boneless, skinless chicken breasts
7 tortillas
2 tbsp taco seasoning
2 tbsp butter
1/2 cup refried beans
1 cup shredded cheese mix
1 can tomato sauce
1-2 tbsp sriracha
I used large flour tortillas here, I know corn is the norm. But trust me, no one was upset about these. Give it a try, or go ahead and use corn if that’s what you have.
Step 1: Cook the chicken either in the oven, frying pan, or poach in boiling water. Use two forks to shred it finely. Cook in a pan with a little butter and taco seasoning.
Step 2: In each tortilla, spread a few tbsp beans, a handful of shredded chicken, and sprinkle on some cheese. Roll up, and place with the seam-side down in a sprayed oven-safe pan.
Step 4: Once the pan is full, sprinkle more cheese over top, then pour the tomato sauce over everything. Use as much as you need to cover the tops, but not to soak them. (Sidenote, I hate the taste of regular enchilada sauce at restaurants, that’s why I went the homemade tomato sauce version. If you like it or have a jar of enchilada sauce at home, feel free to use that.)
Step 5: Squirt on a thin layer of sriracha and/or hot sauce, and bake at 350 for 30-40 minutes.
We ended up having two each, and the leftovers didn’t last more than a day. These could be made in the crock pot as well, simply assemble and leave on low all day. Make sure to add extra sauce so they don’t burn if you go that route.
Serve with a little sour cream on top to cut the spice if that’s your thing.
.
You could make the vegetarian by adding extra grilled veggies or tofu instead of chicken, and just feel free to add in some onions and peppers regardless of what else is in there.
This is part two of a four-part series on Ethiopian cooking, the American way. Since I am such an expert (I know someone from Ethiopia. Plus I’ve eaten it like… four times) I decided to share my versions of some of my favorites.
Sounds like the punchline of a bad Lent joke. Appropriate for April I guess. (Is April still when Lent happens?) But since the earlier post had already covered the ‘red’ meats of beef and pork, this one is for the “white meats”. Sorta. Chicken stew in Ethiopian is called Doro Wat. I’ve figured that most things that say “Wat” mean meat stew, whereas “Tibs” means meat and vegetables stewed together. As in “Yasa Tibs” meaning my fish, tomato & spinach stew.
The recipe I based the Doro Wat from is found HERE from NomNomPaleo, while the inspiration for the fish is found at Allrecipes HERE.
Ingredients (Doro Wat):
3-4 pounds chicken (bone in will give you better flavor, I used a mix of 2 thighs and 2 boneless skinless breast)
1/2 cup diced onion
2 tbsp butter
1 cup chicken stock
2 tbsp turmeric
1 tbsp garam masala
1 tbsp ginger powder
Step 1: Add stock to chicken in a pan, and cook over low heat until no pink is left. Cut the breast into bite-sized cubes.
Step 2: In a separate pan, add butter and diced onions. Cook until the onions are soft and translucent. Add 1 cup diced onion to the chicken.
Step 3: Add the rest of the spices, and simmer for 30 minutes or until serving. Add more stock if liquid starts to evaporate. Ingredients (Yasa Tibs):
1-2 small tilapia (or other white fish) fillets
1 cup fresh spinach leaves
1 tbsp garam masala
1 small can tomato paste
1 tbsp olive oil
1/4 cup fish sauce (or vinegar if you don’t have it)
2 tbsp lemon juice
Garlic salt to taste
Squirt of Sriracha or Tabasco, if you like
Step 1: Cut the fish into bite-sized pieces. Cook in a pan with olive oil until white and flaky.
Step 2: Add all sauces, spices, and spinach. Simmer at least until spinach is wilted, until serving.
This one is delightfully salty and tangy from the fish sauce and acidic lemon juice. And probably the healthiest stew thus far, with little to no fat and a spinach nutrition boost.
When I moved into my new apartment, I went on a stock-up grocery trip as I always do. One thing that was on sale was whole chicken (90 cents a pound or something). Since I had already brined and roasted a whole pheasant, I figured a whole chicken shouldn’t be much more difficult. So I got one and stuck it in the freezer.
Then one day I decided it was starting to get cold enough to count as fall, and chicken soup is great fall weather food! Of course, I roasted the meat and just enjoyed some tasty baked chicken meat first. The carcass is in the crock pot today to make stock for chicken soup.
I took out the bird, made a nice brine*, and roasted it the next day. And it turned out tender and amazing!
*If you don’t want to brine it overnight first, don’t worry about it. Skip right to the roasting part.
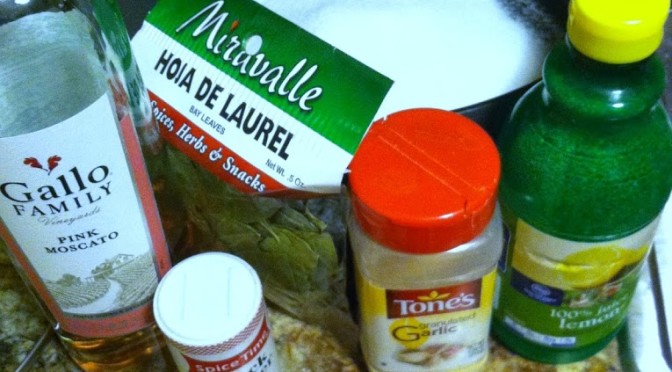
Ingredients for brine:
1 cup salt
1 cup white sugar
1/4 cup lemon juice
1 cup pink moscato (because I had no open white wines)
5 bay leaves
sprinkle garlic, sprinkle black pepper
About a gallon of water
Step 1: Mix all ingredients in a pot large enough to hold the whole bird. Add water to the top (once bird is added, not before, or you’ll spill everywhere. Not that I’ve ever done that…).
Step 2: Stick it in the refrigerator overnight (or at least for 4 hours. You can put it in there in the morning, head off to work and finish roasting it later that night too). I had to put my milk sideways on the bottom shelf to make room for a day, but I feel it is well worth the space-hogging.
Ingredients for the bird:
1 whole frozen chicken, thawed overnight
Several gobs of margerine or butter
1 whole apple, lemon, orange, and/or onion cut into quarters (I used one whole Gala apple)
Salt, pepper, and paprika
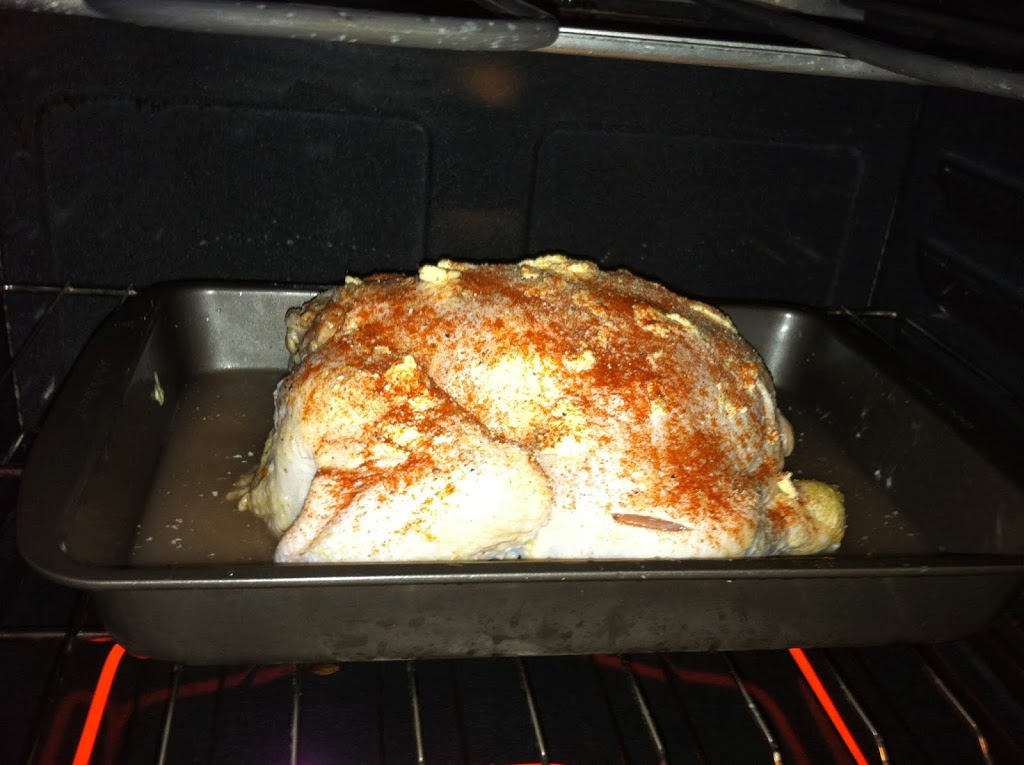
Step 3*: Take the bird out of the liquid, and pour the brine down the sink. Wipe off any moisture with a paper towel and place in a large baking pan. Rub it down all over with margarine. I despise raw chicken, so this part is super disgusting for me, but it is a necessary evil of epicuriosity. (*IF you skip brining, this is where to start)
Shove some butter chunks under the skin if you can too. If there are bits and pieces inside the cavity, take those out and dispose of or cook separately. Then sprinkle it all over with spices, and shove the aromatics (apple, onion, lemon) up the butt. Sorry, inside the cavity…
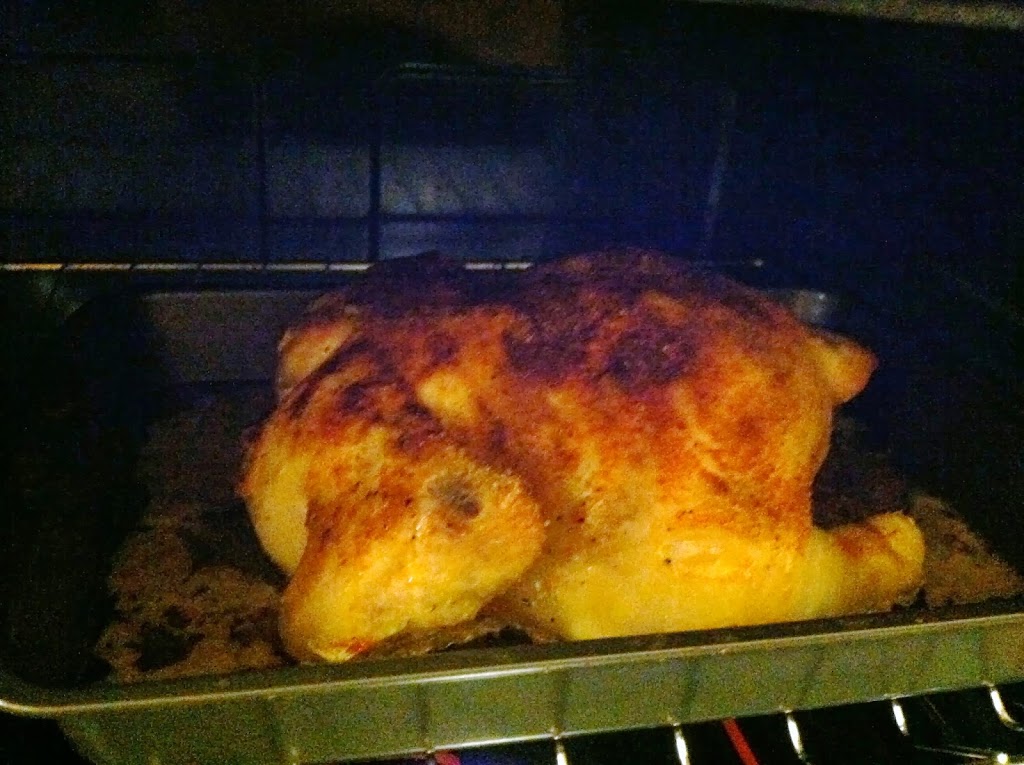
Step 4: Put the bird breast-side down into an oven at 425 for 15-20 minutes covered with aluminum foil. Flip it over, take the foil off, and roast uncovered for another 10-15 minutes. This will lead to a nice crispy outside skin. Then lower the heat to 375 for about another hour, or until the temperature is at least 165 F.
Once it’s all nicely browned and roasted, it looks and smells divine!
Take the aromatics you stuffed it with out and discard (or compost it). Use the meat any way you like! It is tender and moist and super flavorful. Not bad for $5 a bird.
The best recipes in my opinion are the ones that either get eaten the first time around, or lead to easy leftover combinations. I hate to see food go to waste, and unfortunately when you’re cooking for only 1 or 2 people that can happen quite often.
.
You make something that tastes great the first time, and the second time, but by days 3 and up you are sick of it. So it sits in the back of the fridge, hidden by water bottles and fresher produce until you clean out your fridge tri-monthly and get grossed out by the mold and bacteria on it.
.
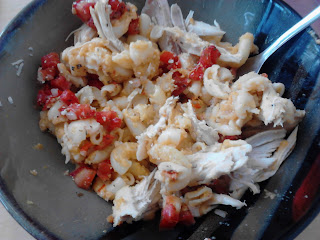
Therefore I try to cook things which easily lend themselves to meal makovers to dress up the leftovers and make it feel like a whole new meal. So I took some macaroni & cheese I’d made earlier, leftover chicken, and bruchetta topping (since the bread was now mush) and mixed it up for a super-easy, quick & healthy lunch.
.
Less wasted food = more money in your pocket = win-win.
My brother had crusted some fresh mahi mahi with Doritos once, and it was amazing. I had about 2 cups of Doritos left in a bag, mostly little pieces, just enough to irritate you. So I decided to make some Doritos chicken.
Ingredients:
2 boneless, skinless chicken breasts, cut into tenders
1 egg, beaten
2 cups crushed Doritos
Step 1: Smash up the Doritos. Beat the egg. Slice the chicken. These steps should take ~5minutes.
Step 2: Coat the chicken in the egg. Roll it in the Doritos until coated. Place on a sprayed cookie sheet.
Step 3: Bake at 350 for at least 45 minutes up to 1 hour, until the chicken is not at all pink.
I have heard so many recipes raving about how easy and delicious Crock Pot salsa chicken is, it is on nearly every Crock Pot recipe list I’ve seen. So one day before leaving for school, I decided on a whim to try it. Turns out, all these people know what they’re talking about! It was amazing by itself over rice, and it is even better shredded on a taco!
.
Ingredients:
3-4 boneless, skinless chicken breasts
2 cups salsa
1 flour tortilla
2 tbsp refried beans
1/2 onion, sliced
1 cup diced bell peppers
2 tbsp taco seasoning
1/2 cup shredded lettuce
1/4 cup sharp cheddar cheese
1 tbsp sour cream
.
Step 1: Put the chicken and the salsa in the crock pot. Cook on low at least 6 up to 10 hours. The chicken will be slightly browned, lightly salsa flavored, and fall-apart tender. It tastes amazing on its own, serve with a vegetable and a starch side dish.
Step 2: Put a tiny amount of olive oil or stock in a frying pan, and fry the onion and pepper until soft. Add the taco seasonings, cover and cook another 2 minutes.
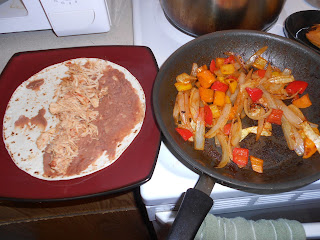
Step 3: Smear refried beans on half the tortilla, heat in microwave 20 minutes. Add cheese so it melts, and about 3-4 oz of the chicken. Then pile on the veggies and smear the sour cream on the other half. Pour salsa on top, roll up and enjoy!
This is super filling, and all the flavors combine into a taste bud party in your mouth! Makes enough for several meals, probably 10 tacos depending on how much you stuff them. The meat could also be used for quesadillas or tamales.
.
So yet again I’m moving soon, and need to clean out my freezer and pantry. I had some chicken quarters I had gotten cheap a while back , and was sick of ground beef tacos. So I decided to make some chicken tacos. It helps that Meijer had a great sale this week, $1 bell peppers and avocados.
.
Ingredients:
2 chicken leg quarters
Taco seasoning
Chili powder
1/4 red, orange and yellow bell pepper
1/4 red onion
1 tortilla
1/4 avocado
2 tbsp salsa
1 tbsp sour cream
1/4 cup black beans
Step 1: Put the chicken in a sprayed crock pot, sprinkle with taco seasoning and chili powder. Add 1/4 cup water to keep moist. Cook on high 4 hours or until chicken is no longer pink.
Step 2: Remove chicken meat from the bones and skin, throw it away. Add more seasoning if you like.
Step 3: Cut the peppers and onion into thin strips. I steamed the peppers for about 10 minutes first.
Step 4: In a tbsp of butter or oil, saute the peppers and onion until soft and translucent. Add some taco seasoning.
Step 5: Warm the beans and tortilla. Layer the chicken, peppers & onion, beans, avocado in chunks, salsa and sour cream.
The combination of flavors is amazing: the creamy avocado, the spiced chicken, the crunchy-soft peppers and sweet onions, tangy salsa, milky sour cream…. just mmmmmmmm! And so much protein and veggie goodness! Obviously you can omit the chicken and just use veggies for vegetarian, and add as much or whatever spices you like.
Jealous? You should be.
The fusion of food, fun, frugality, and curiosity.


 If you follow this diet and lifestyle, you are sure to experience a plethora of health benefits. Your internal organs and skin will thank you for all the wonderful vitamins and minerals you are eating. The antioxidants in the vegetables, healthy fats, and red wine will help keep your body and brain young. And unwanted fat will have a harder time finding a resting place on your hips or gut if you are always in motion.