How to: Set up an online bank account

Most people by now are in the online banking game. Technology has enabled deposits, transfers, and account balance checks at our fingertips for a long time. However, for those who have never done so, setting up an online bank account can be quite intimidating. It is scary to think that with a few clicks and some personal info that you can send money zooming about the inter-webs. But it is true. Setting up online banking is quick and relatively painless, and can be such a financial lifesaver. Especially when combined with mobile banking, you will never have to worry about a bounced check, declined card, mystery charge, late fees, or too-late-to-deposit check again. Well, maybe you can worry about those things, but you will have less of an excuse.

How to choose a bank

Your first step will be to choose a bank to work with. This depends on many factors, including what you will be using the account for, what banks are near you or if you don’t care about brick-and-mortar locations, if you will need a checkbook or card attached to the account, how much of a balance you intend to carry, etc. If all you want is somewhere to put a smallish chunk of change where you can’t spend it and watch it grow, an online provider is a safe bet. They don’t have physical locations, saving them money and allowing them to offer a slightly higher than average rate of return. CapitalOne360 (which acquired ING) is a great way to go, and they are always offering deals and promos. You can choose to have a checkbook or credit/debit card linked to the account as well. Ally is another top “branch-free” bank offering savings, checkings, loans and CDs. While no bank is perfect or 100% guarateed ‘safe’, both these providers are FDIC insured.

Online banking requirements

To sign up with an online only bank will require:

–You choose which type of account you wish to open (savings, checking, IRA, CD, money market, etc. Read the details on the bank’s website for % APR, etc or call the help number on the website to be sure you understand all terms and conditions.)
–Your social security number (and any others if you will not be only person on the account)
–A current mailing address, NOT a PO box
–A valid e-mail address
–Various personal verification data such as date of birth, mother’s maiden name, etc.
–Usually requires an opening deposit (bank rules vary as to whether or not there is a minimum) which can be linked from another account or a check you deposit


Of course, if you already belong to a traditional bank, setting up online banking is a great next step. Not only will you save trees and stamps by switching to electronic statements, you may also get some sort of reward from the bank for doing it, like a lower credit interest rate or no checking account fees. Check with your local branch to see if they have any promotions for going sans paper. Most banks you can simply go to their website and somewhere will be a button to set up online banking for your current account(s). If you have problems stop in a branch or call their help line. It is the same basic process for online only banks, but you will need your account number to link current open accounts.


Should I get a rewards card?

Once you have online banking set up, you can view account balances, set up automatic transfers or payments, link a line of credit for overdraft protection, and so much more. It may seem overwhelming to consider all the various banks and rewards policies out there, but if you don’t already, you should consider getting a card with some sort of reward system. If you feel lost, just starting with something is better than nothing. You can switch cards or banks or reward systems at any time, but you can never get back the 20,000 miles or $500 bonus cash you would have earned with last year’s regular purchases.

What about mobile banking?

If you have a smartphone, you could definitely benefit from enrolling in mobile banking as well. Most larger banks already offer apps to take care of banking needs on the go. You can deposit checks with a click of the camera, check balances, make payments, and transfer money, all while rushing to catch the 5:15 bus, dropping off the kids, heading to happy hour or picking up a rotisserie chicken on the way home. And with no fees associated (yet) there is no reason to not have mobile banking.

Photo from MindFieldLive


So whether you just want a quiet place for a nest egg to grow, to stash your vacation fund until cruise tickets go on sale, to hide some ‘fun money’ from a spouse, or to have a free checkbook delivered to your door, online accounts are the way to go. Just be sure to pick a password you can remember! {Look for my upcoming post on internet safety and creating creative passwords!}
Do you bank online?

Under 5: Tuna-in-a-biscuit pockets

Tuna is a great cheap staple to have in the pantry. From a simple tuna salad sandwich to tuna noodle casserole, it is a great way to get your protein and Omega-3s for under a dollar. This idea came from one of the many cooking sites I browse regularly. It seems people have endless creativity when it comes to finding ways to put food inside other food and making things easy to eat. These could probably even be portable. I imagine kids would find these fun and delicious too. These take only 15 minutes to make, and 5 ingredients. They also just get popped in the oven, so no mountain of dishes afterwards. Keep this recipe up your sleeve for busy nights when you don’t have time to or want to cook a big meal.

Ingredients:
1 large can tuna (or 2 smaller)
1 can cream of chicken (or celery, or mushroom)
2 packages biscuits
1/2 cup frozen peas & carrots
Spray oil


Step 1: Mix the soup, tuna, and veggies in a bowl. It looks like mush, but trust me that it is tasty.

Step 2: Spray a baking pan, and pat a biscuit down flat. Scoop on 1-2 tbsp of the tuna mixture.

Step 3: Cover with another patted down biscuit, and pinch the edges together to seal shut.

Bonus: I had enough tuna mixture that I filled all the biscuits and still had some left over. So I just boiled up about 2 cups of pasta, and spread the rest over it for a super-quick version of tuna noodle casserole! That was lunch the next day.

Step 4: Bake at 350 for 10-12 minutes, until the biscuits get nicely browned on top.

I tried flipping mine halfway through to brown both sides, that may not have been the best idea, as it split open and spilled tuna guts all over. It was still delicious though.


Two of these is a perfect meal, you have protein, veggies and carbs all in one convenient package. I might try this strategy with other things as well, make my own biscuit pizzas and such. They are just so cute, and easy to eat.

Balsamic pork and potato wedges – dinner in under 30 minutes

For a simple, quick weeknight meal, I keep packages of pork chops in the freezer. I buy them in bulk when they are on sale, on of the many ways I mentioned in my post on how to save money on groceries. So I know there are packs of 2 pork chops in the freezer, ready to be thawed and made into a meal in under 30 minutes. Just add a side or two, and dinner is served. This meal is one of my favorites, I love the soft inside and crispy outside of homemade potato wedges, and balsamic vinegar is one of the best marinades for meat.

Ingredients:
2 pork chops
1 tbsp olive oil
~4 tbsp balsamic vinegar
Garlic salt
2 small potatoes, cut into wedges
1 cup frozen or fresh veggies
2 tbsp butter

Step 1: Heat the oven to 350, and spray a baking pan with oil. Put the potato wedges on, and sprinkle on some salt and pepper. Bake them for about 20 minutes, turning at least once to crisp on all sides.

Step 2: While potatoes are in the oven, put olive oil and vinegar in a frying pan. Add the pork chops and cover. Cook on medium heat for 10-20 minutes, turning at least once. Cut through to make sure there is no pink in the center.

Step 3: For the final few minutes of cooking, add in 1-2 cups frozen vegetables. I used broccoli and carrots. Cover again, and let cook until the vegetables are thawed, warmed through, and soft to the touch. Sprinkle everything with some garlic salt, and serve.

The potatoes baking takes the longest amount of time, so if you use a different starch, like minute rice or frozen fries that you just microwave, you could get this on the table in 20 minutes. The balsamic is tangy yet umami, and pairs perfectly with pork. And I am always a fan of meat & potatoes, with enough vegetables to balance everything out. 

What’s you favorite go-to weeknight meal?


How to: Soothe a burn with Aloe vera

.
If you spend much time in the kitchen, odds are you will experience a burn at some point. Whether you grab a hot pan without an oven mitt, misplace your palm on a lit burner, or have issues lighting a grill, cooking is fraught with hot objects which have the potential to come into contact with skin. You could spend money on burn treatments sold in stores, or you could have one of my favorite houseplants: the aloe vera. It is an attractive succulent, easy to care for and proliferative if taken care of, and it has practical use.
.
First recognized by the Egyptians for its healing properties, there are several species of aloe vera. There are several hundred species alone in the genus “Aloe”. The “Aloe vera” is of course the most commonly known houseplant variety. The Aloe vera is actually only existant in cultivation, having no known native wild locations. There are some closely related species in Africa. Many many species of Aloe exist, with varied colors, temperaments, and locations, which you can purchase online or read more about here.
.
Most aloe species produce two natural products, a gel and latex. The gel is the sticky, gooey substance that “leaks” from cut leaves. Aloe latex comes from just under the skin of the leaves, and is yellow in color.  It is typically the aloe gel that is used to treat sunburn and other minor skin irritations. WebMD states: “Some chemicals in aloe gel seem to be able to increase circulation in the tiny blood vessels in the skin, as well as kill bacteria. “
.
The scientific evidence of aloe as an anti-inflammatory and anti-bacterial agent has been mixed. A pair of articles in the NYTimes summarizes some recent studies and their mixed results. Nonetheless, many generations of housewives have vouched for the faster healing times of minor burns and cuts due to heat, friction, or electricity by using the aloe gel. Since I always keep an aloe or three around the house, I am a strong believer in the “why not” philosophy. It certainly can’t make the burn take longer to heal. 
.
So get yourself an aloe (they are cheap at garden centers, or ask a friend who has one for one of their sprouts next time their plant has a baby) and keep it around. Needing water only once a month or so, even the blackest of thumbs should be able to keep it alive. And next time you grab that cast iron pot handle after being on a burner…
 

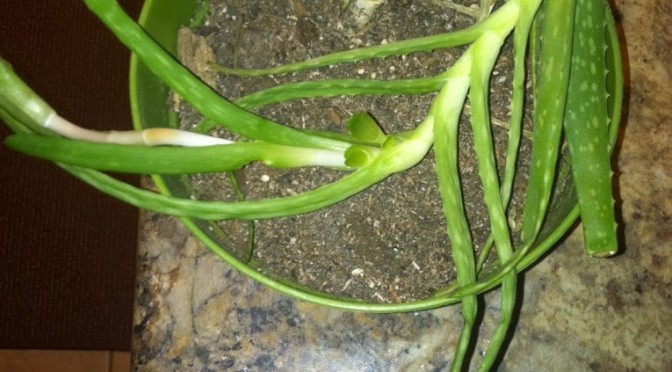
My kitchen aloe plant

I burnt myself a little on my outside palm on a hot pan

Cut a piece of stem off, about 2-3 inches. Squeeze it, and some gel should ooze out.

Rub the aloe gel over the burn side to side, covering all of it generously.

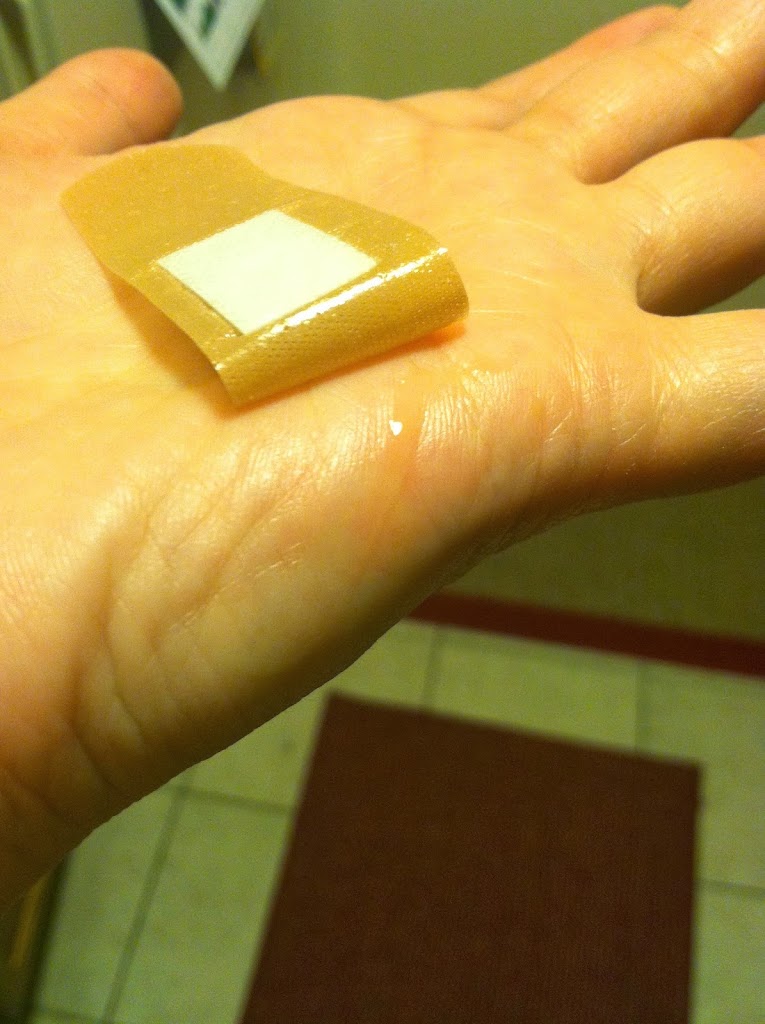
Cover the burned area with a bandage to keep out infections, and wait. This tiny burn was almost completely healed within 48 hours.

Barely a scratch. Since my alternative option would be to treat this burn with nothing, I am glad I had my trusty aloe plant. I’ve also tried beverages which have aloe in them, claiming to aid in digestion and be all healthy… it’s a little weird having chewy chunks of aloe in your water, but hey, maybe it works for you. I’m gonna stick with healing burns faster.