How to Can Homemade Pasta Sauce


Since moving to Connecticut, we have slowly made friends with the neighbors. We are lucky enough to live in a pretty safe and quiet area, where the people are very kind and welcoming. My good fortune is knowing a guy named Tony, a few houses down the street, who gardens for his health.

Now, there are lots of well-known reasons why gardening is good for the body and soul. Being out in nature brings a sense of peace and calm, helps relieve stress and lower blood pressure, and may boost your immune system. Having home-grown fruits and vegetables enables healthier food choices and better nutrition, while keeping you active and exercising. All those hours of digging, planting, weeding, tending, picking, and preserving burns serious calories and keeps you toned and limber.

Not to mention the fact that gardening can save you serious cash! Just buy the seeds and materials once (better yet, swap seeds with other local gardeners for better-adapted produce, and save your own seeds for next year!) and you can garden for free almost forever. It is easy to find local, free sources of soil amendments like fertilizer and mulches if you ask around and get creative.

Tony takes this to a new level! His garden is literally the size of a football field, all out in his large 2-acre New England backyard. He and his wife single-handedly till, plant, weed, and tend this garden every year. His wife tells me that he has even shrunk the garden a little this year, due to time constraints and health issues, so the garden used to be even larger before I knew about it. Amazing.

IMG_1511 - Copy

Tony says his favorite thing about the garden is the sense of community. Everyone on the block knows Tony, and knows they can come by anytime to pick a bag full of produce to take home. His garden produces far more than he and his family alone could enjoy, so he gives freely to everyone around him.

This is the beauty of gardening. You make friends, share food, recipes, and stories, and build a true community.

Needless to say, I was hooked.

By mid-August, I had my kitchen table and counter literally covered in tomatoes, and needed to finally take the time to do something with them all. A large batch I simply cut into quarters and put in gallon freezer bags. They will sit in the freezer until I need to make a soup or chili; then I will thaw them, and the skins will fall right off, and I can use them in whatever recipe is on my mind.

Another large portion goes into cans as sauce to rest in the pantry until it’s pasta night. Tony shared his “lazy Italian” way of making sauce, which saved me tons of work and hours in the kitchen!

The typical way of making sauce is to boil the tomatoes briefly, then submerge in ice water. This makes the skins easy to remove. You then separate the seeds and skin from the inner flesh, and cook down for hours until it thickens into a sauce.

IMG_1514 - Copy

This cooking down process makes the house smell amazing, and warms it up on a chilly day. But this also takes a lot of time, and energy from the stove. I’m a fan of the new “lazy” way, and the sauce tastes just as good! So pull out your blender, and lets get started!

This recipe will make about 5 quarts of sauce.

Don’t add the spices if you want a plain tomato sauce, or change up the spices to whatever you want in the end product. This does use the water-bath canning method, read up on all possible dangers of canning or use a pressure canner if you are unsure.

Ingredients:

  • 8-10 pounds assorted tomatoes
  • 5-6 canning jars, lids, & rings
  • Per jar:
    • 1 tbsp dried onion
    • 1/2 tbsp dried garlic
    • 2 tbsp basil
    • 2 tbsp parsley
    • pinch of salt
    • 1 tbsp vinegar
  • Blender
  • Strainer
  • Cheesecloth or coffee filters

IMG_1426

Step 1: Sterilize your jars by boiling for 5 minute,s or run them through the dishwasher. To each jar add the spices for the sauce. I also chose to add one whole tomato just diced to each jar, because I like a little texture in my sauce. You can skip that step and just add the pureed tomatoes.

IMG_1427

Step 2: Wash all your tomatoes, and cut out the middle hard part & stem. Remove any brown or black spots or mushy areas. If you want to and have time, you can remove the seeds (and save them for next year!).  Cut the tomatoes into quarters.

IMG_1512 - Copy

Step 3: Put the tomatoes into a blender, and blend in batches. My blender can handle about a dozen large tomatoes at a time. You may need to squish some juice out of them to get the blender going at first.

IMG_1513 - Copy

Step 4: Line a strainer over a large pot with coffee filters or cheesecloth. Pour the tomato puree into the strainer and let it sit. You can wait a few hours, or leave it over night if you have a lid. This lets most of the watery juice drip out, leaving the thicker sauce on top. Saves you the hours of boiling down, and now you can keep the tomato water too!

IMG_1438

Step 5: Pour your separated sauce and tomato juice into prepared jars. Wipe the rims and put on the lid and ring. Process in the water bath for 35 minutes (adjust for altitude). Remove the jars to a cloth and let them cool 8-10 hours.

The jars are ready if you hear the “pop” of the lids seal, or if when you press down in the middle the lid does not spring back. Any jars that do not seal, put in the refrigerator and use within a week, or process them again.

The tomato broth that filters out is like liquid gold, and will be great as a base for soups and stews, or you can freeze it in ice cube trays to cook veggies in instead of using oil. The sauce will bring back the taste of summer later on in the dead of winter.

And this is how I processed and preserved about 50 pounds of tomatoes in two days time!

And it is so easy. As long as you use vinegar or lemon to acidify the tomatoes and broth, they are perfectly safe to water bath can at home. Enjoy preserving your bounty. Do you have more tomatoes than you know what to do with?

More things you can do with tomatoes:

Do you can or preserve? Have any other ways to save tomatoes? Tell us about it in the comments below.

Flank Steak With Chimmichurri Sauce


Some may be asking, what is chimichurri? And how do you say that?

Pronounced just how it is spelled, this silly sounding word packs some serious flavor for grilled meats.  Originated in Argentina, it is a green or red sauce based typically on ground parsley, olive oil, and vinegar. Other spices, flavorings, and tomato sauces can be added. It is a bit like hummus or pesto, every home cook and chef has their own secret recipe to make it perfect.

This sauce is very forgiving, and a great way to use some of summer’s last herb bounty before Jack Frost takes the rest. Feel free to experiment with a dash of whatever green goodness you have on hand. It is a fantastic accompaniment to any grilled meats, from racks of ribs or lamb to chicken kebabs, skirt steak, or this recipe here for flank steak. Pretty much any meat you have, just grill it up, douse it in the chimichurri sauce, and watch whoever eats it eyes light up!

This recipe can be made Paleo friendly through the use of ghee or clarified butter, or coconut oil rather than regular butter. It all depends on how strictly you follow certain diets. Choose your cut of meat according to the tastes and appetites of those who will be eating the meal.

IMG_1532

Chimichurri Ingredients:

  • 1/2 cup mint leaves
  • 1/2 cup basil leaves
  • 1/2 small green bell pepper
  • 2 tbsp lemon juice
  • 2 tbsp apple cider vinegar
  • 2 tbsp olive oil
  • 2 cloves garlic

Step 1: Put all ingredients in a blender or food processor, whirl until well combined.  Add a little vinegar or oil if needed to get it to the thickness desired.

IMG_1534

Flank Steak Ingredients:

  • 1 large flank steak (1-2 lbs)
  • 1/2 cup seasoning/rub of choice
  • 2 tbsp butter
  • 2 tbsp chimichurri per person

IMG_1531

Step 1: Take a healthy handful of your rub, and slather it all over all sides of the beef. Don’t be afraid, get on in there! Rub it good, give it a nice massage. It deserves to be pampered in the last few minutes it has before being inhaled by you. I used a prepared Chicago Steak rub from McCormic, but you can try any one of millions of unique rub or marinade ideas, or invent your own!

IMG_1535

Step 2: In a hot frying pan, melt your butter, then add the steak. Let it cook and sizzle, about 7-9 minutes. You want the rub to caramelize a bit and form a nice crisp crust. Flip it over, and cook the other side. You want it to give a little when pressed, but not too springy. You could always use the fist technique to tell. Remove it to a plate and let it rest 5-10 minutes to redistribute the juices.

IMG_1539

Step 3: Cut it against the grain in thin slices for best results. This means if you can see the muscle fibers running lengthwise, cut it perpendicular, top to bottom, for the most tender bites.

IMG_1536

You can now use this meat for tacos, enchiladas, over rice or polenta, or just by itself with some simple sides. I made some garlic chili broccoli rabe and baked potatoes for a simple, amazing, delicious complete meal!

IMG_1537

Even the vegetable-allergic fiancée said that the chimichurri was soooo tasty, and really brought out the meaty, beefy grilled flavors. The vegetal flavors and aromas of the herbs combined with the acid from the vinegar & lemon is just what this humble smoky cut needs to be elevated to restaurant-quality at home. Enjoy!


[amd-zlrecipe-recipe:44]

Slow Cooker Sausage & Kale Stew


Last week, a terrible thing occurred.

No it has nothing to do with upcoming elections. It wasn’t weather related. Everyone I know and love is just fine. (as far as I know.)

My Crock Pot broke.

It was in the sink with dirty dishes, and one thing lead to another, somehow in the mountain of dishes the crock got split right down the middle. The lovely workhorse of my kitchen, and it’s hardy ceramic bowl was now split in twain, to be used no more. I was heartbroken to say the least.

Any reader of the blog knows how in love with my slow cooker I am. This thing is amazing, making my life so much easier by preparing dozens, even hundreds, of slow cooked meals for me while I work or play or do whatever somewhere else. Then we come home to a house that smells amazing and a hot and healthy meal.

Though I will of course replace my crock as soon as humanly possible, I dedicate this post to the crock pot, as its last documented meal prior to fatal injury. May your crock last many years more.

Ingredients:

  • 1 head kale, torn into small pieces
  • 1/2 pint cherry tomatoes
  • 1/2 pound sausage, cut in slices or ground
  • 1 can white beans
  • 1 cup water or broth
  • Optional: parmesan cheese and rustic whole grain bread

IMG_8984

Step 1: Rinse and tear the kale into pieces and place in the slow cooker. Cut the cherry tomatoes in half and add those. Open the white beans and either dump it all in or rinse them first then add to the crock pot. Add in the water or broth to your desired thickness.

IMG_8987

Step 2: Brown the sausage quickly in a frying pan, and add to the crock pot. At this point you can add any spices you want such as garlic, onion, paprika, rosemary, etc. Set on high for 4-5 hours or on low 6-8 hours and let it cook.

IMG_8988

Honestly, this really only needs heated through to be eaten, but the longer you let it stew the more the flavors meld and the broth thickens to become more stew-like and less soupy. Up to you how long you want/need to wait.

IMG_8989

This is amazing on its own, or you can serve it with some nice thick bread on the side. This makes plenty for about 4 servings, and you can of course double or halve it to your needs.


[amd-zlrecipe-recipe:43]


Sunrise on the Beach


Sometimes, necessity is the mother of invention. Sometimes it is bored. Sometimes it is curiosity. And sometimes it is all of the above!

Given the ingredients in the house at the time where a cocktail was needed, a combination of a Sex on the Beach and a Tequila Sunrise came about. And maui wowi, it was delicious! I highly recommend catching a sunrise on the beach asap.

Ingredients (makes 2 16oz glasses):

  • 2 oz spiced rum or tequila
  • 2 oz flavored vodka of your choice
  • 2 oz cranberry or cherry juice
  • 24 oz orange juice

IMG_8737

Step 1: Mix the rum and vodkas in a shaker filled with ice. Pour half into each glass filled with ice. You can see I had 1 oz each of peach and caramel vodka, so I just used those, but you can use whatever flavor you have or just plain.

IMG_8738

Step 2: Pour the orange juice into the liquors to mix. (Maybe your hand slipped while measuring 2 oz rum and added 4, who’s to say?)

IMG_8739

Step 3: Carefully, pour the cranberry or cherry juice down the side of the glass. If you have differing densities and pour slowly enough, the two will not mix completely and you will end up with a nice ‘sunrise’ color gradation. If this doesn’t happen, drink the whole thing and promptly mix another batch. (Kidding!)

Have fun & be safe!

Pork with Mushroom Gravy


This is a great recipe for using up extra mushrooms. It may not be a problem if you have fungus-lovers in your house, but my fiance does not think mushrooms are ‘fun’ in any way. I try to keep sneaking them in though, because they bring that lovely umami flavor to everything, and I personally love the things! This turned out really well, and he asked for seconds… so, vouched-for deliciousness.

IMG_9231

Ingredients:

  • 2 large pork chops or a small roast, about 6 ounces
  • 1 pint mushrooms (any kind, I used white and enoki)
  • 2 garlic cloves
  • 1/2 an onion
  • 4 tbsp plain Greek yogurt
  • 1/2 cup milk
  • 1/2 cup chicken broth or bouillon granules/cubes
  • 2 tbsp flour

IMG_9218

Step 1: Dice up your mushrooms, garlic, and onion. You can use any type of mushroom here, from white to bella to enoki to shiitake.

IMG_9224

Step 2: Cut the pork into bite-sized chunks and brown over medium heat. I served this over noodles, so I started them boiling at the same time. This would also be delicious served over rice or with a nice salad or green beans on the side.

IMG_9225

Step 3: Add the mushrooms, diced garlic, and onion to the pan. Cover and cook on medium heat 10-12 minutes, until onion becomes translucent and mushrooms soften.

IMG_9226

Step 4: Either remove everything to a plate and keep warm, or make the gravy right on top of it all. Mix in the flour, followed by the chicken broth, yogurt, and the milk.

IMG_9229

Step 5: Bring to a boil and then simmer until the gravy thickens. Keep stirring so that it doesn’t burn, and cook down until it is your desired thickness. Add more milk or water or flour as needed.

IMG_9230

Serve either alone or over noodles or rice. I sprinkled it with chopped chives from the back yard and a little garlic salt.


[amd-zlrecipe-recipe:42]


Cherry Pepper Poppers


Cherry Peppers, also known as pimiento peppers, are a common sight on an antipasti bar. Pickled, or stuffed with prosciutto and cheese, these little babies are sweet but with a slight kick that endears them to all lucky enough to taste one. While jars of pickled or stuffed hot or sweet cherry peppers can cost you upwards of $10, you can plant just one bush and have more than enough to make your own to last all year.

photo 3

The cherry peppers grow “upside-down”, with the stem end underneath the developing fruits. They start green and mature to red. Contrary to most peppers, the green ones actually tend to have more “bite” while the riper red peppers are sweeter overall. It does depend upon your particular strain and your water/soil compilation, as the cherry peppers I am able to obtain had more bite than I bargained for!

I am blessed to live in a nice community in which the majority of my neighbors garden, and love to share their bounties amongst the locals. One guy has a literal football field sized garden, just for the ‘therapeutic effects’. Methinks he also is a generous guy who loves sharing his love of gardening & food. =)

Anyhow, this guy has some pretty legit pepper and tomato heirloom strains, passed down through many generations of Italians. These hot/sweet cherry peppers came from him. He has told me of his family’s recipe to stuff them, but I didn’t have any prosciutto, capicola, or mozzarella on hand, so I did a super-quick-and-easy stuff that I sometimes do with jalapenos, and it came out pretty tasty!

photo 1(1)

If you don’t have your own peppers, or access to a neighbor who shares, you could try a local farmer’s market, or the grocery store in mid to late summer. Any mild to hot pepper would work, however. You can also substitute in whatever type of cheese you prefer, and use just about any thinly-sliced deli meat. Additionally you can just use a nice cheese and no meat for a vegetarian appetizer.

These itty-bitty pepper poppers are perfect as an appetizer. They are super simple and will surely impress at your next picnic, barbeque, birthday, or tailgating party.  This recipe makes about a dozen, but you can easily scale up or down based on how many you need/have. They are also pretty “pinchy” (my family word for spicy) so if you have picky palates you might want to soak them in vinegar overnight first.

Ingredients:

  • 1 dozen cherry peppers
  • 1 oz cream cheese
  • 2 slices deli ham or bacon

photo 2(1)

Step 1: Cut the tops off of the peppers. Use a small spoon to scoop out the seeds (and save them for next year!). Tear the ham into small pieces and line the hollow pepper with a slice or two.

photo 3

Step 2: Take a teaspoon and spoon in a chunk of cream cheese, until pepper is fully stuffed. Each pepper will be a slightly different amount based on how large it is.

photo 2(1)

Step 3: Bake at 250F for 10-15 minutes, until cheese is melted and pepper are soft. Let cool until you can touch them, and then try not to wolf down the whole plate in one sitting. Or do. No judgment.

If you make oodles of these and still have peppers out the ears, you can try making your own pickled peppers, just like Peter Piper!

photo 4


[amd-zlrecipe-recipe:41]

How to Save Tomato Seeds


As the world settles into the summer-fall change of pace, kids going back to school, traffic patterns adjusting, temperatures cooling off, birds are migrating, stores change their displays to autumn holidays, and gardeners are busy preserving the tapering bounty of produce.

In season now are fresh juicy peaches, heavy enough to break limbs as they nearly fall off the tree, pears of all shapes, sizes and colors, summer squashes like butternut, delicata, and sweet dumpling, the tail end of watermelon and cantaloupes, and the heat lovers like peppers and tomatoes are ramping down production.

Tomato_Seeds.1
Although, this doesn’t look very ramped-down to me!

Meanwhile, the cold weather lovers like spinach, bok choi, brussels sprouts, pumpkins, and winter squash are coming alive and some may be planted now for a second fall/early winter harvest.

One of my absolute favorite things about gardening is the seeds. And the miracle that one tiny seed is capable of producing pounds upon pounds of produce. And that one single fruit from that plant, if you keep one single seed and plant it again, you can again get pounds and pounds of produce!

I honestly sit and wonder sometimes how many growing seasons it would take for one tomato seed to reproduce enough to cover the planet.

Say one tomato makes 200 seeds, and each seed is planted the next year to create 200 plants. Then each plant creates twenty fruits, each with 200 seeds. Now you have 40,000 seeds, each capable of being planted again the next year.

And so on.

Tomatoes could inherit the Earth in about 10 years, I think.

Tomato_Seeds.12
Seeds from heirloom Italian tomato varieties

There are so many good reasons to save seeds:

  • It promotes heirloom varieties – non-GMO and non-altered versions of a plant that will create new, similar plants the following growing season; each unique
  • You produce plants that are best-adapted to your individual climate, elevation, and soil. No store-bought seeds can be ideally suited to every location, but a few growing seasons of choosing the best fruit and saving the seeds will breed the traits that are best for you & your plants
  • It is essentially free food! If you save seeds, you only have to buy them one time, but can plant indefinitely
  • It promotes self-reliance. If you can grow your own food year after year, it doesn’t matter if the store runs out or doesn’t have any nice-looking produce, you know you can harvest your own right out of your back yard
  • You can create ‘designer produce’. Seed saving is a little bit like genetic modification, only much slower and done as nature does. You can choose fruits based on how quickly they mature, how many leaves the plant grows, or color, and by choosing the trait(s) you want you can enhance the chance that more of the next generation will have those traits. Eventually you can create an entirely new, true-breeding species!

With that said, here’s how to save seeds from tomatoes easily. It is much simpler than you may think!

Ingredients:

  • 1 large tomato of a variety you want to save
  • Cup of water
  • Time

Tomato_Seeds.2

Step 1: Cut the top off the tomato & discard or compost it.

Tomato_Seeds.11

Step 2: Cut the tomato into wedges, and squeeze out the pulp and seeds into a cup. It’s okay to get juice and goo in with the seeds, you will get rid of it soon.

Tomato_Seeds.5

Step 3: Cover with a paper towel or cloth and let it sit at room temperature for a day or two. The water may get frothy, and some seeds may sink while a few float. The goo will slowly degrade, leaving the seeds uncovered.

photo 1(1)

Step 4: Strain through a fine mesh strainer or cheesecloth, or simple pour off the cloudy water and re-cover until there is nothing left but seeds. Spread onto a plate and let air dry for 24 hours.

photo 3

Step 5: Put the dry seeds into an envelope or other container, and store it in a cool, dry area where it is not likely to get wet or be invaded by insects.

Tomato_Seeds.4
Canned tomato sauce from my garden tomatoes

Step 6: The next planting season, plant your seeds and watch them grow! Soon your seeds may have stories attached to them, you can create your own fun names for the new species, and pass them down to your friends and family for their enjoyment too.

Mushroom & Asparagus Barley Risotto


As summer is winding to a close, I am still in denial.  I don’t want to let go of the beautiful unfolding of spring, the delicate greens and fragrant blossoms, the heavy fruits ripening on the vine, the cornucopia of riotous color at the farmer’s market.  Spring and summer make this farm-loving, healthy-cooking, veggie-eating foodaholic girl’s heart sing.

IMG_8532

So when I saw some end of season asparagus and some shiitake mushrooms on sale, I had to nab them.  For a fleeting taste of spring, summer & autumn all rolled into one, this risotto is earthy and vegetal, and completely delicious.

And the best part is, if you use canned mushroom & frozen asparagus you can make this all year round!  A well-stocked fridge/freezer/pantry can bring any season to your plate.

Ingredients:

  • 1/2 pint chopped mushrooms
  • 1/2 pound asparagus
  • 1 cup barley
  • 2 cups chicken stock or water
  • Optional add-ins: diced tomato, garlic, onions, spices to taste

IMG_8531

Step 1: Rinse your asparagus and wipe off any dirt from the mushrooms. Dice them into bite-sized pieces.

IMG_8534

Step 2: Put the barley in a pan with 1 cup of stock or water. (This can be vegan if you use vegetable stock or water in place of the chicken stock). Bring to a boil, and then simmer.

IMG_8535

Step 3: Let the barley cook, watching the liquid level. When it gets low, add a few more tbsp of stock and stir. Continue for 20-25 minutes, until barley is chewy and nearly cooked through. Add the diced veggies for the final 5-10 minutes of cooking.

IMG_8536

At this point, you can season to taste, I only used a little garlic salt. This tastes amazing on its own, or you can add any of the option mix ins suggested, or anything else you happen to have laying about.

IMG_8538

This recipe makes about 2 cups worth of risotto, enough for 4 small side dish servings or two full meals.

[amd-zlrecipe-recipe:39]


Nutrition Facts
4 Servings
Amount Per Serving
  • Calories 246.8
  • Total Fat 2.2 g
  • Saturated Fat 0.5 g
  • Polyunsaturated Fat 0.6 g
  • Monounsaturated Fat 0.8 g
  • Cholesterol 3.6 mg
  • Sodium 178.2 mg
  • Potassium 399.9 mg
  • Total Carbohydrate 49.8 g
  • Dietary Fiber 9.3 g
  • Sugars 3.8 g
  • Protein 9.3 g
  • Vitamin A 4.2 %
  • Vitamin B-12 0.0 %
  • Vitamin B-6 15.2 %
  • Vitamin C 8.0 %
  • Vitamin D 0.0 %
  • Vitamin E 3.9 %
  • Calcium 2.6 %
  • Copper 32.9 %
  • Folate 17.0 %
  • Iron 10.8 %
  • Magnesium 13.9 %
  • Manganese 41.1 %
  • Niacin 25.7 %
  • Pantothenic Acid 15.0 %
  • Phosphorus 17.2 %
  • Riboflavin 15.5 %
  • Selenium 44.6 %
  • Thiamin 13.2 %
  • Zinc 12.5 %
*Percent Daily Values are based on a 2,000 calorie diet. Your daily values may be higher or lower depending on your calorie needs.

Tomato Basil Chicken Cacciatore


One of a busy and/or tired cook’s favorite things is being handed an idea for an easy dinner. Don’t you just hate thinking to yourself or asking the family “what do you want for dinner?” and getting blank stares, or hearing the wind whistle between your ears? Cooking fatigue can happen to the best of cooks. And especially those who are new or new-ish to cooking on the fly have a tough time with this exact question.

Something I’ve used since college to help get the creative kitchen juices flowing (literally and figuratively) is a website called Supercook.

This website curates thousands of recipes from site members and other sites all around the web. All you do is input what ingredients you have in your kitchen or pantry, or what ingredients you want to use, and presto, hundreds of recipe ideas at your fingertips!

Let’s say you have a can of black beans, a can of corn, and some tomatoes from your garden. Those three simple ingredients bring up 26 recipes alone! And by adding in staples that most all of us have (hello, black pepper and salt, flour, oil, sugar, etc) your options expand even more. You can filter by type of dish you want to make, what cuisine you are in the mood for, and even filter by dietary restrictions like excluding nuts, fish, or dairy.

datauri-file

Supercook is sponsoring a Back to Work cooking challenge, whereby they asked who can make magic using super simple pantry ingredients: chicken, rice, and tomatoes.

PICK ME! I can make kitchen magic with next to nothing, as abundantly proven over the years on this blog.

Conveniently, those are three of my favorite ingredients of all time. Entering them into Supercook’s website opens up over two dozen options. Several are too simple (plain steamed rice? yawn), but a recipe for chicken cacciatore catches my eye. With a few more ingredients I have on hand from an abundant harvest (fresh basil, yum!), I know this is what’s happening for dinner.

The recipe is for chicken cacciatore in the crock pot, which is even better for busy working adults! But, I’m impatient, so it had to be made tonight, and that meant on the stove top. Keep in mind you can indeed take all the ingredients and simply chuck it in the slow cooker for a truly hands-off meal that turns out like you slaved for hours.

photo 5
See? Pretty dinner, but oh so easy.

A basic cacciatore recipe includes, of course, chicken, vegetables sauteed in the chicken oils, and diced or peeled tomatoes. The seared chicken is returned to the pot of vegetables and simmered about an hour until done. I of course added a few extras, which you can choose to include, or keep it simple. I used a quart of pasta sauce I’d canned myself, with garlic & basil included. You can just use a can of diced tomatoes for the same effect.

photo 2(1)

Ingredients:

  • 2-3 pounds chicken (breast, thigh, legs)
  • 1 cup brown, wild, or white rice
  • 1-2 cups diced tomatoes or tomato sauce
  • 1/2 an onion, diced
  • 2 medium carrots, diced
  • 1 small red bell pepper, diced
  • Optional extras: spinach, garlic cloves, zucchini, bay leaves

photo 1(2)

Step 1: In a frying pan, sear the chicken on all sides, about 5-7 minutes. Pour off most of the oil and set the chicken aside.

photo 2(2)

Step 2: Add the onion, and any other vegetables or spices you’re using, and cook 10-15 minutes, until onions are soft and translucent and the carrots are soft when poked with a fork.

photo 4

Step 3: Pour in the tomatoes, and bring to a simmer. Add the chicken back to the pan, cover and cook 10-12 minutes.

Pro Tip: The longer you simmer this, the softer the veggies get and the more the flavors meld. But if you’re pressed for time and don’t mind slightly crunchy carrots, this can be done in as little as 15 minutes total.

photo 3(1)

Step 4: Serve warm over pasta, rice, or with a thick rustic bread on the side. I just made some rice in my cooker while the rest of the dish simmered on the stove.

photo 4(1)

This dish is super tasty & satisfying, and also quite healthy. Especially if you pack it full of delicious veggies! You could throw all kinds of things in there, like cauliflower, beans, or broccoli. This flavor combination worked out very well.

photo 3(2)

This dish is also quite frugal in addition to being healthy and delicious. A pack of chicken quarters is often on sale for $0.99/lb or less, rice is an affordable staple, and the veggies were mostly free at the height of gardening season.

I hope you enjoy this as much as I did, and that discovering Supercook can help you too save time and energy by answering the age-old question, “What’s for dinner?”


[amd-zlrecipe-recipe:40]


This recipe & post have been entered into the Supercook “Back To Work” Cooking Challenge! #SupercookChallenge #BacktoWork

Preserving Hot Peppers


Peppers are probably the kind of plant which has most wow-ed me with its prolific seeds. Every time I crack open a bell pepper to make stuffed peppers, or hollow a jalapeno to make poppers, there are mounds of seeds inside. Even in the tiniest pepper, there are likely more seeds than you can count on just your hands.

Pro tip: you can save these seeds and dry them out, and then plant your own pepper garden! Just one jalapeno may produce dozens of plants. Yes, even peppers you buy at the grocery store. Just cut the stem side off, scrape the seeds away from the ribs inside, and dry them on a piece of paper. Store in a cool dark place until you’re ready to plant outside or in a container.

photo 1(1)

Another thing that is amazing about peppers is the sheer variety. From the mild sweet bell pepper to the jalapeno, habanero, or even the ghost chili, there are literally thousands of varieties. Peppers can spontaneously mutate, so even if you save seeds year to year, you can get new color patterns or heat levels. The amount of water and sun, location and type of soil can also affect the peppers.

I’ve been trying, for the past few years, to get more brave about cooking and eating spicier foods. The chemical that makes peppers taste hot & spicy is most often capsaicin. This compound irritates mucous membranes and causes inflammation, and pain if in too high a dose. However, capsaicin also has many health benefits for your heart, blood pressure, anti-diabetes, and more.

photo 4

One of the ways I’ve found to incorporate more spicy foods into my cooking is by using jarred jalapenos. These little guys store forever, and add a bit kick to pizza, salads, sandwiches, chili, pasta, and more. I’ve bought jalapenos in a jar at the store, but this year I had access to an heirloom Italian jalapeno variety, as well as several others like cayenne, poblano, and red cherry peppers.

Thus, I needed a way to use them all up. As state, peppers are very prolific. On one plant, I’ve seen nearly 100 peppers, if the fruit is tiny. No joke.

So given all the health benefits, and the fact that I cannot use them up fast enough before they spoil, jarring seemed like the best way to preserve the summer’s spicy bounty. Turns out, they are ridiculously easy to make. Just look on a jar of peppers at the store, you will see there is likely fewer than ten ingredients. This homemade version needs three.

You can of course can hot or regular peppers, but you must use a pressure canner, not a water bath. There are significant botulism risks if you do not use a pressure canner. However, by adding vinegar, you are effectively pickling the peppers. This prevents harmful bacterias and other nasties from growing. I also store mine right in the fridge.

photo 2(1) copy 2

Ingredients (this makes about a pint):

  • 1-2 cups of peppers (all one kind or a variety)
  • 1/2 cup white vinegar
  • 1 tbsp sea salt

photo 2(1)

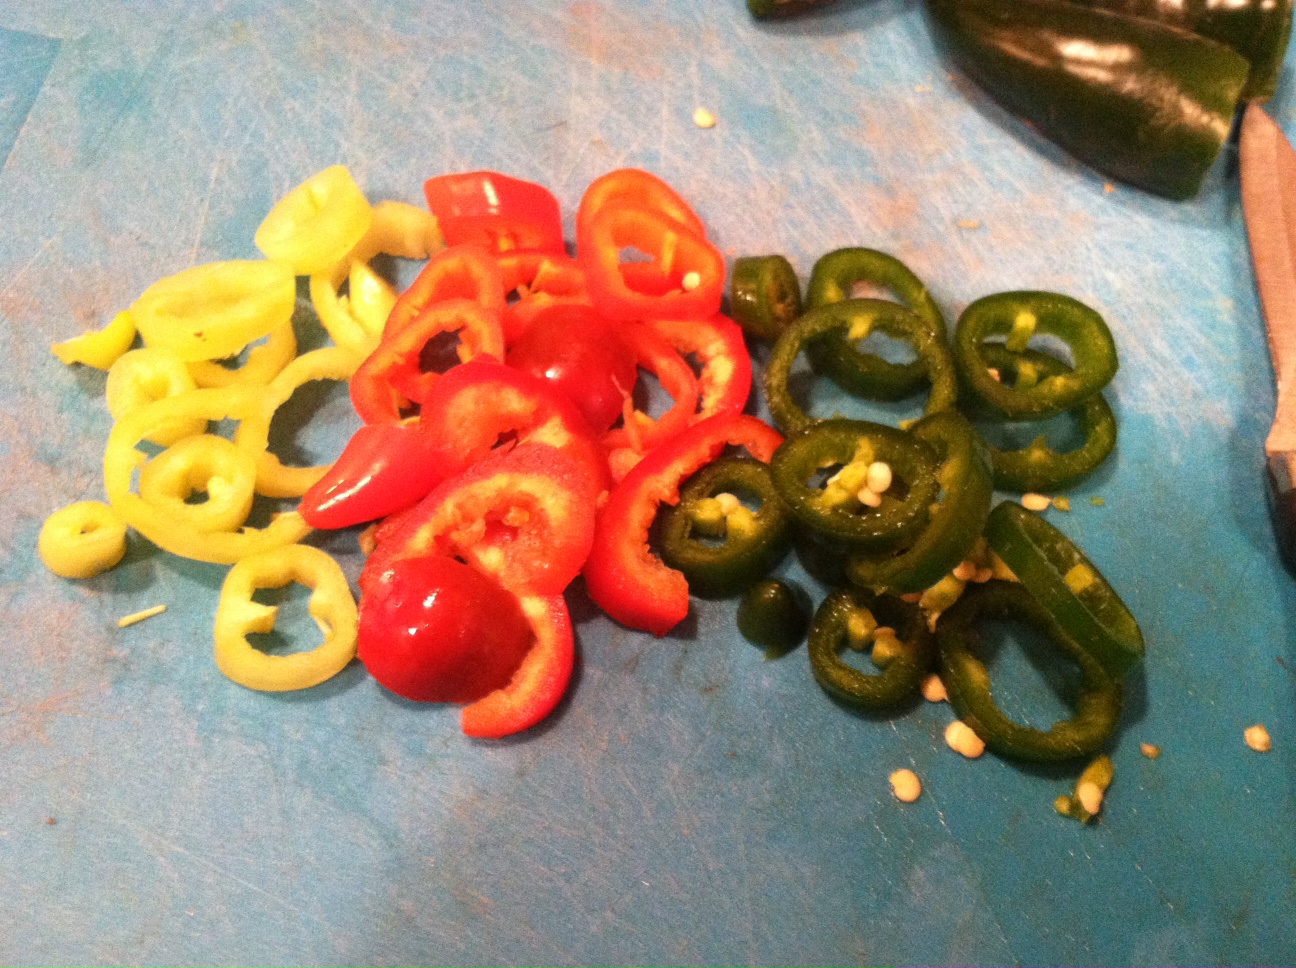
Step 1: Cut the tops off the peppers, then cut down the side ribs and pull out the seeds. Leave the seeds in if you want it extra spicy. Also, it is highly recommended to wear gloves while cutting hot peppers! I made the mistake of not wearing gloves the first time, and my hands were on fire for days.

photo 1(1) copy 2

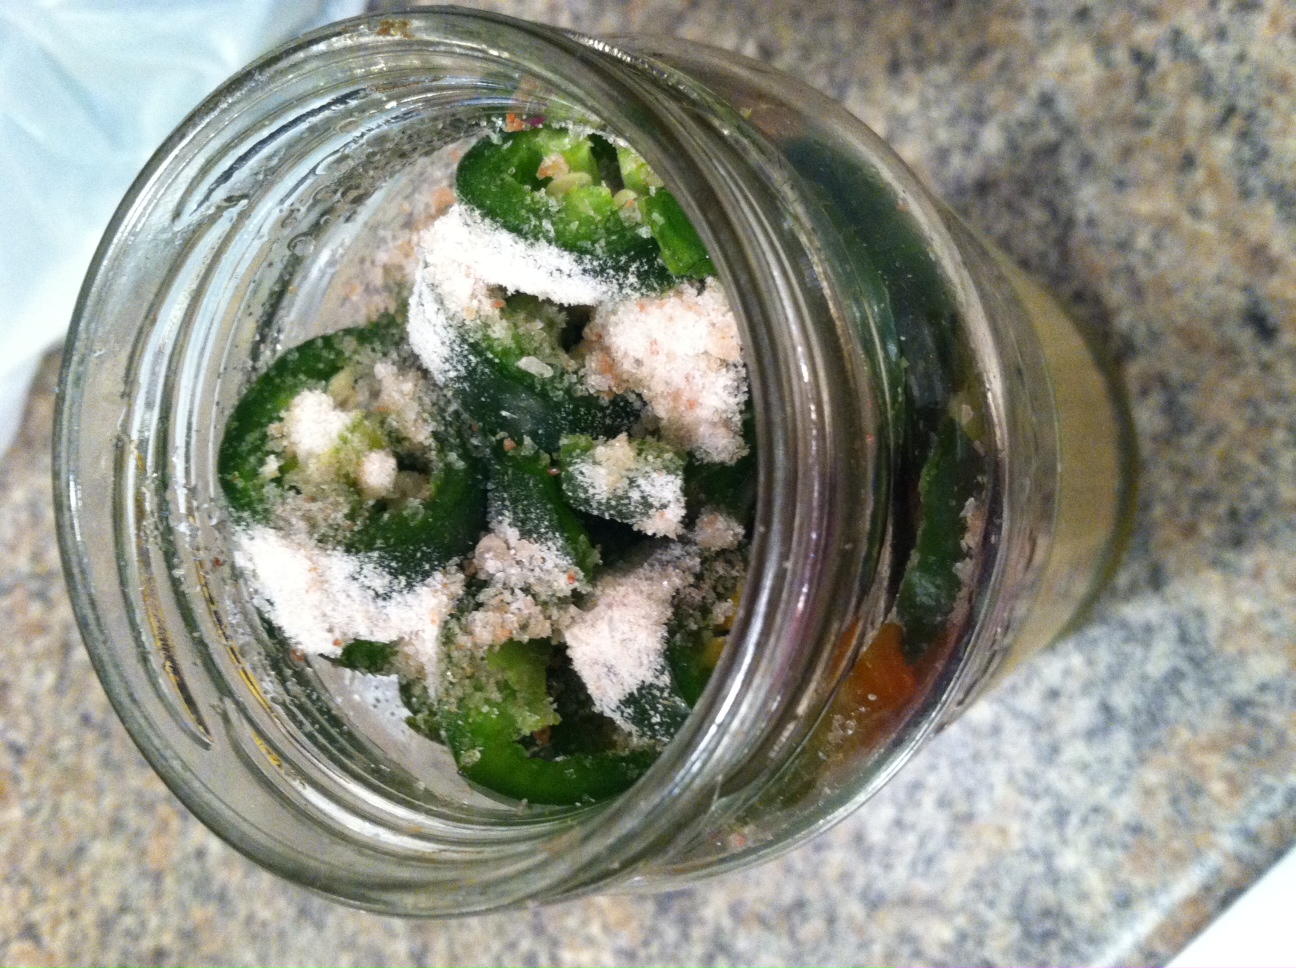
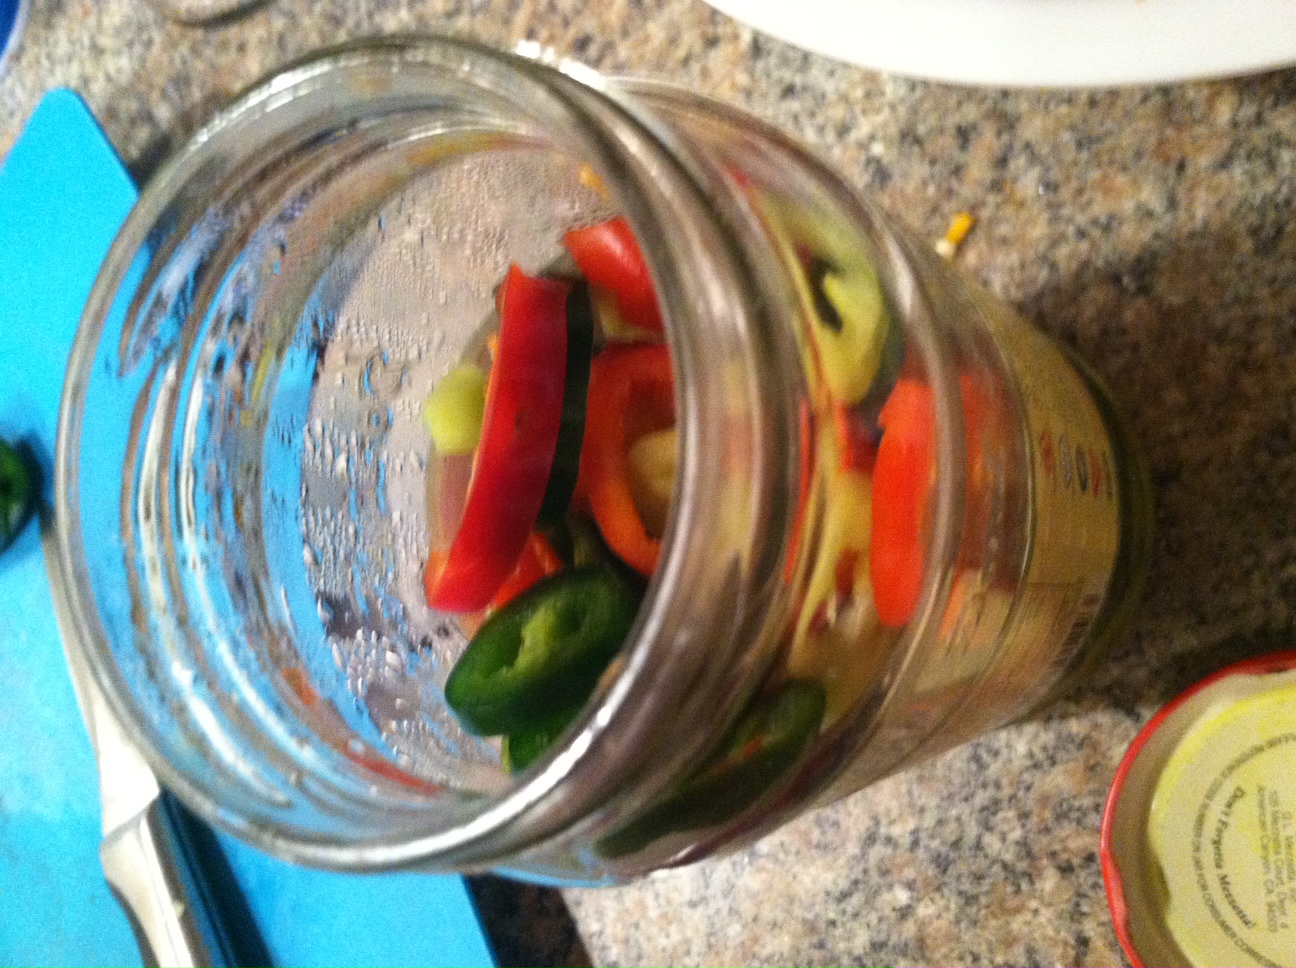
Step 2: Shove all your pepper rings into the jar. Cover with the vinegar about 2/3 full. Pour on the sea salt.

photo 4 copy

Step 3: Add distilled water to the top of the jar, then close it and shake it up, until the salt dissolves. You can of course actually can them, using glass mason jars and steam or pressure canning methods. These processed jars can be stored at room temperature for a longer period of time.

photo 3 copy

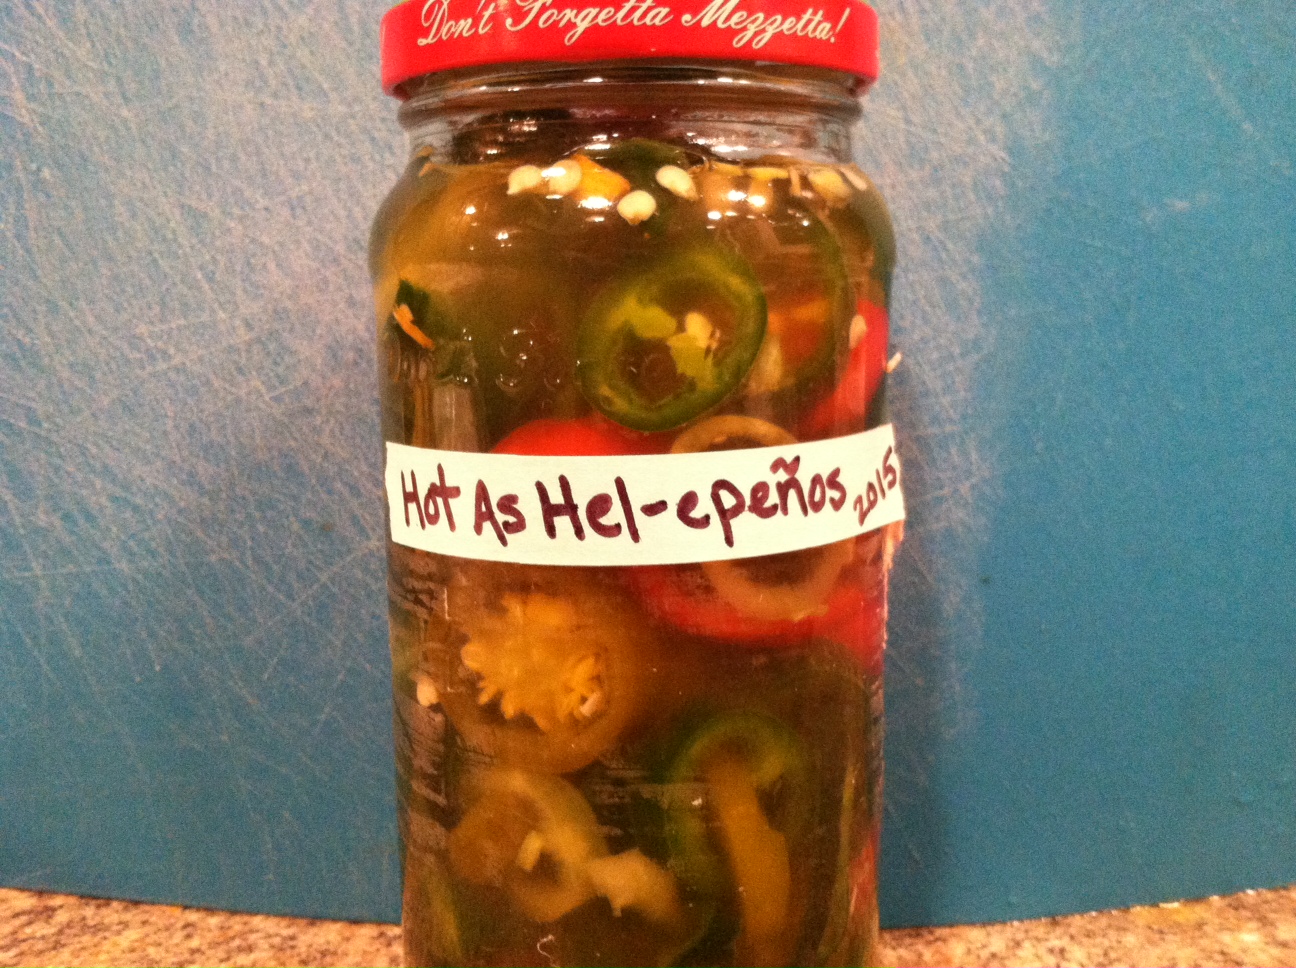
Put the jar in the fridge, and it will be there until you’re ready to use them!

These peppers can make a great little gift, especially if you layer multi-colored peppers in a clear jar. They are quite pretty. These peppers can be eaten as is, on pizza, in soups or chili, and more. It will keep in the refrigerator for several months.

photo 1(1) copy

For a great way to bring back the warm thoughts of summer during the bitter cold of winter, try planning out your garden for spring! Go to websites like Pepper Joe’s Gardening Tips, Hot Pepper Seeds, or the Almanac to find answers to questions, tips on what types of species grow best where you live, organic and heirloom seeds, and more.


[amd-zlrecipe-recipe:38]