This is a great recipe for using up extra mushrooms. It may not be a problem if you have fungus-lovers in your house, but my fiance does not think mushrooms are ‘fun’ in any way. I try to keep sneaking them in though, because they bring that lovely umami flavor to everything, and I personally love the things! This turned out really well, and he asked for seconds… so, vouched-for deliciousness.
Ingredients:
2 large pork chops or a small roast, about 6 ounces
1 pint mushrooms (any kind, I used white and enoki)
2 garlic cloves
1/2 an onion
4 tbsp plain Greek yogurt
1/2 cup milk
1/2 cup chicken broth or bouillon granules/cubes
2 tbsp flour
Step 1: Dice up your mushrooms, garlic, and onion. You can use any type of mushroom here, from white to bella to enoki to shiitake.
Step 2: Cut the pork into bite-sized chunks and brown over medium heat. I served this over noodles, so I started them boiling at the same time. This would also be delicious served over rice or with a nice salad or green beans on the side.
Step 3: Add the mushrooms, diced garlic, and onion to the pan. Cover and cook on medium heat 10-12 minutes, until onion becomes translucent and mushrooms soften.
Step 4: Either remove everything to a plate and keep warm, or make the gravy right on top of it all. Mix in the flour, followed by the chicken broth, yogurt, and the milk.
Step 5: Bring to a boil and then simmer until the gravy thickens. Keep stirring so that it doesn’t burn, and cook down until it is your desired thickness. Add more milk or water or flour as needed.
Serve either alone or over noodles or rice. I sprinkled it with chopped chives from the back yard and a little garlic salt.
As summer is winding to a close, I am still in denial. I don’t want to let go of the beautiful unfolding of spring, the delicate greens and fragrant blossoms, the heavy fruits ripening on the vine, the cornucopia of riotous color at the farmer’s market. Spring and summer make this farm-loving, healthy-cooking, veggie-eating foodaholic girl’s heart sing.
So when I saw some end of season asparagus and some shiitake mushrooms on sale, I had to nab them. For a fleeting taste of spring, summer & autumn all rolled into one, this risotto is earthy and vegetal, and completely delicious.
And the best part is, if you use canned mushroom & frozen asparagus you can make this all year round! A well-stocked fridge/freezer/pantry can bring any season to your plate.
Ingredients:
1/2 pint chopped mushrooms
1/2 pound asparagus
1 cup barley
2 cups chicken stock or water
Optional add-ins: diced tomato, garlic, onions, spices to taste
Step 1: Rinse your asparagus and wipe off any dirt from the mushrooms. Dice them into bite-sized pieces.
Step 2: Put the barley in a pan with 1 cup of stock or water. (This can be vegan if you use vegetable stock or water in place of the chicken stock). Bring to a boil, and then simmer.
Step 3: Let the barley cook, watching the liquid level. When it gets low, add a few more tbsp of stock and stir. Continue for 20-25 minutes, until barley is chewy and nearly cooked through. Add the diced veggies for the final 5-10 minutes of cooking.
At this point, you can season to taste, I only used a little garlic salt. This tastes amazing on its own, or you can add any of the option mix ins suggested, or anything else you happen to have laying about.
This recipe makes about 2 cups worth of risotto, enough for 4 small side dish servings or two full meals.
[amd-zlrecipe-recipe:39]
Nutrition Facts
4 Servings
Amount Per Serving
Calories 246.8
Total Fat 2.2 g
Saturated Fat 0.5 g
Polyunsaturated Fat 0.6 g
Monounsaturated Fat 0.8 g
Cholesterol 3.6 mg
Sodium 178.2 mg
Potassium 399.9 mg
Total Carbohydrate 49.8 g
Dietary Fiber 9.3 g
Sugars 3.8 g
Protein 9.3 g
Vitamin A 4.2 %
Vitamin B-12 0.0 %
Vitamin B-6 15.2 %
Vitamin C 8.0 %
Vitamin D 0.0 %
Vitamin E 3.9 %
Calcium 2.6 %
Copper 32.9 %
Folate 17.0 %
Iron 10.8 %
Magnesium 13.9 %
Manganese 41.1 %
Niacin 25.7 %
Pantothenic Acid 15.0 %
Phosphorus 17.2 %
Riboflavin 15.5 %
Selenium 44.6 %
Thiamin 13.2 %
Zinc 12.5 %
*Percent Daily Values are based on a 2,000 calorie diet. Your daily values may be higher or lower depending on your calorie needs.
One of a busy and/or tired cook’s favorite things is being handed an idea for an easy dinner. Don’t you just hate thinking to yourself or asking the family “what do you want for dinner?” and getting blank stares, or hearing the wind whistle between your ears? Cooking fatigue can happen to the best of cooks. And especially those who are new or new-ish to cooking on the fly have a tough time with this exact question.
Something I’ve used since college to help get the creative kitchen juices flowing (literally and figuratively) is a website called Supercook.
This website curates thousands of recipes from site members and other sites all around the web. All you do is input what ingredients you have in your kitchen or pantry, or what ingredients you want to use, and presto, hundreds of recipe ideas at your fingertips!
Let’s say you have a can of black beans, a can of corn, and some tomatoes from your garden. Those three simple ingredients bring up 26 recipes alone! And by adding in staples that most all of us have (hello, black pepper and salt, flour, oil, sugar, etc) your options expand even more. You can filter by type of dish you want to make, what cuisine you are in the mood for, and even filter by dietary restrictions like excluding nuts, fish, or dairy.
Supercook is sponsoring a Back to Work cooking challenge, whereby they asked who can make magic using super simple pantry ingredients: chicken, rice, and tomatoes.
PICK ME! I can make kitchen magic with next to nothing, as abundantly proven over the years on this blog.
Conveniently, those are three of my favorite ingredients of all time. Entering them into Supercook’s website opens up over two dozen options. Several are too simple (plain steamed rice? yawn), but a recipe for chicken cacciatore catches my eye. With a few more ingredients I have on hand from an abundant harvest (fresh basil, yum!), I know this is what’s happening for dinner.
The recipe is for chicken cacciatore in the crock pot, which is even better for busy working adults! But, I’m impatient, so it had to be made tonight, and that meant on the stove top. Keep in mind you can indeed take all the ingredients and simply chuck it in the slow cooker for a truly hands-off meal that turns out like you slaved for hours.
See? Pretty dinner, but oh so easy.
A basic cacciatore recipe includes, of course, chicken, vegetables sauteed in the chicken oils, and diced or peeled tomatoes. The seared chicken is returned to the pot of vegetables and simmered about an hour until done. I of course added a few extras, which you can choose to include, or keep it simple. I used a quart of pasta sauce I’d canned myself, with garlic & basil included. You can just use a can of diced tomatoes for the same effect.
Ingredients:
2-3 pounds chicken (breast, thigh, legs)
1 cup brown, wild, or white rice
1-2 cups diced tomatoes or tomato sauce
1/2 an onion, diced
2 medium carrots, diced
1 small red bell pepper, diced
Optional extras: spinach, garlic cloves, zucchini, bay leaves
Step 1: In a frying pan, sear the chicken on all sides, about 5-7 minutes. Pour off most of the oil and set the chicken aside.
Step 2: Add the onion, and any other vegetables or spices you’re using, and cook 10-15 minutes, until onions are soft and translucent and the carrots are soft when poked with a fork.
Step 3: Pour in the tomatoes, and bring to a simmer. Add the chicken back to the pan, cover and cook 10-12 minutes.
Pro Tip: The longer you simmer this, the softer the veggies get and the more the flavors meld. But if you’re pressed for time and don’t mind slightly crunchy carrots, this can be done in as little as 15 minutes total.
Step 4: Serve warm over pasta, rice, or with a thick rustic bread on the side. I just made some rice in my cooker while the rest of the dish simmered on the stove.
This dish is super tasty & satisfying, and also quite healthy. Especially if you pack it full of delicious veggies! You could throw all kinds of things in there, like cauliflower, beans, or broccoli. This flavor combination worked out very well.
This dish is also quite frugal in addition to being healthy and delicious. A pack of chicken quarters is often on sale for $0.99/lb or less, rice is an affordable staple, and the veggies were mostly free at the height of gardening season.
I hope you enjoy this as much as I did, and that discovering Supercook can help you too save time and energy by answering the age-old question, “What’s for dinner?”
While I may be spoiled now, living so near the coast, shrimp is also on sale at the grocery store this week (BOGO ftw!). Shrimp is an amazing protein source because it is so low in fat, super versatile, and cooks up in literally minutes.
From shrimp cocktail to shrimp scampi, from jambalaya to tacos to fettuccine, shrimp is a great addition to just about any dish. This simple salad makes use of some leftover cooked shrimp from a party tray, but you could also brown them in Cajun seasoning, or grill them with some pineapple sauce.
If you’re looking for a healthy way to use up some of summer’s fresh veggies, or a healthy-but-tasty lunch or dinner option that takes but a minute to put together, you’ve found just the thing!
Optional: shredded or crumbled cheese, croutons, sunflower seeds, chia seeds…
This quick salad can literally be tossed together in under a minute if you eat the shrimp cold out of the salad, or 5 minutes if you brown it in a pan first. Use any combination of greens, veggies, and dressings you want.
This can also be layered into a mason jar for a quick on-the-go healthy lunch, snack, or dinner.
For those who do not know, late summer is when the garden bounty is rolling in, including tomatoes and herbs like basil. Home gardeners are likely giving away baskets of fresh veggies and herbs to friends, family, and neighbors. Those who know how and have the time & inclination are putting up the excess for the long, cold winter ahead by canning, drying, and freezing.
I planted a few basil seeds in late April, and had no idea they would take off so well! They were tiny seedlings when I had them in a pot in the window, but when I put them outside they just flourished! Now I have a basil bush just outside my front door. It is wonderfully convenient to just run out and grab a few leaves.
This tomato soup recipe is stunningly simple. Don’t let its simplicity fool you though, it is also amazingly delicious. There is nothing quite so amazing as fresh, local produce simply prepared. Orange goo in a can doesn’t even come close.
With only 3 ingredients, this soup is so easy a five-year-old could probably make it. And, honestly, you don’t even need the basil, you can just make a simple creamy tomato soup by leaving it out. I added it because you can only eat so much pesto in one week. 🙂
And the final bonus, it is both vegetarian and vegan, as well as gluten free! If you just blended it all, I bet it could be made raw too! It is very healthy, as well as Paleo and Mediterranean. There isn’t a diet I know of on which you cannot eat this soup. If you don’t have or don’t like coconut milk, you can omit it for a regular tomato soup, or use cows milk, almond milk, etc instead.
Ingredients:
1/2 can coconut milk (6-7 oz)
4-5 large ripe tomatoes
Handful of basil leaves
Optional: olive oil, salt & pepper
Step 1: Open the coconut milk and mix it up with a spoon. Pour half into a pot and begin heating. Dice up your tomatoes into quarters and add to the pot. Bring to a simmer, and cook for 10-12 minutes.
Step 2: You can stop here if you don’t mind your soup a little chunky and don’t want to add basil, it has a nice rustic texture at this point. Would be great served with some whole-grain bread. But if you want it creamy and smooth, pop it into the blender and give it a whirl.
Step 3: Add the handful of basil, and blend again.
(Note: be sure to have the lid on the blender firmly. Otherwise, you end up with a hot, orange mess all over your stove. Not that I would know from experience…)
Pour your hot, finished creamy tomato soup into 2 bowls, top with sea salt & black pepper and a drizzle of olive oil if you like. This makes a little less than 1 quart of soup, and can easily be doubled to use the whole can of coconut milk. Simply add more tomatoes.
As we head into Labor Day weekend, we all have some reasons to be bittersweet. The summer ending is bound to be a little bit sad, as we bid adieu to extra-long days of sunshine, warmer temperatures, cookouts and backyard barbecues, possibly more free time and relaxation than usual, and quality family time if you have little ones.
Those of you that do entertain spawn over the summer months, are probably eagerly anticipating the return to school (or overjoyed that they are already gone!) And there are the many joys of autumn to look forward to as well, pumpkin-pie everything, leaves changing colors, brisk nights and cooler days, and many fun holidays.
As summer winds to a close, perhaps you are going to celebrate with a little outdoor grilling? I know I plan to! (Though for this or any burger recipe, you can also cook the patties inside in a frying pan or broil in the oven. In case the desire for grilling hits mid-December).
For this burger, we went all-in, with a double-wide bun to accomodate two patties, as well as loads of yummy toppings and my fabulous creamy chile coleslaw! But feel free to top it however you want, and say sayonara to summer in style. This recipe makes 1 double-burger, and could be split into two singles.
Ingredients:
1 large hoagie-style bun
2 burger patties (frozen, fresh, or homemade)
2 slices cheese of choice
3-4 tbsp coleslaw
1 large roma or 1 small beefsteak tomato
3-4 slices of pickle
Step 1: Clean & spray your grill with nonstick cooking oil.
Step 2: Set the grill to medium heat, and cook burgers 3-4 minutes each side, until desired done-ness. (The tougher the burger feels when you poke it, the more done it is. Medium is about the feeling of your thumb muscle when lightly closing your fist)
Step 3: Top patties with the cheese in the last 1 minute of cooking to melt it on. I used white American, but feel free to use whatever you like, or no cheese at all.
Step 4: Put the patties on the bun, smear the coleslaw on the opposite side. Layer on other toppings.
Step 5: Quickly flip the two sides together, trying not to lose all the slaw in the transaction. Smush it all together.
Step 6: Nom it! These guys came out absolutely perfectly, the creamy yet tangy slaw was a perfect addition, along with the fresh tomato slices right out of the garden (ya’ll know its the height of tomato season!) and salty pickles.
Other topping ideas include: hummus, salsa, guacamole, crushed potato chips, onion rings, lettuce, and classic condiments like ketchup, mustard, and mayo.
Veggie burgers have so much more potential than a frozen patty of flour, preservatives, and mushy veggie starch. I’ve written previous articles on making burgers out of pinto beans and quinoa, or incorporating broccoli slaw. A veggie burger is as simple as some cooked vegetables and some thing(s) to bind everything together into a patty.
This recipe combines some of end-of-summer stars and healthy whole grain oats into a sweet and tasty patty that can be eaten on its own, in a bun or wrap, or over a salad of greens or grains. As always, substitute in whatever other veggies you have and like for those you don’t have or enjoy.
Ingredients:
1 small-med eggplant
2 medium sweet potatoes
1/2 red onion, diced
1/2 cup shredded radishes
1 cup whole oats and/or flour
2 tbsp spices of choice
1/4 cup olive oil
Step 1: Dice up the eggplant, onion, and sweet potato. Peel the sweet potato if you don’t want pieces of peel in your burgers. You can pre-boil the potato if you want it to cook faster, or you can put it into a pan with a lid and slow-cook prior to adding the eggplant and onion. Cook all veggies until soft enough to mash with a fork.
Step 2: In a large bowl, mash all the veggies together with a fork or potato masher. Add the oats & shredded radish, and mix until it begins to become sticky, such that you can shape patties from it. You can also add an egg if you need extra binding.
For spices, I added in some garlic salt, paprika, and black pepper.
Step 3: In a frying pan, pour the oil and heat it to medium. Shape the patties into small rounds with your hands. Fry the patties a few at a time, making sure they aren’t touching. Fry until crispy and brown, about 5-6 minutes each side.
Step 4: Place the patties on a wire rack or paper towels to drain extra oil off the patties.
You can use these just as you would a regular burger and top with pickles, lettuce, tomato, hot peppers, ketchup, mayo, etc.
We all have hectic days where we just don’t have time to pack a lunch with heart-shaped cheeses, individually peeled grapes, and 3-4 servings of vegetables included. Whether for yourself or some back-to-school young’uns, packing so many lunches all year long can get tiresome.
But don’t give up! As stated over and over again in financial writing, bringing a lunch is nearly always cheaper than a similar meal out at a restaurant, or even “fast casual” food places. While articles like the Simple Dollar point out that there is a large margin of what a brown bag lunch may cost, just keep track yourself for one week and you will soon see.
Even if you have the smallest of fast-food options (maybe half a $6 sandwich, and half the next day, for a total per day of $3, not including any drinks or extras), it is easy to create incredibly cheap meals for yourself at home, or even pack lunches which you can assemble wherever you are when it’s time to eat. Sometimes for even less than $1 a day!
And with a little creativity, you can create these easy, cheap meals, and actually make them healthy too! We’re talking several levels above ramen noodles, folks. Just check out my “less than 5” section for a plethora of ideas.
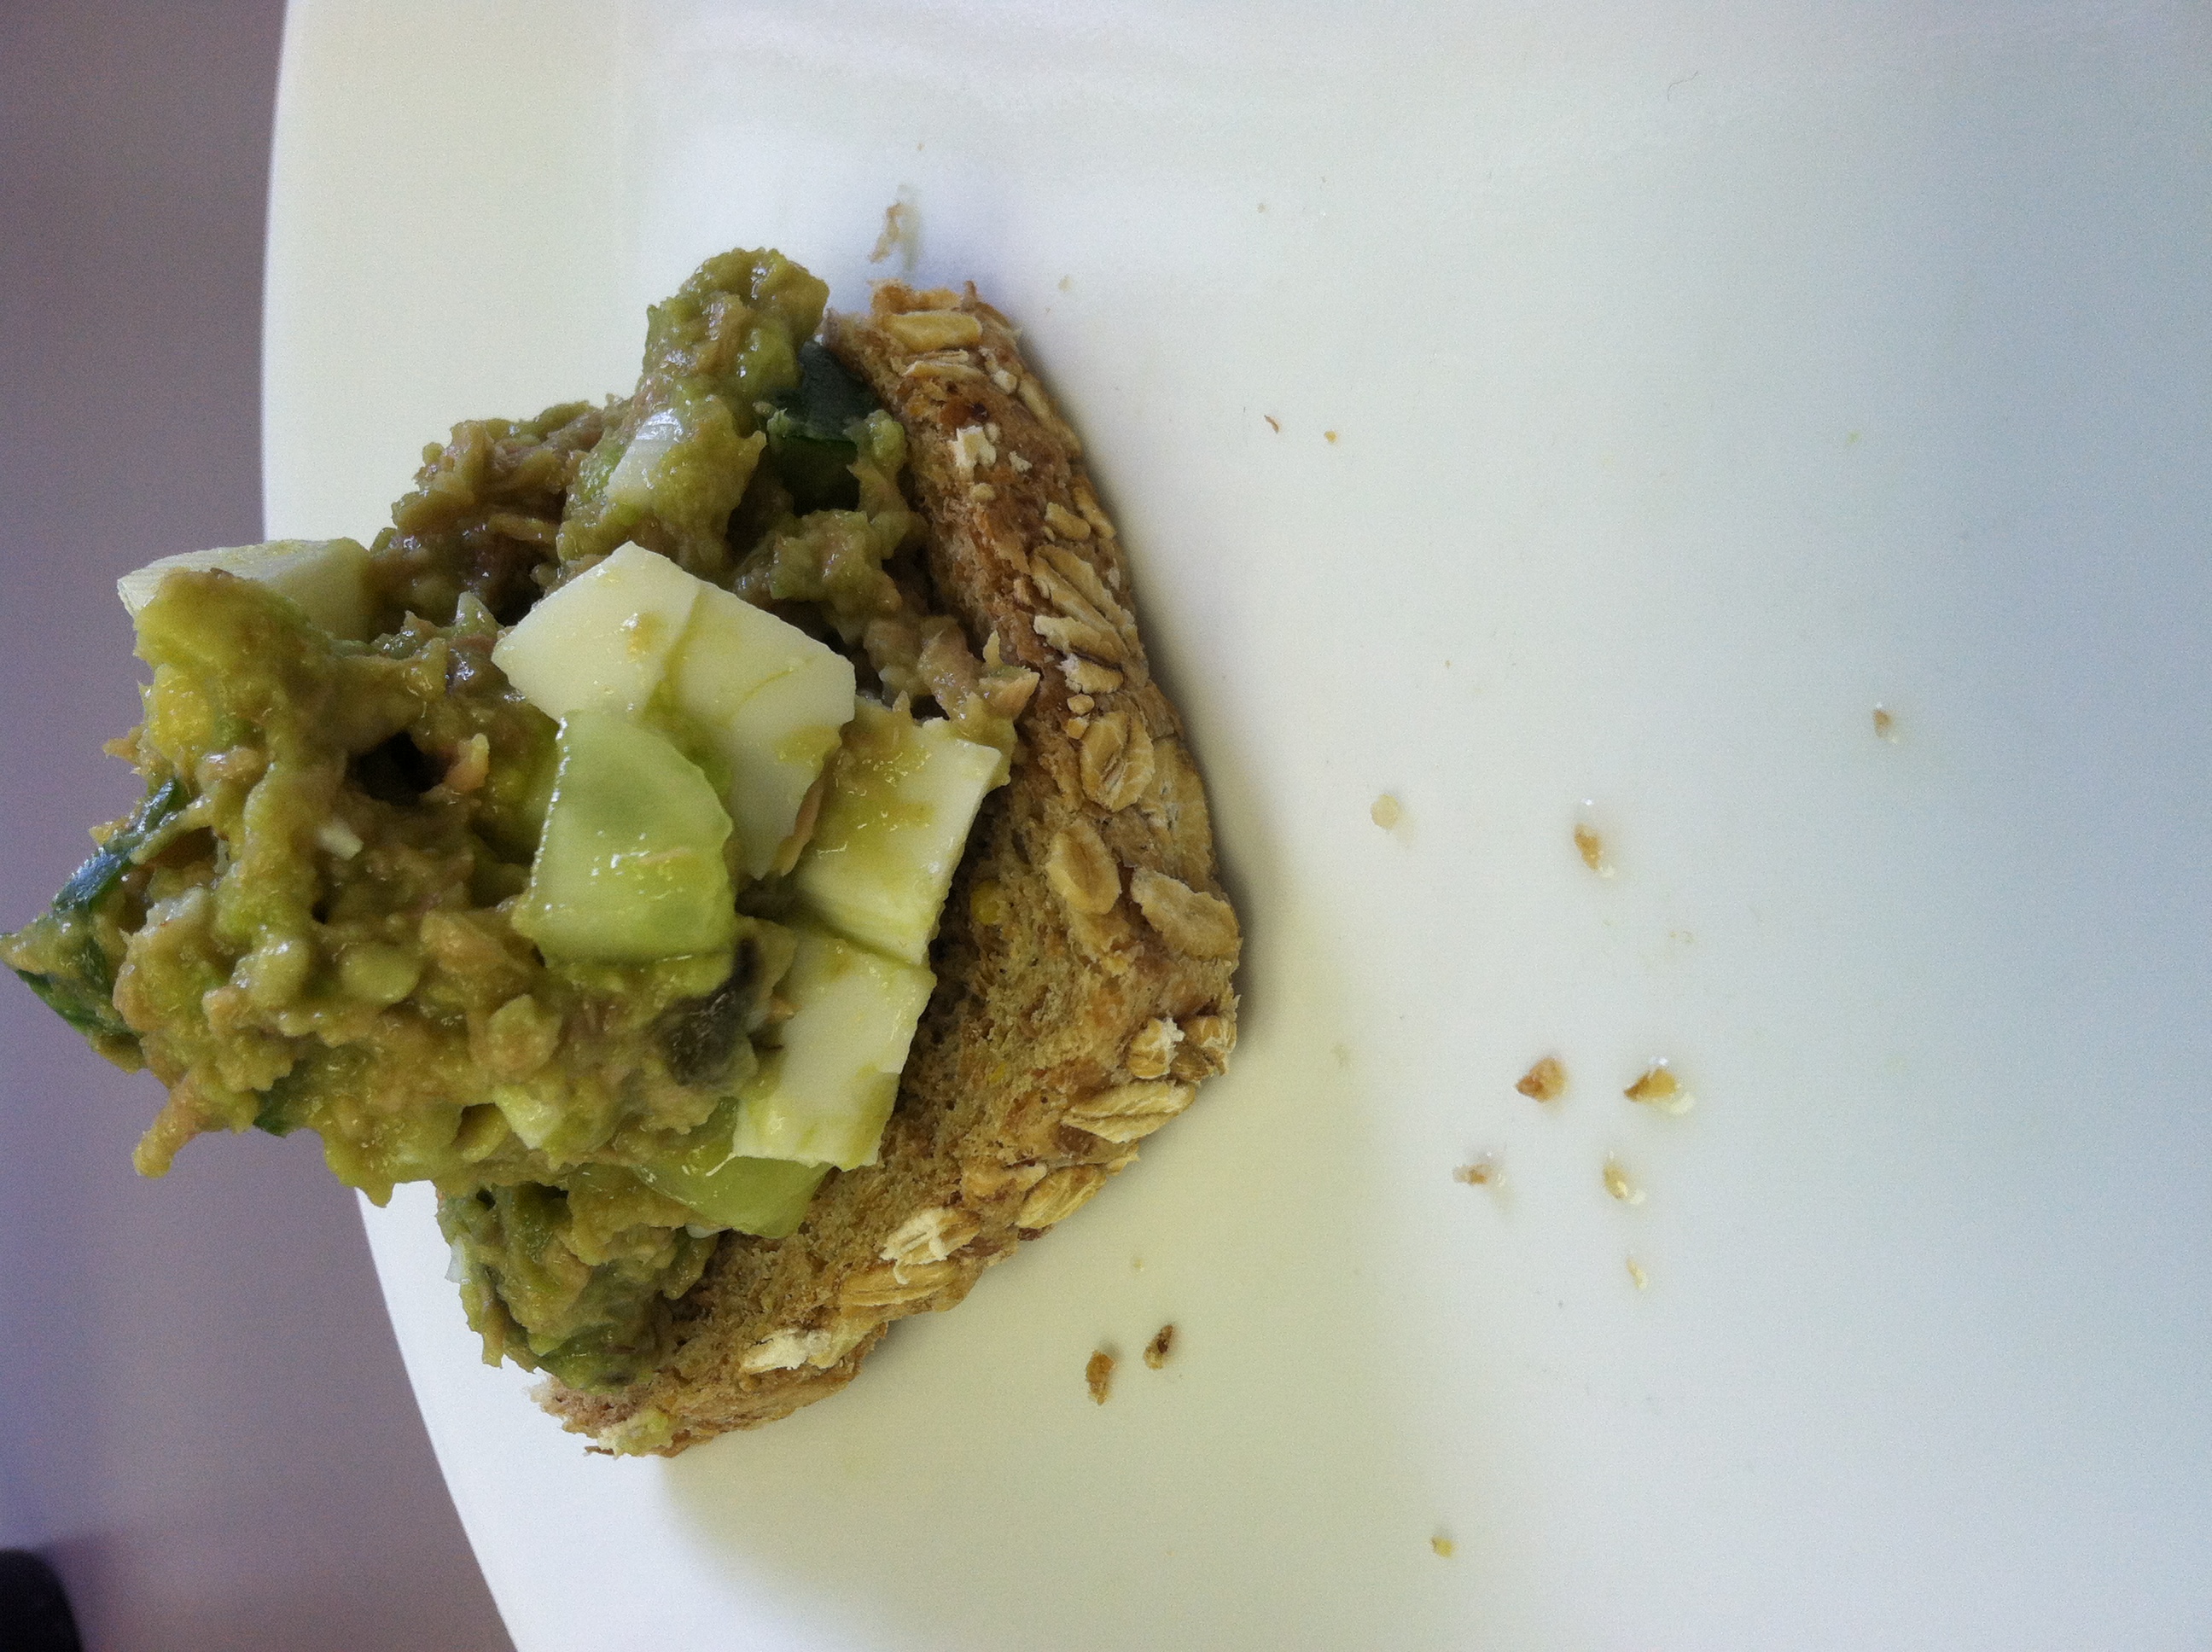
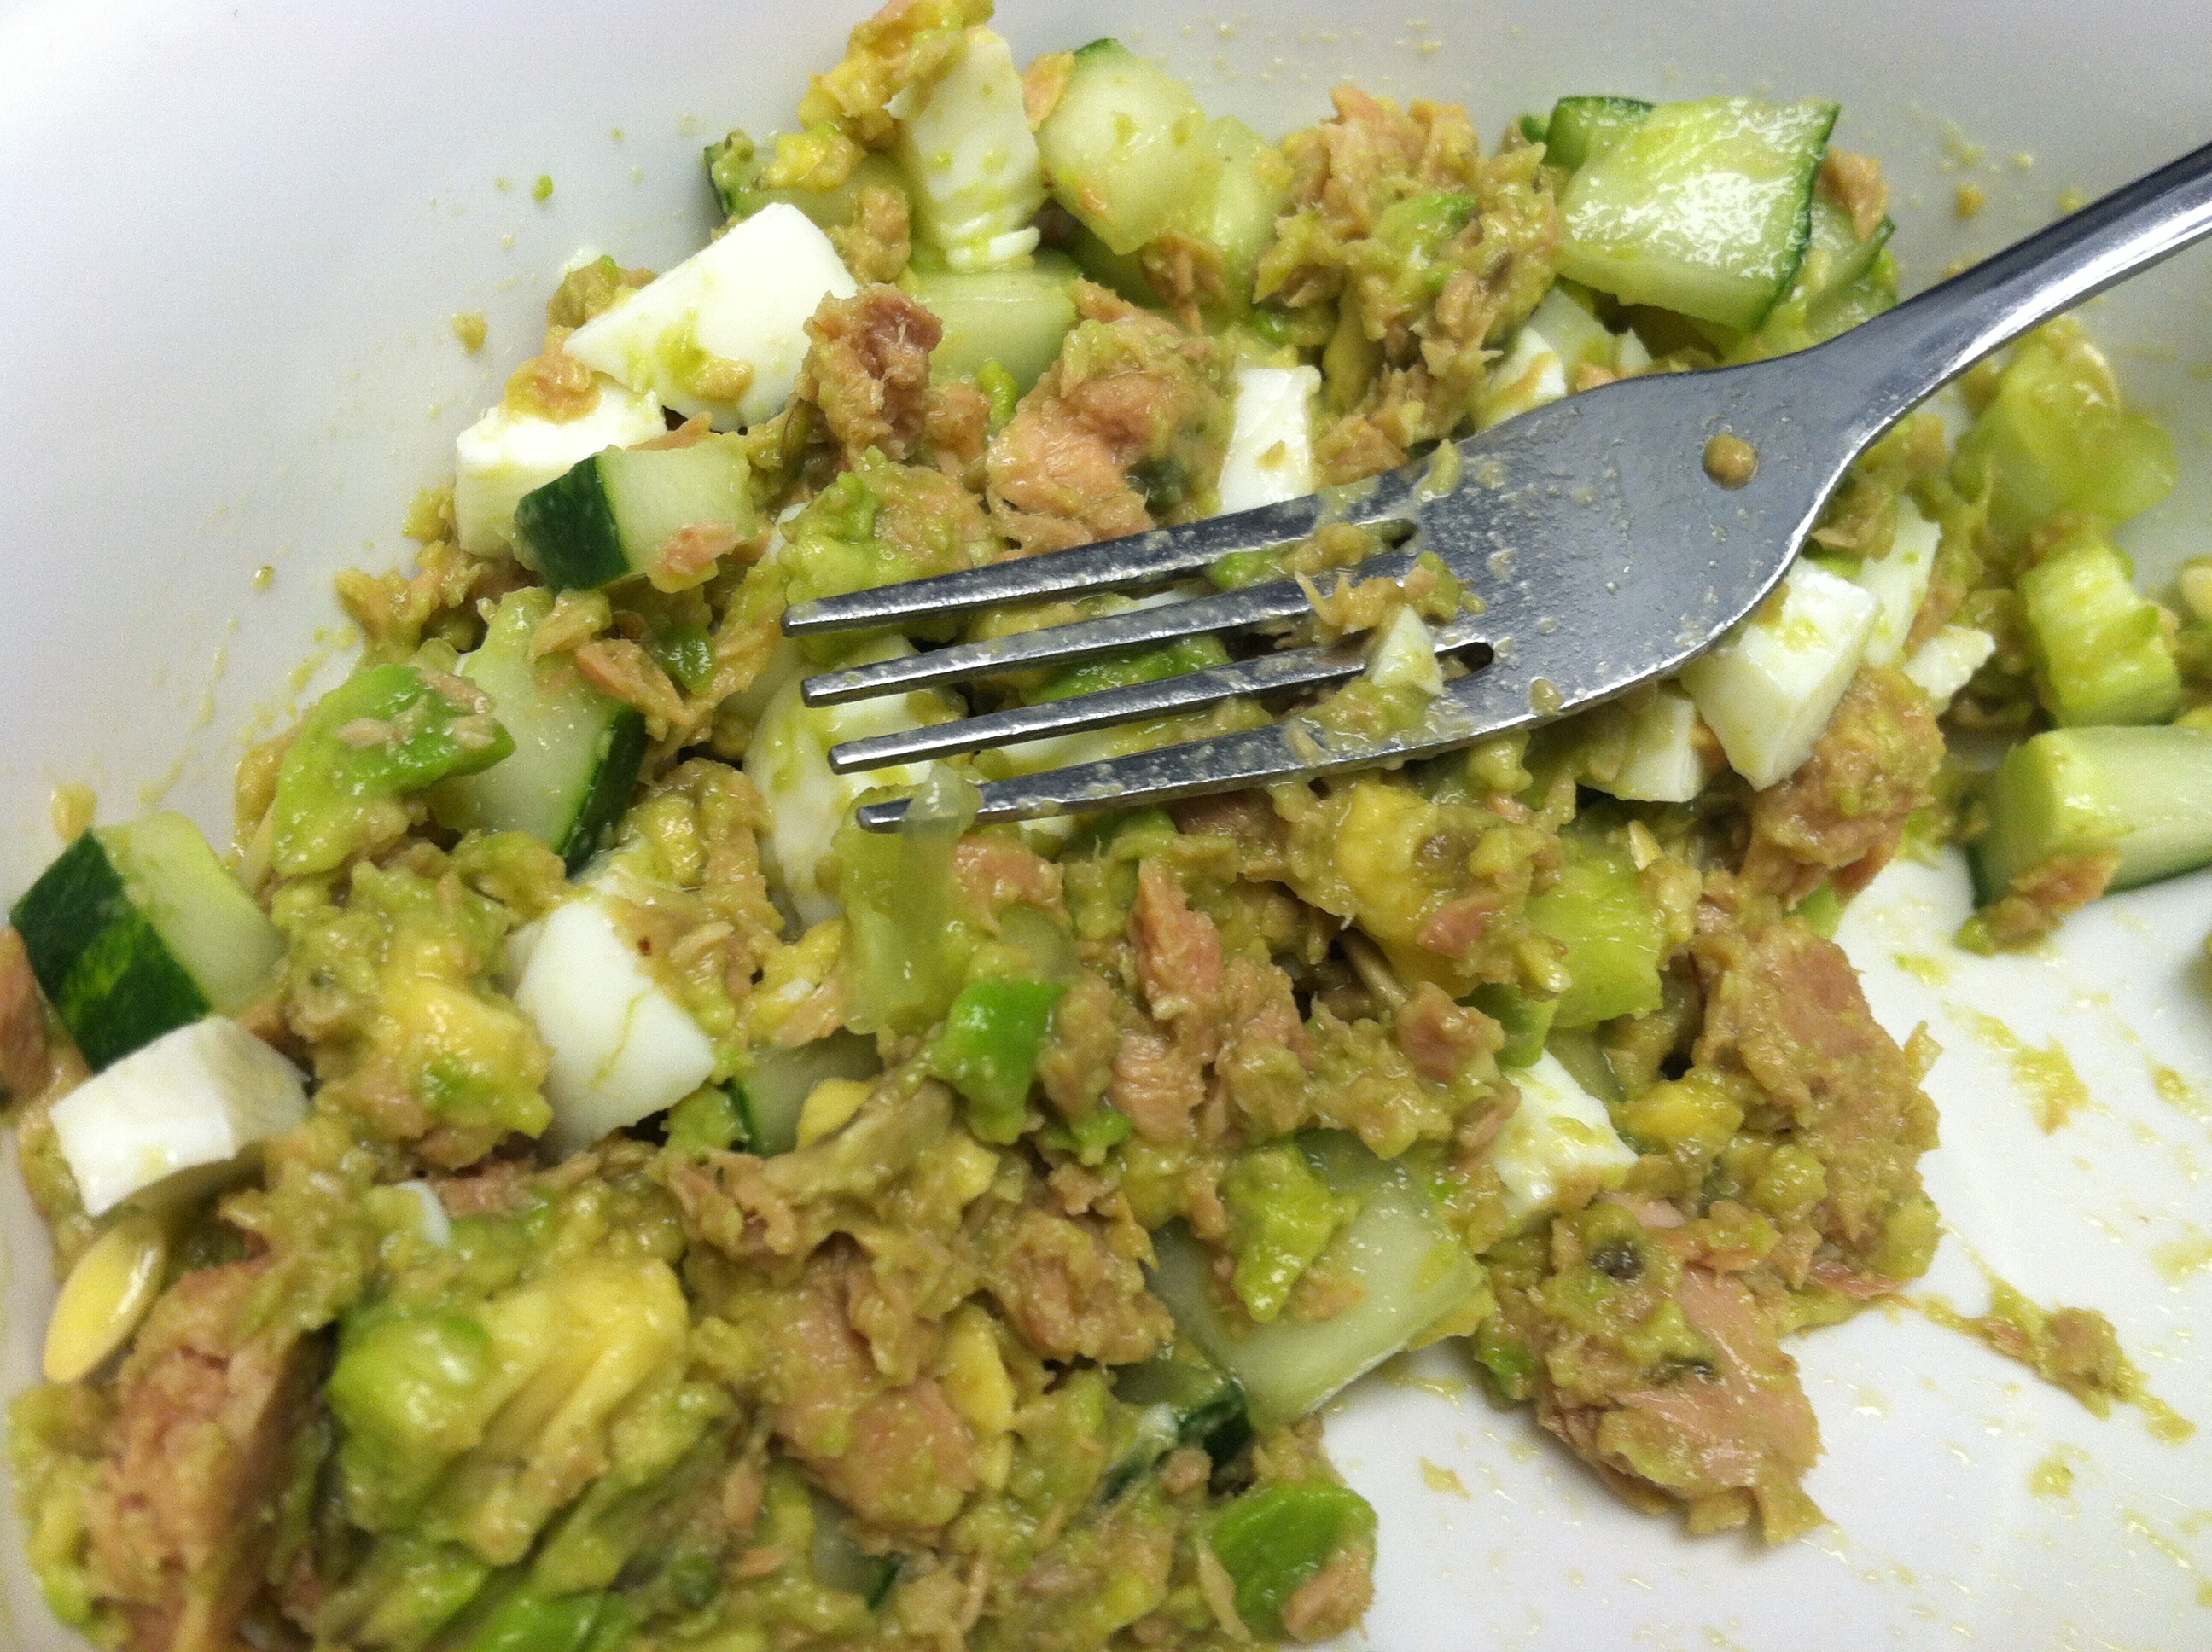
This recipe is a healthified tuna salad. By adding several kinds of vegetables you bulk up the salad with fiber and vitamins, and adding an egg gives the already 16g of protein an extra 6g boost. If you’re truly hard core, you can even forego the mayonnaise and just add lemon juice for a dash of flavor.
This is borderline vegetarian, if you are lacto-ovo vegetarian. It is extremely healthy, especially if you omit mayo. You can pack all the ingredients in a cooler and assemble at your desk or at school. If you buy tuna on sale, you can get it for $0.30 a can. 1/2 avocado + 1/2 cucumber is slightly less than $1.
Add another $0.50 or so for one egg and a few cents for lemon juice and any seasonings, and you have a hefty lunch/appetizer/dinner for about $2. Add a few big leaves of romaine for a dinner of tuna salad wraps, or serve over a big bed of lettuce with some nuts and berries for a more filling option.
Ingredients:
1 can or pouch chunk tuna in water
1 hard boiled egg
1/2 cucumber, diced
1/2 avocado
2 tbsp lemon juice
2 tbsp mayonnaise
Step 1: Open the tuna and drain. Rinse the cucumber and dice into small chunks. You could use celery here, or peas, or shredded carrot. Whatever vegetable you like to add bulk and nutrition.
Step 2: Cut the avocado in half and scoop out the seed. In a bowl, combine the tuna, lemon juice, and mayo. Mix well. Add the cucumber and avocado, smash it around until well combined. Dice the boiled egg, and mix that in.
Season with garlic salt and black pepper if so desired. Serve with slices of bread, a wrap or pita, or whole wheat crackers.
While fried green tomatoes are usually considered a southern dish they can be found in northern homes as well. The northern version is more likely to be made with white flour rather than corn flour or corn meal. Also, green tomatoes tend to be prepared at the end of the season in the north when the remaining fruit is harvested before the first frosts, whereas green tomatoes are picked throughout the season in the south.
They certainly pre-date the movie Fried Green Tomatoes at the Whistle Stop Café, released in the early 1990’s.
“Lovers of tomatoes are very fond of them, sliced green as apples are sliced, and fried in butter. Some persons are fond of them sliced and fried after being dipped in butter. The green tomatoes, which the season will not permit to ripen, may be turned to good account by using them fried.” – The New England Farmer. Oct. 14, 1836.
Traditional preparation of fried green tomatoes begins by cutting the tomatoes into approximately 1/4-inch (~1 cm) slices. They are then seasoned with salt and pepper, coated with plain, coarse cornmeal, and shallow fried in bacon fat for a few minutes each side, or until golden brown.
Shallow frying is preferred, as the tomatoes do not float in the oil, which allows the weight of the tomato to press the cornmeal to the underside of the tomato. Alternatives include using breadcrumbs or flour instead of cornmeal, and frying in vegetable oil or other fat.
A ‘wash’ may be used; in this case, the sliced tomatoes are first dipped in a liquid before the cornmeal is added. This liquid is usually buttermilk, or occasionally beaten egg. Using beaten egg results in a slightly firmer texture than using buttermilk. ‘Washes’ are used because cornmeal does not readily stick to raw green tomatoes.
Adding the liquid helps the cornmeal stay in place during the cooking process. This also results in the coating on the tomato becoming thicker and less crunchy when compared with tomatoes cooked without a ‘wash’.
These fried green tomatoes were made with the first big, juicey green gems on the vine at the beginning of the season, because I just couldn’t wait any longer for them to redden. You can eat these at any time throughout the growing season, and if you live in colder climates it is a way to use up unripe fruit before the first frosts kill them off.
Served with a tasty, tangy basil mayo, these are amazing appetizers, party bites, or a vegetarian main or side dish. They are best served hot and fresh, as the coating loses its crunch over time.
Basil Mayonnaise Ingredients:
1/2 cup mayonnaise
2 tbsp brown mustard
1 tbsp lemon juice
1/2 cup packed basil leaves
2 cloves garlic
Step 1: Rinse the fresh basil well and drain. In a blender, combine the basil, mayo, garlic, mustard, and lemon juice.
Step 2: Blend well until combined. Place in a shallow dish to dip, can refrigerate up to 3 days ahead of time.
Fried Green Tomatoes Ingredients:
3 medium unripe, green tomatoes
1 cup flour
2 eggs
1 cup breadcrumbs
1/2 cup cornmeal
2 cups vegetable oil
Step 1: Rinse the tomatoes well to make sure there is no residue or dirt on them. Slice into 1/4 – 1/2 inch thick slices.
Step 2: Beat the two eggs lightly. Place the flour, scrambled egg, and cornmeal/breadcrumb mixture onto three separate shallow plates. Put the oil in a frying pan, and heat to medium (just below when it would start simmering).
Step 3: Dip the green tomato slices one at a time into the flour and flip to coat both sides.
Step 4: Dip the floured slice into the egg mixture & slush it around to fully coat.
Step 5: After the eggs, dip into the cornmeal & breadcrumb mixture, and flip to fully coat.
Step 6: Place the tomato slices into the hot oil, make sure they aren’t touching. Cook for 5-7 minutes, until the breading becomes brown and crispy. Flip and fry the other side another 5-7 minutes.
Step 7: Place on a cooling rack or paper towels to drain the oil. Serve hot with the basil mayonnaise on the side.
Hope this helps you enjoy more of summer’s bounty!
For my 400th (!!!) post, we are talking about beef heart. As in the thing that keeps the cow alive. (Sorry if that is a bit too real for you.) And also because I love all you readers who keep this fun for me! I can’t believe I have posted four hundred recipes and random ramblings, and y’all keep coming back for more…
But heart is really good! I promise. Just like chicken liver makes a great pasta sauce, give this organ a chance to impress. Organ meats are part of the whole animal, and humans have a very long history of using every bit. Only recently have our palates become pickier, such that regular pieces like bones, tail, tongue, and liver are no longer the norm, and are even looked at askance.
Organ meats can be tremendously beneficial for your health, supplying tons of iron, selenium, and other trace and important minerals. They can of course, also wreck your health, if eaten from tainted sources or too frequently. Organ meats do tend to include higher than muscle levels of cholesterol.
Kelly the Kitchen Kop has a great article containing many common objections to organ meats, along with the true facts. Beef heart is a great organ meat to start with, because it’s flavorful, surprisingly lean, and inexpensive. On average, a serving costs half of a comparable serving of beef chuck roast, and the taste is much milder than liver (for those having nightmares of “liver and onions” right now).
A 3-ounce serving of beef heart has just 95 calories and 15 grams of protein, and only contains 3 grams of total fat in a 3-ounce serving, which is only slightly more than the same portion of chicken breast. Beef heart is a rich source of all the B vitamins except folate, but it’s especially high in vitamin B-12. Three ounces provide more than 200 percent of the recommended daily intake.
Many cultures which still enjoy organ meats use beef heart, such as anticuchos, a beef heart kebab which is the most popular dish in Peru. Argentina is a large beef producer, and nearly all the hearts are shipped to Peru because of such high demand. Beef heart takes well both to fast, high-heat searing and long, slow low-cooking. You can even ask your butcher to grind it up, and mix it into your lean ground beef. Bet you wouldn’t even notice a difference!
In this recipe, I combined very inexpensive, pre-cut heart with seasonally abundant zucchini for a ridiculously low-cost-per-plate meal, served with a simple sauce over rice. The beef (2lb) was $1.44, the zucchini was free from the garden, but let’s say you bought it at the store for about $1.00, an onion & some mushrooms would be about $1.00, and the 2 cups of rice maybe another $0.50 or so. A few tbsp of soy sauce and Worcestershire sauce adds a couple more pennies.
That brings the total for two meals to about $3, or $1.50 per serving. Beat that, fast food!
Ingredients:
1 medium zucchini
2 pounds beef heart cut into chunks or strips
1/2 white onion, cut into thin strips
1/2 pint mushrooms, sliced thin
1/4 cup soy sauce (or fish sauce)
1/4 cup Worchestershire sauce
1 tbsp vegetable or olive oil
Step 1: Dice the onion, mushrooms, and zucchini. In a frying pan, add 1 tbsp oil and the veggies. Cover and cook for 8-10 minutes, stirring, until onion is translucent and the zucchini is softened.
Step 2: If you didn’t buy pre-cut heart, cut the fat and tendons off the meat, then cut into chunks or strips. Add the meat and the sauces to the pan. Cook on medium heat 5-7 minutes, stirring, until meat is thoroughly cooked.
Step 3: In a separate pot or rice cooker, cook 1-2 cups of rice. Serve half the mixture over half the rice on two plates. You could also serve this over couscous, quinoa, barley, brown rice, on its own, or in pita pockets.
[amd-zlrecipe-recipe:33]
The fusion of food, fun, frugality, and curiosity.