Breastfeeding: All about it


For a process as old as humanity itself, breastfeeding gets a lot of media attention. 

I’ve read many articles and arguments over the years, and decided to spend some time looking into the matter. Not that I need to worry about it, having no children myself. But maybe someday, who knows. 

And it has to do with two of my most favorite topics, money and food. How so? you may ask. Well, breastfeeding saves you money because your body naturally makes it. It is free food for several months for this little critter you just popped out of your body. And food, because that’s what breast milk is.

Also I’m just insatiably curious. I read this article on Yahoo, and it stirred something in me.  <Update as of Aug 2014: Also you should check out this article from Verily all about recent celebrity breastfeeding photos and what it should tell “regular” moms about breastfeeding in public too.>

Why does the entire world think their opinions are needed, welcome, or necessary about what a woman does with her own body? I’ve always been of the opinion that what I do is my business and what you do is yours. 

I object to smoking in public because I hate the smell of smoke, it makes me gag and cough, and actively damages my health. If you want to smoke in your own house or car or whatever, that’s your life decision. If you dress like a hooker or wear your pants down to your ankles, yes I will silently judge you. But you aren’t actively harming me or stopping me from living my life, so I have nothing to say to you about it.

It is the same with breastfeeding. I’ve seen women in public and private doing so, both with and without covers. I’m more comfortable if they use a cover, sure. I feel super awkward if a lady’s breast is all hanging out, but that doesn’t mean I have to look at it. Look away, or go somewhere else. If she doesn’t feel the need to cover up, that’s her choice.

Anyways, time to get down off my soap box and look at some facts.

How it works

“Breastfeeding” is exactly that, the act of feeding an infant with milk produced by a female human breast. This production of milk is lactation, and is a natural anatomical event which begins after giving birth. Newborns only minutes old already have a suckling reflex which enables them to latch on to a breast, suck, and swallow milk. Surprisingly, Wikipedia has a very complete and thorough page all about breastfeeding.
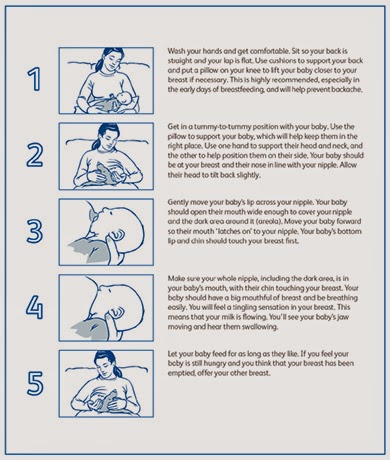
Photo from SMAHCP

Common recommendations are that babies be breast fed within an hour of birth, exclusively breastfed for the first six months, then supplemented with age-appropriate foods until age two or “as long as is mutually desired by the mother and baby” (American Academy of Pediatrics).

During pregnancy and after giving birth, the woman’s hormonal endocrine system drives milk production in the milk duct system of the breasts. Progesterone, estrogen, prolactin, oxytocin, and others all influence development and production of milk. The milk ejection process, known as let-down, is triggered by oxytocin in response to the baby’s suckling. It can also become a conditioned response, as in beginning at the cry of the baby.

The milk is made from the nutrients in the mother’s body and bloodstream, and consists of just the right balance of fat, sugar, protein, and water for the baby. How much milk is produced can change depending on the age of the child, how often they nurse, and how much they consume per nursing session.
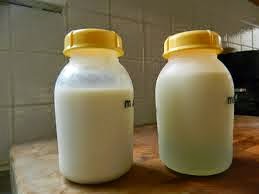
From the Wikipedia page: Formula (left) next to breast milk (right)

Many years ago, and in some poor countries today, your only option is to breastfeed. With the invention of formula, this freed mothers to allow others to feed their child if for some reason they could not. A third option has been even more recently made available through the widespread use of pumps. This combines the benefit of using your own milk with the convenience of having stores whenever the baby is hungry and using a bottle. The choice is personal, and unique to each mother’s situation. 

Women who are nursing or pumping need to be careful of what they eat, as you can pass on toxins, mercury, and alcohol through breast milk. Alcohol-containing breastmilk has been shown to have a detrimental effect on motor development. Additionally, excess caffeine in breastmilk can cause irritability and restlessness in infants, so keep it under three cups of coffee (or 300 mg) per day.

Health/cognitive effects

Chronic non-communicable diseases (NCD) such as heart disease, respiratory diseases, and diabetes, are a growing concern in the developed and developing worlds. These diseases have a complex interaction of causes from genetics to gender, age and ethnicity, to environmental factors and lifestyle choices.

The major risk factors of chronic NCDs include smoking, hyperlipidemia (high lipids in the blood), hypertension (high blood pressure), hyperglycemia (high levels of sugar in the blood), obesity, and a sedentary lifestyle. A review titled “The protective effects of breastfeeding on chronic non-communicable diseases in adulthood: A review of evidence” looks at the current body of literature researching the effects of breastfeeding on NCDs. There is a growing body of evidence which suggests that breastfeeding has protective roles for the infant against obesity, hypertension, dyslipidemia, and type II diabetes mellitus during adulthood. 

Mother’s milk has been a staple of child rearing for decades, maybe millennia. Its nutritional content and makeup has been adapted to feed a newborn infant into a strong, healthy toddler. It also contains antibodies from the environment of the mother, and thus the baby, helping the baby’s immune system develop. There are numerous physical, emotional, psychological and health benefits for mothers too.

In addition to its short-term benefits, encouraging breastfeeding can have long-term beneficial health effects at individual and population levels. 

The Agency for Healthcare Research and Quality stated in their review Breastfeeding and Maternal and Infant Health Outcomes in Developed Countries, that “A history of breastfeeding is associated with a reduced risk of many diseases in infants and mothers from developed countries.”

Benefits for Baby

According to the American Academy of Pediatrics, research shows that breast feeding provides advantages with regard to general health, growth, and development for the baby. Infants who are not breastfed are at a significantly increased risk for a large number of acute and chronic diseases including:

  • lower respiratory infection
  • ear infections
  • bacteremia
  • bacterial meningitis
  • botulism
  • urinary tract infection
  • necrotizing enterocolitis
  • weak jaw and jaw muscles

There are numerous studies that show a possible protective effect of breast milk feeding against sudden infant death syndrome, insulin-dependent diabetes mellitus, Crohn’s disease, ulcerative colitis, lymphoma, allergic diseases, digestive diseases, and a possible enhancement of cognitive development. However, the association between breastfeeding and ‘intelligence’ is not clear.

Regardless, it is hard to argue that breastfeeding will in any way harm your baby’s health. In fact, the vast majority of mothers plan on breastfeeding, but various health, behavioral, or social factors get in the way and prevent them or cause them to stop early.

Benefits For Mom


Breastfeeding can have numerous benefits for mom, in physical, mental, and financial terms. Benefits for the mother include: 

  • Assists in post-baby weight loss (breastfeeding uses up about 500 calories a day)
  • Uterine shrinkage (apparently that’s a good thing?)
  • Decreased risk of breast cancer, ovarian cancer, and endometrial cancer (if you nurse a female child, it also decreases her lifetime risk of breast cancer! that’s pretty flippin cool)
  • Decreased rates of depression 
  • Decreased risk of osteoporosis
  • Bonding experiencefor both mother and baby
  • Less expensive than formula
  • Lactational amenorrhea – delays return of fertility by suppressing ovulation, however is not 100% guaranteed, so please don’t use this as the only form of birth control if you don’t want another little one to follow on this one’s heels

Breast milk was developed over millennia of evolution, and as such is perfectly suited to its job of feeding infants during their first few months and years of life.Studies have shown that the caloric intake of breastfeeding and non-breastfeeding mothers was not very different, therefore breastfeeding is a cost-effective way of feeding an infant, providing nourishment for a child at a small cost to the mother.  Breastfeeding soon after giving birth increases the mother’s oxytocin levels, making her uterus contract more quickly and reducing bleeding. And of course it bonds baby and mom closer together at every meal.

If you cannot or choose not to directly breast feed but still want to give your baby your milk, you can use a breast pump to express the milk and store it. Milk can be stored in special freezer bags (6-12 months) or in bottles in the refrigerator (6-8 days). This frees the mother to return to work or other daytime duties, enables other partners or caregivers to feed the child, and still offers all the benefits of using natural milk. Research suggests that the antioxidant activity in expressed breast milk decreases over time but it still remains at higher levels than in infant formula.

Are there any drawbacks?

Sometimes, due to drug use, infections, mastitis, or other health problems, a woman cannot use natural breast milk. There are still options available. If you want your child to still receive human breast milk, there are breast milk banks where kindly new mothers can donate excess breast milk. The milk will not be tailored to your baby, but will still be nutritionally superior to formula. See the Human Milk Banking Association of North America website for a bank near you. Or elsewhere in the world, a quick Google search should find some.

The process of weaning a baby can also be somewhat traumatic for both mother and child. Many mothers dread the loss of the bonding experience with their child.

Weaning is the process of introducing other foods and reducing the frequency of milk, until the child is no longer receiving any breast milk. Most mammals stop producing the enzyme lactase, which breaks down the lactose in milk. This can lead to lactose intolerance. The frequency of lactose intolerance rises over time, and varies among human populations.

It is also unconfirmed that breastfeeding causes any type of permanent disfigurement or ‘sag’. This is more correlated with age, weight, lifestyle, and other factors.

We also cannot discount the fact that many mothers are physically, mentally, or socially unable to begin or continue breastfeeding. There are myriad reasons why this may end up not being right for a mom, some of which may include:

  • Inability to latch
  • Mastitis
  • Chapped/infected nipples
  • Leaking
  • Thrush 
  • Low supply

Everyone’s body is different, everyone’s baby is unique, and everyone has their own individual family and career situation. We get enough advice and mom-shaming and parent guilt from the media, let’s not perpetuate it amongst women. Everyone must make the choice that is best for them at the time.

Why So Much Controversy 

 
The whole concept of to breastfeed or not seems to have a long-running polarizing effect. Again, I am not a mom, and have no intensely strong opinion either way. I think we are all free to make our own choices, and should respect each other as women and human beings in the choices each other makes. 
.

However, it seems moms on both sides of the fence take issue with the other side. Both choices are beset with the notion of being “right” or “good”, while the other choice is wrong and hurts the child, mother, or both. 

This is silly. As women we are genetically and evolutionarily programmed to keep an offspring alive. And this is really the key. NO ONE is perfect. Everyone messes up sometimes. Everyone sucks sometimes. And that’s okay. RenegadeMothering gets it.
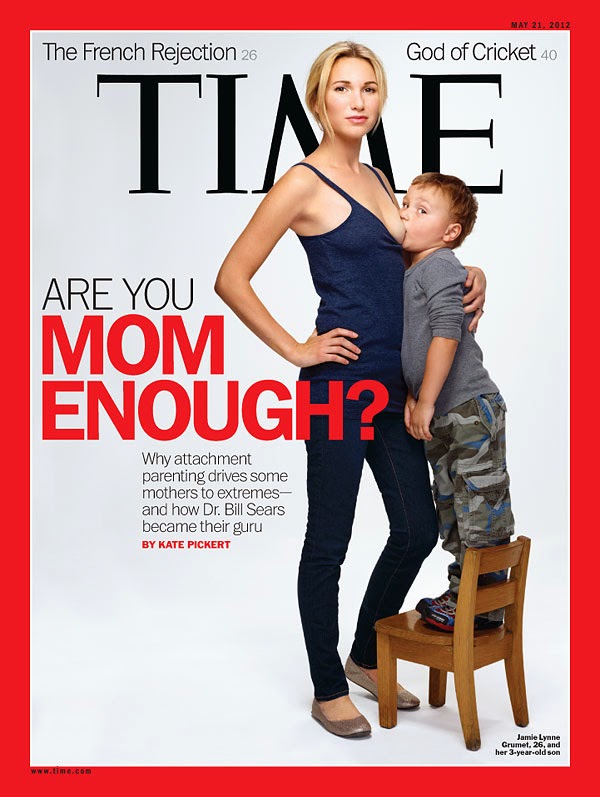
 
The controversial TIME magazine cover “Are you MOM enough?“
The upsetting part though, is that society has developed a super-negative view of breastfeeding, especially in public. Women get stares, glares, and sometimes even asked to leave places, all for trying to provide food to their hungry babies. Yet no one objects to a lady on a park bench with a bottle.
.

Negative perception of breastfeeding has led women to feel discomfort when breastfeeding in public. Wikipedia says: “Even though many women are educated about the health benefits of breastfeeding, less than 25% choose to breastfeed their children”. 

A major driver of this is the over-sexualization of breasts. As they say, sex sells. And we like to sell lots of stuff. Therefore, we see lots of breasts in ads, on billboards, in magazines, on TV, on the subway… Every day we are bombarded with images of sexualized women and men trying to make us buy things. Thus, the thought of someone bearing one of those in public touches a nerve because people do not like to associate feeding an infant with sexual pleasure.

Societal judgment along with limitations as to when and where you can breastfeed in public leads some women to give up much sooner than they would have otherwise, which could have negative health effects for the baby later on in life. Shame should not be used as a tool to advocate for or against breastfeeding, rather women should be able to individually define what a good mother is.

As a society, we need to move towards providing women with education on the benefits of breastfeeding, as well as problem solving skills for women who may find it difficult.

More great blogs and websites to check out: 

  • http://www.kidspot.com.au/why-im-glad-i-was-told-to-stop-breastfeeding-in-public/
  • http://healthfoundationsbirthcenter.com/2013/11/19/15-cool-facts-about-breastfeeding/
  • http://thegothicmommy.wordpress.com/2012/12/02/pressure-to-breastfeed/
  • http://www.who.int/features/factfiles/breastfeeding/en/
  • http://www.unicef.org/mozambique/media_9256.html


References – made using EasyBib (the world’s best auto-citation site!)

Kelishadi, Roya, and Sanam Farajian. “The Protective Effects of Breastfeeding on Chronic Non-communicable Diseases in Adulthood: A Review of Evidence.” Advanced Biomedical Research 3.1 (2014): 3. Print.
Much, Daniela, Andreas Beyerlein, Michaela Rothbauer, Sandra Hummel, and Anette-G. Ziegler. “Beneficial Effects of Breastfeeding in Women with Gestational Diabetes Mellitus.” Molecular Metabolism 3.3 (2014): 284-92. Print.
Slusser, W. “Breastfeeding and Maternal and Infant Health Outcomes In Developed Countries.” AAP Grand Rounds 18.2 (2007): 15-16. Print.
World Health Organization. “10 Facts on Breastfeeding.” WHO. N.p., Feb. 2014. Web. 


Less than 5: Big-kid Ramen

Another in my “Less than 5” recipe series. All recipes beginning with that title will have less than 5 ingredients and/or cost less than $5. Bonus for ones that also take less than 5 minutes. =)
 
Ramen used to be the greatest after-school snack ever. Then in college, it was pretty much a daily staple. At 10-20 cents per pack, the good people of Ramen keep poor college kids worldwide from starving. When I started graduate school, and started taking this blog more seriously, I figured Ramen was no longer part of my life. I had graduated to frittatas, lasagna, and white bean chicken chili. Big kid food. 
But then in my masters study, my Taiwanese advisor had Ramen for lunch nearly every day. She just fancied it up by adding a handful of fresh spinach and an egg. Well of course I had to try it, as the chicken-salt smell of Ramen is hard to resist. Adding veggies ups the nutritional value (which previously was negative zero) and an egg or tuna will bump up the protein.

It turns out to make a decently healthy meal, for way less than a dollar per serving. Ever since then, when I have a random Ramen craving, I give in with the justification that at least it’s “big kid” Ramen. Now you can too!

 
Ingredients:
  • 1 package Ramen noodles
  • 1 cup frozen mixed vegetables or spinach
  • Optional: 1 egg, thinly sliced meats, shrimp, tuna
  • Spices (I used parsley, parmesan, and red chili pepper for kick)

Step 1: Heat the noodles and 2-3 cups water for 3 minutes in the microwave, or pour in boiling water. Let stand for 3 minutes.

Step 2: Add the vegetables and egg. Break the yolk so it doesn’t explode. Microwave another 3 minutes.

Step 3: Stir in seasoning packet and spices, enjoy!

The chili flakes gave it a nice bite of heat, and I like the frozen mixed veggies because of the corn and carrots’ sweetness. You can get creative with this. Use tofu, beans, tuna, chicken. Any cooked vegetable will work well. I’m partial to the chicken flavoring only, but there are beef and shrimp flavorings too.

For 0.10 (noodles) + 0.10 (egg) + 0.10 (frozen veg) = $0.30 

Not a bad meal!


What do you put in your Ramen?

Recipe Review: Strawberry Cheesecake Shake


As you may or may not know, I love this website called SparkPeople. They have trackers for all sorts of things: water intake, workouts, food intake, weight, recipes, etc. It’s a great community and getting bigger. People are really supportive, and there are so many inspiring weight loss stories! All for free.

Anyway, a lot of my recipe inspirations come from there, and when I saw this Strawberry Cheesecake Shake appear in my inbox the other day, I knew I had to try it.

See, I ordered some Whey Protein Powder on Amazon, and love it. BulkSupplements has some great, clean supplements, and the best price-per-ounce out there. (I have their anhydrous caffeine powder too, for really slow mornings!) As with all supplements, you need to be safe, and use your best judgment. Ask your doctor if you aren’t sure what or how much to take.

Anyways, I like this protein powder because it is just powdered whey (like from milk) so there is no added sugars or calories or flavors. I can put it in anything. And this shake calls for protein powder, so I think: perfect breakfast! 

The claim is that this tastes like strawberry cheesecake. Really? Does anything “healthy” taste like the unhealthy food it claims to mimic? I’ve had way too many promising sounding yogurts turn out to be chalky and awful. But stick with me… this one’s a winner.

With only 3 ingredients (if you don’t add the extras) and about a minute to make, this one qualifies for my “Less than 5” too I think.

Ingredients:
1/2 cup milk (I used vanilla soymilk)
1/2 cup cottage cheese
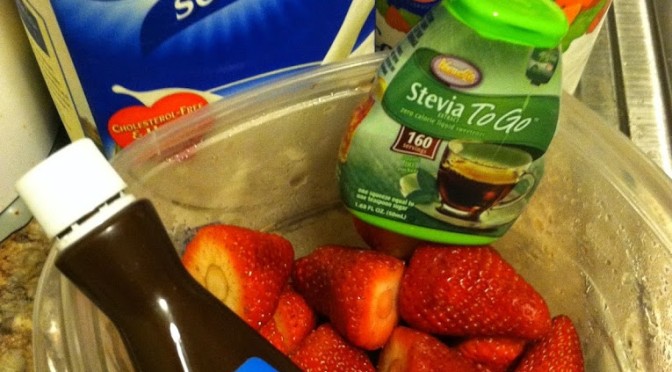
1 1/2 cups strawberries (fresh or frozen)
*2 tsp almond flavoring (optional, or vanilla)
*2 squirts liquid stevia — use the sweetener of your choice. Honey, splenda, sugar, naked…
*1 tbsp whey protein
 * = all optional, add to taste or don’t add, your choice


Step 1: Blend the milk and the cottage cheese together until smooth. This is the important part, make sure there are no cheese chunks left. Pulse in the blender for 30-60 seconds, then dip in a spoon. If you pour it off and no chunks are left, you’re good, continue.

Step 2: Add the sweetener, flavoring, protein powder, and strawberries. You could use any fruit here really, peaches would be good, or raspberries. Strawberry-banana is always a solid bet.

Blend for 1-2 minutes, until smooth and creamy.

Step 3: Pour into a container and enjoy! I took this for breakfast, and I swear to you it really does taste like a liquid strawberry cheesecake. The protein from the cottage cheese and the whey powder made it extra filling, so I wasn’t the least bit hungry until lunchtime. This would be a good post-workout snack if you cut it in half too. Enjoy!
 

Nutritional Info
  • Servings Per Recipe: 1
  • Amount Per Serving
  • Calories: 236.3
  • Total Fat: 2.7 g
  • Cholesterol: 10.5 mg
  • Sodium: 518.6 mg
  • Total Carbs: 36.4 g
  • Dietary Fiber: 6.2 g
  • Protein: 19.4 g

  (Note: Adding protein powder will increase the protein level and likely calorie count)


What’s your favorite pre- or post-workout snack?


How to cook a whole Brisket


Beef brisket is by far one of my favorite cuts of meat. Brisket comes from the chest area of a cow, and is chock full of connective tissue called collagen. This is what can cause meat to be tough and chewy. This is also why brisket requires a loooooooong cooking time. Chefs and home cooks will all have varying opinions on the best rubs, sauces, and ways to cook brisket.

In my opinion, there really isn’t a wrong way, as long as brisket is being served I’m a happy camper! 

If you’re intimidated by trying to cook such a large chunk of meat (since stores usually sell it by the whole brisket, i.e. the entire chest muscle) you can probably ask a store butcher to cut it into smaller sizes. But let me assure you, if I can pull this off in my tiny apartment kitchen, you sure can too!

Do be aware that a whole brisket is typically upwards of ten pounds. Though some part of that is the “fat cap“, a thick band of fat connected to the meat, and you probably want to cut that off before eating. But leave it on for the cooking part, as it helps keep the meat tender and juicy, and tasting awesome! 

If I had a huge grill, I would use that baby on low and slow all day. Since I don’t have that, I made due with baking in the oven. And I’m totally not mad about that. I used mustard as the base for the rub, to get it to stick, and to add flavor. And made the rub from some spices I had around the house. You can change it up to use whatever spices you want, add some BBQ sauce, get creative.


Ingredients:

  • 1 14 pound beef brisket
  • 1 cup yellow mustard
  • 1 cup pork rub spices
  • 1/4 cup dried onion
  • 1/4 cup garlic salt
  • Ground white pepper
  • Black pepper
  • Paprika

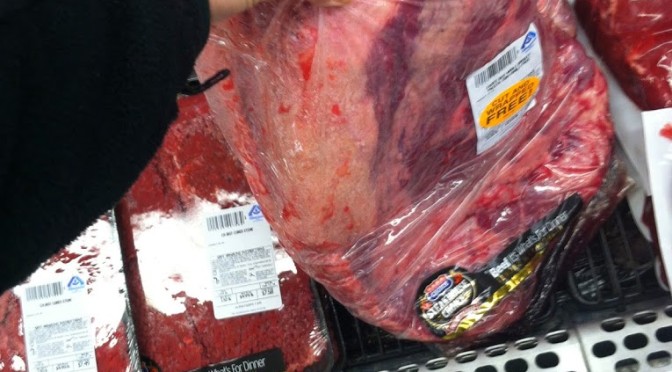
This is what the brisket looks like a the store. Quite the hunk of beef.

Ready and waiting to become a masterpiece.

Step 1: Smear a healthy amount of mustard all over the brisket, flip it, and cover the other side too. Use your hands and get all around the edges and in the crevices.

Step 2: In a small bowl, mix together all the spices.

Sprinkle the spice mixture liberally all over the meat. This is very thick, so it’s pretty dang difficult to over-season at this stage. Rub it all over so you get a crispy, flavor-filled crust.

Beautiful.

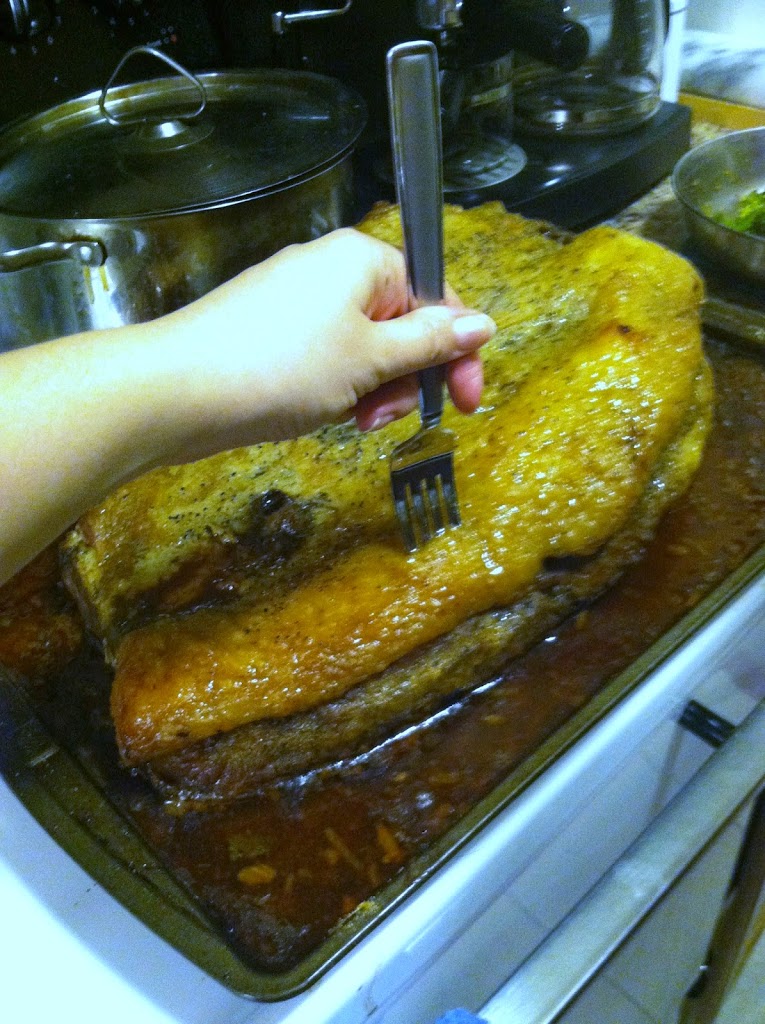
Step 3: Place the brisket in an oven-safe pan with the fat cap upwards, so all the delicious melting fat will drip through your meat and keep it moist. Cover with foil and place into an oven set at 275. Add a cup of water or beef broth to keep it moist.

Now the hard part. Wait. This baby needs to cook for about 6-8 hours, low and slow.

When there is no longer any pink, or if you have a meat thermometer make sure it reads 150 or more, your brisket is ready to be enjoyed!

This. Meat. Is. Amazing.

I served the brisket with roasted whole new potatoes and onion, and steamed broccoli the first night. There were leftovers all week, and no one was upset about that. Made some pulled brisket BBQ sandwiches, brisket salad, just ate chunks of the salty, beefy goodness cold. 

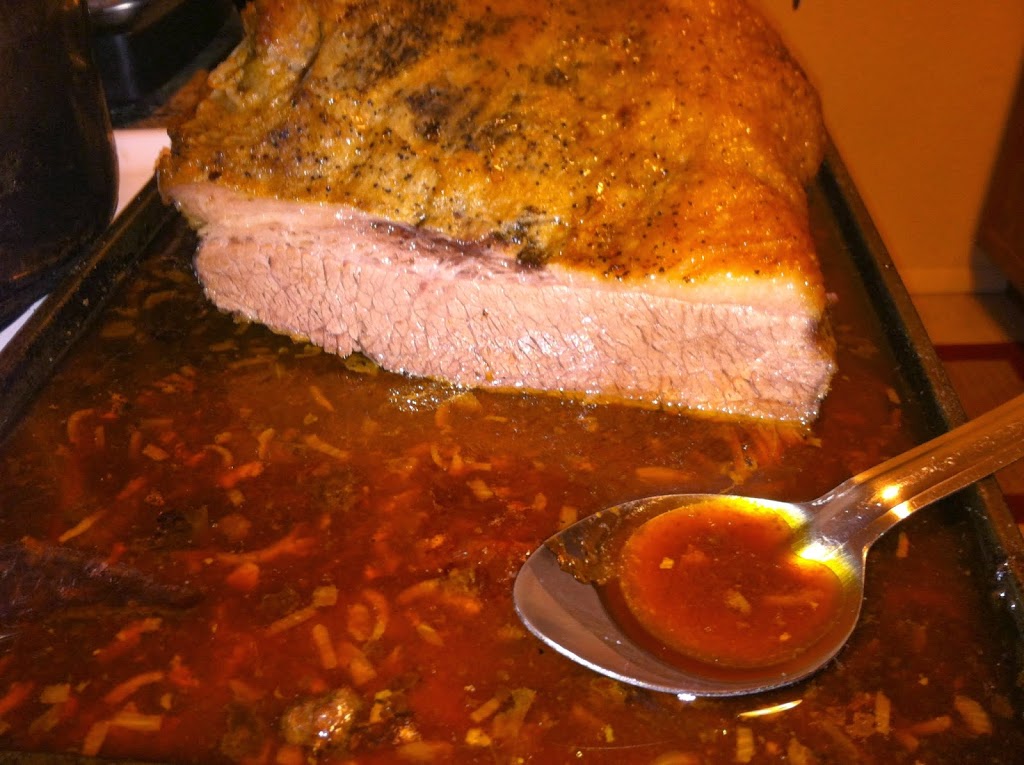
The drippings were delicious too, but had a lot of the melted fat in it.

That didn’t stop us from using the drippings as a gravy!

Wooooooooooooooooooooooooooooooooow was this good. Makes me consider changing careers to be a cattle farmer, just so I can have this once a month. Then I’d probably also have a heart attack within a decade… Worth.


Have you ever made brisket? How do you cook it?


Save

Meal Planning: What it is, why you should, and how to do it


A very popular topic in food and cooking related blogs and forums is meal planning. What is it, how can you do it, is it worth the time? I’ll start by saying that this article is going to be just full of suggestions, tips and tools. Everyone’s situation is different, so I cannot write an article that will work for every single person who might read it. I don’t know if you’re single, vegetarian, diabetic, have three kids, on food stamps, or a combination of all those things. I will however try my best to give you general tips with more specific scnearios as we go along.

Feel free to email me at BudgetEpicurean (at) gmail (dot) com if you have a specific question, or any question really.

As featured on Stacking Benjamin’s podcast:
Meal Planning Made Easy

What is Meal Planning?


Meal planning is simply that: planning your meals in advance. The period of planning time may vary, for some you don’t plan dinner until it is 7pm and you’re starving. Some people plan per week, others plan per month. It is up to you how frequently you can and want to think about your upcoming meals.

The most common way to go about planning meals is to use a spreadsheet or pre-made printout. If you are an experienced cook or have adequate food in your home already, you could simply list the day and the meal(s) you intend to make. There are abundant options of formats available for free online, and there are also yearly or monthly services which will plan your meals for you. Most paid services will also create a grocery shopping list to go with the meal plan.

But why pay for a service you can do for yourself in 20 minutes on one weeknight? I am after all, the Budget Epicurean!

Why should I bother?


Well, if it really seems like too much trouble, you don’t need to read any further. Or pay for someone to do it for you. But meal planning can save you the loss of significant money in the form of food waste.

Americans waste billions of pounds of food per year, up to 40% of the food that households purchase!! This is due mostly to bad planning. You make too much and no one likes the leftovers. Or you cook, then go out, then cook again, and it goes bad before you can rotate the leftovers. Or you miss an expiration date and the goods expire. 

By planning your meals in advance, you are creating several opportunities to save money. You are also bettering your health. This is what planning meals and cooking at home does for you:

  • You can feature weekly sale items in your meals, saving you $$
  • You can buy in bulk for similar meals, saving you $$
  • You cut down on food waste, saving $$ and landfill space
  • You control portion sizes, helping your health
  • You control what ingredients go in it, meaning you can ‘have it your way’
  • You determine what meals to make, avoiding boredom
  • No preservatives or extra chemicals are added, boosting your health

How to make a meal plan

A typical week’s meal plan for me.

As stated above, there are plenty of free and paid templates online. But the simplest way to do it is make it on your own. If you are super new to cooking in general, take a gander at Real Simple’s “Cooking Basics” checklist. Then follow these steps:

Step 1: Make a list of meals you/your family likes to eat, and meals you know how to make.

Step 2: Draw out a grid for the week. Seven columns, and 3-5 rows for individual meals and snacks.

Step 3: Start filling in spaces you know. For example, if you have kids, you can fill in the “lunch” squares with “school” if they buy a lunch, or “PB&J + apple + string cheese + juice” if you make their lunches. Feel free to add in things like “Eat out” or “Leftovers buffet” for nights you know will be busy.

Step 4: Check your local grocery ads. Figure out what is on sale that could go into meals you would like to make. For example, if romaine, tomatoes, chicken, and salad dressings are on sale, you should schedule in a grilled chicken salad for dinner and/or lunch a few days this week.

Step 5: Once you have figured out what meals you are making, do a quick check of your cupboards and refrigerator. Write down any items you need to buy at the store. This is your week’s grocery list.

Step 6: Take your list to the store, and buy only what is on the list. Don’t let yourself be lured by that juicy looking steak or the whole rotisserie chicken, unless it was on your list. This will take willpower and practice, but will be a huge money-saver.

Step 7: Post your week’s (or month’s) meal plan where you will see it, maybe on the refrigerator door. Then simply follow it each day. 

Grocery cart

The planning process should take you only 20-30 minutes on a weekend or weeknight, and a 30 minute trip to the store. Once you get the hang of a basic meal plan, you can get much more detailed. For example, you can plan to make large amounts of a basic ingredient, like beans or rice, on the weekend. Then throughout the week take the portion you need for that day’s dinner out. Or have notes to yourself to defrost the pork chops you will cook Wednesday on Tuesday night.

Don’t forget to add in little things like snacks, desserts, and occasional days out so you don’t get ‘frugal fatigue’. 

For more information & ideas:
The CDC has a great article on cutting costs and calories by planning meals at home as well as one the go.
EatThisMuch has an awesome calorie calculator/meal planner that allows you to input a calorie amount, and it automatically gives you three meals (or more depending on what you choose) with that amount. You can change out meals you don’t like, or add more.
Cooking Light also has a weekly meal planner which allows you to choose recipes from their archives and drag & drop to create your week.


Do you plan meals in advance?


Cinco de Mayo drink: Margarita Spritzer

Happy Cinco de Mayo!


 Most people will be celebrating early since the 5th of May is a Monday, so I figured I’d post this early as well. 

As with most holidays, I always wonder how they started and what they really mean. As I dug into the history of this one, I was surprised and learned quite a bit. 

Most people tend to think this holiday commemorates Mexico’s Independence Day, but that is not true. Mexico’s independence day is actually September 16th, not May 5th. The 5th of May is the day a Mexican city won a huge battle with the French. For a great 2-minute video, check out the History Channel. 

In 1861, Mexico was so far in debt to so many countries that the president Benito Juarez declared that they could not pay back any countries they owed. This made the French super mad, and they invaded. Good cheese isn’t cheap, you know.

So the French rampaged across Mexico, winning battle after battle. Then on May 5, 1862, in the state of Puebla, the Mexicans finally defeated the French, despite being less prepared, not well trained or equipped, and outnumbered 2:1 on the battlefield!

The French quickly regrouped and eventually took Mexico City, but that euphoria of an unlikely victory tasted sweet. Just like a cold margarita. The victory was so inspiring, American generals began using it as “inspiration for the Union struggle in the Civil War”. (*All quotes from the History Channel video mentioned above)

Mexican-Americans, and Americans of all kind, took to remembering that battle every May 5th with food, drinks, parades, dancing, game, and bullfights (from About.com “Cinco de Mayo – the Basics“). Over time, the holiday died down in most of Mexico, except in Puebla where the battle was originally won. However, north of the border we never got out of the habit, and Cinco de Mayo is still celebrated every year with margaritas, Meixcan food, and other festivities. And now you know the “surprisingly American history behind this Mexican holiday”.

So to celebrate these brave Mexican fighters who didn’t want their tacos replaced with baguettes, make yourself a big ol’ pitcher of these Margarita Spritzers! With less “extras” and sugar, this version of the lime classic is lower on calories but big on taste, and how hard it hits is up to how much tequila you pour!

This margarita requires NO triple sec, the source of most margarita’s zing and pucker, but it’s also a sugar bomb with calories galore. This is a super simple recipe, with endless customization choices.


Ingredients:

  • 1 oz gold tequila
  • 1 oz simple syrup*
  • 1 oz lime juice
  • 1 cup soda water (lemon-lime flavor is best)
  • Salt for rimming if you like
  • Fresh lime slices for garnish

Step 1: *Simple syrup – add 1 cup sugar, 1/2 cup brown sugar, and 2 cups water to a pot. Bring to a gentle boil, or at least heat until all sugar is dissolved. Chill for ~1 hour.

Step 2: On two flat plates, pour onto one a tbsp lime juice and on the other some sea salt. Take a glass, and rub the rim in the juice. Then swirl it around in the salt so it sticks.

Step 3: In a shaker, combine (per drink) 1 oz tequila, 1 oz simple syrup, and 1 oz lime juice. Shake with ice until cold.

 Step 4: Pour over ice in rimmed glass, and top with soda water. Stir and garnish as desired.

Try any juice you like in place of lime; cherry, pomegranate, strawberries. I’m a total purist and prefer simply lime over ice, but you can blend it if you must. Check out CookingChannel‘s list of top 20 Margarita Recipes for inspiration.

This 5th of May, raise a glass to those brave Mexicans who kept the French in France and enabled this long tradition of May festivity. ¡Que viva México!


What do you do on May 5th? Do you celebrate Cinco de Mayo? Do you have any special margarita recipes I need to know about?


Breaking Out of a Rut Without Going Broke: Financial Tips for Career Transitioning


I’ve recently come to realize I’ve lost something I’ve had my whole life. Something that some, if not all, people never have. Direction. I didn’t really appreciate it until it was no longer there, like most important things in life. For me, it is science.

Science has been an inevitable, magnetic pull as far back as I can remember. I never even hesitated when people asked “What do you want to be?” or “What will you major in?”

Biology of course.

There are other things you can study and do? Who knew.

Biology in action.

Therefore, my whole life thus far has been laser-beam-focused on science. And I’ve certainly achieved my objective. From four different lab internships throughout undergrad, to a published masters thesis, to a PhD candidate position on a top medical campus, I’d say in terms of ‘doing science’ I have succeeded so far. 

Problem is, one day I realized that magnet was getting weaker.

And I fought it. I tried to re-focus, to think about it differently. But it faded away like a sunset, leaving the darkness of confusion in its wake. That thing which defined me, drove me, inspired me; now there is no pull. There is no sense of purpose, no goal to strive for.

Now what? 

I’m very fortunate that my parents taught me how to manage money from a young age. I started my first savings account at 13 with my meager allowance. I had many a lemonade stand and bake sale, babysat as soon as any parent would allow me, and had a part time job at a roller rink by 15.

My dad made me a deal to pay for half of my first car, and by the time I had my license in hand, I’d paid cash for a cute little green Saturn. Throughout college and my masters degree, I worked two jobs to cover rent, food, gas, and books. My high test scores had rewarded me with a full tuition scholarship. Because of this life-long money awareness, I made it out of six years of school with less than 1/3 the average college debt. 

I will be forever grateful to my parents for those lessons in frugality and saving.

Those lessons are ones I continue to apply every day in my life. My savings account is by no means impressive, but it would be enough at this point to allow me to be unemployed for about 5 months without changing my lifestyle one bit. If I cut back dramatically I could probably stretch that to 8 or 9 months. That is such a peace of mind when looking at a possible huge life change, like a major career transition.

As if the thought of not having a job weren’t stressful enough, I just think how much worse it would be if I literally needed that paycheck to pay my necessary bills. And I know a lot of people are currently in, will soon be, or have been in that exact situation, and my heart goes out to you.

If you are, or think you may soon be in a career transition situation, I have a few pieces of advice you should consider now to make it easier when that day comes.

1. Pay yourself first.

This is the most important rule of money. You pay your landlord rent, you pay the dealer for your car, you pay the grocery store for your food, you pay Uncle Sam his taxes. Why would you not pay yourself? After all, you are the one doing the hard work at whatever your job is to bring that paycheck home.

Statistics from December 2013 reveal that 40% of Americans are not saving for retirement, while 25% have no savings at all. That is a very scary thing. And when you pay all the required bills, there is not much left over for silly things like, say, food and gas. I understand. But that’s why it’s imperative you save 10% first. 

Use automatic transfers to make it easier. On the first of the month, just take 10% of your paycheck, whether that is $10 or $1000, and transfer it into a savings account.

It may be slow, but over time it will build. And you will find that you can still make it to the end of the month. Maybe you will have to cut out a trip to the store, or a movie night. But think how much better you will sleep at night when there is a cushion of cash you can call your own.

2. Scale back on non-necessities.

If you know for a fact that a period of transition is coming up, scaling back on your lifestyle can make a huge difference between being comfortable and feeling squeezed. If you know you will be transitioning to a different field, might be unemployed for a few months, or will have to take a lower paid position, try to estimate how your income will change and start living off that lower amount now. Save the difference. 

Maybe cut back on eating out, going to happy hours, or buy fewer groceries, and stop smoking now. Find ways to minimize the cost of things you like to do. Go to a matinee on Saturday instead of a Friday night if you like theaters. Have a potluck game night with friends rather than going out to a dinner. Host your own wine tasting; $30 goes a lot farther at home than in a club.
3. Make a budget and stick to it.

The first step here is to figure out how much you are currently spending. For one month, track every cent that leaves your accounts. You can do this by hand, or try using an online tracking tool like You Need a Budget or Mint.com. Here’s a handy article I wrote on using Mint if you’re new.

The next step is to figure out how much you want to or should be spending in these categories. Things like rent/mortgage, car or loan payments, and utilities are rather concrete. Focus on categories you have control over, such as entertainment, hobbies, gas, and groceries.

Find more great tips in How to Make & Stick to a Budget.

4. Learn to cook, and cook at home the majority of the time.

Eating out can cost $5-$15 for lunch and $10-$20 or more per person for dinner. If you have lunch with co-workers every day, and dinner at a restaurant 2-4 times per week, that is a significant expense. It will save you hundreds per year if you cook your own meals at home. Obviously I am a huge proponent of learning to cook! 

In the archives here you should find plenty of simple, cheap meals as inspiration, and the internet has seriously infinite ideas. Even just picking up a loaf of bread, peanut butter, and jelly will give you two week’s worth of lunches for less than you probably spend in one day eating out.

If you don’t think you have time to cook, check out my 10 Minute Chili Mac, Fancy Ramen Soup, or Easy Steak Stir-fry. Search “less than 5” here for meals that cost less than $5, take less than 5 minutes, and require less than 5 ingredients.

For even more tips on getting your grocery bill as low as it can go, check out How to Save Money on Your Grocery Bill.

5. Find frugal entertainment & frugal friends.


If your social circle is based on events where you are pressured into spending money, then you need to start branching out. Big trips, buying ‘toys’ like boats and golf clubs, and going out drinking cost you big bucks. Try new hobbies that don’t require money, like taking up jogging or walking, join a book club, hike, start a garden, or find a local sport club.

You could entertain yourself with a visit to the park, your local museums, or volunteering. Help Habitat for Humanity, your local church or soup kitchen, or go to Volunteer Match to find something that fits your interests in your area. You can get involved in your community, help people, and meet new friends along the way.

More ideas on cheap/free hobbies:
23 Fulfilling Hobbies You Can Start Right Now from Thought Catalog
The Only Thing You’ll Need to Spend is Time from The Simple Dollar
100 Cheap Hobbies – Spend Time Not Money from Free in 10 Years 
The 35 Best Ways to Spend Your Free Time (Frugally) from WiseBread 

Job transitioning articles:
When Your Dream Job Disappoints, How to Find Plan B from The Wall Street Journal
Don’t Burn Bridges: 10 Ways to Maximize a Job Transition from Monster Working
Transitioning From One Job to Another from Business Insider
Advice for People who Want to Quit Their Jobs from Thought Catalog

This post began with the intent of giving tips for making a career transition easier, but these tips are applicable to any stage of life. If you start incorporating these ideas into your daily life, you will notice your bank balances going up, maybe your debts going down, and your worries starting to ease. You may even find a whole new world of things you didn’t know existed, and make new life-long friends.

Though a career transition is scary, being prepared can help make it easier. The more you have saved, and the fewer your bills and expenses, the more comfortable you will feel financially. Then you can focus on perfecting that resume, building your network, and polishing your interview skills instead.

I have no idea where I will go from here, but I know that having some money in the bank and minimal expenses makes it a lot less scary to not know.


Have you ever transitioned between careers? What advice do you have?

The Most Important Rule of Money: Pay Yourself First


Let me begin by saying I am not a financial expert, nor do I have financial training. I am not a CPA, an investment banker, or a tax expert. I am just a normal American, still in school, with a job (sorta), who has read a lot of finance blogs, books, and articles. I apply this one rule to my life every day. And I am in a fairly stable position. I can manage my monthly expenses, and have a small amount set aside for retirement and savings. I’d like to share with you the most important rule of money I ever learned.

My main financial training came from my parents. My father set each of us kids up with a savings account at age 13. We were taught how to balance a checkbook, and how interest works for or against you. I was given a book that remains the cornerstone of my financial outlook on life. That book was “The Richest Man in Babylon” by George Clayson (free audio version on YouTube). It is a simple fictional story of life in ancient Babylon, and how the richest man tried to teach the people how to also become rich.

The number one rule of how to begin growing wealthy, is this: Pay Yourself First. All other things will build upon that rule.

But what does that mean? An article from About.com says: “Money, like water, expands to fill the container in which it is placed”. This means that if you set a goal for your money, and take steps to get it to that “container”, it will eventually expand to reach that amount. But if you don’t have goals and a plan to reach those goals, you are likely to reach the end of the month with no more money than you began with. Many Americans are living paycheck to paycheck, 75% by some estimates! But it doesn’t have to be that way.

The Road to Financial Freedom

It will not be easy. If it were, there would be no debt and everyone would be wealthy. It will require discipline. It will require sacrifices. But it is more than possible. If you are determined to get out of debt and/or become financially stable and eventually wealthy, start taking these steps right now.

Step 1: At the beginning of the month, before paying anything else, pay yourself. Try for 10% of your take-home paycheck. If you feel that is too high, begin with 5% and work your way up. But DO IT. Take that 10%, whether it be $10 or $1000, and put it into a savings or investment account. Even if you can’t ‘afford it’. If after that, you pay your other bills and come up short, write down by how much.

Step 2: Find a way to make up the difference; increase your income and/or decrease your expenses. You may need to work a few extra hours, pick up a side job, sell some things, or give up a few perks. But ask yourself, are immediate gratification items worth lifelong financial bondage? Is it worth going out for dinner or drinks to always have debt hanging over your head? Pay yourself, then do what it takes to make up the difference this month. Then do the same next month.

Step 3: Reduce your ‘extra’ expenses. Anything you do not require to live is extra. Rent/mortgage, utilities, and basic food. Besides that, do what you can to cut back. Maybe take the bus or carpool instead of driving, eat in all week, stop going out for movies. Make it a game and see how low you can get your spending to go. This is where budgeting comes in. Create a budget of how much you want to/can afford to spend in certain categories each week/month, and follow it.

Step 4: Build up a solid emergency fund. For a typical single individual, you probably need about 3 month’s expenses. If you have children, plan for an extra month per child as well. This would help cover things like doctor visits, sickness, car troubles, job loss. It will give you a huge comfort knowing you have some money saved and so small life problems won’t totally derail your financial life. This emergency savings is the beginning seed of financial freedom.

Step 5: Once you’ve built up an emergency fund, invest your personal paychecks. Keep that 1-3 month fund in something liquid like a savings account, then start using that 10% per month to invest. Open a 401K or money market account, and start investing in your future. Pay down debts, or buy stocks/mutual funds/bonds/real estate. Educate yourself on investing options, and play it safe until you learn the ropes. Don’t believe ‘get-rich-quick’ schemes or you’re likely to lose your carefully guarded nest egg. This money is the seed you hope to grow into a tree of wealth, a bad investment will rip it up by the roots and you will have to start all over. Continue to ‘water’ it with monthly investments, and over time you will see it grow.

Though this can be so very difficult at first, over time paying yourself first will become natural. You will start to feel a great sense of pride and accomplishment as you watch your balances grow and your debts disappear. You will start to enjoy living more frugally, because it means you have more left over to add to your savings and investment. Best of all, you will rest easier knowing that if an emergency arises, you can easily take care of it, and your future retirement will be more comfortable. Don’t wait another day, set up that direct deposit and take the first step down the road to financial freedom today!


More articles on Paying Yourself First:
Pay Yourself First: What It Means and How to Do It from Wisebread
Pay Yourself First from Get Rich Slowly
What Does Pay Yourself First Mean from AboutBudgeting


Do you pay yourself? Any advice to get started?

Three egg omelets

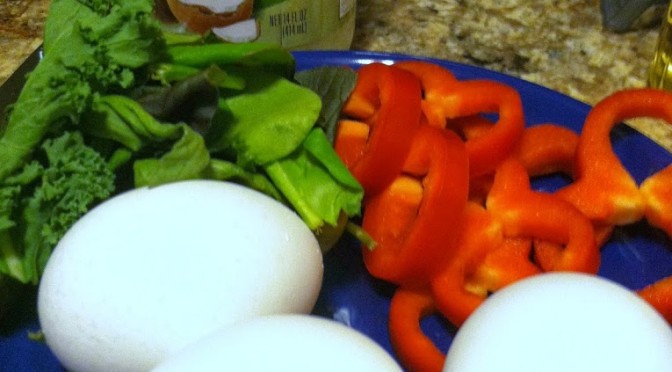
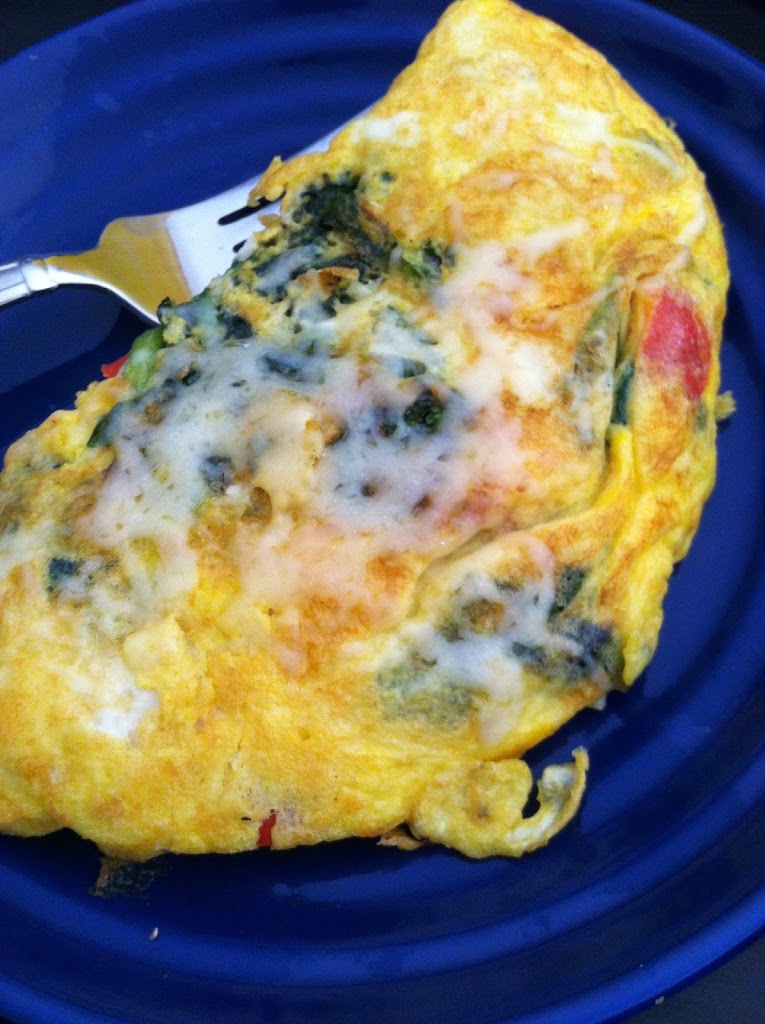
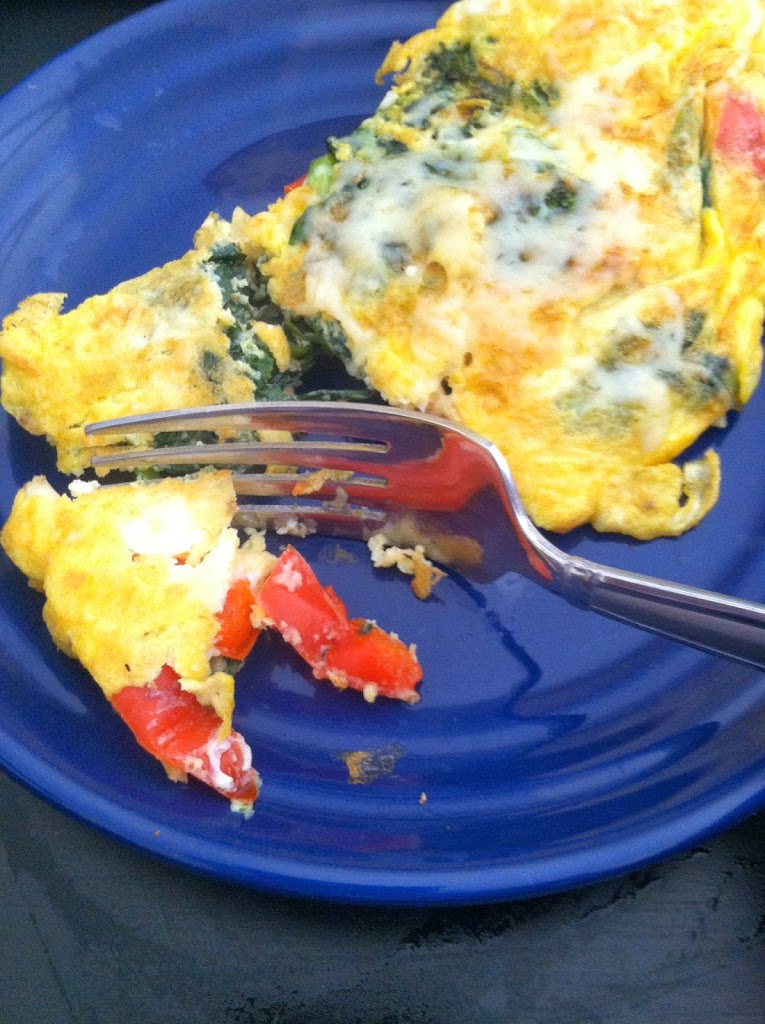
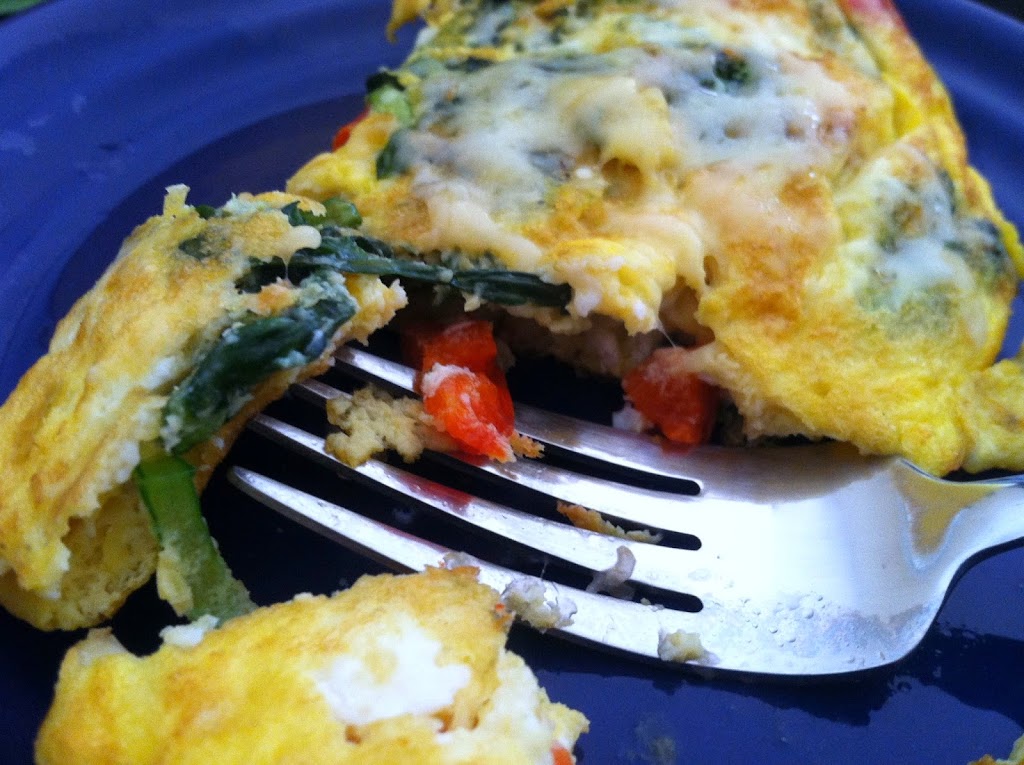
Omelets are an always popular breakfast item. Usually reserved for the weekends or a restaurant, I wanted to show you how easy they can be. As explained in my Ham & Greens Frittata post, the difference between and omelet and a frittata is that a frittata has all the ingredients mixed into the eggs, it is all cooked together, and not folded up. An omelet is partly cooked, and then the ingredients are added in and the eggs are folded around the other ingredients. Most are intimidated by the flip, or fold technique. However, with a few simple tricks you can make a fluffy protein half-moon like a pro chef in no time.

Ingredients:
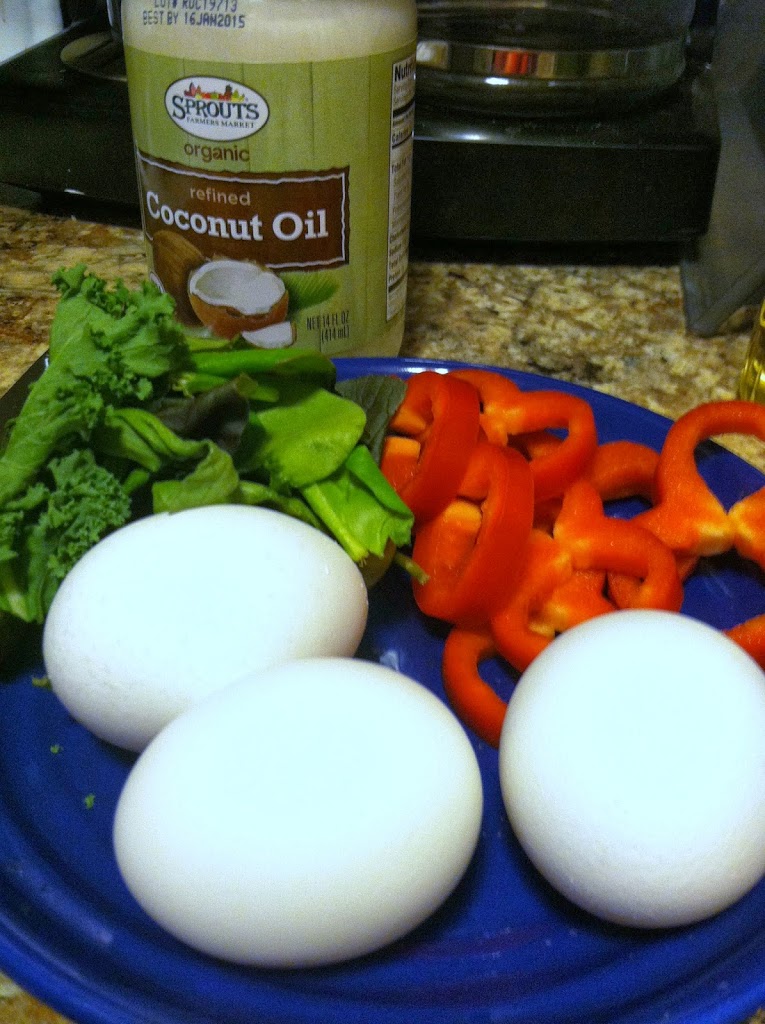
3 eggs (large, fresh, and room temperature if you can)
1/2-1 cup chopped veggies of choice
Meat and or cheese if you like
Vegetable spray, olive oil, or here I use coconut oil for the pan

Step 1: Add 1 tbsp coconut oil (olive oil, etc) to a warm frying pan. Saute and veggies or fully cook any meat you are adding. Set to the side to keep warm.

Step 2: Break all three eggs into a bowl and lightly whisk. You can use one or two whole eggs and the rest egg whites if you are concerned about cholesterol, or use egg substitutes. They should work just the same.

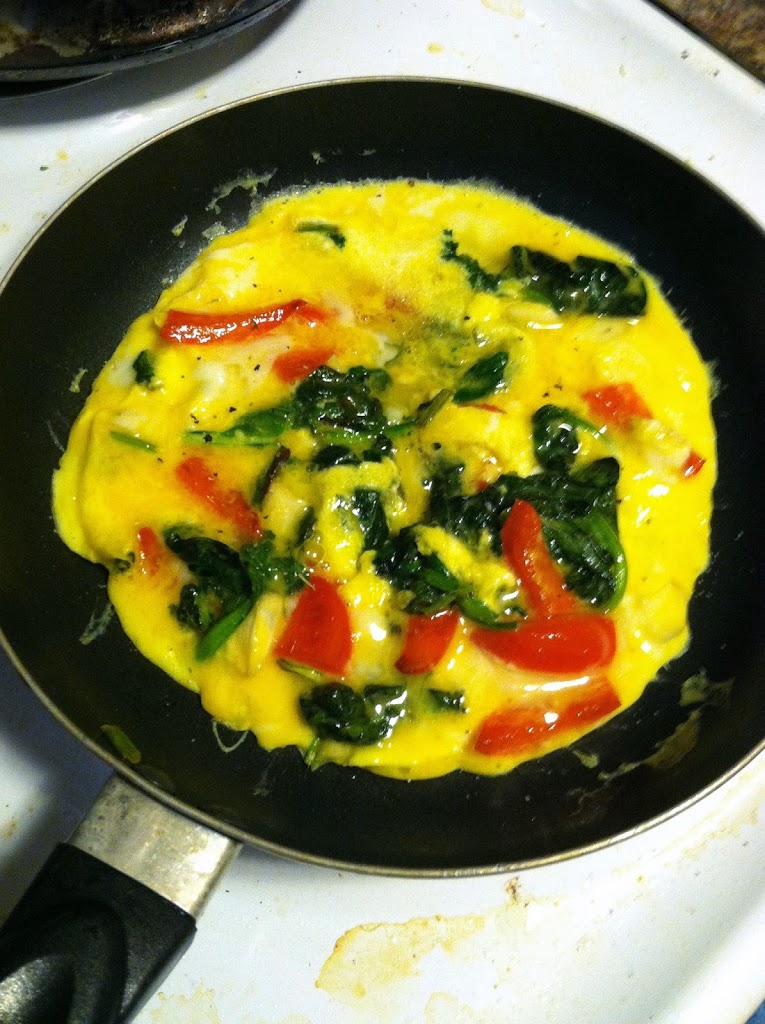
Step 3: Now the (not so) tricky part. Pour the eggs into the pan. You can wait to add the other ingredients until the last minute, or just add them on top of the eggs like I did. When the egg starts to cook (you will know by the change in color and texture) push it down the sides of the pan with a spoon or spatula. Mix up the egg in the center a little too. This helps to get the egg to cook on the bottom.

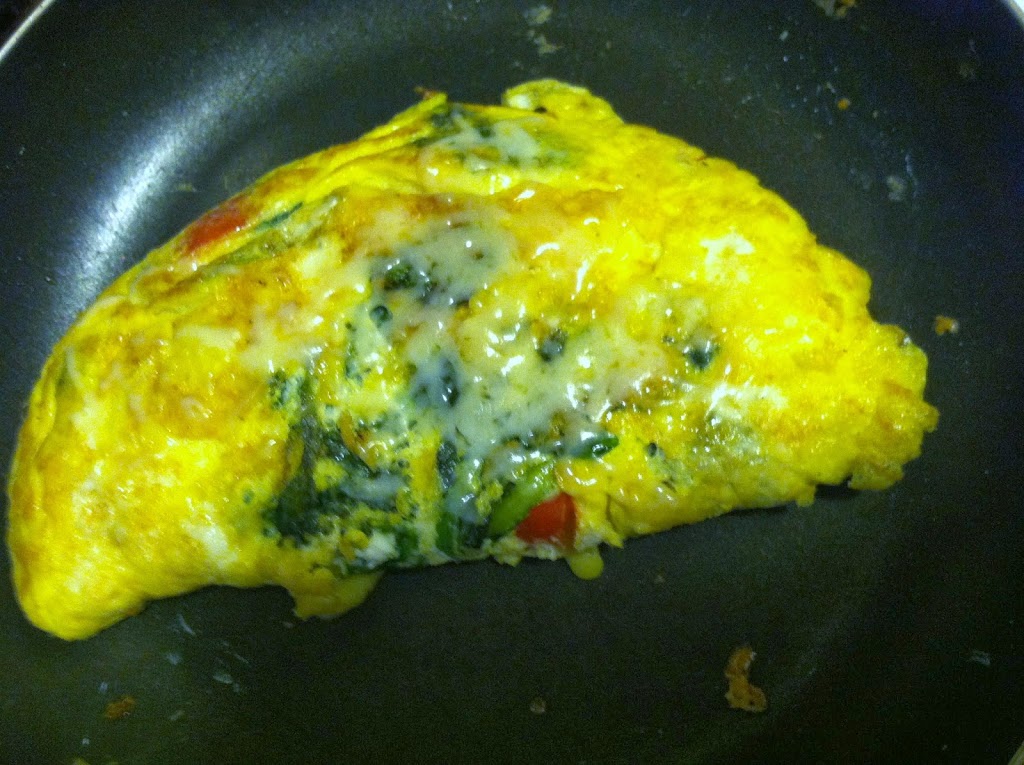
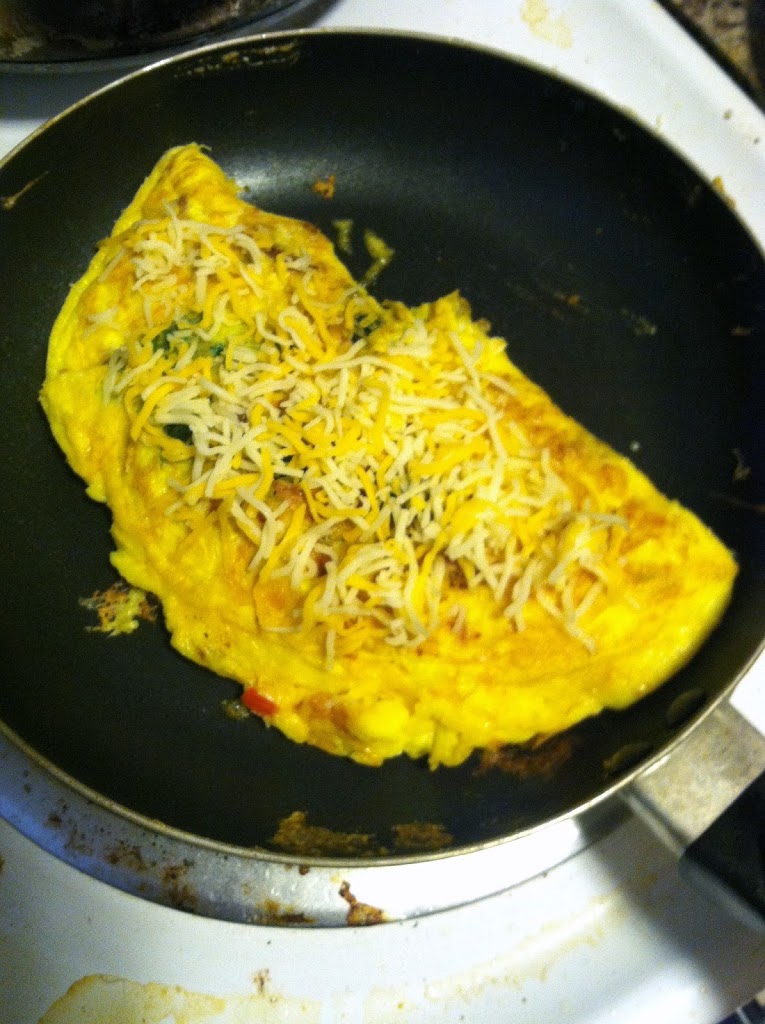
Step 4: Wiggle the pan around as you use the spoon or spatula to push the cooked egg to the center, and tilt it to get the uncooked egg to run up the sides. Repeat until most of the egg is cooked. Then, using a spatula or spoon, flip the egg in half, covering the fillings. It’s a great idea to add a sprinkle of cheese first for a gooey inside at the end!

Step 5: Let cook for another few minutes, then flip and cook a few more. This is just to ensure that all the egg inside heats enough to cook fully.

Sprinkle with a bit of cheese, and enjoy! You can use whatever type of vegetables or beans you like here. Onion, mushroom, greens, zucchini, and peppers work great


Of course, for the carnivore in the house I had to make a ham & bacon one too. All breakfast meats are amazing in omelets as well. Get creative, try any combination that sounds good. And don’t worry about not getting the half-flip perfect. Worst case scenario, you still have some delicious scrambled eggs.
Either way, break an egg and enjoy!


What is your favorite dish to make with eggs?


The fusion of food, fun, frugality, and curiosity.