Category Archives: Less than 5

These recipes take less than 5 ingredients, less than $5, and/or less than 5 minutes

Easy Stuffed Peppers


Do you love meals that don’t take much work?  Do you want to eat healthier?  Do you want healthy meal ideas that don’t take much work?  You’ve come to the right place!

This is a super simple meal I had at work during my “track every thing I eat week“.  It took less than 10 minutes in the morning to put together, then I just let it cook in our small toaster oven at work for an hour.  By lunchtime it was hot and ready to go!  With no preservative, added fats or sugars, and all fresh produce from my or my neighbor’s garden, it doesn’t get much better.

You can of course use whatever produce you have available to you.  Other pepper colors can be sweeter (for example, red bell peppers) and you can stuff just about any vegetable in there.  You can also use other grains if you don’t like couscous, for example rice, barley, quinoa, or wheat germ.

Ingredients:

  • 2 small bell peppers
  • 1 large tomato
  • 1/2 small eggplant
  • 6 tbsp couscous
  • 2 garlic cloves
  • 8 tbsp hot water

Stuffed Bell Peppers Assembled

Step 1: Cut the tops off the peppers and pull out the seeds. Cut in half and lay in an oven-safe container.  Chop the eggplant and garlic, and cut the tomato into quarters.

Stuffed Bell Peppers With Couscous and Tomato

Step 2: Pour 1 1/2 tbsp couscous into the pepper, mix with chopped garlic, and top with eggplant pieces. Add 2 tbsp hot water to each half to get the couscous soaking. If you want to add some ground turkey, go for it. Cover with the tomato slices.

Baked Stuffed Bell Peppers With Couscous and Tomato

Step 3: In an oven or toaster oven, cook on high (350) for about 1 hour.  Add more water to each pepper half as needed.

This is a lovely, hands-off meal, just assemble and let it go.  It is light and healthy but packed with flavor.

Veggie Packed Pasta Sauce


Pasta sauce is one of my absolute favorite things to pack extra veggies into!  Any time you have a sauce, chili, soup, or stew, is an excellent opportunity to be sneaky healthy.  By blending things in, no one knows they are there, yet you are giving the people eating the meal extra doses of fiber and vitamins.  There’s no reason not to!

The best things for blending in include beans, greens, and carrots.  Beans thicken the sauce because of their natural fiber content.  Greens may change the color a bit, so keep that in mind.  And carrots provide a slight sweetness while not affecting the overall color very much.  Keep in mind with carrots, you must cook them first so they soften before trying to blend them in, or juice them.

In this sauce, I went really bold and added some spinach as well as a half bag of frozen carrots and peas I had left from a previous meal.  To this I added a full can of stewed tomatoes, and 1/2 cup milk.  Simmering everything together makes it soften, and then if you have eaters that won’t tolerate chunks, pop half or all of it into a blender before serving.

Ingredients:

  • 1 package frozen spinach, thawed
  • 1 can stewed diced tomatoes
  • 1/2 bag frozen carrots & peas
  • 1/2 cup milk

Sneaky healthy pasta sauce

Step 1: Thaw the spinach, and squeeze out extra water.  Put in a pan with the peas and carrots, and cook, stirring often, for about 15 minutes or until carrots have softened.

Rigatoni with spinach pasta sauce

Step 2: Add the tomatoes and milk, and cook another few minutes.  Puree in a blender.  You can further cook it down to thicken the sauce, or serve as is.

I added some crumbled cooked bacon and sprinkled on Parmesan cheese, but if you serve as is this is a perfect vegetarian meal.  You can see what I mean about the greens changing the color of the sauce.  If that is a problem, just start with very small amounts of greens, maybe just a handful of spinach rather than the whole package.


Morning Health Shot


One of the most consistent recommendations for better health is     always to drink more water.  It is almost certain the majority of        people do not drink as much water as they need.  (Take your weight, divide it in half, and that is how many ounces you need per day. For example, a 200 pound man needs about 100 ounces of water.)  The next most common advice I have found is to drink lemon water, possibly with cayenne pepper and/or honey every day.

The reasons for doing so range from boosting the immune system to cleansing the liver, kick-starting the metabolism and weight loss to a burst of natural energy.  Lemon juice itself has several health               benefits associated with it. It is well known as a useful treatment for kidney stones, detoxifying with Vitamin C, reducing diabetes risk, and aiding in alkalinizing the body.  Lemon is antioxidant, astringent, and contains boatloads of vitamins and minerals.

Lemon and Pepper

Cayenne pepper is recommended because it contains capsaicin, a spicy compound which stimulates the circulatory system.  It opens capillaries, aids digestion, and helps to regulate blood sugar levels.  It also kick-starts the metabolism and increases your internal body temperature, which can contribute to weight loss over time.

And finally, honey can also help in weight loss when consumed with warm water and lemon juice. Honey is packed with 22 amino acids and a number of valuable vitamins and minerals, many of which       benefit the body’s metabolism. By regulating metabolic function, food is broken down and utilized properly, fat is converted into usable energy, and overall health is improved. Be sure to use local, raw, unfiltered honey whenever possible.

Heart shot glass

I gave this a try for 4 weeks.  I could not handle the full-glass-of-warm-spicy-water, so I distilled it down into one shot.  I know, the whole drink-a-big-glass-of-water is part of the deal, but I always        followed it with a 16 oz glass of water.  Here’s what I did:

  • 2 tbsp. lemon juice (fresh when I had it, bottled when I didn’t)
  • 1-2 tsp local honey
  • Pinch chipotle pepper (I didn’t have cayenne, but it is basically the same thing)

Mix those in a shot glass, down it, and follow with a big glass of plain water.

The results?

Well, the horrible taste of sweet/acidic/spicy does kinda wake you up a bit.  Overall I didn’t notice a huge variation in energy levels, in the morning or throughout the day. Neither did I notice a big difference in how I felt, health-wise.  This may be because I already eat a pretty nutritious diet full of things that help detox and alkalinize me, but I didn’t notice a big enough difference to stay with it long term.


How about you guys? Have you ever tried a lemon water/cayenne detox, or is it part of your daily life? What benefits have you seen? Please share your experience in the comments!


How to Make Infused Oils


Ever read a recipe that calls for a “garlic-infused oil” or  some such thing?  Thought to yourself, “That would be way too expensive to buy! I’ll just use regular“?  Have you ever tried something in a restaurant or cooked by a friend that had a little special something hiding in the other flavors?  It may have been an infused oil!  And guess what? They are so easy to make your own!

I had this idea originally because I had found some very pretty small glass jars at a garage sale. They were the perfect size for something you only use a little bit of at a time, or as gifts. This made them the perfect medium for experimenting with infusions!

Infused olive oil and vinegars

An infusion simply means that an aromatic is soaked in oil long enough that some of the aromas and/or flavors of the additions are imparted into the oil. The beauty of this method is that you can use pretty much anything you enjoy the flavor of and want to taste in your oils!

You can choose to blend herbs with the oil, or simply put some into the bottle and let it sit. This makes a lovely presentation, and since these were meant as gifts, that is what I chose to do. I also had made my own vinegars, so a nice set of one oil and one vinegar will make for a great gift in the coming months!

Ingredients:

  • Oil to fill your container
  • About 2 tbsp flavoring per 1/2 cup oil

Step 1: Whether using garlic, fresh herbs, citrus, ground spices, or citrus fruits, make sure your produce is as fresh as possible and washed and dried.

Step 2: Heat your oil and your flavorings for about 5 minutes, to just bubbling. This helps release the flavors and smells into the oil. Let cool completely

Step 3: Filter your oil, or don’t, and pour into your jars. If you do include more herbs for looks, be aware that it will likely cause the finished product to look cloudy. This is ok.

Homemade infused oils and vinegars

You can try pretty much any flavoring you can imagine, and can get creative with combinations too! Try citrus and rosemary, cilantro and lime, lemon and black pepper, or basil and garlic. For the very brave, try infusing hot pepper for a spicy oil to fry your chicken in.

These infusions can now be gifts to a foodie in your life, who will likely be very impressed with your kitchen DIY abilities. Or you can use them to cook with of course, or as dipping oils served with crusty breads. Swirl into homemade hummus, or drizzle some on top of quick vegan tomato soup.

Have fun with it, & good luck!

Eggplant Parmesan


Ah, gardening debates. Every gardener most likely has very strong optionions on which heirloom tomato variety is tastiest, easiest to grow, produces the most. Which plants grow best together, which can help attract pollinators or repel pests. Who has the hottest pepper, the most productive beans, the biggest gourds. A question I chose to tackle this summer:

Which is better, purple or white eggplant?

Having never heard of white eggplant before now, this is a question entirely new to me. But as it turns out, eggplants used to come in only white, which is how they got their name. The small, white fruits growing on the vines looked like eggs hanging down. It is only recently that the purple cultivars became much more popular and well-known, such that when you think of eggplant you likely only think of the purple kind.

eggplants

To decide the answer to this question, I decided to make some eggplant parmesan. This is a dish which many of my relatives have long loved, but I turned up my nose at the very thought. As I’ve grown older and my taste buds expanded, I decided to give this classic another try.

Everything tastes better to me when I’ve made it myself. And if it isn’t half bad, then I’ll give restaurant versions a second shot as well.

Ingredients:

  • 1 purple eggplant
  • 1 white eggplant
  • 2 eggs, beaten
  • 1 cup flour
  • 1 cup breadcrumbs or crushed crackers
  • Olive or vegetable oil for frying

IMG_1515 - Copy

Step 1: Rinse the eggplants and cut off the spiny stem and bottom parts. If you like, peel the white eggplant. I did not. Cut into 1/2-inch thick slices. (I also saved the seeds. Cause that’s how I roll.)

IMG_1516 - Copy

Step 2: Dip the slices into flour and coat on all sides. Then dip into the egg, and again coat all sides. Finally roll it in the breadcrumbs or crackers. Place enough oil in a frying pan to coat the bottom and heat to about medium.

IMG_1517 - Copy

Step 3: Place the slices in the oil, and fry about 5-7 minutes on both sides. You want a nice crispy coat and a fully cooked interior without burning the outsides. Put on a plate to cool.

IMG_1519 - Copy

To go with the eggplant, I made some pasta and used my homemade pasta sauce I canned. I added a tbsp of turmeric to the sauce for additional antioxidant effects and nutrition. Hence the vibrant yellow color.

IMG_1518 - Copy

This was super tasty, and both the fiancée and our guest said it was the best eggplant parm they’ve had.

As for which is best? Turns out they were both delicious!

[amd-zlrecipe-recipe:45]

Do you have an opinion on white versus purple eggplant? Is there an eggplant recipe you’d love to share? Tell us more in the comments!

How to Make Oven-Dried Tomatoes


Since between my own backyard garden and my generous neighbor who has a football-field-sized garden I still had a bumper crop of tomatoes, even after canning oodles of quarts and pints of sauce and tomato broth and salsa, I decided to try my hand at oven-dried tomatoes packed in olive oil.

Dried tomatoes in olive oil are delicious little flavor bombs to add to garlic bread for a simple bruschetta, toss into salads or pasta, or top a pizza. The oil itself can also be used in salad dressings or anywhere tomato-flavored infused oil would be tasty. Very popular in the Mediterranean region such as Greece and Italy, this preservation method has been around for a very long time, and I had bags of romas just begging to be bathed in high quality oil that was on sale.

IMG_1544

But a jar can be quite pricey, up to $10 in the supermarket. It is far cheaper to can your own! You must invest in the jars and good-quality oil, but it is worth it for the superior taste and nutrition of using local tomatoes, and you can re-use jars forever.

All you need is some wire racks, an oven, and some time. If you have the oven on anyways, to make a roast or cookies, or perhaps to heat the house in the chill of autumn, this is the perfect project. This oven heat is conducive to drying many things, so you could also make a platter of dried apples or sweet potato chips at the same time.

There is some debate over the safety of dried tomatoes and botulism risk. It is possible that small droplets of water may stay inside the tomato and provide a medium for botulism or bacterium to grow. Obviously read up on facts and use your own best judgment when deciding whether to refrigerate, process, freeze, or store at room temperature. This article is not advice, just what I chose to do in my own kitchen with my own produce.

Ingredients:

  • 40-50 tomatoes, Roma are the best for drying
  • 2 wire racks (cookie sheets work too, you’ll just have to flip them halfway to make sure they dry on all sides)
  • 2-3 cups extra virgin olive oil
  • 1-3 canning jars, lids, & rings

IMG_1529

Step 1: Cut the tops & cores out of the tomatoes, slice them in half, and push out as many seeds as you can with your fingers or a knife. Save the seeds for planting, drink them, use in a soup, or compost.

IMG_1530

Step 2: Place the tomato halves on a wire rack or baking sheet, cut side up, and put into the oven at 200 degrees. Crack the door open if  you don’t mind the heat to allow more air circulation. Let them dry for 1 hour, then flip them if using baking sheets and check the dryness levels.

IMG_1543

Step 3: Take the completely dry tomatoes and begin packing them into sterile mason jars. The tomatoes are ready if they are rubbery with absolutely no water when squeezed, but you don’t want them so dry they are crunchy with no give. If you choose to use a vinegar dip, use tongs to dip each tomato prior to placing in a sterilized jar.

IMG_1545

Step 4: Pour in olive oil to cover the tomatoes. Make sure they are completely covered. If you feel okay with it, you can now store your tomatoes this way in a dark cabinet, or in the refrigerator.

IMG_1546

You may also choose to water-bath or pressure can your jars at this point. Totally up to you.

IMG_1547

These little jars will store for about 2 weeks in the refrigerator, and potentially up to a year in the cupboard if processed. They make lovely presents, if you can bring yourself to part with them. I recommend putting them somewhere easily accessible as you are likely to want to use them all up within days.

For ideas on how to use these, start here:

Check it out on Pinterest: https://www.pinterest.com/pin/350506783478334749/

Cherry Pepper Poppers


Cherry Peppers, also known as pimiento peppers, are a common sight on an antipasti bar. Pickled, or stuffed with prosciutto and cheese, these little babies are sweet but with a slight kick that endears them to all lucky enough to taste one. While jars of pickled or stuffed hot or sweet cherry peppers can cost you upwards of $10, you can plant just one bush and have more than enough to make your own to last all year.

photo 3

The cherry peppers grow “upside-down”, with the stem end underneath the developing fruits. They start green and mature to red. Contrary to most peppers, the green ones actually tend to have more “bite” while the riper red peppers are sweeter overall. It does depend upon your particular strain and your water/soil compilation, as the cherry peppers I am able to obtain had more bite than I bargained for!

I am blessed to live in a nice community in which the majority of my neighbors garden, and love to share their bounties amongst the locals. One guy has a literal football field sized garden, just for the ‘therapeutic effects’. Methinks he also is a generous guy who loves sharing his love of gardening & food. =)

Anyhow, this guy has some pretty legit pepper and tomato heirloom strains, passed down through many generations of Italians. These hot/sweet cherry peppers came from him. He has told me of his family’s recipe to stuff them, but I didn’t have any prosciutto, capicola, or mozzarella on hand, so I did a super-quick-and-easy stuff that I sometimes do with jalapenos, and it came out pretty tasty!

photo 1(1)

If you don’t have your own peppers, or access to a neighbor who shares, you could try a local farmer’s market, or the grocery store in mid to late summer. Any mild to hot pepper would work, however. You can also substitute in whatever type of cheese you prefer, and use just about any thinly-sliced deli meat. Additionally you can just use a nice cheese and no meat for a vegetarian appetizer.

These itty-bitty pepper poppers are perfect as an appetizer. They are super simple and will surely impress at your next picnic, barbeque, birthday, or tailgating party.  This recipe makes about a dozen, but you can easily scale up or down based on how many you need/have. They are also pretty “pinchy” (my family word for spicy) so if you have picky palates you might want to soak them in vinegar overnight first.

Ingredients:

  • 1 dozen cherry peppers
  • 1 oz cream cheese
  • 2 slices deli ham or bacon

photo 2(1)

Step 1: Cut the tops off of the peppers. Use a small spoon to scoop out the seeds (and save them for next year!). Tear the ham into small pieces and line the hollow pepper with a slice or two.

photo 3

Step 2: Take a teaspoon and spoon in a chunk of cream cheese, until pepper is fully stuffed. Each pepper will be a slightly different amount based on how large it is.

photo 2(1)

Step 3: Bake at 250F for 10-15 minutes, until cheese is melted and pepper are soft. Let cool until you can touch them, and then try not to wolf down the whole plate in one sitting. Or do. No judgment.

If you make oodles of these and still have peppers out the ears, you can try making your own pickled peppers, just like Peter Piper!

photo 4


[amd-zlrecipe-recipe:41]

Mushroom & Asparagus Barley Risotto


As summer is winding to a close, I am still in denial.  I don’t want to let go of the beautiful unfolding of spring, the delicate greens and fragrant blossoms, the heavy fruits ripening on the vine, the cornucopia of riotous color at the farmer’s market.  Spring and summer make this farm-loving, healthy-cooking, veggie-eating foodaholic girl’s heart sing.

IMG_8532

So when I saw some end of season asparagus and some shiitake mushrooms on sale, I had to nab them.  For a fleeting taste of spring, summer & autumn all rolled into one, this risotto is earthy and vegetal, and completely delicious.

And the best part is, if you use canned mushroom & frozen asparagus you can make this all year round!  A well-stocked fridge/freezer/pantry can bring any season to your plate.

Ingredients:

  • 1/2 pint chopped mushrooms
  • 1/2 pound asparagus
  • 1 cup barley
  • 2 cups chicken stock or water
  • Optional add-ins: diced tomato, garlic, onions, spices to taste

IMG_8531

Step 1: Rinse your asparagus and wipe off any dirt from the mushrooms. Dice them into bite-sized pieces.

IMG_8534

Step 2: Put the barley in a pan with 1 cup of stock or water. (This can be vegan if you use vegetable stock or water in place of the chicken stock). Bring to a boil, and then simmer.

IMG_8535

Step 3: Let the barley cook, watching the liquid level. When it gets low, add a few more tbsp of stock and stir. Continue for 20-25 minutes, until barley is chewy and nearly cooked through. Add the diced veggies for the final 5-10 minutes of cooking.

IMG_8536

At this point, you can season to taste, I only used a little garlic salt. This tastes amazing on its own, or you can add any of the option mix ins suggested, or anything else you happen to have laying about.

IMG_8538

This recipe makes about 2 cups worth of risotto, enough for 4 small side dish servings or two full meals.

[amd-zlrecipe-recipe:39]


Nutrition Facts
4 Servings
Amount Per Serving
  • Calories 246.8
  • Total Fat 2.2 g
  • Saturated Fat 0.5 g
  • Polyunsaturated Fat 0.6 g
  • Monounsaturated Fat 0.8 g
  • Cholesterol 3.6 mg
  • Sodium 178.2 mg
  • Potassium 399.9 mg
  • Total Carbohydrate 49.8 g
  • Dietary Fiber 9.3 g
  • Sugars 3.8 g
  • Protein 9.3 g
  • Vitamin A 4.2 %
  • Vitamin B-12 0.0 %
  • Vitamin B-6 15.2 %
  • Vitamin C 8.0 %
  • Vitamin D 0.0 %
  • Vitamin E 3.9 %
  • Calcium 2.6 %
  • Copper 32.9 %
  • Folate 17.0 %
  • Iron 10.8 %
  • Magnesium 13.9 %
  • Manganese 41.1 %
  • Niacin 25.7 %
  • Pantothenic Acid 15.0 %
  • Phosphorus 17.2 %
  • Riboflavin 15.5 %
  • Selenium 44.6 %
  • Thiamin 13.2 %
  • Zinc 12.5 %
*Percent Daily Values are based on a 2,000 calorie diet. Your daily values may be higher or lower depending on your calorie needs.

Preserving Hot Peppers


Peppers are probably the kind of plant which has most wow-ed me with its prolific seeds. Every time I crack open a bell pepper to make stuffed peppers, or hollow a jalapeno to make poppers, there are mounds of seeds inside. Even in the tiniest pepper, there are likely more seeds than you can count on just your hands.

Pro tip: you can save these seeds and dry them out, and then plant your own pepper garden! Just one jalapeno may produce dozens of plants. Yes, even peppers you buy at the grocery store. Just cut the stem side off, scrape the seeds away from the ribs inside, and dry them on a piece of paper. Store in a cool dark place until you’re ready to plant outside or in a container.

photo 1(1)

Another thing that is amazing about peppers is the sheer variety. From the mild sweet bell pepper to the jalapeno, habanero, or even the ghost chili, there are literally thousands of varieties. Peppers can spontaneously mutate, so even if you save seeds year to year, you can get new color patterns or heat levels. The amount of water and sun, location and type of soil can also affect the peppers.

I’ve been trying, for the past few years, to get more brave about cooking and eating spicier foods. The chemical that makes peppers taste hot & spicy is most often capsaicin. This compound irritates mucous membranes and causes inflammation, and pain if in too high a dose. However, capsaicin also has many health benefits for your heart, blood pressure, anti-diabetes, and more.

photo 4

One of the ways I’ve found to incorporate more spicy foods into my cooking is by using jarred jalapenos. These little guys store forever, and add a bit kick to pizza, salads, sandwiches, chili, pasta, and more. I’ve bought jalapenos in a jar at the store, but this year I had access to an heirloom Italian jalapeno variety, as well as several others like cayenne, poblano, and red cherry peppers.

Thus, I needed a way to use them all up. As state, peppers are very prolific. On one plant, I’ve seen nearly 100 peppers, if the fruit is tiny. No joke.

So given all the health benefits, and the fact that I cannot use them up fast enough before they spoil, jarring seemed like the best way to preserve the summer’s spicy bounty. Turns out, they are ridiculously easy to make. Just look on a jar of peppers at the store, you will see there is likely fewer than ten ingredients. This homemade version needs three.

You can of course can hot or regular peppers, but you must use a pressure canner, not a water bath. There are significant botulism risks if you do not use a pressure canner. However, by adding vinegar, you are effectively pickling the peppers. This prevents harmful bacterias and other nasties from growing. I also store mine right in the fridge.

photo 2(1) copy 2

Ingredients (this makes about a pint):

  • 1-2 cups of peppers (all one kind or a variety)
  • 1/2 cup white vinegar
  • 1 tbsp sea salt

photo 2(1)

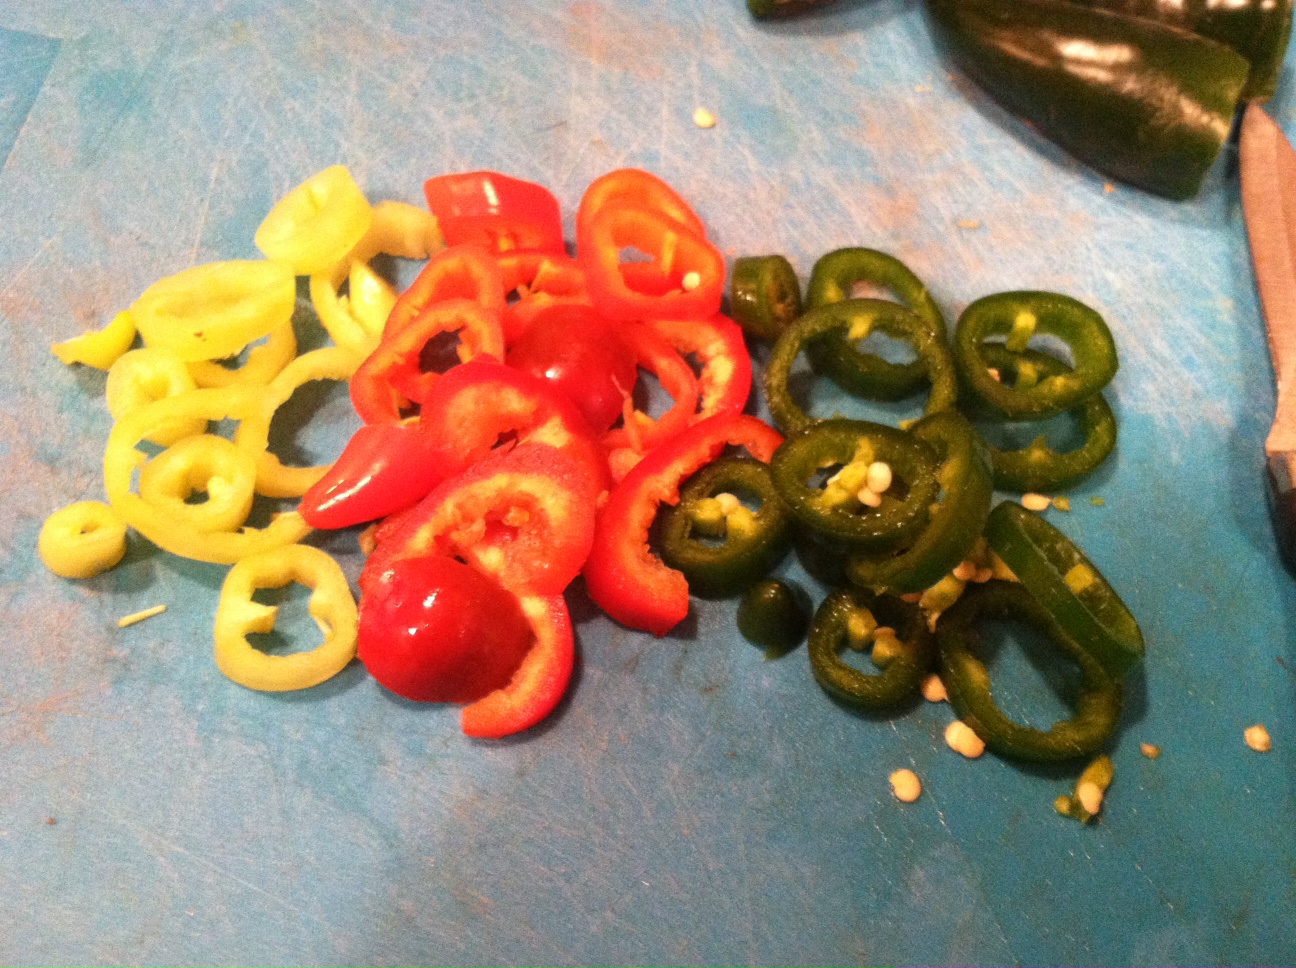
Step 1: Cut the tops off the peppers, then cut down the side ribs and pull out the seeds. Leave the seeds in if you want it extra spicy. Also, it is highly recommended to wear gloves while cutting hot peppers! I made the mistake of not wearing gloves the first time, and my hands were on fire for days.

photo 1(1) copy 2

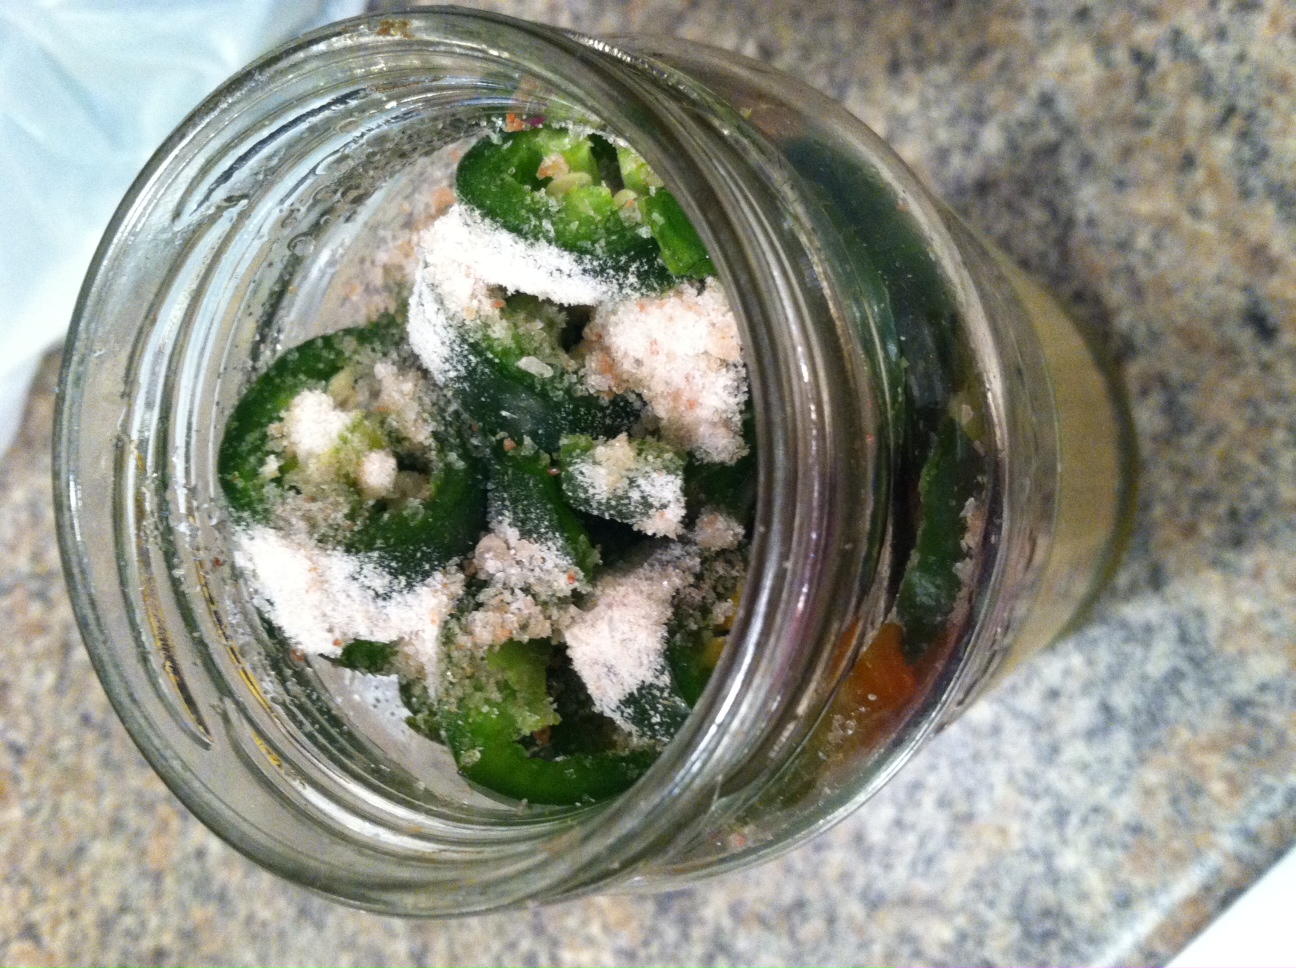
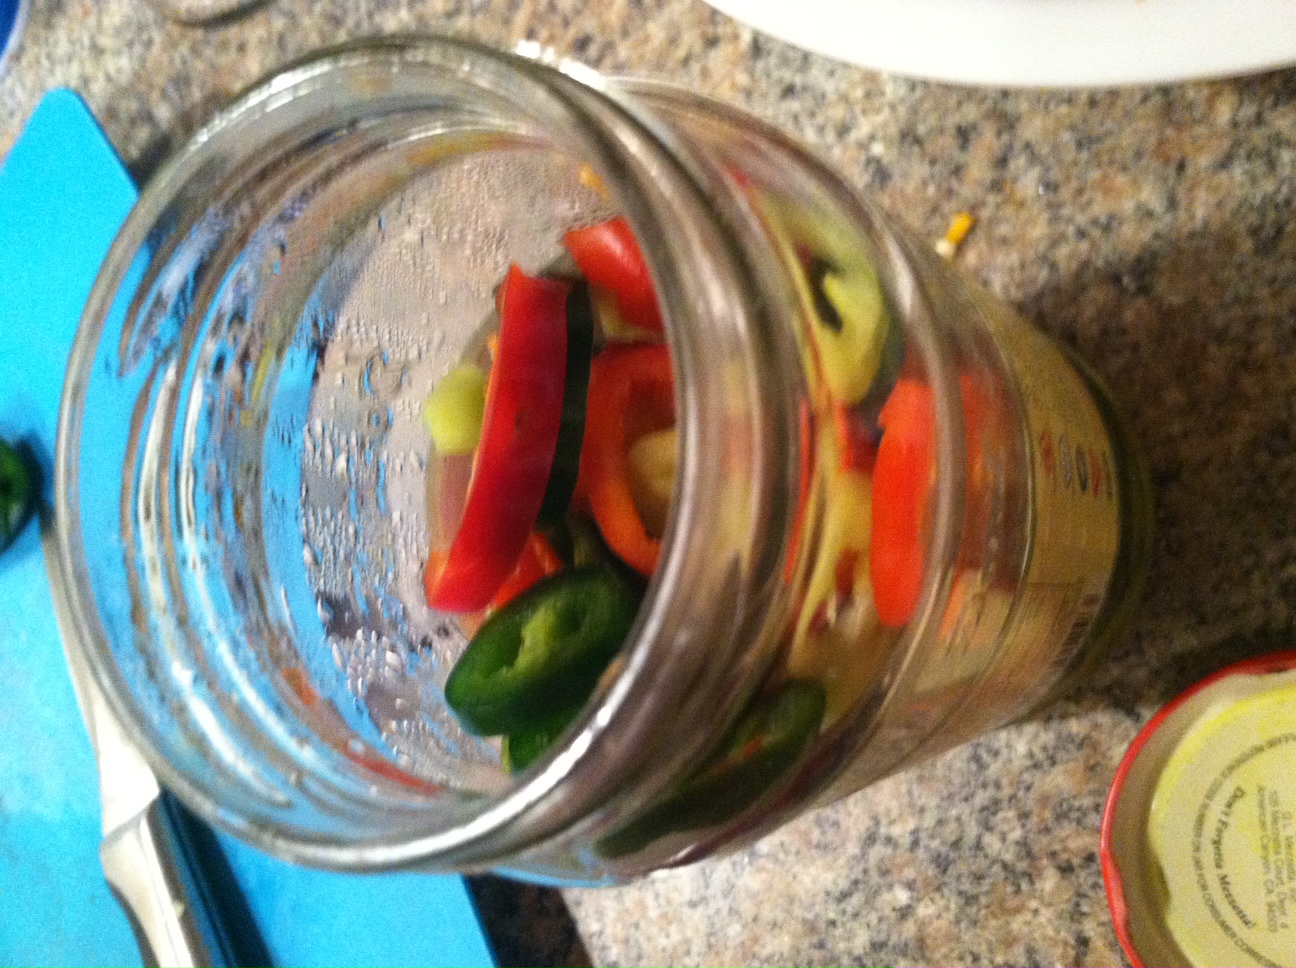
Step 2: Shove all your pepper rings into the jar. Cover with the vinegar about 2/3 full. Pour on the sea salt.

photo 4 copy

Step 3: Add distilled water to the top of the jar, then close it and shake it up, until the salt dissolves. You can of course actually can them, using glass mason jars and steam or pressure canning methods. These processed jars can be stored at room temperature for a longer period of time.

photo 3 copy

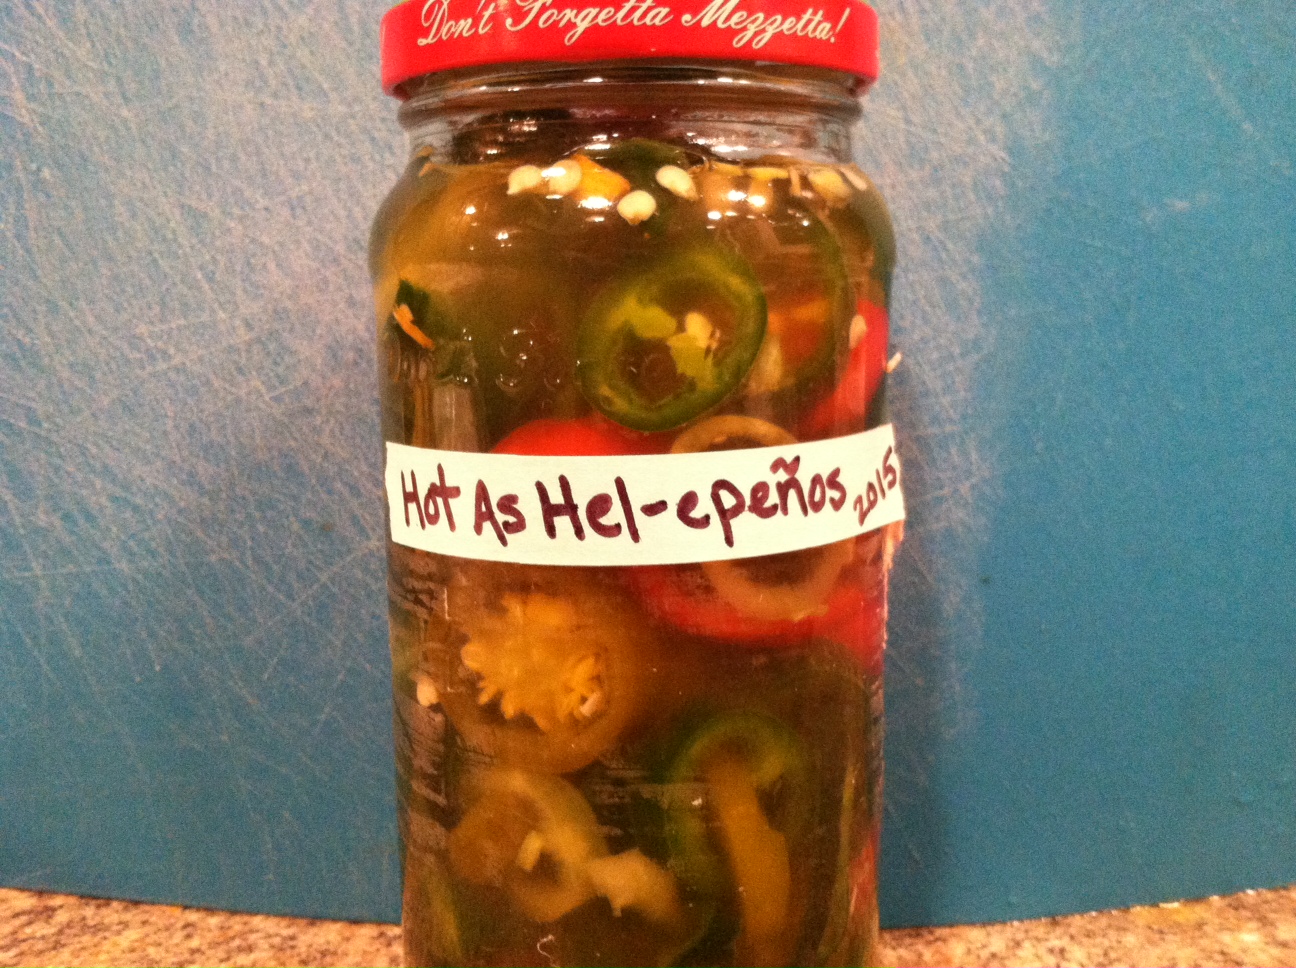
Put the jar in the fridge, and it will be there until you’re ready to use them!

These peppers can make a great little gift, especially if you layer multi-colored peppers in a clear jar. They are quite pretty. These peppers can be eaten as is, on pizza, in soups or chili, and more. It will keep in the refrigerator for several months.

photo 1(1) copy

For a great way to bring back the warm thoughts of summer during the bitter cold of winter, try planning out your garden for spring! Go to websites like Pepper Joe’s Gardening Tips, Hot Pepper Seeds, or the Almanac to find answers to questions, tips on what types of species grow best where you live, organic and heirloom seeds, and more.


[amd-zlrecipe-recipe:38]

Shrimp Salad


While I may be spoiled now, living so near the coast, shrimp is also on sale at the grocery store this week (BOGO ftw!). Shrimp is an amazing protein source because it is so low in fat, super versatile, and cooks up in literally minutes.

From shrimp cocktail to shrimp scampi, from jambalaya to tacos to fettuccine, shrimp is a great addition to just about any dish. This simple salad makes use of some leftover cooked shrimp from a party tray, but you could also brown them in Cajun seasoning, or grill them with some pineapple sauce.

If you’re looking for a healthy way to use up some of summer’s fresh veggies, or a healthy-but-tasty lunch or dinner option that takes but a minute to put together, you’ve found just the thing!

Ingredients:

  • 2 cups greens (spinach, romaine, iceberg, arugula…)
  • 1 cup diced fresh veg (bell pepper slices, mushrooms, carrots, cucumber, radishes…)
  • Handful cooked shrimp
  • 2 tbsp dressing
  • Optional: shredded or crumbled cheese, croutons, sunflower seeds, chia seeds…

IMG_7397

This quick salad can literally be tossed together in under a minute if you eat the shrimp cold out of the salad, or 5 minutes if you brown it in a pan first. Use any combination of greens, veggies, and dressings you want.

This can also be layered into a mason jar for a quick on-the-go healthy lunch, snack, or dinner.