Category Archives: Less than 5

These recipes take less than 5 ingredients, less than $5, and/or less than 5 minutes

Creamy Tomato Basil Soup


For those who do not know, late summer is when the garden bounty is rolling in, including tomatoes and herbs like basil. Home gardeners are likely giving away baskets of fresh veggies and herbs to friends, family, and neighbors. Those who know how and have the time & inclination are putting up the excess for the long, cold winter ahead by canning, drying, and freezing.

basil (1)

I planted a few basil seeds in late April, and had no idea they would take off so well! They were tiny seedlings when I had them in a pot in the window, but when I put them outside they just flourished! Now I have a basil bush just outside my front door. It is wonderfully convenient to just run out and grab a few leaves.

This tomato soup recipe is stunningly simple. Don’t let its simplicity fool you though, it is also amazingly delicious. There is nothing quite so amazing as fresh, local produce simply prepared. Orange goo in a can doesn’t even come close.

With only 3 ingredients, this soup is so easy a five-year-old could probably make it. And, honestly, you don’t even need the basil, you can just make a simple creamy tomato soup by leaving it out. I added it because you can only eat so much pesto in one week. 🙂

tomato (2)

And the final bonus, it is both vegetarian and vegan, as well as gluten free! If you just blended it all, I bet it could be made raw too! It is very healthy, as well as Paleo and Mediterranean. There isn’t a diet I know of on which you cannot eat this soup. If you don’t have or don’t like coconut milk, you can omit it for a regular tomato soup, or use cows milk, almond milk, etc instead.

photo

Ingredients:

  • 1/2 can coconut milk (6-7 oz)
  • 4-5 large ripe tomatoes
  • Handful of basil leaves
  • Optional: olive oil, salt & pepper

photo 1

Step 1: Open the coconut milk and mix it up with a spoon. Pour half into a pot and begin heating. Dice up your tomatoes into quarters and add to the pot. Bring to a simmer, and cook for 10-12 minutes.

photo 2

Step 2: You can stop here if you don’t mind your soup a little chunky and don’t want to add basil, it has a nice rustic texture at this point. Would be great served with some whole-grain bread. But if you want it creamy and smooth, pop it into the blender and give it a whirl.

tomato (1)

Step 3: Add the handful of basil, and blend again.

tomato (4)

(Note: be sure to have the lid on the blender firmly. Otherwise, you end up with a hot, orange mess all over your stove. Not that I would know from experience…)

tomato (3)

Pour your hot, finished creamy tomato soup into 2 bowls, top with sea salt & black pepper and a drizzle of olive oil if you like. This makes a little less than 1 quart of soup, and can easily be doubled to use the whole can of coconut milk. Simply add more tomatoes.

Enjoy!

[amd-zlrecipe-recipe:37]
Pearberry Margarita


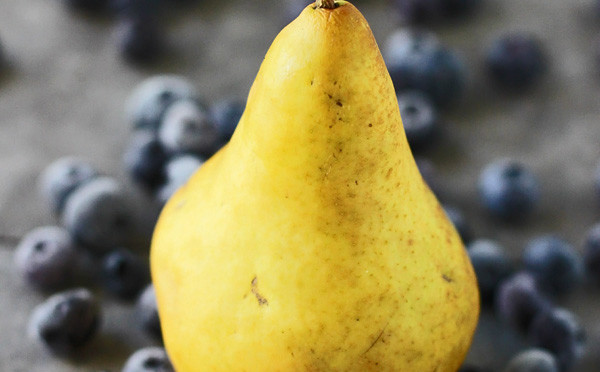
As summer winds to a close and hot days continue, fruit trees are bursting with fruit. A neighbor has a pear tree and was kind enough to share some of the harvest. One can only eat so many pears before needing to find something new to do with them…

So why not blend it into a drink? I’m always looking for ways to sneak an extra serving of fruit and/or vegetables into just about anything. And a good way to hide healthy stuff is with liquor! If there’s tequila and sour mix, who care what else is in there right?

(But see if the people who try it don’t love your secret)

This recipe makes enough for 2 servings of about 5 ounces each. You can easily scale this up to make a pitcher full for a party. Also feel free to experiment with different types of berries or mixers to find the flavor combo you like best.

Ingredients:

  • 1 large, very ripe pear
  • 1/4 cup blueberry margarita mix (or 1/2 cup fresh berries)
  • 2 oz tequila
  • 2 oz sour mix
  • 2 oz lime juice
  • Handful of ice

IMG_9347

Step 1: If you want to and feel brave, you can peel the pear. I just threw the whole thing in, skin on. Cut it in half, then into quarters. Slice out the stem, seeds, and core. Put that in a blender.

IMG_9346

Step 2: Add the liquids and tequila, and blend until the pear is completely mashed. Add the ice, and pulse or blend until it reaches your desired consistency.

IMG_9343

If you have blueberry sugar, you can rim the glasses by first dipping them in water or lime juice, then rubbing the rims on a shallow plate covered in the sugar. (Or use normal sugar with a few drops of blue food coloring for the same effect.)

I don’t recommend this over ice unless you also strain it. Blended, the grittiness inherent to pears isn’t as noticeable. You could try this basic recipe with any number of fruits, but I recommend softer types (like pears, peaches, berries) over harder or mushy fruits (apples, bananas).

Salud!


Sausage & pepper quiche


This recipe is so simple, you can make it for one person or a dozen, using only a plastic cup & frying pan, or the fanciest of oven-safe cast iron cookware. I used one turkey sausage link and a few slices of bell pepper, plus bagged spinach. But feel free to use whatever veggies you have in the fridge, like onion, carrots, broccoli, etc.

Scale up by multiplying the ingredients list by however many people you are wanting to serve. You could also put bread in the bottom of an oven-safe pan and pour this over it to create a breakfast strata, or just scramble it all in a pan if you don’t have a stove-top-to-oven pan.

Ingredients:

  • 1 sausage link
  • 1/2 bell pepper, sliced
  • 2 eggs
  • 1/2 cup spinach
  • Salt & pepper
  • Optional: sprinkle of cheddar cheese

IMG_4650

Step 1: In a frying pan or cast iron skillet, brown the sausage link. (You could also use a 1/4 cup of ground sausage or a patty). Cut the sausage into small bite sized pieces.

IMG_4651

Step 2: Break the eggs into a bowl or cup. Scramble them well with a fork, until fluffy.

IMG_4652

Step 3: In the skillet, using sausage oils, cook the peppers 5-6 minutes until softened, then add spinach. Cook just a few minutes, until wilted. Add the sausage back in and mix.

IMG_4653

Step 4: Pour the scrambled eggs on top, and distribute evenly around the pan. Let cook on medium heat, for 7-8 minutes, until the eggs are halfway cooked.

IMG_4654

If using, sprinkle on the cheddar cheese, and add the seasoning.

IMG_4655

Step 5: Assuming you are using an oven-safe pan, put the entire pan into the oven (carefully!) on 350 F for 10 minutes to fully cook the eggs. Alternatives here are to scramble it, or make it into an omelet by flipping it in half.

IMG_4657

Cut into pizza slices, and enjoy! This is a great brunch recipe, could be breakfast for dinner, and is even fast & easy enough to make for yourself on a weekday morning. Feel free to omit the sausage for a quick & delicious vegetarian breakfast as well.


[amd-zlrecipe-recipe:30]

Simple soy sauce chicken

.
.
This is a super simple recipe that I’ve used time and time again. It is great on its own, or as the base of a more complex sauce. Feel free to experiment with adding new ingredients as you become more sure of your own tastes and what flavors go well together. Ideas include: slices of lemon or orange, zest from citrus, lime juice, apple cider vinegar, fish sauce, thyme, parsley, oregano, tomato paste, pureed anchovies, olives, crushed nuts…
.
Chicken is also a great meat for those on a budget. Especially if you buy dark meat like drumsticks or thighs, these are often on sale for 0.99/pound or less. You can also use chicken leg quarters, which includes both drumsticks & thigh meat. My sister, who is in college now, also loves this quick, easy, always-delicious chicken. Pair with a veggie or two & a carb for a filling, frugal meal in under 20 minutes.
.
Ingredients:
  • 2-4 pieces of chicken (thighs, drumsticks, or breasts all work)
  • 1/4 cup soy sauce
  • 2 tbsp diced garlic (or 3-4 cloves, chopped)
  • 2 tbsp lemon juice or vinegar
  • Sprinkle of garlic salt or S&P
Step 1: In a frying pan, lay the chicken in a single layer. If using breasts, spray the pan or spread around 1 tbsp oil first. If using drumsticks or thighs, the chicken should release some of its own fat while it cooks so it won’t stick.
Step 2: In a small bowl, combine the soy sauce, garlic, and lemon juice. Mix well, and pour over the chicken.
Step 3: Bring the heat to medium, and cook, covered, for 10-12 minutes. Flip, and cook the other side for 5-7 minutes.
Step 4: Poke with a fork or cut a small slice in the thickest part. Once you’re sure there is no pink inside, your chicken is ready!
This chicken is especially good when paired with fried rice, but it works well with any grain (white/brown rice, quinoa, barley, couscous) or potato (mashed, baked, boiled). I love fresh asparagus & boil-in-bag edamame was on sale, which rounded out this meal nicely.

Country Style BBQ Ribs


What meat-eater doesn’t love ribs? I mean really, isn’t it just so satisfying to take a hunk of meat and bone and gnaw on it? Dripping BBQ sauce all over your hands and face and maybe other table mates, it is such a throwback to our caveman roots.

Summertime and grilling ribs go hand-in-hand. Unfortunately, ribs and my bank account staying full are not quite as cozy. A full rack of baby backs can run over $30, even at the grocery store. And if you order it already cooked in a restaurant with two people, the meal total can creep up towards triple digits.

While in the meat section of the grocery store, I came across a marked-down package marked “country style ribs”. Remembering these beauties from childhood, I decided to cook these up the way I remember them. My mom always cooked them this way, and they are fall-off-the-bone amazing. This lead me to question why there is such a disconnect between the different rib types.

IMG_9290

Thanks to AmazingRibs.com, I know more about pigs than I ever wanted to, and I even wrote an article about the different cuts of a pig before. The text following is from their website:

“Pigs have 14 rib bones. They are attached to the spine and are usually divided into four popular cuts: Baby back ribs, spareribs, St. Louis cut ribs, and rib tips. Starting at the top are the baby backs, closest to the backbone, nestled beneath the loin muscle. They are curved, round bones, close together, and most of the meat is on top of the bones, cut from the underside of loin muscle.

As you move further from the spine, the bones get larger, flatter, straighter, and wider apart with more meat between them. There is more fat marbling in the meat as you go further from the spine and closer to the belly. The front ribs are connected to the breast bone with a number of small bones and cartilage known as the rib tips. There are a number of other cuts, and they are all described below.”

pork cuts

As it turns out, Country-style ribs are not really ribs at all! They are actually pork chops, more meaty and less fatty than real ribs. They are cut from the front end of the baby backs near the shoulder. They respond well to brining before low and slow cooking. This is good news, because that is similar to how I cooked them.

Now, if you are thinking to yourself, “but I want ribs tonight, like now, I don’t want to have to wait to brine them!”

Have no fear! We skip the long 24-hour-brine and instead boil them in water with some vinegar added. This imitates the long brine in a much shorter time window. Finishing on the grill gives them the nice crispy outside char, and waiting to add sauce until the last minute ensures that the sauce is caramelized but not burnt.

Best of all, this is only 3 ingredients! (If you use store-bought sauce. I still think making your own is better, but that requires another 9-10 ingredients (which you probably have already)).

Ingredients:

  • 5-7 pounds country style ribs
  • 1-2 cups BBQ sauce (I recommend sweet & tangy homemade)
  • 1 gallon water
  • 1/2 cup white vinegar

IMG_9275

Step 1: Bring a large pot of water to a boil, and add the vinegar. Throw in the ribs, and boil about 15 minutes.

IMG_9276

Step 2: Drain the ribs, and fire up the grill. Once it’s nice and hot, line with aluminum foil (to prevent sticking, you can also spray the grill with oil before lighting and go right on the grate) and place the ribs on top. Close and cook 5-7 minutes, then flip and cook another 5-7 minutes.

IMG_9279

Step 3: Once nicely browned, coat thoroughly in sauce. Cover & cook again for just a few more minutes to caramelize the sugars.

IMG_9277

Let rest for a few minutes before serving. Then try to hold yourself back from eating a dozen at a time! Goes great with BBQ Bacon Baked Beans, mashed cauliflower potatoes, and Italian cucumber & tomato salad.

IMG_9299

Next time you have a picnic, party, or craving for something finger-lickin good, make up a few dozen of these and everyone is sure to be pleased.


Italian Cucumbers & Tomatoes


In the summer heat, with the garden beginning to produce bumper crops, there is nothing better than a refreshing side dish you can pick from your own yard (or farmers market or grocery store) and have ready in under ten minutes. This can be served room temperature or refrigerated, and is easy to make ahead for a party later or the next day, but fast enough to be ready like, now.

IMG_9288

Cucumber has cooling properties, and tomatoes have tons of trace minerals and compounds. Put the two together, and you’ll always get something delicious with a side of healthy. Feel free to mix it up with whatever herbs you have handy. I had chives, but dill, parsley, mint, or basil would also go nicely here. You could also add in feta or goat cheese if the spirit moved you.

Oh, and if you don’t have or don’t like bottled Italian dressing, feel free to quickly whip up your own vinaigrette. Combine one from each of the following: 1/4 cup (white vinegar, apple cider vinegar, balsamic vinegar, lime juice, lemon juice) + 2-3 tbsp (olive oil, vegetable oil, coconut oil, palm oil). Optional additions: mashed or diced garlic cloves, fresh/dried herbs, salt and/or pepper, and infused oils or vinegars.

Ingredients:

  • 1 cup cherry tomatoes (or 2 large, diced)
  • 1/2 large cucumber, diced
  • 2-3 tbsp chopped herbs
  • 1/2 cup Italian dressing (affiliate link)

IMG_9283

Step 1: If using cherry tomatoes, cut in half. If using large round tomatoes, dice into quarters or eighths. Rinse the cucumber well, and cut half into small cubes.

IMG_9284

Step 2: Dice your herbs, feel free to combine more than one kind too. Mix it all together in a bowl and drizzle on the dressing. Toss to coat.

IMG_9300

This awesome side dish has graced many a backyard barbecue over the years, and will continue to do so for a very long time. It can be left in the refrigerator overnight, and up to 3 days. The longer you leave it, the more water will come out of the veggies though, so by the third day it gets a little soggy. I bet you’ll finish it all in one sitting anyhow. 😉

Below is the total nutrition information for this dish. It makes about 4 servings at 1/2 cup each.

Nutrition Facts


User Entered Recipe
  1 Serving 
Amount Per Serving
  Calories 281.4
  Total Fat 18.2 g
  Saturated Fat 1.6 g
  Polyunsaturated Fat 0.1 g
  Monounsaturated Fat 0.0 g
  Cholesterol 0.0 mg
  Sodium 903.2 mg
  Potassium 261.5 mg
  Total Carbohydrate 25.4 g
  Dietary Fiber 1.4 g
  Sugars 12.1 g
  Protein 1.2 g
  Vitamin A 27.7 %
  Vitamin B-12 0.0 %
  Vitamin B-6 3.6 %
  Vitamin C 99.1 %
  Vitamin D 0.0 %
  Vitamin E 0.7 %
  Calcium 2.7 %
  Copper 3.0 %
  Folate 6.5 %
  Iron 6.7 %
  Magnesium 4.8 %
  Manganese 6.8 %
  Niacin 1.9 %
  Pantothenic Acid     2.9 %
  Phosphorus     4.6 %
  Riboflavin 2.4 %
  Selenium 0.1 %
  Thiamin 2.7 %
  Zinc 2.2 %
*Percent Daily Values are based on a 2,000 calorie diet. Your daily values may be higher or lower depending on your calorie needs.

Hawaiian BBQ Pizza


Whoever was first to combine ham & pineapple was a brilliant person. Taking an Easter ham and slathering in brown sugar, and coating it in pineapple slices, leads to a sweet & salty perfect meal every time. This was then copied in sandwiches, and of course on top of pizza.

I’m a big fan of pizza due to its limitless topping capabilities. You can add just about anything to a pizza, and it will taste at least pretty good, and at best mind-blowingly delicious.

The “Hawaiian” combo of flavors is a pizza natural. Some are die-hard lovers, some may have never heard of such a crazy thing. Either way, give it a try yourself and see if you don’t have a new favorite.

Ingredients:

IMG_9400

Step 1: Pre-heat the oven to 450. If you have a pizza stone, great. If you don’t, a cookie sheet works just as well, or any oven-safe pan.

IMG_9403

Step 2: Drain the pineapple, reserve juice for a cocktail, syrup, or smoothie later. Spray your cooking item, and roll the dough flat.

IMG_9409

Step 3: Layer on your ham slices, pineapple slices, and pour on the sauce. Cover with a thin layer of cheese if desired.

IMG_9410

Step 4: Bake at 450 for 25-30 minutes, until dough is brown and crispy on the edges. Dig in!


Mango Cherry Hurricanes


As a souvenir from my first visit to N’awlins, I had to bring home some hurricane mix. A little bit ironic now… anyways, this double-rum juice-heavy cocktail is a crowd pleaser and a sure party starter. It is the recognized ‘signature’ drink of the Big Easy. However, there are those that protest today’s Bourbon Street foot-long pitchers of syrupy sweet mixtures.

But as always, to heck with expectations. I had some hurricane mix waiting to be enjoyed, some spiced rum, a can of mango and a sunny day calling my name.

Try your own version at home with whatever type of juice you enjoy. Pineapple, mango, guava, lemon, orange, cherry, or passion fruit (the true original) are all delightful choices. You can even mix and match multiple. As long as there’s rum! Preferably 1:1 light and dark, but dark is all I had, so I just doubled up 😉

Ingredients:

  • 1 can mango + juice
  • 1 package hurricane mix
  •  1 cup spiced rum
  • Optional: cherries or other fruit for garnish

IMG_9650

Step 1: Mix the hurricane mix & water in a large container. Depending on how many you are making, adjust recipe. This is for four drinks’ worth.

IMG_9652

Step 2: In a blender, blend the mango in its own juice until smooth.

IMG_9653

Step 3: In a large glass, add crushed ice 2/3 way full. Pour in 1/2 cup mix, 2-3 shots of rum (depending how strong you want it), and top with mango.

To make a large pitcher full, you won’t get the pretty layers, but simply mix 1 cup rum, 2 cups mix, and 1 cup mango. Adjust up to whatever volume you want. Then pour at will.

Garlic Roasted Goat Shoulder


For those of you who have never had goat products, I highly encourage you to try them! Everything from goat milk, to goat cheese, to goat meat, is delicious and pretty darn good for you. Goat cheese lasagna is absolutely fabulous, sharper and earthier than any ricotta ever will be, and it makes a great spread for toast or bruschetta. Pairs nicely with roasted sweet potato, beets, and on fresh green salads.

Goats milk is naturally homogenized, which means it doesn’t separate into the “cream” and skim milk, as natural cow’s milk does. The cow milk you buy in the store is one homogenous mixture because of the homogenization process; essentially putting such high pressure on the milk to shoot it through tiny tubes that fat globules break up into itty-bitty uniform pieces that no longer clump together and float to the surface.

Fun fact: baby goats are called kids. So when a goat has a baby, it’s just kidding!

Lame jokes aside, goats are delicious, and also good for the environment. They naturally think some of our worst plant enemies, like poison ivy & thistles, are delicious treats. They can even be used as a carbon-neutral landscaping option! (No seriously, you can rent goats to trim your lawn and get rid of unwanted greenery). As a final bonus, goat manure is odorless, can be directly applied to soil without composting, does not contain seeds, and is richer in nitrogen than that of cows or horses.

Ok, so goats are good at eating bad vegetation. How do they compare to cows and other meat producers? A similarly sized serving of goat meat has a third fewer calories than beef, a quarter fewer calories than chicken and much less fat, and up to two-thirds less than a similar sized portion of pork or lamb (source). They are browsers, not grazers, and a field can handle nearly ten times more goats than cows.

If the “gamey” taste and smell of what you think goat meat is turns you off, you may have had a bad experience. Some cultures prize older, tougher bucks, which are known to have that ‘barnyard’ smell about them. Give a local supplier a chance to show you what a younger cut is like, and you may completely change your mind.

So these little guys are totally adorable, extremely useful, and then completely delicious while also quite healthy for you. What are you waiting for?? Check out a local farmers market, or halal butcher, and find some goat near you.

I found Blue Slope Farm at the farmer’s market in CT. The proprietor, Matt, was there and he was very kind and helpful. He runs a working farm with cows, goats, and a maple syrup distillery. Their products are all local, they hand-raise their herd of over 200 cows each year to produce tender grass-fed veal and are branching out into goat meat. If you’re in New England check them out, they are top notch.

Ingredients:

  • 2 cuts goat shoulder chops
  • 5-10 garlic cloves
  • 4 tbsp spice mix of choice
  • 2 tbsp olive oil
  • 1/3 cup red wine

IMG_9463

Step 1: Drizzle the olive oil in the pan, and sprinkle spices onto chops. Place in the pan and sprinkle spices on the other side too.

IMG_9464

Step 2: Pour in the red wine, and cover. Cook low and slow for 10-15 minutes, until browned.

IMG_9465

Step 3: Using a sharp knife, cut holes in the meat. Press garlic cloves into the holes. Flip chops, cut holes into the other side, and fill with garlic. Cover and cook another 10-15 minutes on low.

IMG_9466

Step 4: Remove cover, turn heat to medium-high. Let wine evaporate, and sear the meat. Once lightly charred, flip and sear the other side. Be careful not to burn badly.

IMG_9468

Serve your delicious, sustainable, healthy chops with some fresh seasonal veggies and enjoy!

Bacon Wrapped Asparagus


Summer is the time for delicious veggies, picnics and get-togethers, and grilling out. While I’m a huge fan of any vegetable on the grill, I also believe bacon makes everything better. Water chestnuts, shrimp, and yes, even pork can and should be wrapped in bacon.

But if you’re trying to sneak extra veggies and fiber in, without compromising your meat-eating standards, this recipe is just the ticket. It only takes 2 ingredients and 15 minutes on the grill or in the oven to have a crisp, irresistible appetizer or side dish. Make these and watch as everyone inhales their vegetables. Or go here to watch me make these.

IMG_9371

Ingredients:

  •  2 pounds asparagus
  • 1 pound of bacon (turkey bacon may work too)

IMG_9354

Step 1: Cut the bottom most inch or two off of the asparagus. This is the hardest, woodiest part and does not taste very good. Then take 2-4 stalks, and one slice of bacon. Wrap the bacon around the asparagus stems from the bottom up.

IMG_9355

Step 2: Repeat for all the asparagus. Place the bundles either on top of a baking rack with a baking sheet underneath or on the grill. You want the bacon grease to be able to drip off as it cooks.

IMG_9357

Step 3: Grill on medium-low heat, flipping once, until bacon is fully cooked and asparagus is wilted but still crisp. Or bake in an oven at 350, turning once, for 15 minutes.

IMG_9370

That’s all there is to it! Let them cool enough to handle, and then chow down.

IMG_9373


Click below to watch the step by step video: