Mediterranean Vegetable Panini


Anything “Mediterranean” has been a buzzword lately. Claims abound that if you eat like someone from the Mediterranean, you will lose weight. I’m not completely sure where “the Mediterranean” even is, but I picture somewhere on the coast of Greece or Italy. The diet involves lots of fresh vegetables like eggplant, peppers, zucchini, mushrooms, etc. as well as health fats from olive oil, fish, and avocado.

Combined with low amounts of red meat, sugar, and saturated fat plus an active lifestyle, it is claimed that you will suffer less cardiovascular problems, health issues in general, and live longer. I’m sure the sun, sand, and surf of the Mediterranean Sea doesn’t hurt… While there is always going to be conflicting information about diets because of marketing and such, here are a few websites for some information: WebMD – Mediterranean Diet Weight Loss Effectiveness?; Mayo Clinic – Mediterranean Diet & Heart Health; US News Best Diet – Mediterranean Diet: What you need to know.

This sandwich was inspired by Udis Bread. They have an eggplant panini that is absolutely amazing, it is a huge slice of eggplant grilled, with grilled red bell pepper and goat cheese. I had bought an eggplant and didn’t know what to do with it, so I decided to try my own version of an eggplant panini. I also had a red bell pepper and some zucchini, so I decided to go all veggie-licious. You can sub in whatever vegetables you like, ones that hold up to grilling are the best. Also I don’t have a ‘real’ grill, so the hand dandy George Foreman did the heavy lifting. You could also use a pan and just put a lid on top of the sandwich weighted down with something to grill it.

Ingredients:
1 1/4″ thick slice eggplant
2 (or 1 really big) slices of zucchini
2/3 red bell pepper, seeded
Handful of spinach
2 tbsp hummus
thick slice cheese (I had white cheddar)

Step 1: Brush or spray grill with olive oil so the veggies don’t stick. Grill eggplant, zucchini, and bell pepper for about 10-15 minutes, until softened and beginning to char.

Step 2: Layer the veggies, hummus, and cheese onto some bread. Spray the grill again, and press the sandwich for 2-5 minutes, just to heat through.


I actually took this in for lunch, and though a little moist from the hummus it held up well.

You can use whatever kind of bread you like, or try a wrap or pita pocket. 


Warning: it may be a better idea to wait until you are ready to eat the sandwich to add hummus. The bottom of the sandwich was a little squishy. If you get rid of the cheese, then this sandwich is also vegan.


Twice the wine for half the calories!

Just in time for Thirsty Thursday, a smart trick to let yourself enjoy two glasses of wine for the caloric price of one!

Whether at home with your girls or sweetie, or out on the prowl at happy hour, this is a sneaky trick to help manage your weight without putting a damper on your social life. 

Disclaimer

Now, before I tell you the trick, let me say this is in no way an endorsement for drinking. I am not giving anyone permission to over-indulge or anything like that.

There is much mixed information in the news about how red wine contains antioxidants and resveretrol, so it has to be healthy; or alcohol causes lowered inhibition, weight gain, and loose morals, so it’s the devil.

There is some truth to both sides, and my life motto is all things in moderation.  Women are recommended to drink no more than one beverage per day, and men two.

An alcoholic beverage means:

  • 5 ounces of wine
  • 12 ounces of beer
  • 1.5 ounces of 80-proof distilled spirits, such as vodka (a shot)

While it is true that some studies show various mental and physical health benefits of moderate amounts of alcohol (specifically wine), alcohol also contains “empty” calories.

This means that you are getting calories from the drink, but no health benefits from vitamins or nutrients. So you need to take into account the calories that you will be adding on top of all your food calories for the day, or you will gain weight over time.

This also goes for other “empty” beverages like soda pop or sugary coffee drinks. 

Calories in Wine

Depending on the type of wine, one 5 ounce glass can contain between 100 and 300 calories. That is the typical size of a midday snack or breakfast. The range is large because it depends upon the type of wine and the sugar content.

Sweeter wines tend to have more sugar, and thus more calories, than dry wines. Which is unfortunate, because I can kill a whole bottle of moscato in one sitting, but take two hours to force down a dry red. I guess that’s the idea…

The website GetDrunkNotFat is aptly named, and specializes in exactly the type of information you would think. They have a great chart here that summarizes many types of beverages (including things other than wine) broken down by calories per serving, serving size, even grams of carbohydrates per serving.

You should also check out this amazing infographic on “Wine for Beginners” by Madeline Puckette from WineFolly.com: 

The part you’ve been waiting for!

Anyways, there is a way you can have you wine and drink it too. (Nonsensical metaphor, check). Simply ask the bartender or yourself to mix half wine with half soda water.

Carbonated water or seltzer water have as many calories as regular water: Zero.

Therefore, you can have 2.5 oz of wine plus 2.5 oz of sparkling water, twice! That’s nicer than having one glass of wine, and one glass of water, don’t you think? 

Carbonated water gets its fizzy property from dissolved carbon dioxide. Many names are basically synonymous, including: soda water, seltzer, carbonated water, club soda, sparkling water, and mineral water, with small distinctions.

The exception, which is not synonymous, is tonic water.

This is definitely not water-flavored; if ever you have tried it you are aware of its bitter taste. This bitter property comes from the organic compound quinine.  

What quinine looks like. In case you ever need to
organic chemistry your way out of a situation at a bar.

While bitter compounds are typically rejected by your taste buds (from an evolutionary mechanism which protected early people from ingesting poisons, see the comic below), quinine has been used in medicine for centuries.

In fact, quinine has been and is still used occasionally to treat malaria. Interestingly, it is also naturally fluorescent.

So if you’re at a club with black lights, you could always order a gin & tonic and amaze your friends with your glowing beverage. 

The same logic applies to foods and drinks. If it was bitter, it might be poison. At least nowadays we know better.

So now that you know, choose your fizzy calorie-free mixer, and your wine of choice. May I recommend not diluting a very expensive fine wine, but going for something like (now) three-buck-chuck?

Simply because, if you can afford a $200-bottle of wine, I assume you want to enjoy the wine itself. In that case, please proceed, and maybe email me so we can be friends?

You can even use flavored soda water so that you don’t notice a taste difference, or improve the taste of a wine you aren’t terribly fond of, but are tired of that 1/3 full bottle in the fridge.

It makes a bubbly beverage that feels special. And good news, there is no scientific evidence that carbonated water harms bone health, in case that was a concern.

Enjoy responsibly!


For more health effects of alcohol, check out:

 
Do you have any healthy or frugal drinking tips?


Ways to Use Hard Boiled Eggs & Ham

Happy Easter! If you are reading this today, Easter Sunday, then thank you loyal reader! If this is a day, week, month after the fact, don’t worry. This post is created with you in mind. On Easter Sunday, the typical American family will enjoy a nice meal of ham and boiled eggs, with many other possible additions including Easter bread, bacon, quiche… This means there is likely to be some amount of ham and likely large amounts of eggs left over. 

Since one can only eat so many cold ham sandwiches and limited amounts of egg salad, I put together a reference of many kinds of recipes to re-purpose leftover foods into new and exciting dishes! Keep in mind, cooked ham keeps great in the freezer for up to 6 months, so that is always an option. Hard boiled eggs will keep in the freezer up to a week.

Recipes for Hard Boiled Eggs


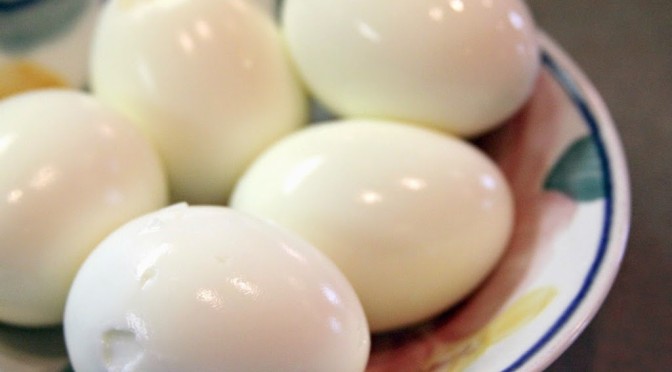
Photo from “Spoonlighting” blog, I recommend reading it


Classic egg salad: chop up eggs and mix with mayonnaise. This can be jazzed up many ways- add Tabasco, dill, curry powder, celery, etc.

Tuna salad: take plain tuna fish salad to the next level by adding chopped boiled eggs to it. Adds a nice texture balance, and even more protein.

Potato salad: make a classic potato salad and toss in some eggs as well. Boil chopped potatoes until soft, drain and toss with mustard, mayonnaise, sour cream, spices, and a few chopped eggs.

Deviled: take the yolks from the eggs and mash separately. Add mustard and mayonnaise. You can get crazy and try crushed nuts, pesto, BBQ sauce, whatever your  imagination thinks up. Put into a plastic ziplock, cut a corner off, and pipe the filling back into the egg halves. Garnish with a dash of paprika or fresh dill.

This classic strawberry shortcake, from the LA Times, with a secret ingredient: boiled egg yolk in the batter.

Cobb salad: make a bed of lettuce, then cover with chopped tomato, bacon, avocado, and hard boiled egg. Really, boiled eggs can top any salad.

Soup garnish: serve a hearty chilled gazpacho or borscht the traditional way, topped with a halved hard boiled egg.

Pickled: using spices, vinegar, and some beet juice for that lovely ruby color, pickle your leftover eggs and they will keep much longer. Try this recipe from Allrecipes.

Noodle soup: add a cooked egg into anything from fancy glass noodle Pho to ramen to add a kick of proteins and vitamins.

For even more ideas, see Health’s article “8 Excellent Recipes for Hard-Boiled Eggs“

Recipes for Leftover Ham

Photo from “Petit Jean Meats“. They recommend heating their ham
in your dishwasher to save oven space. Go read it, I’m not lying.

Sandwiches: this one’s a given. Who doesn’t love a few thick slices of ham on a soft roll or bun, slathered in mayo and topped with tomato? But once you’ve had that three days in a row for lunch, it’s time for something a little more exciting…

Breakfast: leftover ham is a rockstar in the breakfast department. Layer it with a cooked egg and cheese on a bagel, wrap it up in a breakfast burrito, or add it to any frittata, quiche, or strata.

Soups: ham and navy bean, ham and barley, ham and potato, the possibilities are endless here. Just search “ham soup” and watch how many pages Google finds. Don’t forget, the bone add a nice layer of flavor so don’t get rid of it. Add it to the stock while it simmers away and enjoy extra umami. 

Scalloped potatoes: another ham classic, just layer thinly sliced potatoes, coat with flour and butter, and ham, add a little milk, and bake at 350 for 45 minutes. You can add in extra veggies like peas, happiness like bacon, or get crazy and use sweet potatoes to up the oomph of health.

Casseroles: add ham into any type of casserole. Ham, broccoli and cheese. Ham, beans and rice. Ham… you get the idea. Adding new ingredients and baking it all together gives the leftover a fresh breath of life.

Pizza: use small chunks or thin slices and add ham to homemade pizza. Add pineapple for Hawaiian, sausage and pepperoni for meat lovers, BBQ sauce, or ranch.

A great idea for any types of leftovers that freeze well is to freeze them in smaller, recipe-sized or single-serving packages. That way, when you’re rushed for dinner and just want to throw some ham into tonight’s pasta primavera, you don’t have to wait to defrost a big chunk, you can just grab one of the two-slice packages you froze.

Two really great resources for inspiration come from AllRecipes. They have a collection of Leftover Ham Recipes as well as a special Easter Ham section. You should also check out PremeditatedLeftovers article on 10 uses for leftover ham plus 5 things to do with a ham bone.


What’s your favorite way to use leftovers?


Baked ham & greens frittata

Frittatas are an awesome brunch staple, because they are easy to make and infinitely customizable. This would be a great Easter brunch option! They are the perfect answer to a vegetarian source of protein. Add in tofu, beans, and whatever veggies you want, but the eggs do the heavy lifting in the protein department. One typical large egg contains 6 g of protein, which is 12% of the recommended daily allowance for an adult (source: USDA). It also has keratin for your eyes, vitamin D, A and B, with only 70-80 calories. There aren’t many other protein sources with as complete nutrition for such a low per calorie count.

What’s a Frittata anyway?

Frittatas are most similar to a crust-less quiche. So if you love quiche but want to cut down on carbohydrates, calories, and saturated fat without sacrificing taste and versatility, a frittata is perfect for you. There is some confusion as to the difference between a frittata and an omelet. The main difference is that  omelets traditionally have the egg mixture cooked and folded around a filling which is added on top at the last minute, whereas a frittata is all mixed and cooked together, not folded over. A frittata is also traditionally baked in the oven for all or part of its cooking time. Your best choices for a perfect frittata are cast iron or a non-stick oven-safe frying pan. 

Now, if you have never tried a frittata, it may be intimidating. Or perhaps you have tried before with little luck. They turn out too dry, tough, overly browned, stuck to the pan, or too bland. That’s ok. There are a few tricks to the perfect frittata every time. Whatever pan you use, make sure to spray with cooking oil or spread some olive oil around so the eggs don’t stick. You need more for stainless steel than for non-stick or cast iron. Then make sure to cook any meat thoroughly first, then the veggies, then add the eggs. The rest of the tips are below.

Ingredients:
6 large eggs
1/2 cup spinach
1 cup cooked asparagus
4 slices deli turkey
Cheddar cheese
Spices (Mrs. Dash & garlic salt) 

Step 1: Preheat the oven to 400. Cook any meat you’re using first (bacon, sausage, chorizo), remove it, and drain any fat. Then cook your veggies until slightly softened. You want them to still have a little crunch, as they will be cooked further.

Step 2: Add the meat or tofu and heat until warm. Season liberally here, as you will lose some flavor. I used a Mrs. Dash seasoning mix and generous amounts of garlic salt.

Step 3: Spread the contents of the pan into an even layer. You can sprinkle on a little cheese to let it melt here. Then beat the eggs in a separate bowl until fluffy and pour over the veggies and/or meat. Tilt the pan around so the eggs spread all the way to all edges. Let it cook just until it begins to set and is hard around the edges.

Step 4: Put the whole pan into the oven and bake for 8-10 minutes. When you cut a hole in the center and no raw egg is left, pull it from the oven. Let cool 5-10 minutes, then cut into wedges like a pie and serve.

It turns out only gently browned but cooked through. The eggs are springy and light, and it is super filling without feeling heavy.

Frittatas have so many uses! If you’ve had a late day and are starving but don’t want too complicated of a dinner that you can make fast, just throw whatever veggies into it, have a nice glass of wine with it, and there’s a 20 minute dinner. If you’re having friends or family over for brunch or lunch, add a light salad. If you want to make a nice weekend breakfast for yourself or your family, just make some toast. Frittatas are so versatile. 

Enjoy, and Happy Easter!


(Easter Sunday is the 20th, in case you didn’t know. I had to look it up too, don’t worry.)

How to Perfectly Hard-Boil an Egg; & 6 Ways to Dye Hard Boiled Eggs

Happy Easter!!!

I’m guessing not many people will be reading this blog the day of, since Easter is kinda a major holiday. That’s why this is published a little early. There are many great things about Easter.

Egg hunts, baskets of presents and candy, Cadbury eggs, chocolate bunnies, Easter Sunday brunch. If you’re religious, that church part. Since a major part of Easter is coloring hard boiled eggs (or at least it always has been for me), it’s important to know how to properly hard boil an egg. It’s gross when you peel an egg to eat it only to find a grimy green ring around the yolk, or the yolk is still runny.

There are many theories on how to perfectly boil eggs.

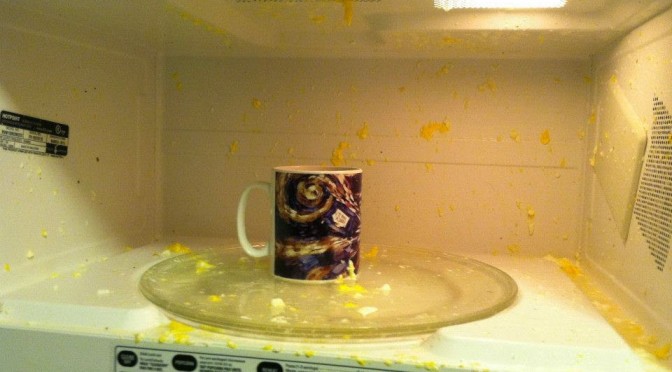
First rule though: DO NOT TRY TO MICROWAVE IT.

Seriously. Even thought BuzzFeed claims there are 12 ways to do it right. (Most of those ways don’t involve in-the-shell eggs, so that’s cheating). If you just put a raw egg into water and stick it in the microwave, the steam will build up quickly.

You will spend the next 2 minutes oblivious to the imminent explosion, then the next 10 minutes after that cleaning dripping raw egg and shell shards from your entire microwave.

Not that I know from experience or anything…

How to perfectly boil eggs

1. Place 6-12 eggs in a pan which has a lid. Cover the eggs with cold water, add a little salt, and maybe a tsp of vinegar.
2. Bring the eggs to a boil on the stove. As soon as they start a rolling boil, remove them from the heat and cover.
3. Let them sit in the hot water for 10-15 minutes. Then drain and rinse with cold water to stop the cooking process.
4. To peel, bang the egg on a hard surface, or roll it in your hands to break the shell. Start at the larger end and pull off shell pieces, running under cold water if you need extra help to get the shell off.

This version from MarthaStewart is actually closest to how we do it at my house. (Should I be upset about that?). This article from SimplyRecipes is also a good detailed explanation. The green ring is caused by boiling water, so the best way is to have the eggs at a rolling boil as short a time as possible.

Fresh eggs are usually harder to peel, so if you have eggs you bought last week rather than this morning, use those. Adding a teaspoon of vinegar to the cooking water may make peeling easier too. This is also a good idea to add if you’re boiling the eggs to dye them. 

Ways to Dye Easter Eggs

First of all, you will want to cover the surface where you are dying eggs with newspaper or cloth to prevent staining your family heirloom table. This can get messy. Then make sure you have plenty of eggs for each person dying, because this is fun and it’s easy to get carried away! Just one more pretty egg, please….
 
1. Food coloring or Kool-Aid
You can use plain food coloring to dye cooked, cooled eggs, no need for expensive store-bought kits. Just add 20 drops or so to 1/2 cup water and 1 tbsp vinegar, then leave them in the water until they are the color you want. Or add one whole packet of KoolAid (NO SUGAR) to 1 tbsp vinegar and 1/2 cup water. Adding more vinegar or leaving it in the color longer will give more and more vibrant colors.
2. Decorations
There are a lot of ways to decorate your egg, just be sure you do so before you put them in the dye. You can add stickers, draw on them with a crayon (anywhere the wax is, there will be no color and it will stay white) or wrap with rubber bands to create stripes. Then place in bought dye kits or food coloring.
3. Layering
Starting with the lightest color, dye the egg. For example, yellow. Then, use wire, a spoon, or string to dip the egg into the next color only part of the way, leaving part of the egg unsubmerged. For example, blue. This will make the overlapping areas green. If you don’t dip it all the way in the yellow, you can have a yellow-green-blue egg. You can do this multiple times to create many layers of color.
4. Sponge painting
If you intend to eat these eggs, make sure you are using food grade dye and paint. If these are just for show, go crazy with whatever. Using a small piece of sponge (kitchen or makeup kind) dip into paint, and dab across the dyed or non-dyed egg surface. You can use multiple colors to create works of art.
5. Swirled/Marbelized
Once you are SURE you don’t need a dye color alone, add a tbsp vegetable oil. Where the oil sticks to the egg will dye lighter or not dye at all as compared to the color you add it to. But be sure, because once you add the oil you cannot remove it! This creates beautiful swirled eggs.
6. Cracked Dye
After you cool cooked eggs, break the shells just a bit on purpose by banging them on a hard surface once or twice. Then dye as usual. When peeled, the egg will have spidery dye patterns of color! Use food grade dye if you intend to eat them.


Once you’re finished with the fun of dying eggs, put on a baking rack or back into the carton to dry and set.

Have fun decorating, hiding, and/or eating your eggs this Easter!

What’s your favorite part of Easter?


No pain no gain? — Delayed-Onset Muscle Soreness (DOMS)


Anyone who has ever begun a weight-lifting regimen, shoveled a long driveway, or lifted something heavy only to be sore the next day (or two, or three…) is familiar with the concept of delayed-onset muscle soreness (DOMS).

This is the constant ache in your muscles that you feel 24-48 hours after doing something strenuous to which you are not accustomed. To be clear, it is not the same as the sharp, immediate pain of a pull or strain, nor is it the same as the muscle fatigue you feel while working out.

What causes DOMS?

There is some misinformation on the internet and in common knowledge that a build up of lactic acid or lactate, created through aerobic respiration, causes muscle soreness. While it is true that a build-up or inability to get rid of lactate can hinder workouts, this is not the cause of DOMS. This is caused by microscopic tears in the muscles during the “eccentric“, or lengthening, portion of an exercise. This causes the muscle to forcefully contract while it lengthens.

The opposite is the “concentric” portions of an exercise. Examples of eccentric moves include walking or running down hills, the lengthening portion of a bicep curl, the downward portion of a squat or lunge, or jumping. It is believed these microtraumas to the muscle fibers combined with inflammation and swelling cause the associated pain.
.
I once had a “leg day” where I did over 200 squats/lunges per leg, and was then limping around for three days after. Hopefully that was just a ‘beginning to build muscle’ stage and won’t be the norm.

Unfortunately, there is not much you can do to prevent this soreness, especially if it is a new activity. When you first begin letting weights or playing a sport, there is going to be some amount of discomfort. There are a few things you can try to prevent or ease soreness.

To ease muscle aches:

  1. Take an anti-inflammatory like ibuprofen or Aleve. This will help calm the ‘pain’ signals to your brain and decrease any swelling so you heal faster.
  2. Take a hot/cold shower. Let me explain. If you take a very cold shower or bath right after the workout, anecdotal evidence says it may help decrease how sore you are later. The next day, if sore, try a soothing hot bath to ease achy muscles.
  3. Try foam rolling. These rolling-pin looking foam tubes are designed to relax the tissue layer surrounding muscles and easy achy soreness. Here’s a Yahoo article about it.
  4. Massage the sore areas. It may hurt a lot while happening, but some swear that it gets rid of pain faster after.
  5. Active recovery. Do light exercise like yoga, walking, or swimming. This makes the muscles continue to move, gets blood flowing through the sore areas, and hopefully help them heal quicker. 
  6. Take Vitamin C before and/or after a workout. Vitamin C is an antioxidant, and may help prevent muscle damage caused by free radicals created when muscles work hard.
  7. Try a creme like IcyHot or Bengay to soothe deep muscle soreness.
  8. Drink lots of water and green tea. Staying well-hydrated is always a good idea, but your muscles can be up to 70% water, so keeping them hydrated means keeping them able to work.

While time is really the only thing guaranteed to help make muscle soreness go away, hopefully this article will inspire you to be safe and smart, and ease your way into weights.

Please, DO NOT use this soreness as an excuse to just stop working out! It just means you pushed a little too hard this time.

In fact, some think that DOMS is a necessary part of building new muscles. Here’s an article from fitness magazine Runner’s World on “Why Delayed Onset Muscle Soreness Is a Good Thing” by Mackenzie Lobby. 
.
Your muscles will build themselves back up and get bigger and stronger, especially with repeats of those motions (so keep legs, arms & shoulders days on the schedule). The severity of the soreness will decrease over time as your muscles build and adapt to the exercises.

Eventually whatever left you sore and weak will be no problem at all. Rest and recover, then get back out there!

Regular movement is the number one best thing you can do for your heart, blood pressure, and overall health and wellbeing. 
.
For more information you can see This PDF from the American College of Sports Medicine.

Do you have any advice for sore muscles?

Under 100 Calories per Bowl: Cruciferous Vegetable Soup


I’m always a big fan of recipes that help “clean out the fridge or pantry“, and if they are healthy as well then bonus! We all have some assorted cans, boxed, half bag of frozen mixed vegetables, etc. that have been sitting around since approximately we moved into whatever abode we inhabit.

Even the most strict, list-making, meal-planning, leftover-eating of us have odds and ends we need to try to use up before expiration dates. It is especially hard with produce. I have a bad habit of buying everything that’s on sale, I want to cook eventually, sounds healthy… and then I have a fridge packed full of five-day-old veggies beginning to wilt and lose nutrients. Sad face. 

That’s why this soup is fantastic! You can mix and match what vegetables you add based on what you have waiting to be used, and choose whatever protein and grain is in the half-empty box in your cupboard. There is of course a few caveats.

You need a huge ratio of veggies to other stuff, and a large portion of it must be water IF you are going for a filling, vegetarian, healthy, low-cal, low-fat soup.

Try to choose mostly cruciferous vegetables and/or leafy greens, as those pack the most nutrients and fiber for the least carbs and calories. Cruciferous vegetables include cauliflower, broccoli, brussels sprouts, etc. Limit the beans and grains to one cup each to keep calorie counts low. If you have a “meat tooth” feel free to throw in some cooked shredded chicken or steak.

Ingredients:

  • 1 whole head green cabbage, shredded
  • 1/2 head cauliflower, cut into florets
  • 1/2 bunch kale, chopped
  • 1 cup fresh spinach
  • 1 cup barley
  • 1 cup pinto beans
  • 1 can diced tomatoes
  • Garlic salt
  • Lots of water (stock or bouillon for extra flavor)

Step 1: Chop all your veggies and add to the crock pot. Add the grain (barley) and protein (beans) as well as diced tomatoes. You can sub fresh chopped tomato or tomato sauce, or forget the tomatoes. I just super love diced tomatoes in all the things.

Step 2: Cook on low for 4-6 hours, until veggies, barley and beans are tender. Add any other seasonings you like. Enjoy for under 100 calories per bowl as often as you are hungry!


*Disclaimer: I do not recommend crash diets like the cabbage soup diet where this is all you eat all day, but I do believe that soup before a full meal will help dampen hunger and make it easier to eat healthy and manage a healthy weight, and broth based soups should be incorporated into your meal plans to keep total grocery costs for the week low.

The Art of Ethiopian: Part 4 – Cheese, Greens, & Injera


This is the fourth and final post in my Art of Ethiopian Cuisine post series. From a 100%-not-Ethiopian-American, I must say this all tasted really dang good. And it doesn’t take too much hands-on work time. If I had had a real Ethiopian over to try it, I’m not sure what their opinion would be. But if you want the “Americanized” easy version, these recipes are sure to do the trick!


The Art of Ethiopian Cuisine: Part 1 – Beef & Pork
The Art of Ethiopian Cuisine: Part 2 – Chicken & Fish
The Art of Ethiopian Cuisine: Part 3 – Potatoes & Lentils
The Art of Ethiopian Cuisine: Part 4 – Cheese, Greens, & Injera

Ayib

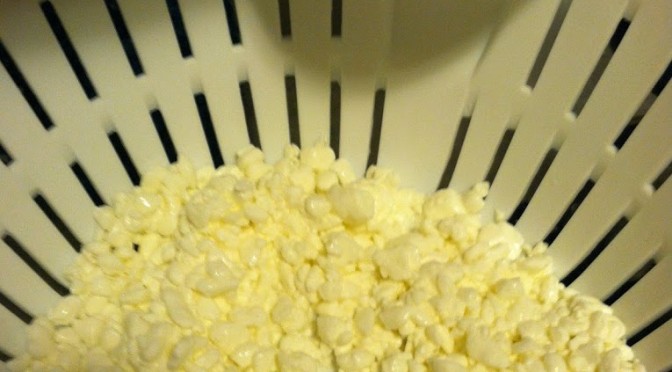
The cheese is called “Iab or Ayib” and is like a cottage cheese/ricotta hybrid. You usually need it to temper the heat in these types of dishes, but my recipes leave out the Berberi spices you will notice. If you like super hot foods, feel free to pick some up and sprinkle it into all these stews. Because I don’t have hours or days to make it the proper way, THIS recipe from Whats4Eats comes close to approximating Iab.  

Ingredients (Ayib):

  • 1 cup large curd cottage cheese
  • 2 tbsp plain Greek yogurt
  • 1 tbsp lemon juice
  • Sprinkle sea salt

Step 1: Rinse the cottage cheese in cold water and let it drain. Press dry with paper towels if you like. I tried that and the towel got cheese curds stuck all over it so try at your own risk.

Step 2: In a bowl, mix the cheese curds, yogurt, lemon juice, and salt. Refrigerate until serving.

Gomen Wat

The greens are called “Gomen Wat” (guess Wat…again) and the recipe I used is based off the one HERE on my trusty AllRecipes site. I didn’t have collard greens, so I used what I had, which was kale. I bet you could use spinach instead as well, any leafy green will do.

Ingredients (Gomen Wat):

  • 2 cups chopped kale
  • 2 cups water/stock
  • 1 tbsp turmeric
  • 1 tsp ground ginger
  • 3-4 tbsp lemon juice
  • 2 cloves garlic, chopped
  • Sea salt
Step 1: Put the greens, spices, and liquids in a small crock pot. Cook on low for 1-3 hours. 

Make sure to stir every now and then. The greens will wilt and take up less room. I like my greens extra tangy to counteract the bitter. I also sprinkle them with a healthy dose of fresh coarse ground sea salt. Keep on low until you serve.


Injera

And of course, the cornerstone of the meal, that which holds it all together and is both plate and utensil, the Injera bread. Usually it is made from pure Teff flour and allowed to ferment and rise for three days. I unfortunately had neither the grain nor the time. So I based mine off this cheat recipe HERE from Whats4Eats, which does not need either. It rather ingeniously uses club soda and lemon for both the bubbles and the tang.

Ingredients (Injera):

  • 2 cups flour
  • 1 tbsp baking powder
  • 2 tbsp lemon juice
  • 2 cups club soda

As you can see, I had lemon-lime club soda so at first I didn’t use the lemon juice. Several other recipes I found also use vinegar if you don’t have lemon.

Step 1: Combine all ingredients and stir just until all flour is incorporated. The club soda will bubble quite a bit. 

Step 2: On a hot, sprayed griddle, pour about 1/2 cup of batter. 

Step 3: Typically injera is only cooked on one side, but I found that this better was just thick and pancake-y enough that I had to let it mostly cook, then flip for a final minute or two. There were still bubbles, which approximates injera.

However the consensus was that this dough was thicker and sweeter than usual. So these are the Americanized Ethiopian pancake version of injera. And actually some said they prefer it, so perhaps this is a better way to ease an American palate into ethnic cuisine.And this was the final meal.

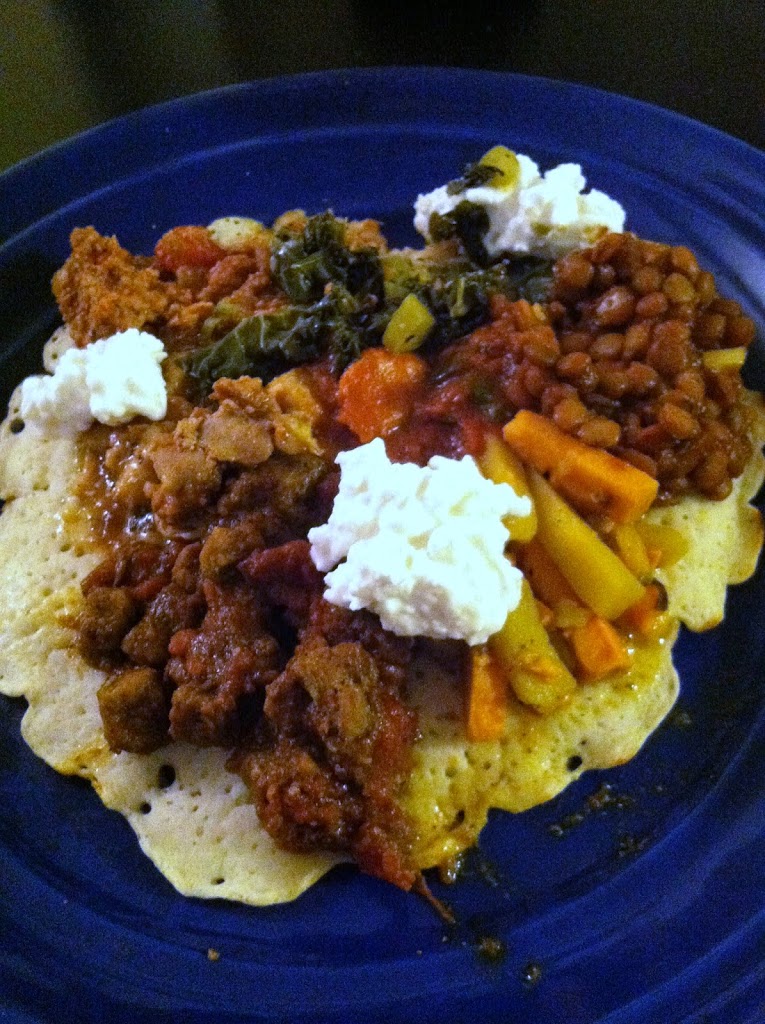
Ground beef, pork, chicken, fish, lentils, potatoes, greens, cheese and my injera pancakes. You of course don’t have to cook all these at the same time, but I encourage you to at least make some injera and try one or two stews. You may find that you crave the flavors of Ethiopia from now on! And by cooking all this at home, you control the ingredients, so this meal turns out to be quite healthy, and very filling.


What’s your favorite ethnic cuisine?


The Art of Ethiopian: Part 3 – Potatoes & Lentils


Welcome to part three of my four-part Art of Ethiopia Cuisine post series! If you’ve been following along, you already know how to make Minchet-Abesh Alicha, Doro Wat, Yasa Tibs, and know Injera is just around the corner!

The stars of this post were considered side dishes to us meat-eaters, but could easily stand alone in an all-vegetarian meal. This is all about the tubers and lentils.

Lentils for Lent, ha. That should be a thing too.

Lentil stew is called “Mesir Wat” (remember Wats?) and the recipe I based mine off of is HERE at A Spicy Perspective. The two potato stew starring both Yukon classics and sweet potatoes was of my own invention.

I had had something similar at the Nile, an Ethiopian restaurant near me, and was trying to replicate it. I think it’s pretty darn close. I made a small batch, but you could easily scale it up to however many potatoes you want to use.

The Art of Ethiopian Cuisine: Part 1 – Beef & Pork
The Art of Ethiopian Cuisine: Part 2 – Chicken & Fish
The Art of Ethiopian Cuisine: Part 3 – Potatoes & Lentils
The Art of Ethiopian Cuisine: Part 4 – Cheese, Greens, & Injera

Ingredients (2 Potato Stew):

  • 1 sweet potato
  • 2 large baking potatoes
  • 1 cup water/stock
  • Garlic salt
  • 1 tsp turmeric
  • 1 tbsp curry powder
  • 1 tbsp cornstarch

Step 1: Dice the potatoes into tiny pieces. The smaller the pieces, the faster they will cook. Just try to make the pieces uniform in size.


Step 2: I used my rice cooker for this. Because I’m in love with this appliance. You can use a small slow cooker too, or a small sauce pot on the stove. Put the potatoes in, and add the spices and liquid.

Cook on low for at least 30 minutes, or until ready to serve.

About 10 minutes prior to dinner, add the cornstarch. Make sure it mixes in well, no-one wants a cornstarch bomb. This will thicken the sauce, but is not absolutely required.


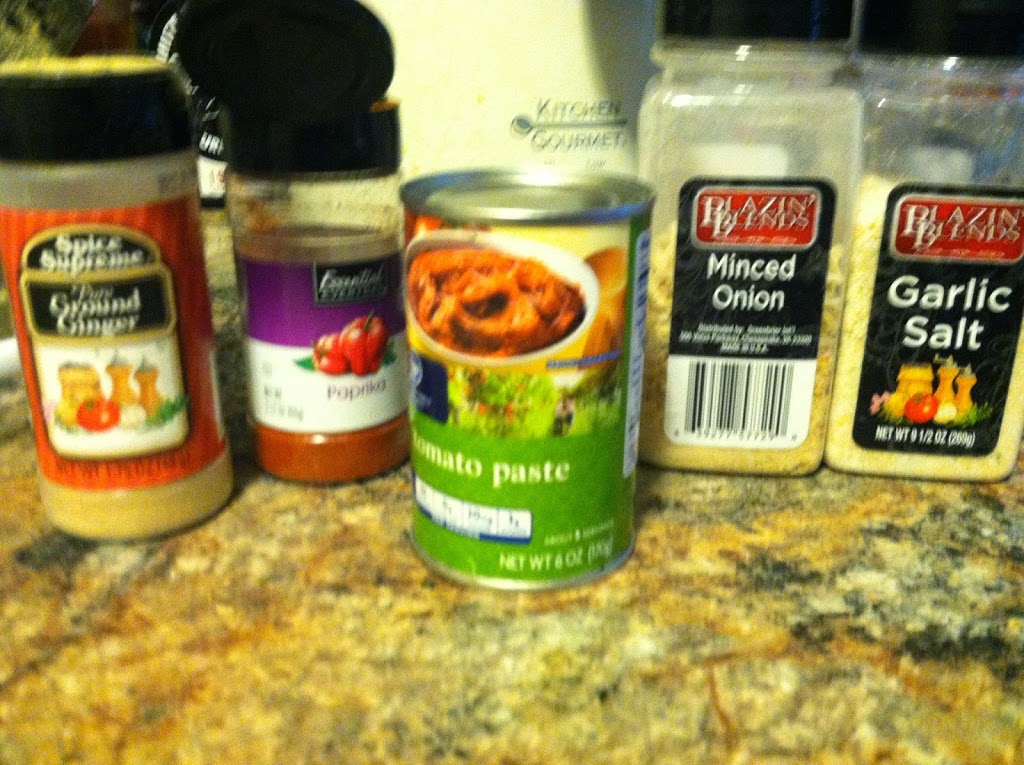
Ingredients (Mesir Wat):

  • 1 cup lentils (any color, I had brown)
  • 1.5 cups water/stock
  • 1 small can tomato paste
  • 1 tsp ground ginger
  • 1 tbsp minced onion
  • 1 tsp garlic salt

Step 1: Combine all ingredients in a small slow cooker, or sauce pot on the stove.

Step 2: Cook over low heat, stirring occasionally, for at least 30-60 minutes, until lentils are soft and fully cooked.

You can leave them in there foreeeeeever, just keep stirring occasionally so they don’t stick and burn on the bottom, and add more liquid as needed.


These were really tasty, I liked the slight tomato and garlic flavor.

Thickened up nicely after about 1 hour in the crock pot. I like lentils a lot, and this would be tasty with some added veggies as a meal unto itself!

More to come: Cheese, Greens & Injera

The Art of Ethiopian: Part 2 – Chicken & Fish


This is part two of a four-part series on Ethiopian cooking, the American way. Since I am such an expert (I know someone from Ethiopia. Plus I’ve eaten it like… four times) I decided to share my versions of some of my favorites.

The recipes are fairly straightforward, you just need to obtain the spices, and be patient. All said, the cooking for this dinner party probably took about 6 hours. The dishes took twice that long. 😉

The Art of Ethiopian Cuisine: Part 1 – Beef & Pork

The Art of Ethiopian Cuisine: Part 2 – Chicken & Fish
The Art of Ethiopian Cuisine: Part 3 – Potatoes & Lentils
The Art of Ethiopian Cuisine: Part 4 – Cheese, Greens, & Injera

Part 2: Chicken and Fish

Sounds like the punchline of a bad Lent joke. Appropriate for April I guess. (Is April still when Lent happens?) But since the earlier post had already covered the ‘red’ meats of beef and pork, this one is for the “white meats”. Sorta.

Chicken stew in Ethiopian is called Doro Wat. I’ve figured that most things that say “Wat” mean meat stew, whereas “Tibs” means meat and vegetables stewed together. As in “Yasa Tibs” meaning my fish, tomato & spinach stew.

The recipe I based the Doro Wat from is found HERE from NomNomPaleo, while the inspiration for the fish is found at Allrecipes HERE. 


Ingredients (Doro Wat):

  • 3-4 pounds chicken (bone in will give you better flavor, I used a mix of 2 thighs and 2 boneless skinless breast)
  • 1/2 cup diced onion
  • 2 tbsp butter
  • 1 cup chicken stock
  • 2 tbsp turmeric
  • 1 tbsp garam masala
  • 1 tbsp ginger powder


Step 1: Add stock to chicken in a pan, and cook over low heat until no pink is left. Cut the breast into bite-sized cubes.


Step 2: In a separate pan, add butter and diced onions. Cook until the onions are soft and translucent. Add 1 cup diced onion to the chicken.


Step 3: Add the rest of the spices, and simmer for 30 minutes or until serving. Add more stock if liquid starts to evaporate.


Ingredients (Yasa Tibs):

  • 1-2 small tilapia (or other white fish) fillets
  • 1 cup fresh spinach leaves
  • 1 tbsp garam masala
  • 1 small can tomato paste
  • 1 tbsp olive oil
  • 1/4 cup fish sauce (or vinegar if you don’t have it)
  • 2 tbsp lemon juice
  • Garlic salt to taste
  • Squirt of Sriracha or Tabasco, if you like


Step 1: Cut the fish into bite-sized pieces. Cook in a pan with olive oil until white and flaky.

Step 2: Add all sauces, spices, and spinach. Simmer at least until spinach is wilted, until serving.

This one is delightfully salty and tangy from the fish sauce and acidic lemon juice. And probably the healthiest stew thus far, with little to no fat and a spinach nutrition boost.


Up next: 
Part 3 – Potatoes & Lentils

The fusion of food, fun, frugality, and curiosity.