Category Archives: Informative

How to Build a Pantry Immediately Under $50


This is an article on how to start building a pantry immediately, with very little up-front cost. If you already have ten years’ worth of canned beans in the basement, that is awesome, but this article is not for you. I am writing this article to the people who:

  • Are tired of looking at bare cupboards.
  • Can’t sleep at night because they just used up their last box of <insert boxed food here>.
  • Just like to be prepared for stuff.
  • Would really love to have the makings for a meal readily available without having to go to the store.
  • Want to eat real food, without spending a lot.
  • Know winter is coming.
  • Like to save money!
  • Want to have some kind of food around no matter what.
  • Don’t have much money to spend building a pantry.

asian spices & sauces

Whether you are preparing for a hurricane, tough economic times, flexibility in meal planning, or just because you know you’d sleep better at night, you can start building a pantry right now, and for less than $50 per person.

A pantry by definition is a room or place in which food is stored as an ‘extra’ or backup to the kitchen. There is a wide variety of ways      people build pantries, from an extra can of soup on the top shelf to a maximum-prepper-root-cellar type pantry with hundreds of freeze dried meals, and everything in between. If you have a few boxes of ramen under the bed, that’s a pantry. If you have a stash of your      favorite cookies hidden somewhere you don’t have to share, that’s a pantry.

Home Canned Tomatoes

This article will give you an exact idea of how to build a pantry in one shopping trip, for less than $50 (per person) which could provide  enough calories to survive for 1 month. But, keep in mind this is “survive”, not eat like you’re on a cruise ship vacation. It is, however, way better than ramen noodles, and is real, healthy, good food.       (Heck you could even just use this as your personal “less than $50 monthly grocery shopping list & meal plan” any time).

Prices are based on stores in the New Haven, CT area.  Prices may vary based on where you are located, sales and/or coupons, and time of the year.  Feel free to make certain substitutions tailored to your situation.  If you have access to free or cheaper foods, stock up on those as well (for example, a garden, barter system, foraging, etc).

Always be on the lookout for opportunities for urban foraging like an overhanging apple tree, rogue tomato plant, whatever. Also, many plants we consider weeds are edible. Just be sure to read/watch enough to know what you are doing before eating      anything wild you pick.

Stocked freezer

This plan is meant to provide enough food for one person for three meals for thirty days.  Most meals will be very simple, but will be enough to survive. And this is real food, not freeze dried astronaut ice cream. You could eat any of these suggested meals at any time.  If you have more room in your budget, you can add more “comfort” foods like sauces, spices, dried fruits, desserts, snacks, or other items you desire.

I’d recommend ALDI if you have one near you. (Go here to see their locations). They have the most consistently low prices overall for packaged and even fresh foods that I’ve seen. Otherwise, find the store nearest you that has good deals. Follow general grocery rules, like shopping produce that is in season, making a list, buying in bulk when the prices are low, etc. to save even more.

Purchase per person:

  • 3 cans chicken — 2.97
  • 5 cans tuna or salmon — 5
  • 15 lbs beans (any type) — 8.50
  • 5 lbs rice — 2.99
  • 5 lbs potatoes — 1.99
  • 1 large canister oats — 2.29
  • Tortillas (12 pack) — 0.99
  • 10 bags frozen vegetables — 10
  • 2 cans any type fruit — 2
  • 1 jar pasta sauce — 1
  • 1 pound pasta — 0.88
  • Dozen bananas — 2.22
  • 1 jar peanut butter — 1.49
  • 1 jar jelly — 1
  • 5 cans diced tomatoes — 4.40
  • 2 loaves bread — 1.70

Grand Total: $49.42

These items can sit wherever you have extra room, and you know they will be there in a pinch. You can also add any items that your family specifically goes through a lot of, such as chickpeas, eggs, or a certain spice mix.

Be sure that you use these items prior to their expiration dates by incorporating them into what you already cook. There is no sense in spending even a small amount of money on food that you end up not eating. A list of many suggested meals using these items is below.

Suggested meals:

And if you happen to have a pantry already, hopefully this list can help jump-start your creativity. Just a few simple ingredients can quickly come together to create a satisfying meal for far less than you would spend outside the home. Having a well-stocked pantry means you can have a snack or meal ready to go in minutes, and without having to wait in line or drive 30 minutes.

Counter covered with groceries

To continue to build your stockpile, simply pick up one extra item each time you go to the grocery store. Add two jars of pasta sauce to your cart when you only need one, and now you have a spare. When there is a great sale on peaches and you can afford to, stock up. That way you keep your overall cost lower, by purchasing frequently      eaten items in bulk when the price is low. Just don’t get too crazy, you don’t want to buy way more than you will ever eat or buy things you end up hating and throwing away.

Also keep an eye out for mark-downs on products that are about to expire (like meats & fresh vegetables, but use or freeze ASAP), slightly dented (I’m lookin’ at you, 10 cent dented cans of soup), or out of season (sprinkles in the shape of a leaf are still sprinkles in the summertime). One extra can or bag at a time can make a big impact on your yearly grocery tally. And you will get the satisfaction of knowing that you have a buffer of food for whenever, whatever, happens.

(Title picture is of pantry items used to make Salsa Chicken Soup)

How To Ripen Green Tomatoes


Sometimes, green tomatoes will fall off the vine or be pulled off in the process of harvesting ripe red tomatoes. And sometimes you need to harvest all the potentially edible green tomatoes before first frost kills everything. So if you have lots of tomatoes left on the vine, but all of them are nowhere near red, and you’ve already made all the fried green tomatoes you can handle, you may be wondering, can I speed up the ripening process?

The short answer is, yes you can!

Green Tomatoes

You may wonder, do you need a specific temperature? Nope.

Do you need special equipment? Nope.

Do you need the whole plant? Nope again.

Green tomato wrapped in newspaper

There are two ways to go about this that I have tried with great success.  The first way is to wrap the tomatoes in newspaper, then place in a paper bag with an apple or two.  Apples give off ethylene gas, which causes fruits and plants to ripen (and at too high concentrations, to die).

This is also why you should not store apples & bananas next to each other, as the apples will cause the bananas to ripen more quickly as well. Unless your bananas are green and you want to eat them immediately, then by all means, use the apple trick.

Green tomatoes in newspaper with apples

The second method, which the writer  of InMyKitchenGarden agrees is far easier and does indeed work, is to bring them inside and simply set them on the counter until ripe.

Yup. Just like that. Done.

You may of course lose one or two to rotting, and they may dry out a bit the longer you leave them, but that’s okay.  Older home-grown tomatoes are still far better than no tomatoes, and sure will be better than anything you can buy at the store months from now.

Green tomato in newspaper

Since in Connecticut, first frost is predicted for this Sunday (heads up to anyone who hasn’t heard!) I will be out in the garden Friday or Saturday, loading up on anything larger than a marble to bring inside. A few will become fried green tomatoes (which I have totally fallen in love with!), another handful I’ll put some into paper bags, and others I’ll simply leave in a basket on the counter.

Then you can enjoy your green tomatoes through their various stages of ripening for weeks, and possibly months, to come. The speed at which they ripen will depend upon how close to ripe they were when picked, the temperature of your house, humidity levels, etc. and could take from a few days to a month or more.

As long as they aren’t mushy, liquid, or covered in black or white spots, they are still safe to eat. And if by chance they aren’t very pretty by the time they are red (or pink/orange/yellow) then you can try canning sauce from them, or oven drying them, and then cosmetics won’t matter.

Now go get those green tomatoes before Jack Frost does!

5 Ways to Preserve Tomatoes


As summer winds down into the gorgeous chill days of fall, gardens are finally running out of steam on producing tomatoes.  If you’ve read earlier articles you know how much fun I’ve had with gardening in my neighborhood this summer!  Baskets upon baskets of these lovely red jewels.  And now, sadly, my final harvest is coming to fruit on the vine, and soon I’ll pull up the plants before Jack Frost takes them away.

IMG_1511 - Copy

For those who still have one last bumper crop, or have a huge pile on the counter starting to soften, here are 5 ways to easily preserve tomatoes for all year round.  From as simple as cut & freeze to the process of canning (made simple with my one easy trick!) there are lots of ways to put up what you have now for when it is no longer available fresh, and preserve the lovely nutrients inside.

Option 1: Cut & Freeze

The simplest of all: just cut up your tomatoes into halves or quarters, and toss into a freezer bag. Label and put in the freezer. Later, you can use these tomatoes in sauces, soups, stews, and chilies with no problem. If you want to remove the skins, simply defrost and the skins will fall right off! Or you can leave whole, or puree them with the skins on.

Option 2: Oven Drying

Oven Dried Tomatoes in Olive Oil

It is oh-so-easy to dry your own tomatoes! All you really need is a wire rack, a knife, oodles of tomatoes (preferably roma), and some time.  See my article How to Make Oven Dried Tomatoes.

Option 3: Canning diced tomatoes

Quarts of Homemade Canned Pasta Sauce

Canning your own diced tomatoes is a snap! As long as you have the time to invest, canning your own will create a much healthier, flavorful option than store-bought cans. Simply dice up your tomatoes, place in a canning jar, and process. Be sure to always follow the rules of safe canning whether using a water bath or pressure canning method.

Option 4: Canning pasta sauce

Canning Pasta Sauce

Canning pasta sauce is only slightly more involved than diced tomatoes in that you add spices to the jars. I added fresh basil, garlic salt, and dried onion. Read the full article HERE.

Option 5: Turn them into tomato products

IMG_1514 - Copy

If plain tomatoes aren’t your favorite, there are still SO MANY tomato-based products we use daily that you can make in your own kitchen. Give some or all of them a try:

And there you have it, easy ways to preserve tomato bounty! Any home gardener who has weathered at least one tomato season has had more chopped fresh tomatoes than they could handle, and these are all tried-and-true preservation methods. Using these techniques you can enjoy the flavor of summer all year long.

How to Make Infused Oils


Ever read a recipe that calls for a “garlic-infused oil” or  some such thing?  Thought to yourself, “That would be way too expensive to buy! I’ll just use regular“?  Have you ever tried something in a restaurant or cooked by a friend that had a little special something hiding in the other flavors?  It may have been an infused oil!  And guess what? They are so easy to make your own!

I had this idea originally because I had found some very pretty small glass jars at a garage sale. They were the perfect size for something you only use a little bit of at a time, or as gifts. This made them the perfect medium for experimenting with infusions!

Infused olive oil and vinegars

An infusion simply means that an aromatic is soaked in oil long enough that some of the aromas and/or flavors of the additions are imparted into the oil. The beauty of this method is that you can use pretty much anything you enjoy the flavor of and want to taste in your oils!

You can choose to blend herbs with the oil, or simply put some into the bottle and let it sit. This makes a lovely presentation, and since these were meant as gifts, that is what I chose to do. I also had made my own vinegars, so a nice set of one oil and one vinegar will make for a great gift in the coming months!

Ingredients:

  • Oil to fill your container
  • About 2 tbsp flavoring per 1/2 cup oil

Step 1: Whether using garlic, fresh herbs, citrus, ground spices, or citrus fruits, make sure your produce is as fresh as possible and washed and dried.

Step 2: Heat your oil and your flavorings for about 5 minutes, to just bubbling. This helps release the flavors and smells into the oil. Let cool completely

Step 3: Filter your oil, or don’t, and pour into your jars. If you do include more herbs for looks, be aware that it will likely cause the finished product to look cloudy. This is ok.

Homemade infused oils and vinegars

You can try pretty much any flavoring you can imagine, and can get creative with combinations too! Try citrus and rosemary, cilantro and lime, lemon and black pepper, or basil and garlic. For the very brave, try infusing hot pepper for a spicy oil to fry your chicken in.

These infusions can now be gifts to a foodie in your life, who will likely be very impressed with your kitchen DIY abilities. Or you can use them to cook with of course, or as dipping oils served with crusty breads. Swirl into homemade hummus, or drizzle some on top of quick vegan tomato soup.

Have fun with it, & good luck!

Restaurant Review: O’Rourke’s Diner


This is a review of a local diner in Connectict. The Budget Epicurean has not been compensated in any way for this review, and all opinions are my own. For reviews, preference will be given to unique, local, family-owned establishments. Food locations will be evaluated based on:

  • Taste: 1 (wet toast) – 10 (your taste buds have died and gone to heaven)
  • Atmosphere: 1 (gas station bathroom) – 10 (Buckingham Palace)
  • Value: 1 (not worth it) – 10 (super duper deal)


In the heart of Middletown, Connecticut, just off Route 9, sits a classic metal diner.  The type of train-car shaped metal diner that brings to mind the “good old days”, Route 66, and other memories of a bygone era. This is O’Rourke’s Diner.

O'Rourke's Diner in Middletown CT

Established in 1941 by John O’Rourke, and owned to this day by his son, Brian, this diner has seen good times and bad, as well as a few reincarnations. A brief history, from their website:

O’Rourke’s Diner – A Brief Timeline
1941 – Uncle John J. O’Rourke, a veteran of Jack’s Lunch, purchases the old wooden Dunn’s Diner.
1946 – Uncle John replaces the diner with a brand new sparkling Mountain View diner to accommodate the growing crowds.
1966 – As a high school honors student, Brian works at the diner up to 40 hours per week, in addition to delivering newspapers.
1977 – Uncle John retires. Brian O’Rourke and his cousin, John Sweeney O’Rourke buy the diner. Brian’s culinary talents emerge in the form of wonderful soups like Irish stew and roasted plum tomato.
1985 – Brian buys out his cousin to “take the diner to the next level.” He uses his experiences throughout the ’80s in the kitchens of New Orleans, Barttra (Ireland), and the Caribbean to reinvent the omelet. This is the beginning of O’Rourke’s Diner as we know it – a cross-section of humanity with amazing culinary artistry!
August 31, 2006 – O’Rourke’s Diner is decimated by fire.
Sept. 2006–Feb. 2007 – The community unites to “raise the phoenix from the flames!”

Interior of ORourkes diner

The interior of the new/old diner is cozy yet not claustrophobic. There is a lovely bookshelf just inside the entry way containing an eclectic mix of mismatched awards, family photos, knickknacks, books, and other paraphernalia. A wrap-around bar seating circles the kitchen area, welcoming locals to sit down, have a cup of coffee, and chat with the waiter, waitresses, and hard-working chefs.

IMG_1416

When we ask the staff for favorites and suggestions, of course they say it’s all good. Every food place usually does. But of course, since they have been seen on Diners, Drive-Ins, and Dives,  plan on ordering at least one of those items recommended by the great Guy Fieri.

When we are told about Chef Brian and how he took the place over and totally revamped the menu, and that not only does he have a “Chef Brian’s Special of the Day” but that he is in the building this morning, we know at least one of us is definitely ordering that. So that left two more people to order.

Busy kitchen at ORourkes diner

After a little discussion, and an evaluation of what people were in the mood for, final decisions were made and the orders placed.

First up, we had to try their fruit juice of the day. It was a mango-pineapple juice, with frozen cubes of mango and cantaloupe to keep it chilled instead of ice to water it down. All of their breakfast smoothies and juices are made fresh each morning with usually local, seasonal fruit. They come in cute hand-held-sized cups with decorative straws. I really appreciate the small details.

Next up, we had to try the “Leprechaun Bites”.  According to their menu: “Every morning the little leprechauns in the kitchen start the day off by baking a variety of goodies. Leprechaun bites are an ever-changing assortment of daily sweet breads, cakes, treats, and toppings.” Today, the leprechauns were in the mood for poppyseed & lemon bread, and blueberry muffins it seems.

IMG_1417

The breads were both tasty, not overwhelmingly sweet. The blueberry ones weren’t quite blueberry enough for me, and a little dry. But I really enjoyed the lemon poppyseed, I feel like I could eat a whole loaf of that easily.

The next plate to hit the table I didn’t even get a picture of because it was gone too quickly! Chef Brian’s special comes with an ‘appetizer’, which was a small wedge of pistachio pancake with homemade whip topping. The pancake was Kelley green, and lightly nutty with just a hint of sweet. It was a delicious teaser for what followed.

IMG_1422

Chef Brian’s breakfast was a work of art. Two eggs benedict sat atop a bed of greens, tomatoes, and olives with two crostini on the side. It was like nothing any of us had ever tasted before.

My choice was the Mexican breakfast platter – 2 eggs topped with black beans, guacamole, tomatoes & onions & home fries. I’m a big fan of black beans and guac, and was just in the mood for something different. This was just the ticket. With a healthy heaping of proteins (hello eggs and black beans on one plate!) and good fats from the avocado, this breakfast was very satisfying and I didn’t feel at all guilty about finishing the whole thing.

IMG_1421

Though I did ask for my eggs scrambled, and they came out over-hard.

My dining neighbor ordered the buckwheat pancakes with sweet potato homefries. A fellow healthy eater, she was very pleased with the health factor of this meal. Definitely not for a meat-and-potatoes kinda person, who would be confused by the heavier consistency. But I thought they were quite tasty, and the sweet potato homefries are a great idea.

IMG_1419

But the breakfast that really took the cake was of course the DDD special: Banana Bread French Toast. Diner, Drive-Ins, and Dives recommended this plate, and now we know why! Two thick, hot slices of house made banana bread, coated in egg and fried, then doused in sweet syrupy cooked bananas. It was absolutely delicious!

O'Rourke's diner banana french toast

Lesson learned, when a very famous person know for eating good food recommends a certain dish, that’s probably what you should order!

The restroom was cramped but clean, and our waitress (plus two others wandering about) was very friendly, helpful, and always kept the coffee refilled. We felt very welcomed and comfortable. The only complaint I have is that it was FREEZING. They had the air conditioner was set to Arctic blast evidently. Luckily it was a gorgeous sunny day and we could escape to the sunshine, as soon as we gorged ourselves on bananas and pancakes. =)

ORourke Diner clover sculpture

Overall, I’d give O’Rourke’s diner:
  • Taste: 6
  • Atmosphere: 8
  • Value: 7

How to Make Oven-Dried Tomatoes


Since between my own backyard garden and my generous neighbor who has a football-field-sized garden I still had a bumper crop of tomatoes, even after canning oodles of quarts and pints of sauce and tomato broth and salsa, I decided to try my hand at oven-dried tomatoes packed in olive oil.

Dried tomatoes in olive oil are delicious little flavor bombs to add to garlic bread for a simple bruschetta, toss into salads or pasta, or top a pizza. The oil itself can also be used in salad dressings or anywhere tomato-flavored infused oil would be tasty. Very popular in the Mediterranean region such as Greece and Italy, this preservation method has been around for a very long time, and I had bags of romas just begging to be bathed in high quality oil that was on sale.

IMG_1544

But a jar can be quite pricey, up to $10 in the supermarket. It is far cheaper to can your own! You must invest in the jars and good-quality oil, but it is worth it for the superior taste and nutrition of using local tomatoes, and you can re-use jars forever.

All you need is some wire racks, an oven, and some time. If you have the oven on anyways, to make a roast or cookies, or perhaps to heat the house in the chill of autumn, this is the perfect project. This oven heat is conducive to drying many things, so you could also make a platter of dried apples or sweet potato chips at the same time.

There is some debate over the safety of dried tomatoes and botulism risk. It is possible that small droplets of water may stay inside the tomato and provide a medium for botulism or bacterium to grow. Obviously read up on facts and use your own best judgment when deciding whether to refrigerate, process, freeze, or store at room temperature. This article is not advice, just what I chose to do in my own kitchen with my own produce.

Ingredients:

  • 40-50 tomatoes, Roma are the best for drying
  • 2 wire racks (cookie sheets work too, you’ll just have to flip them halfway to make sure they dry on all sides)
  • 2-3 cups extra virgin olive oil
  • 1-3 canning jars, lids, & rings

IMG_1529

Step 1: Cut the tops & cores out of the tomatoes, slice them in half, and push out as many seeds as you can with your fingers or a knife. Save the seeds for planting, drink them, use in a soup, or compost.

IMG_1530

Step 2: Place the tomato halves on a wire rack or baking sheet, cut side up, and put into the oven at 200 degrees. Crack the door open if  you don’t mind the heat to allow more air circulation. Let them dry for 1 hour, then flip them if using baking sheets and check the dryness levels.

IMG_1543

Step 3: Take the completely dry tomatoes and begin packing them into sterile mason jars. The tomatoes are ready if they are rubbery with absolutely no water when squeezed, but you don’t want them so dry they are crunchy with no give. If you choose to use a vinegar dip, use tongs to dip each tomato prior to placing in a sterilized jar.

IMG_1545

Step 4: Pour in olive oil to cover the tomatoes. Make sure they are completely covered. If you feel okay with it, you can now store your tomatoes this way in a dark cabinet, or in the refrigerator.

IMG_1546

You may also choose to water-bath or pressure can your jars at this point. Totally up to you.

IMG_1547

These little jars will store for about 2 weeks in the refrigerator, and potentially up to a year in the cupboard if processed. They make lovely presents, if you can bring yourself to part with them. I recommend putting them somewhere easily accessible as you are likely to want to use them all up within days.

For ideas on how to use these, start here:

Check it out on Pinterest: https://www.pinterest.com/pin/350506783478334749/

How to Can Homemade Pasta Sauce


Since moving to Connecticut, we have slowly made friends with the neighbors. We are lucky enough to live in a pretty safe and quiet area, where the people are very kind and welcoming. My good fortune is knowing a guy named Tony, a few houses down the street, who gardens for his health.

Now, there are lots of well-known reasons why gardening is good for the body and soul. Being out in nature brings a sense of peace and calm, helps relieve stress and lower blood pressure, and may boost your immune system. Having home-grown fruits and vegetables enables healthier food choices and better nutrition, while keeping you active and exercising. All those hours of digging, planting, weeding, tending, picking, and preserving burns serious calories and keeps you toned and limber.

Not to mention the fact that gardening can save you serious cash! Just buy the seeds and materials once (better yet, swap seeds with other local gardeners for better-adapted produce, and save your own seeds for next year!) and you can garden for free almost forever. It is easy to find local, free sources of soil amendments like fertilizer and mulches if you ask around and get creative.

Tony takes this to a new level! His garden is literally the size of a football field, all out in his large 2-acre New England backyard. He and his wife single-handedly till, plant, weed, and tend this garden every year. His wife tells me that he has even shrunk the garden a little this year, due to time constraints and health issues, so the garden used to be even larger before I knew about it. Amazing.

IMG_1511 - Copy

Tony says his favorite thing about the garden is the sense of community. Everyone on the block knows Tony, and knows they can come by anytime to pick a bag full of produce to take home. His garden produces far more than he and his family alone could enjoy, so he gives freely to everyone around him.

This is the beauty of gardening. You make friends, share food, recipes, and stories, and build a true community.

Needless to say, I was hooked.

By mid-August, I had my kitchen table and counter literally covered in tomatoes, and needed to finally take the time to do something with them all. A large batch I simply cut into quarters and put in gallon freezer bags. They will sit in the freezer until I need to make a soup or chili; then I will thaw them, and the skins will fall right off, and I can use them in whatever recipe is on my mind.

Another large portion goes into cans as sauce to rest in the pantry until it’s pasta night. Tony shared his “lazy Italian” way of making sauce, which saved me tons of work and hours in the kitchen!

The typical way of making sauce is to boil the tomatoes briefly, then submerge in ice water. This makes the skins easy to remove. You then separate the seeds and skin from the inner flesh, and cook down for hours until it thickens into a sauce.

IMG_1514 - Copy

This cooking down process makes the house smell amazing, and warms it up on a chilly day. But this also takes a lot of time, and energy from the stove. I’m a fan of the new “lazy” way, and the sauce tastes just as good! So pull out your blender, and lets get started!

This recipe will make about 5 quarts of sauce.

Don’t add the spices if you want a plain tomato sauce, or change up the spices to whatever you want in the end product. This does use the water-bath canning method, read up on all possible dangers of canning or use a pressure canner if you are unsure.

Ingredients:

  • 8-10 pounds assorted tomatoes
  • 5-6 canning jars, lids, & rings
  • Per jar:
    • 1 tbsp dried onion
    • 1/2 tbsp dried garlic
    • 2 tbsp basil
    • 2 tbsp parsley
    • pinch of salt
    • 1 tbsp vinegar
  • Blender
  • Strainer
  • Cheesecloth or coffee filters

IMG_1426

Step 1: Sterilize your jars by boiling for 5 minute,s or run them through the dishwasher. To each jar add the spices for the sauce. I also chose to add one whole tomato just diced to each jar, because I like a little texture in my sauce. You can skip that step and just add the pureed tomatoes.

IMG_1427

Step 2: Wash all your tomatoes, and cut out the middle hard part & stem. Remove any brown or black spots or mushy areas. If you want to and have time, you can remove the seeds (and save them for next year!).  Cut the tomatoes into quarters.

IMG_1512 - Copy

Step 3: Put the tomatoes into a blender, and blend in batches. My blender can handle about a dozen large tomatoes at a time. You may need to squish some juice out of them to get the blender going at first.

IMG_1513 - Copy

Step 4: Line a strainer over a large pot with coffee filters or cheesecloth. Pour the tomato puree into the strainer and let it sit. You can wait a few hours, or leave it over night if you have a lid. This lets most of the watery juice drip out, leaving the thicker sauce on top. Saves you the hours of boiling down, and now you can keep the tomato water too!

IMG_1438

Step 5: Pour your separated sauce and tomato juice into prepared jars. Wipe the rims and put on the lid and ring. Process in the water bath for 35 minutes (adjust for altitude). Remove the jars to a cloth and let them cool 8-10 hours.

The jars are ready if you hear the “pop” of the lids seal, or if when you press down in the middle the lid does not spring back. Any jars that do not seal, put in the refrigerator and use within a week, or process them again.

The tomato broth that filters out is like liquid gold, and will be great as a base for soups and stews, or you can freeze it in ice cube trays to cook veggies in instead of using oil. The sauce will bring back the taste of summer later on in the dead of winter.

And this is how I processed and preserved about 50 pounds of tomatoes in two days time!

And it is so easy. As long as you use vinegar or lemon to acidify the tomatoes and broth, they are perfectly safe to water bath can at home. Enjoy preserving your bounty. Do you have more tomatoes than you know what to do with?

More things you can do with tomatoes:

Do you can or preserve? Have any other ways to save tomatoes? Tell us about it in the comments below.

How to Save Tomato Seeds


As the world settles into the summer-fall change of pace, kids going back to school, traffic patterns adjusting, temperatures cooling off, birds are migrating, stores change their displays to autumn holidays, and gardeners are busy preserving the tapering bounty of produce.

In season now are fresh juicy peaches, heavy enough to break limbs as they nearly fall off the tree, pears of all shapes, sizes and colors, summer squashes like butternut, delicata, and sweet dumpling, the tail end of watermelon and cantaloupes, and the heat lovers like peppers and tomatoes are ramping down production.

Tomato_Seeds.1
Although, this doesn’t look very ramped-down to me!

Meanwhile, the cold weather lovers like spinach, bok choi, brussels sprouts, pumpkins, and winter squash are coming alive and some may be planted now for a second fall/early winter harvest.

One of my absolute favorite things about gardening is the seeds. And the miracle that one tiny seed is capable of producing pounds upon pounds of produce. And that one single fruit from that plant, if you keep one single seed and plant it again, you can again get pounds and pounds of produce!

I honestly sit and wonder sometimes how many growing seasons it would take for one tomato seed to reproduce enough to cover the planet.

Say one tomato makes 200 seeds, and each seed is planted the next year to create 200 plants. Then each plant creates twenty fruits, each with 200 seeds. Now you have 40,000 seeds, each capable of being planted again the next year.

And so on.

Tomatoes could inherit the Earth in about 10 years, I think.

Tomato_Seeds.12
Seeds from heirloom Italian tomato varieties

There are so many good reasons to save seeds:

  • It promotes heirloom varieties – non-GMO and non-altered versions of a plant that will create new, similar plants the following growing season; each unique
  • You produce plants that are best-adapted to your individual climate, elevation, and soil. No store-bought seeds can be ideally suited to every location, but a few growing seasons of choosing the best fruit and saving the seeds will breed the traits that are best for you & your plants
  • It is essentially free food! If you save seeds, you only have to buy them one time, but can plant indefinitely
  • It promotes self-reliance. If you can grow your own food year after year, it doesn’t matter if the store runs out or doesn’t have any nice-looking produce, you know you can harvest your own right out of your back yard
  • You can create ‘designer produce’. Seed saving is a little bit like genetic modification, only much slower and done as nature does. You can choose fruits based on how quickly they mature, how many leaves the plant grows, or color, and by choosing the trait(s) you want you can enhance the chance that more of the next generation will have those traits. Eventually you can create an entirely new, true-breeding species!

With that said, here’s how to save seeds from tomatoes easily. It is much simpler than you may think!

Ingredients:

  • 1 large tomato of a variety you want to save
  • Cup of water
  • Time

Tomato_Seeds.2

Step 1: Cut the top off the tomato & discard or compost it.

Tomato_Seeds.11

Step 2: Cut the tomato into wedges, and squeeze out the pulp and seeds into a cup. It’s okay to get juice and goo in with the seeds, you will get rid of it soon.

Tomato_Seeds.5

Step 3: Cover with a paper towel or cloth and let it sit at room temperature for a day or two. The water may get frothy, and some seeds may sink while a few float. The goo will slowly degrade, leaving the seeds uncovered.

photo 1(1)

Step 4: Strain through a fine mesh strainer or cheesecloth, or simple pour off the cloudy water and re-cover until there is nothing left but seeds. Spread onto a plate and let air dry for 24 hours.

photo 3

Step 5: Put the dry seeds into an envelope or other container, and store it in a cool, dry area where it is not likely to get wet or be invaded by insects.

Tomato_Seeds.4
Canned tomato sauce from my garden tomatoes

Step 6: The next planting season, plant your seeds and watch them grow! Soon your seeds may have stories attached to them, you can create your own fun names for the new species, and pass them down to your friends and family for their enjoyment too.

Preserving Hot Peppers


Peppers are probably the kind of plant which has most wow-ed me with its prolific seeds. Every time I crack open a bell pepper to make stuffed peppers, or hollow a jalapeno to make poppers, there are mounds of seeds inside. Even in the tiniest pepper, there are likely more seeds than you can count on just your hands.

Pro tip: you can save these seeds and dry them out, and then plant your own pepper garden! Just one jalapeno may produce dozens of plants. Yes, even peppers you buy at the grocery store. Just cut the stem side off, scrape the seeds away from the ribs inside, and dry them on a piece of paper. Store in a cool dark place until you’re ready to plant outside or in a container.

photo 1(1)

Another thing that is amazing about peppers is the sheer variety. From the mild sweet bell pepper to the jalapeno, habanero, or even the ghost chili, there are literally thousands of varieties. Peppers can spontaneously mutate, so even if you save seeds year to year, you can get new color patterns or heat levels. The amount of water and sun, location and type of soil can also affect the peppers.

I’ve been trying, for the past few years, to get more brave about cooking and eating spicier foods. The chemical that makes peppers taste hot & spicy is most often capsaicin. This compound irritates mucous membranes and causes inflammation, and pain if in too high a dose. However, capsaicin also has many health benefits for your heart, blood pressure, anti-diabetes, and more.

photo 4

One of the ways I’ve found to incorporate more spicy foods into my cooking is by using jarred jalapenos. These little guys store forever, and add a bit kick to pizza, salads, sandwiches, chili, pasta, and more. I’ve bought jalapenos in a jar at the store, but this year I had access to an heirloom Italian jalapeno variety, as well as several others like cayenne, poblano, and red cherry peppers.

Thus, I needed a way to use them all up. As state, peppers are very prolific. On one plant, I’ve seen nearly 100 peppers, if the fruit is tiny. No joke.

So given all the health benefits, and the fact that I cannot use them up fast enough before they spoil, jarring seemed like the best way to preserve the summer’s spicy bounty. Turns out, they are ridiculously easy to make. Just look on a jar of peppers at the store, you will see there is likely fewer than ten ingredients. This homemade version needs three.

You can of course can hot or regular peppers, but you must use a pressure canner, not a water bath. There are significant botulism risks if you do not use a pressure canner. However, by adding vinegar, you are effectively pickling the peppers. This prevents harmful bacterias and other nasties from growing. I also store mine right in the fridge.

photo 2(1) copy 2

Ingredients (this makes about a pint):

  • 1-2 cups of peppers (all one kind or a variety)
  • 1/2 cup white vinegar
  • 1 tbsp sea salt

photo 2(1)

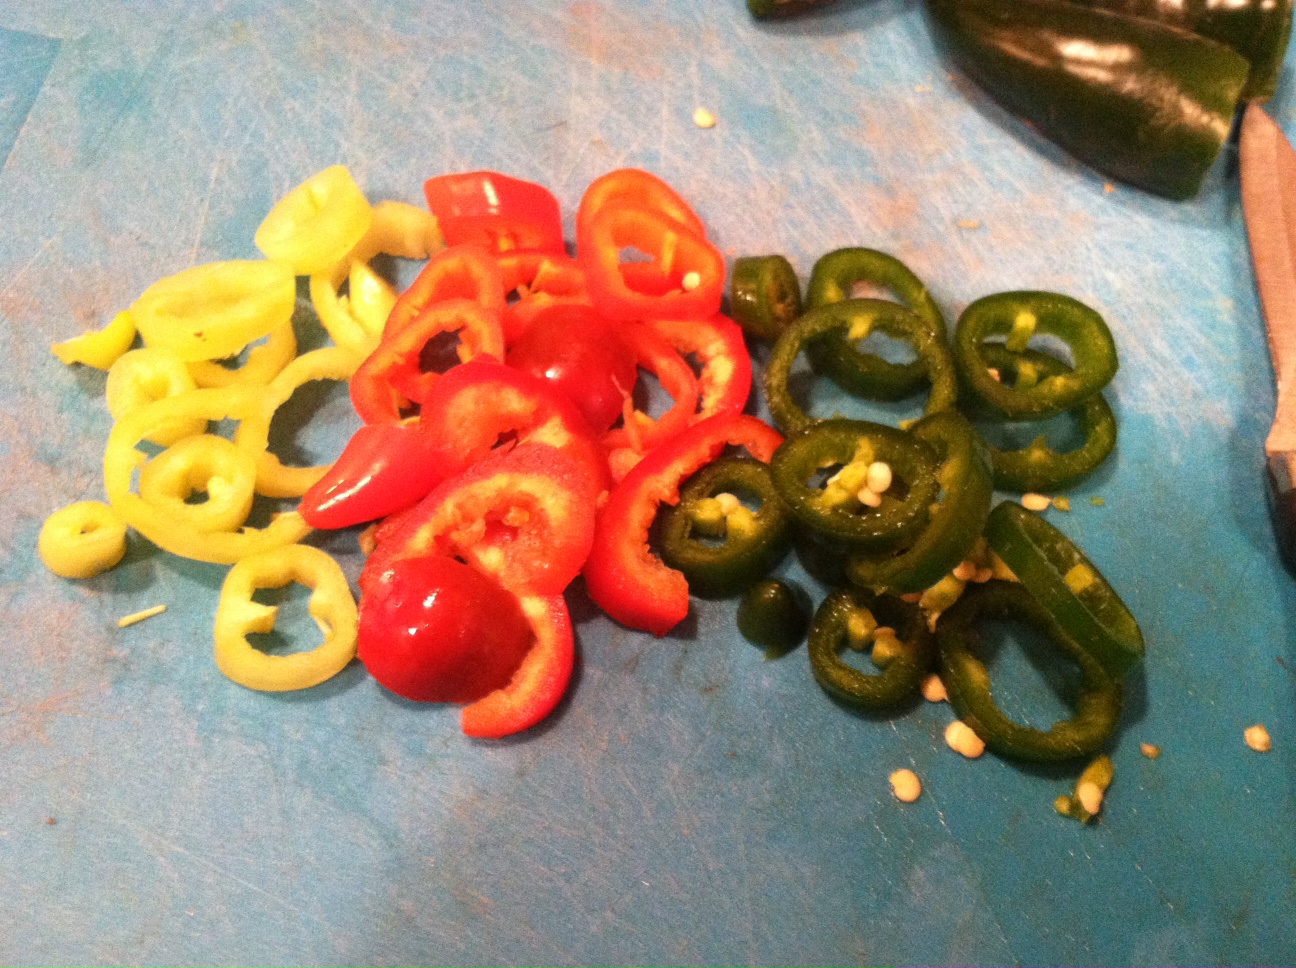
Step 1: Cut the tops off the peppers, then cut down the side ribs and pull out the seeds. Leave the seeds in if you want it extra spicy. Also, it is highly recommended to wear gloves while cutting hot peppers! I made the mistake of not wearing gloves the first time, and my hands were on fire for days.

photo 1(1) copy 2

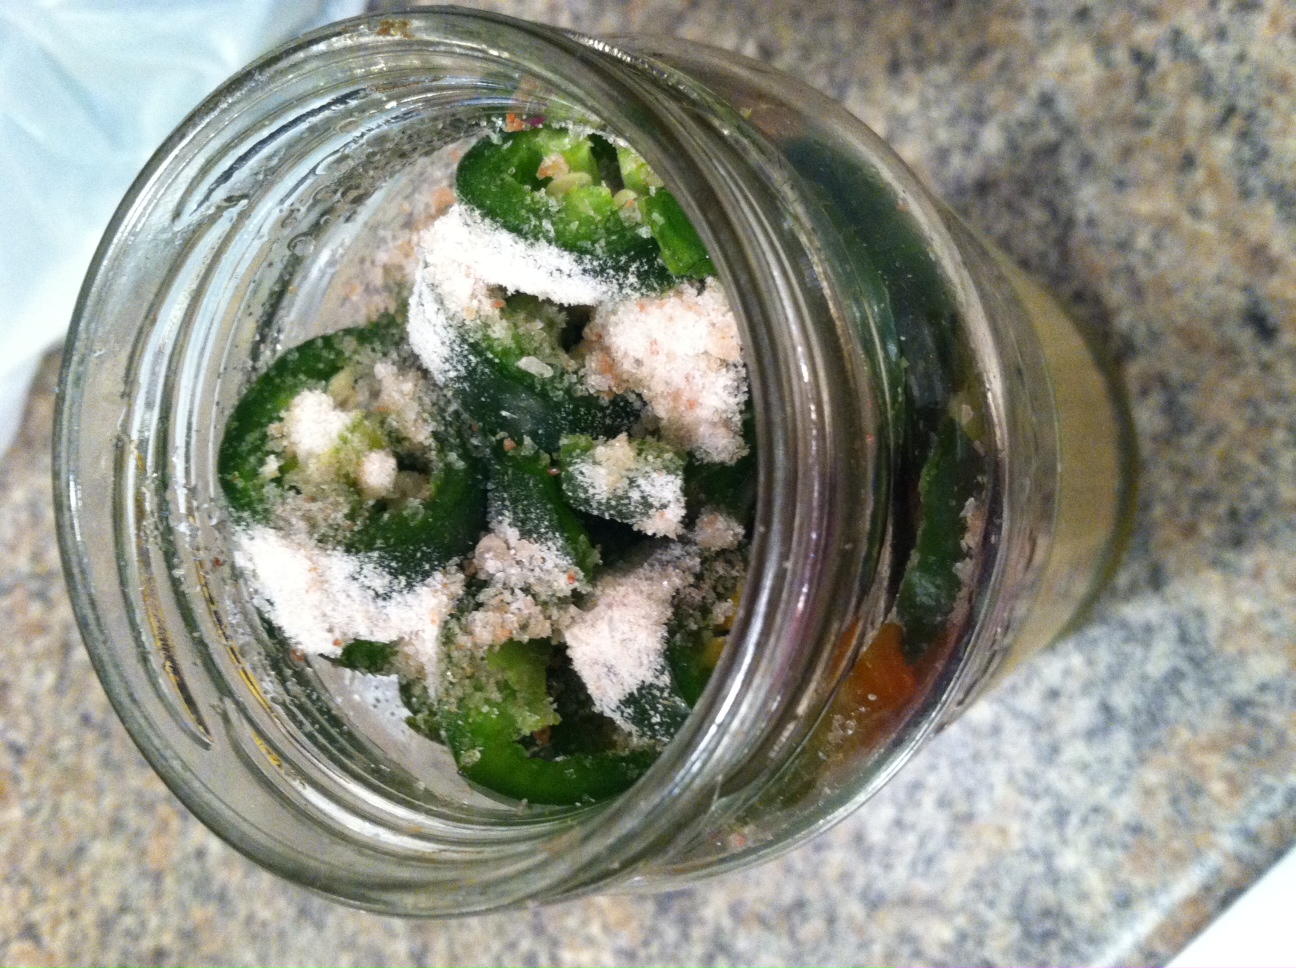
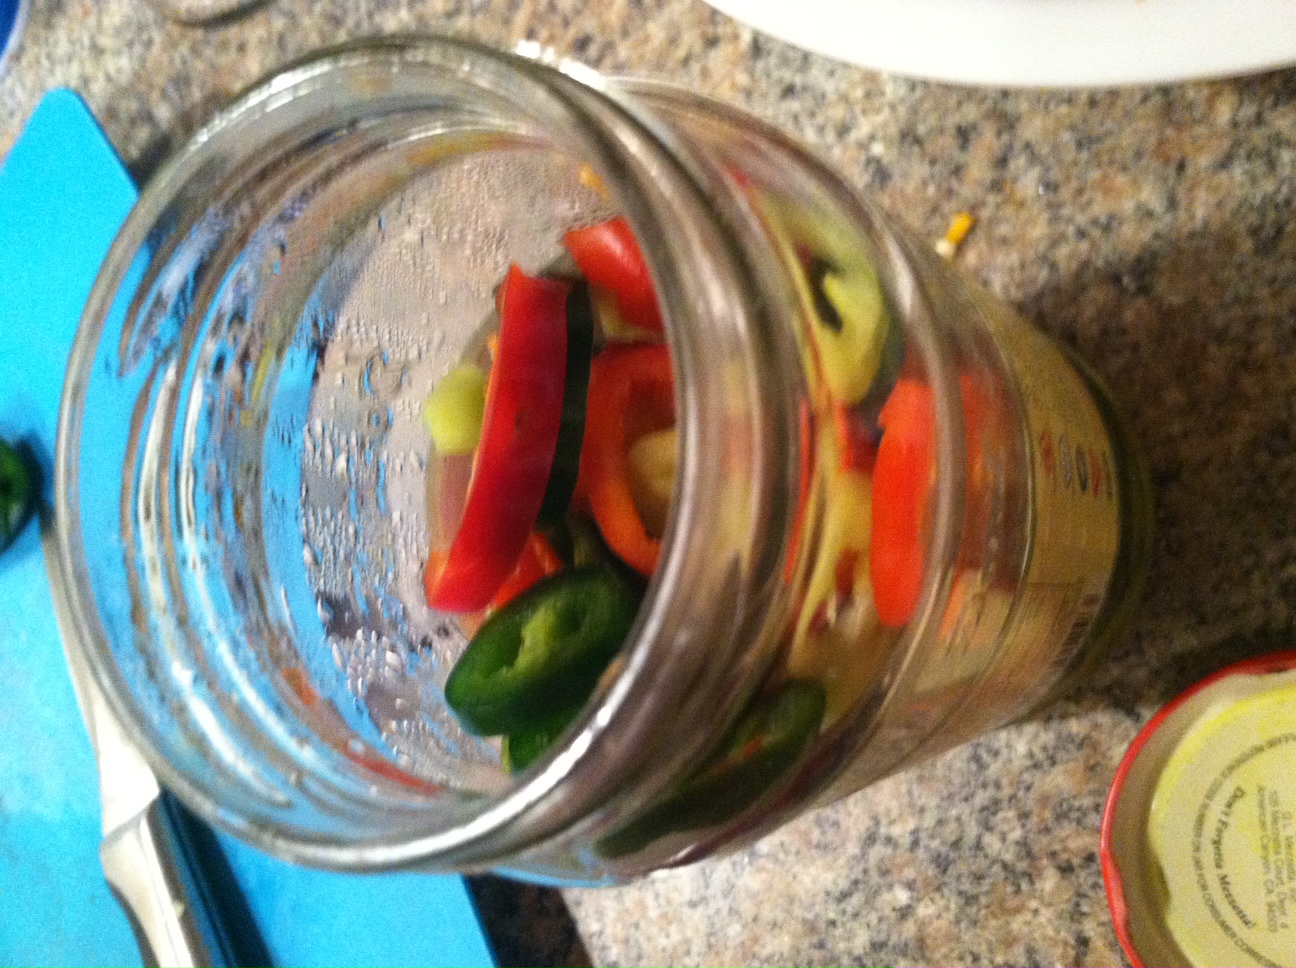
Step 2: Shove all your pepper rings into the jar. Cover with the vinegar about 2/3 full. Pour on the sea salt.

photo 4 copy

Step 3: Add distilled water to the top of the jar, then close it and shake it up, until the salt dissolves. You can of course actually can them, using glass mason jars and steam or pressure canning methods. These processed jars can be stored at room temperature for a longer period of time.

photo 3 copy

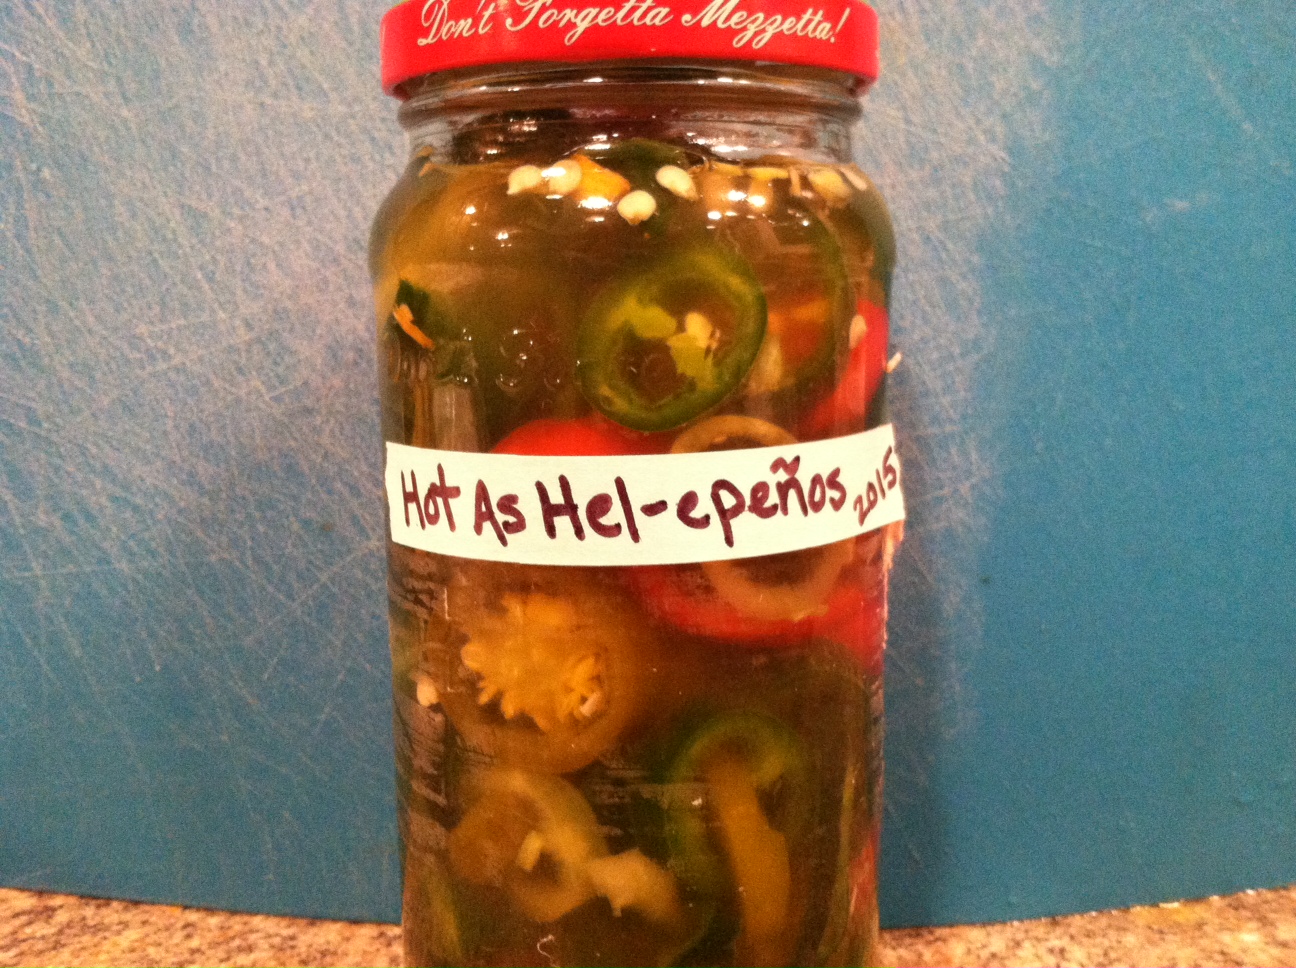
Put the jar in the fridge, and it will be there until you’re ready to use them!

These peppers can make a great little gift, especially if you layer multi-colored peppers in a clear jar. They are quite pretty. These peppers can be eaten as is, on pizza, in soups or chili, and more. It will keep in the refrigerator for several months.

photo 1(1) copy

For a great way to bring back the warm thoughts of summer during the bitter cold of winter, try planning out your garden for spring! Go to websites like Pepper Joe’s Gardening Tips, Hot Pepper Seeds, or the Almanac to find answers to questions, tips on what types of species grow best where you live, organic and heirloom seeds, and more.


[amd-zlrecipe-recipe:38]

The B Vitamins

If you haven’t had a chance yet, go check out my intro article “What are Vitamins” for a short summary of what they do and why you need the various A through K vitamins.

There are many B vitamins, together referred to as the “B complex” often. This is because when vitamins were first being discovered and named, a Polish biochemist named Kazimierz Funk isolated what he called a “vital amine” from blood and named it factor B, as the second such compound which had been discovered.

Later is was realized that what he had isolated was in fact a mixture of several compounds, the B vitamins. Several of these compounds turned out to be for other processes which caused them to lose standing as a “vitamin” (hence the jumping around in the numbering system). As you can see, the history of the vitamin B complex as we know it today was a bit… complex.

—The B Vitamins—

b-vitamins-2

Vitamin B1 — a water-soluble vitamin also called Thiamine, this vitamin is needed to turn carbohydrates into energy, for muscle contraction, for healthy digestion, and to enable nerve signaling. You can get your Thiamine from whole grains, peas, edamame (or soybeans), nuts, seeds, brown rice, eggs, liver, and pork.

Not getting enough thiamine may cause weakness, fatigue, nerve damage, or psychosis. Deficiency is seen most often in those who abuse alcohol. Excess alcohol makes it more difficult for the body to absorb thiamine from food. This can lead to a disease called beriberi. At its most severe, thiamine deficiency can cause brain damage, leading to Korsakoff syndrome or Wernicke’s disease. The same person may develop either or both these diseases. There is no known poisoning linked to too much thiamin consumption.

RDA for adult males = 1.2 mg/day, for females = 1.1 mg/day, if pregnant or breast-feeding = 1.4 mg/day.

Vitamin B2 — a water-soluble vitamin also known as Riboflavin, it is important for releasing energy from carbohydrates, digestion of fats and proteins, red blood cell production, and protection of the nervous system. It can be found in green leafy vegetables (mustard greens, spinach, kale), legumes (peas & soybean), nuts, dairy, fish, meat, eggs, yeast extract, and fortified breads & cereals.

Riboflavin is destroyed by light exposure, so limit storing foods containing this vitamin on the counter in the open. Store them in a closed bread box, cabinet, or the refrigerator instead.  Because many if not most of our bread and cereals are fortified (meaning riboflavin is added to the product) riboflavin deficiency is quite rare. Symptoms include anemia, mouth sores, and swelling of the mucous membranes. There is no known poisoning associated with high levels of B2 intake.

RDA for adult males = 1.3 mg/day, for females = 1.1 mg/day. Slightly higher if pregnant or breast-feeding.

Vitamin B3 — a water-soluble vitamin also known as Niacin or niacinamide in manufactured form, it is found in a variety of foods, including liver, chicken, beef, fish, cereal, peanuts, and legumes, and is also synthesized from tryptophan, an essential amino acid found in most forms of protein. Best sources include organ meats (such as liver, which makes great pasta sauce or heart, which you can stir-fry), venison, whole grains, mushrooms, and yeast.

Niacin can be converted into niacinamide, and these are both precursors of NAD and NADP, important molecules in the process of hydrogen transfer, catabolism of fat, carbohydrate, protein, and alcohol, cell signaling and DNA repair, as well as anabolism reactions such as fatty acid and cholesterol synthesis. A severe deficiency in B3 leads to pellagra, a painful disease characterized by diarrhea, dermatitis, inflammation, and eventual dementia.

RDA = 14 mg/day for women, 16 mg/day for men, and 18 mg/day for pregnant or breast-feeding women.

Vitamin B5 — also called Patothenic acid or pantothenate, is water-soluble. It is required for our bodies to synthesize coenzyme-A (CoA) an acyl-carrier required for the citric acid cycle leading to ATP synthesis, as well as metabolizing proteins, carbohydrates, and fats. This vitamin is found in nearly every food, with avocados, legumes, eggs, meats, yogurt, and whole grains as the largest sources. As a supplement in salt form it may improve oxygen utilization efficiency and reduce lactic acid accumulation in athletes.

Toxicity is unlikely, in fact there has been no established upper limit on this particular vitamin. As well, deficiency is extremely rare and as such has not been thoroughly studied. What symptoms we can observe are similar to other B vitamin deficiencies, including irritability, fatigue, aparthy, numbness, cramps, and hypoglycemia.

Insulin receptors are acylated with palmitic acid when they do not want to bind with insulin. Therefore, more insulin will bind to receptors when acylation decreases, causing hypoglycemia. Additional symptoms could include restlessness, malaise, sleep disturbances, nausea, vomiting, and abdominal cramps.[20]

RDA = varies with age from 2mg/day for children age 1-2 to 5mg/day for adult men and women, with a slight increase to 6-7 mg/day for pregnant or breastfeeding women.

Vitamin B6 — also called pyridoxine, is involved in the process of making several neurotransmitters in the brain, including serotonin and norepinephrine. These chemicals help your brain to regulate happiness and fear. Vitamin B6 is also involved in the formation of myelin, a protein layer that forms around nerve cells.

Mild deficiency of vitamin B6 is common. A more serious Vitamin B6 deficiency in adults may cause health problems affecting the nerves, skin, mucous membranes, and circulatory system, while in children all these as well as the central nervous system is affected. Deficiency can occur in people with kidney failure complications, liver scarring, overactive thyroid, alcoholism, inability to absorb nutrients, and heart failure, as well as those taking certain medications.

Major sources of vitamin B6 include cereal grains (whole wheat, barley, farro), legumes (peas, peanuts, black beans, pinto beans), vegetables (carrots, spinach, peas, and potatoes), milk, cheese, eggs, fish, liver, meat, and fortified or whole wheat flour. Vitamin B6 is often used with other B vitamins in vitamin B complex formulas.

Vitamin B6 has been studied for the treatment of many conditions, including anemia (low amounts of healthy red blood cells), vitamin B6 deficiency, lowering homocysteine levels, certain seizures in newborns, and side effects of the drug cycloserine. Evidence in support of other uses is lacking.

RDA = 1.3 milligrams in men and women ages 19-50; 1.7 milligrams in men aged 51 and older; and 1.3 milligrams in women aged 51 and older. The maximum daily intake of vitamin B6 in adults and pregnant or breastfeeding women over age 18 is 100 milligrams.

Vitamin B12 — also known as Cyanocobalamine, Vitamin B12 is an essential water-soluble vitamin that is commonly found in a variety of foods, such as fish, shellfish, meat, eggs, and dairy products. Vitamin B12 is important in DNA synthesis in every cell in your body. Vitamin B12 is bound to the protein in food. Acid in the stomach releases B12 from protein during digestion. Once released, B12 combines with a substance called intrinsic factor (IF) before it is absorbed into the bloodstream.

Vitamin B12 is frequently used in combination with other B vitamins in a vitamin B complex formulation. The human body stores several years’ worth of vitamin B12 in the liver, so low levels in the body are rare. Decreases in vitamin B12 levels are more common in the elderly, HIV-infected persons, and vegetarians. Inability to absorb vitamin B12 from the intestinal tract can cause a type of anemia called pernicious anemia. Fever and symptoms of “excessive sweating” have been reported with anemia due to low levels of vitamin B12; however, these are fixed with vitamin B12 treatment.

For vegetarians or vegans, it is important to know that B12 is found exclusively in animal products, and you are at risk of mild deficiency. Based on how strict your diet are, there are some non-meat options: eggs (1 chicken yolk gives 6% RDA, while goose or duck eggs contain higher levels), cheeses (Swiss has the most), whey powder (100g provides over 40% RDA), milk or yogurt (8-20% RDA per cup), and yeast or yeast extracts (such as Marmite or nutritional yeast). Of course, fortified foods and supplements also help. If you are concerned, please contact your health care provider or a nutritionist for a plan that’s right for you.

Recommended dietary amounts (RDAs) are 2.4 micrograms daily for ages 14 years and older, 2.6 micrograms daily for pregnant females, and 2.8 micrograms daily for breastfeeding females.

Folic Acid — also known as Vitamin B9, folic acid is naturally found in many foods, and folic acid is the synthetic form. Foods naturally high in folate include: leafy vegetables (such as spinach, broccoli, and lettuce), okra, asparagus, fruits (such as bananas, melons, and lemons) beans, yeast, mushrooms, meat and organ meat (such as beef liver and kidney), orange juice, and tomato juice.

Some conditions may increase your need for folic acid. These include:

  • Alcoholism
  • Anemia, hemolytic
  • Diarrhea (continuing)
  • Fever (prolonged)
  • Hemodialysis
  • Illness (prolonged)
  • Intestinal diseases
  • Liver disease
  • Pregnancy
  • Stress (continuing)
  • Surgical removal of stomach

Some studies have found that folic acid taken by women before they become pregnant and during early pregnancy may reduce the chances of certain birth defects (neural tube defects). Claims that folic acid and other B vitamins are effective for preventing mental problems have not been proven. Many of these treatments involve large and expensive amounts of vitamins. It is always best to get the majority of your daily vitamins from foods, such as by eating a large salad full of leafy greens before each meal.

RDA = children 75-400 mcg/day, Adults 150-400 mcg/day, pregnant fenales 400-800 mcg/day, and breastfeeding females 260-800 mcg/day.


Hopefully this has helped clear up a little bit of the confusion surrounding the illustrious B complex, and you have learned a little bit more about your body and what it needs to function at its best. These are some of the many reasons why your mom always told you to “eat your vegetables”, why Popeye was so empowered when he ate spinach, and why vegetables consistently rank at the top of ways to lose and maintain weight loss over time.


Disclaimer: I am not a licensed health care professional nor a registered dietitian. This article is intended to be informative and perhaps entertaining. I am not dispensing health advice or instruction. Consult your own health care professional and conscience before making any decisions regarding your diet and general health.