Category Archives: Vegetarian

Veggie Packed Pasta Sauce


Pasta sauce is one of my absolute favorite things to pack extra veggies into!  Any time you have a sauce, chili, soup, or stew, is an excellent opportunity to be sneaky healthy.  By blending things in, no one knows they are there, yet you are giving the people eating the meal extra doses of fiber and vitamins.  There’s no reason not to!

The best things for blending in include beans, greens, and carrots.  Beans thicken the sauce because of their natural fiber content.  Greens may change the color a bit, so keep that in mind.  And carrots provide a slight sweetness while not affecting the overall color very much.  Keep in mind with carrots, you must cook them first so they soften before trying to blend them in, or juice them.

In this sauce, I went really bold and added some spinach as well as a half bag of frozen carrots and peas I had left from a previous meal.  To this I added a full can of stewed tomatoes, and 1/2 cup milk.  Simmering everything together makes it soften, and then if you have eaters that won’t tolerate chunks, pop half or all of it into a blender before serving.

Ingredients:

  • 1 package frozen spinach, thawed
  • 1 can stewed diced tomatoes
  • 1/2 bag frozen carrots & peas
  • 1/2 cup milk

Sneaky healthy pasta sauce

Step 1: Thaw the spinach, and squeeze out extra water.  Put in a pan with the peas and carrots, and cook, stirring often, for about 15 minutes or until carrots have softened.

Rigatoni with spinach pasta sauce

Step 2: Add the tomatoes and milk, and cook another few minutes.  Puree in a blender.  You can further cook it down to thicken the sauce, or serve as is.

I added some crumbled cooked bacon and sprinkled on Parmesan cheese, but if you serve as is this is a perfect vegetarian meal.  You can see what I mean about the greens changing the color of the sauce.  If that is a problem, just start with very small amounts of greens, maybe just a handful of spinach rather than the whole package.


Mom’s Special Cranberry Sauce


With Thanksgiving just around the corner, I am getting ready for cooking up all the associated goodies.  If you are lucky enough to have a mom, aunt, grandmother, etc who has special family recipes that have been passed down over generations, do yourself a favor and start to learn those recipes.  Instead of watching cartoons or football, get into the kitchen and help out.  You never know when it will be your turn to feed yourself, your family, or your whole neighborhood.

This recipe is passed down from my fiancee’s mother.  It is hands-down his favorite Thanksgiving dish, so much so that his mom usually makes a double recipe just so he can have one whole batch to himself.  I also doubled the recipe, and it was still all gone within two days.  You can easily multiply this recipe to make as much as you need, this makes about 10 cups of sauce.

It is a perfect blend of tangy cranberry and sweet from the sugar.  The orange juice and orange peel gives it a nice depth of flavor, and you can adjust the other spices such as cinnamon, nutmeg, clove, allspice, etc to your own liking.

IMG_6402

Ingredients:

  • 1 can crushed pineapple
  • 1 cup white sugar
  • 1 cup brown sugar
  • 1 16 oz bag cranberries
  • 1 cup orange juice
  • 1/4 cup grated orange peel
  • 2 tbsp cinnamon

IMG_6403

Step 1: Put the orange juice in a pan and bring it to a boil.  Rinse the cranberries and add them to the pot.

IMG_6407

Step 2: Add the sugars and the entire can of crushed pineapple.

IMG_6406

Step 3: Then add the spices.  You might want to make sure you use a pot that will be big enough to hold everything…

IMG_6404

Step 4: Grate the orange peel.  Try not to get any white pith in there. Add it to the pot,  mix well.

IMG_6419

Step 5: Simmer for at least 1 hour, until the cranberries begin to burst and liquefy.  It will thicken as you cook it down, and will thicken even more upon cooling.

This stuff is so good, I don’t even have a picture of the finished product! The recipe is great for doubling or tripling, and freezes well.  This can easily be made up to a month ahead of time, and simply reheated the day of, for an easy time-saver.

Eggplant Parmesan


Ah, gardening debates. Every gardener most likely has very strong optionions on which heirloom tomato variety is tastiest, easiest to grow, produces the most. Which plants grow best together, which can help attract pollinators or repel pests. Who has the hottest pepper, the most productive beans, the biggest gourds. A question I chose to tackle this summer:

Which is better, purple or white eggplant?

Having never heard of white eggplant before now, this is a question entirely new to me. But as it turns out, eggplants used to come in only white, which is how they got their name. The small, white fruits growing on the vines looked like eggs hanging down. It is only recently that the purple cultivars became much more popular and well-known, such that when you think of eggplant you likely only think of the purple kind.

eggplants

To decide the answer to this question, I decided to make some eggplant parmesan. This is a dish which many of my relatives have long loved, but I turned up my nose at the very thought. As I’ve grown older and my taste buds expanded, I decided to give this classic another try.

Everything tastes better to me when I’ve made it myself. And if it isn’t half bad, then I’ll give restaurant versions a second shot as well.

Ingredients:

  • 1 purple eggplant
  • 1 white eggplant
  • 2 eggs, beaten
  • 1 cup flour
  • 1 cup breadcrumbs or crushed crackers
  • Olive or vegetable oil for frying

IMG_1515 - Copy

Step 1: Rinse the eggplants and cut off the spiny stem and bottom parts. If you like, peel the white eggplant. I did not. Cut into 1/2-inch thick slices. (I also saved the seeds. Cause that’s how I roll.)

IMG_1516 - Copy

Step 2: Dip the slices into flour and coat on all sides. Then dip into the egg, and again coat all sides. Finally roll it in the breadcrumbs or crackers. Place enough oil in a frying pan to coat the bottom and heat to about medium.

IMG_1517 - Copy

Step 3: Place the slices in the oil, and fry about 5-7 minutes on both sides. You want a nice crispy coat and a fully cooked interior without burning the outsides. Put on a plate to cool.

IMG_1519 - Copy

To go with the eggplant, I made some pasta and used my homemade pasta sauce I canned. I added a tbsp of turmeric to the sauce for additional antioxidant effects and nutrition. Hence the vibrant yellow color.

IMG_1518 - Copy

This was super tasty, and both the fiancée and our guest said it was the best eggplant parm they’ve had.

As for which is best? Turns out they were both delicious!

[amd-zlrecipe-recipe:45]

Do you have an opinion on white versus purple eggplant? Is there an eggplant recipe you’d love to share? Tell us more in the comments!

How to Make Oven-Dried Tomatoes


Since between my own backyard garden and my generous neighbor who has a football-field-sized garden I still had a bumper crop of tomatoes, even after canning oodles of quarts and pints of sauce and tomato broth and salsa, I decided to try my hand at oven-dried tomatoes packed in olive oil.

Dried tomatoes in olive oil are delicious little flavor bombs to add to garlic bread for a simple bruschetta, toss into salads or pasta, or top a pizza. The oil itself can also be used in salad dressings or anywhere tomato-flavored infused oil would be tasty. Very popular in the Mediterranean region such as Greece and Italy, this preservation method has been around for a very long time, and I had bags of romas just begging to be bathed in high quality oil that was on sale.

IMG_1544

But a jar can be quite pricey, up to $10 in the supermarket. It is far cheaper to can your own! You must invest in the jars and good-quality oil, but it is worth it for the superior taste and nutrition of using local tomatoes, and you can re-use jars forever.

All you need is some wire racks, an oven, and some time. If you have the oven on anyways, to make a roast or cookies, or perhaps to heat the house in the chill of autumn, this is the perfect project. This oven heat is conducive to drying many things, so you could also make a platter of dried apples or sweet potato chips at the same time.

There is some debate over the safety of dried tomatoes and botulism risk. It is possible that small droplets of water may stay inside the tomato and provide a medium for botulism or bacterium to grow. Obviously read up on facts and use your own best judgment when deciding whether to refrigerate, process, freeze, or store at room temperature. This article is not advice, just what I chose to do in my own kitchen with my own produce.

Ingredients:

  • 40-50 tomatoes, Roma are the best for drying
  • 2 wire racks (cookie sheets work too, you’ll just have to flip them halfway to make sure they dry on all sides)
  • 2-3 cups extra virgin olive oil
  • 1-3 canning jars, lids, & rings

IMG_1529

Step 1: Cut the tops & cores out of the tomatoes, slice them in half, and push out as many seeds as you can with your fingers or a knife. Save the seeds for planting, drink them, use in a soup, or compost.

IMG_1530

Step 2: Place the tomato halves on a wire rack or baking sheet, cut side up, and put into the oven at 200 degrees. Crack the door open if  you don’t mind the heat to allow more air circulation. Let them dry for 1 hour, then flip them if using baking sheets and check the dryness levels.

IMG_1543

Step 3: Take the completely dry tomatoes and begin packing them into sterile mason jars. The tomatoes are ready if they are rubbery with absolutely no water when squeezed, but you don’t want them so dry they are crunchy with no give. If you choose to use a vinegar dip, use tongs to dip each tomato prior to placing in a sterilized jar.

IMG_1545

Step 4: Pour in olive oil to cover the tomatoes. Make sure they are completely covered. If you feel okay with it, you can now store your tomatoes this way in a dark cabinet, or in the refrigerator.

IMG_1546

You may also choose to water-bath or pressure can your jars at this point. Totally up to you.

IMG_1547

These little jars will store for about 2 weeks in the refrigerator, and potentially up to a year in the cupboard if processed. They make lovely presents, if you can bring yourself to part with them. I recommend putting them somewhere easily accessible as you are likely to want to use them all up within days.

For ideas on how to use these, start here:

Check it out on Pinterest: https://www.pinterest.com/pin/350506783478334749/

How to Can Homemade Pasta Sauce


Since moving to Connecticut, we have slowly made friends with the neighbors. We are lucky enough to live in a pretty safe and quiet area, where the people are very kind and welcoming. My good fortune is knowing a guy named Tony, a few houses down the street, who gardens for his health.

Now, there are lots of well-known reasons why gardening is good for the body and soul. Being out in nature brings a sense of peace and calm, helps relieve stress and lower blood pressure, and may boost your immune system. Having home-grown fruits and vegetables enables healthier food choices and better nutrition, while keeping you active and exercising. All those hours of digging, planting, weeding, tending, picking, and preserving burns serious calories and keeps you toned and limber.

Not to mention the fact that gardening can save you serious cash! Just buy the seeds and materials once (better yet, swap seeds with other local gardeners for better-adapted produce, and save your own seeds for next year!) and you can garden for free almost forever. It is easy to find local, free sources of soil amendments like fertilizer and mulches if you ask around and get creative.

Tony takes this to a new level! His garden is literally the size of a football field, all out in his large 2-acre New England backyard. He and his wife single-handedly till, plant, weed, and tend this garden every year. His wife tells me that he has even shrunk the garden a little this year, due to time constraints and health issues, so the garden used to be even larger before I knew about it. Amazing.

IMG_1511 - Copy

Tony says his favorite thing about the garden is the sense of community. Everyone on the block knows Tony, and knows they can come by anytime to pick a bag full of produce to take home. His garden produces far more than he and his family alone could enjoy, so he gives freely to everyone around him.

This is the beauty of gardening. You make friends, share food, recipes, and stories, and build a true community.

Needless to say, I was hooked.

By mid-August, I had my kitchen table and counter literally covered in tomatoes, and needed to finally take the time to do something with them all. A large batch I simply cut into quarters and put in gallon freezer bags. They will sit in the freezer until I need to make a soup or chili; then I will thaw them, and the skins will fall right off, and I can use them in whatever recipe is on my mind.

Another large portion goes into cans as sauce to rest in the pantry until it’s pasta night. Tony shared his “lazy Italian” way of making sauce, which saved me tons of work and hours in the kitchen!

The typical way of making sauce is to boil the tomatoes briefly, then submerge in ice water. This makes the skins easy to remove. You then separate the seeds and skin from the inner flesh, and cook down for hours until it thickens into a sauce.

IMG_1514 - Copy

This cooking down process makes the house smell amazing, and warms it up on a chilly day. But this also takes a lot of time, and energy from the stove. I’m a fan of the new “lazy” way, and the sauce tastes just as good! So pull out your blender, and lets get started!

This recipe will make about 5 quarts of sauce.

Don’t add the spices if you want a plain tomato sauce, or change up the spices to whatever you want in the end product. This does use the water-bath canning method, read up on all possible dangers of canning or use a pressure canner if you are unsure.

Ingredients:

  • 8-10 pounds assorted tomatoes
  • 5-6 canning jars, lids, & rings
  • Per jar:
    • 1 tbsp dried onion
    • 1/2 tbsp dried garlic
    • 2 tbsp basil
    • 2 tbsp parsley
    • pinch of salt
    • 1 tbsp vinegar
  • Blender
  • Strainer
  • Cheesecloth or coffee filters

IMG_1426

Step 1: Sterilize your jars by boiling for 5 minute,s or run them through the dishwasher. To each jar add the spices for the sauce. I also chose to add one whole tomato just diced to each jar, because I like a little texture in my sauce. You can skip that step and just add the pureed tomatoes.

IMG_1427

Step 2: Wash all your tomatoes, and cut out the middle hard part & stem. Remove any brown or black spots or mushy areas. If you want to and have time, you can remove the seeds (and save them for next year!).  Cut the tomatoes into quarters.

IMG_1512 - Copy

Step 3: Put the tomatoes into a blender, and blend in batches. My blender can handle about a dozen large tomatoes at a time. You may need to squish some juice out of them to get the blender going at first.

IMG_1513 - Copy

Step 4: Line a strainer over a large pot with coffee filters or cheesecloth. Pour the tomato puree into the strainer and let it sit. You can wait a few hours, or leave it over night if you have a lid. This lets most of the watery juice drip out, leaving the thicker sauce on top. Saves you the hours of boiling down, and now you can keep the tomato water too!

IMG_1438

Step 5: Pour your separated sauce and tomato juice into prepared jars. Wipe the rims and put on the lid and ring. Process in the water bath for 35 minutes (adjust for altitude). Remove the jars to a cloth and let them cool 8-10 hours.

The jars are ready if you hear the “pop” of the lids seal, or if when you press down in the middle the lid does not spring back. Any jars that do not seal, put in the refrigerator and use within a week, or process them again.

The tomato broth that filters out is like liquid gold, and will be great as a base for soups and stews, or you can freeze it in ice cube trays to cook veggies in instead of using oil. The sauce will bring back the taste of summer later on in the dead of winter.

And this is how I processed and preserved about 50 pounds of tomatoes in two days time!

And it is so easy. As long as you use vinegar or lemon to acidify the tomatoes and broth, they are perfectly safe to water bath can at home. Enjoy preserving your bounty. Do you have more tomatoes than you know what to do with?

More things you can do with tomatoes:

Do you can or preserve? Have any other ways to save tomatoes? Tell us about it in the comments below.

Mushroom & Asparagus Barley Risotto


As summer is winding to a close, I am still in denial.  I don’t want to let go of the beautiful unfolding of spring, the delicate greens and fragrant blossoms, the heavy fruits ripening on the vine, the cornucopia of riotous color at the farmer’s market.  Spring and summer make this farm-loving, healthy-cooking, veggie-eating foodaholic girl’s heart sing.

IMG_8532

So when I saw some end of season asparagus and some shiitake mushrooms on sale, I had to nab them.  For a fleeting taste of spring, summer & autumn all rolled into one, this risotto is earthy and vegetal, and completely delicious.

And the best part is, if you use canned mushroom & frozen asparagus you can make this all year round!  A well-stocked fridge/freezer/pantry can bring any season to your plate.

Ingredients:

  • 1/2 pint chopped mushrooms
  • 1/2 pound asparagus
  • 1 cup barley
  • 2 cups chicken stock or water
  • Optional add-ins: diced tomato, garlic, onions, spices to taste

IMG_8531

Step 1: Rinse your asparagus and wipe off any dirt from the mushrooms. Dice them into bite-sized pieces.

IMG_8534

Step 2: Put the barley in a pan with 1 cup of stock or water. (This can be vegan if you use vegetable stock or water in place of the chicken stock). Bring to a boil, and then simmer.

IMG_8535

Step 3: Let the barley cook, watching the liquid level. When it gets low, add a few more tbsp of stock and stir. Continue for 20-25 minutes, until barley is chewy and nearly cooked through. Add the diced veggies for the final 5-10 minutes of cooking.

IMG_8536

At this point, you can season to taste, I only used a little garlic salt. This tastes amazing on its own, or you can add any of the option mix ins suggested, or anything else you happen to have laying about.

IMG_8538

This recipe makes about 2 cups worth of risotto, enough for 4 small side dish servings or two full meals.

[amd-zlrecipe-recipe:39]


Nutrition Facts
4 Servings
Amount Per Serving
  • Calories 246.8
  • Total Fat 2.2 g
  • Saturated Fat 0.5 g
  • Polyunsaturated Fat 0.6 g
  • Monounsaturated Fat 0.8 g
  • Cholesterol 3.6 mg
  • Sodium 178.2 mg
  • Potassium 399.9 mg
  • Total Carbohydrate 49.8 g
  • Dietary Fiber 9.3 g
  • Sugars 3.8 g
  • Protein 9.3 g
  • Vitamin A 4.2 %
  • Vitamin B-12 0.0 %
  • Vitamin B-6 15.2 %
  • Vitamin C 8.0 %
  • Vitamin D 0.0 %
  • Vitamin E 3.9 %
  • Calcium 2.6 %
  • Copper 32.9 %
  • Folate 17.0 %
  • Iron 10.8 %
  • Magnesium 13.9 %
  • Manganese 41.1 %
  • Niacin 25.7 %
  • Pantothenic Acid 15.0 %
  • Phosphorus 17.2 %
  • Riboflavin 15.5 %
  • Selenium 44.6 %
  • Thiamin 13.2 %
  • Zinc 12.5 %
*Percent Daily Values are based on a 2,000 calorie diet. Your daily values may be higher or lower depending on your calorie needs.

Preserving Hot Peppers


Peppers are probably the kind of plant which has most wow-ed me with its prolific seeds. Every time I crack open a bell pepper to make stuffed peppers, or hollow a jalapeno to make poppers, there are mounds of seeds inside. Even in the tiniest pepper, there are likely more seeds than you can count on just your hands.

Pro tip: you can save these seeds and dry them out, and then plant your own pepper garden! Just one jalapeno may produce dozens of plants. Yes, even peppers you buy at the grocery store. Just cut the stem side off, scrape the seeds away from the ribs inside, and dry them on a piece of paper. Store in a cool dark place until you’re ready to plant outside or in a container.

photo 1(1)

Another thing that is amazing about peppers is the sheer variety. From the mild sweet bell pepper to the jalapeno, habanero, or even the ghost chili, there are literally thousands of varieties. Peppers can spontaneously mutate, so even if you save seeds year to year, you can get new color patterns or heat levels. The amount of water and sun, location and type of soil can also affect the peppers.

I’ve been trying, for the past few years, to get more brave about cooking and eating spicier foods. The chemical that makes peppers taste hot & spicy is most often capsaicin. This compound irritates mucous membranes and causes inflammation, and pain if in too high a dose. However, capsaicin also has many health benefits for your heart, blood pressure, anti-diabetes, and more.

photo 4

One of the ways I’ve found to incorporate more spicy foods into my cooking is by using jarred jalapenos. These little guys store forever, and add a bit kick to pizza, salads, sandwiches, chili, pasta, and more. I’ve bought jalapenos in a jar at the store, but this year I had access to an heirloom Italian jalapeno variety, as well as several others like cayenne, poblano, and red cherry peppers.

Thus, I needed a way to use them all up. As state, peppers are very prolific. On one plant, I’ve seen nearly 100 peppers, if the fruit is tiny. No joke.

So given all the health benefits, and the fact that I cannot use them up fast enough before they spoil, jarring seemed like the best way to preserve the summer’s spicy bounty. Turns out, they are ridiculously easy to make. Just look on a jar of peppers at the store, you will see there is likely fewer than ten ingredients. This homemade version needs three.

You can of course can hot or regular peppers, but you must use a pressure canner, not a water bath. There are significant botulism risks if you do not use a pressure canner. However, by adding vinegar, you are effectively pickling the peppers. This prevents harmful bacterias and other nasties from growing. I also store mine right in the fridge.

photo 2(1) copy 2

Ingredients (this makes about a pint):

  • 1-2 cups of peppers (all one kind or a variety)
  • 1/2 cup white vinegar
  • 1 tbsp sea salt

photo 2(1)

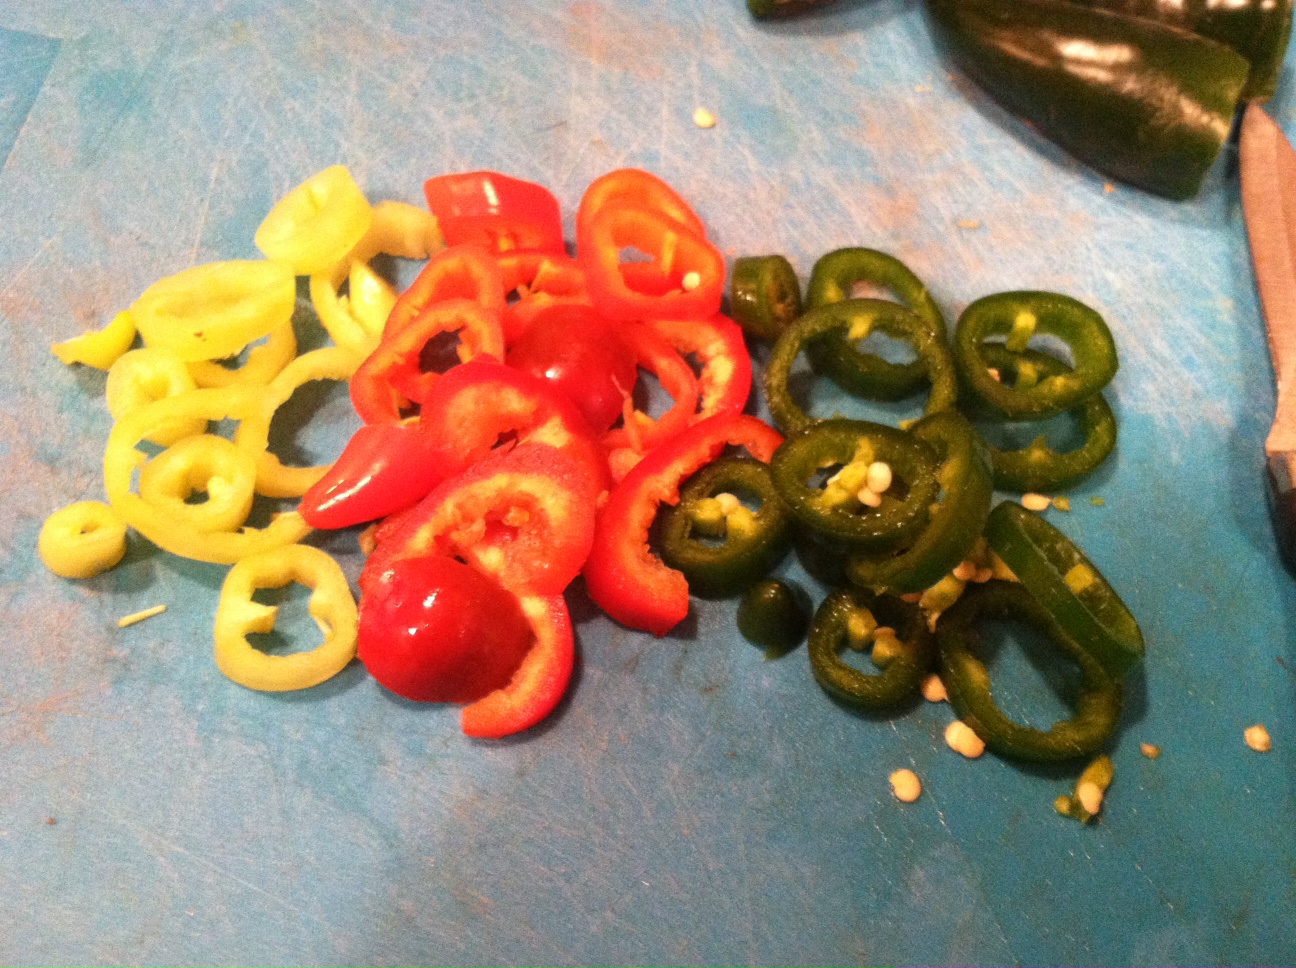
Step 1: Cut the tops off the peppers, then cut down the side ribs and pull out the seeds. Leave the seeds in if you want it extra spicy. Also, it is highly recommended to wear gloves while cutting hot peppers! I made the mistake of not wearing gloves the first time, and my hands were on fire for days.

photo 1(1) copy 2

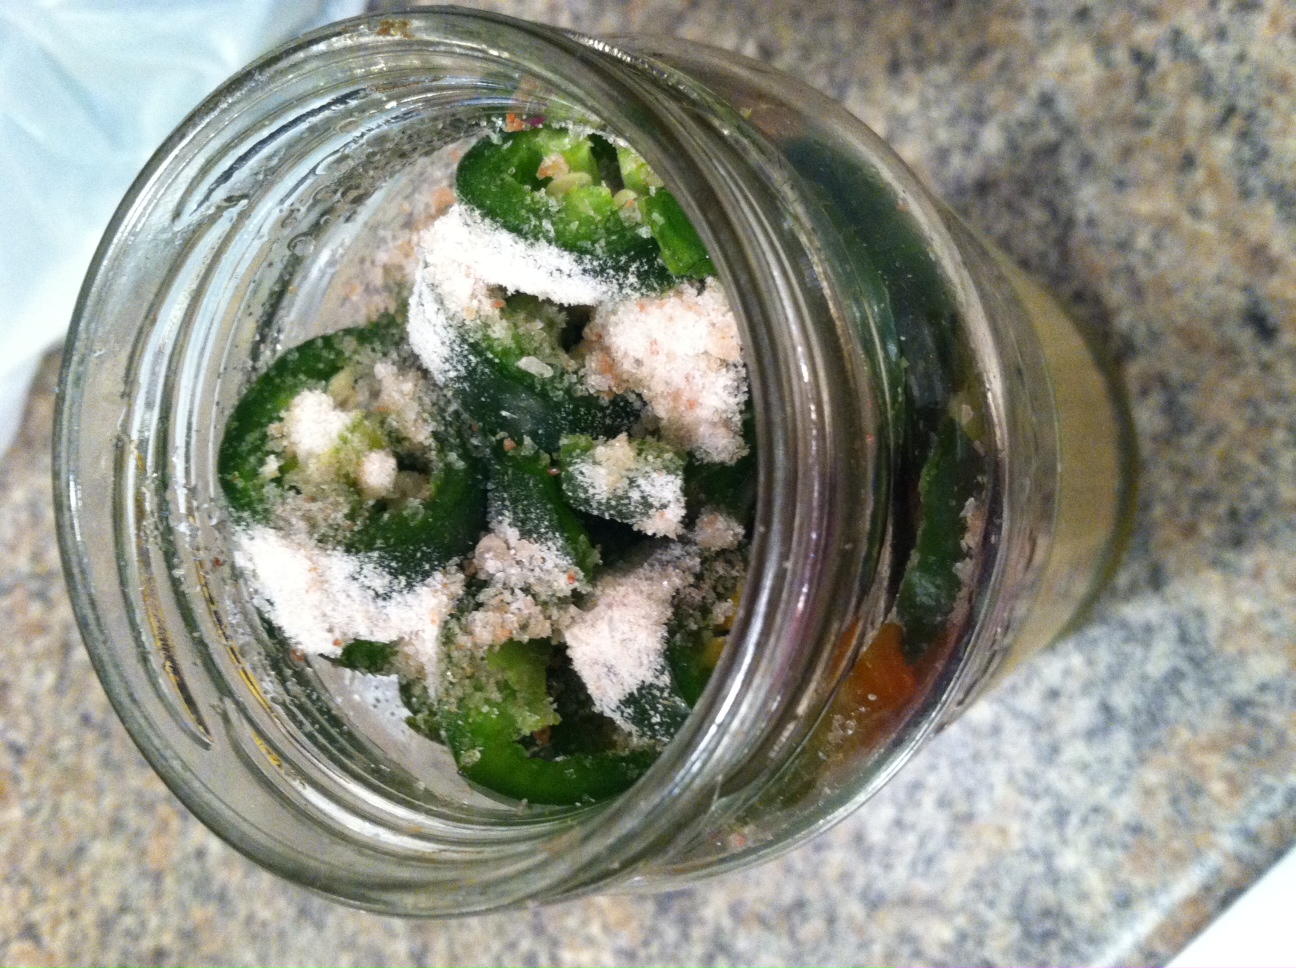
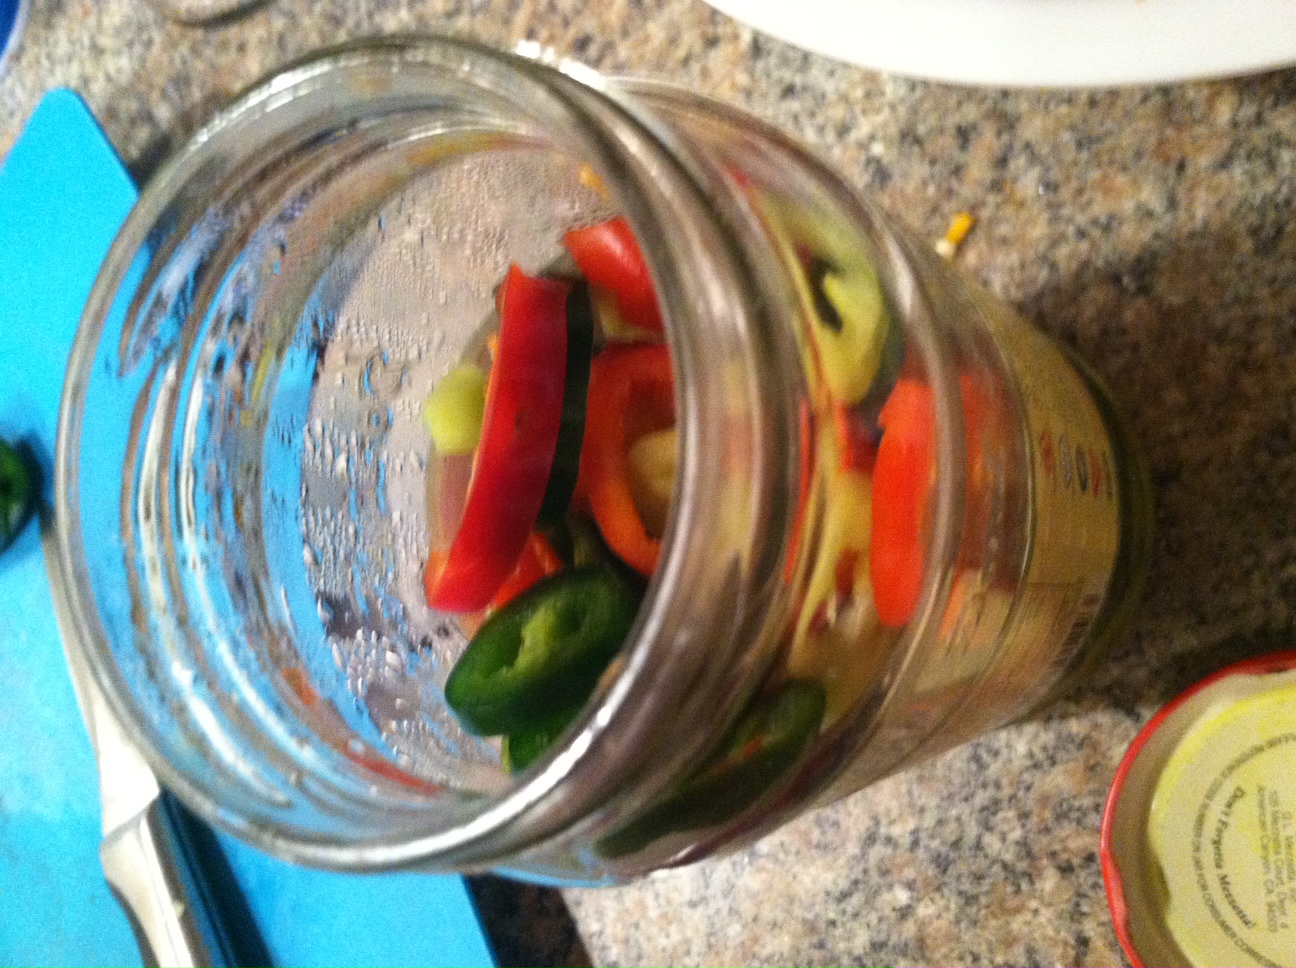
Step 2: Shove all your pepper rings into the jar. Cover with the vinegar about 2/3 full. Pour on the sea salt.

photo 4 copy

Step 3: Add distilled water to the top of the jar, then close it and shake it up, until the salt dissolves. You can of course actually can them, using glass mason jars and steam or pressure canning methods. These processed jars can be stored at room temperature for a longer period of time.

photo 3 copy

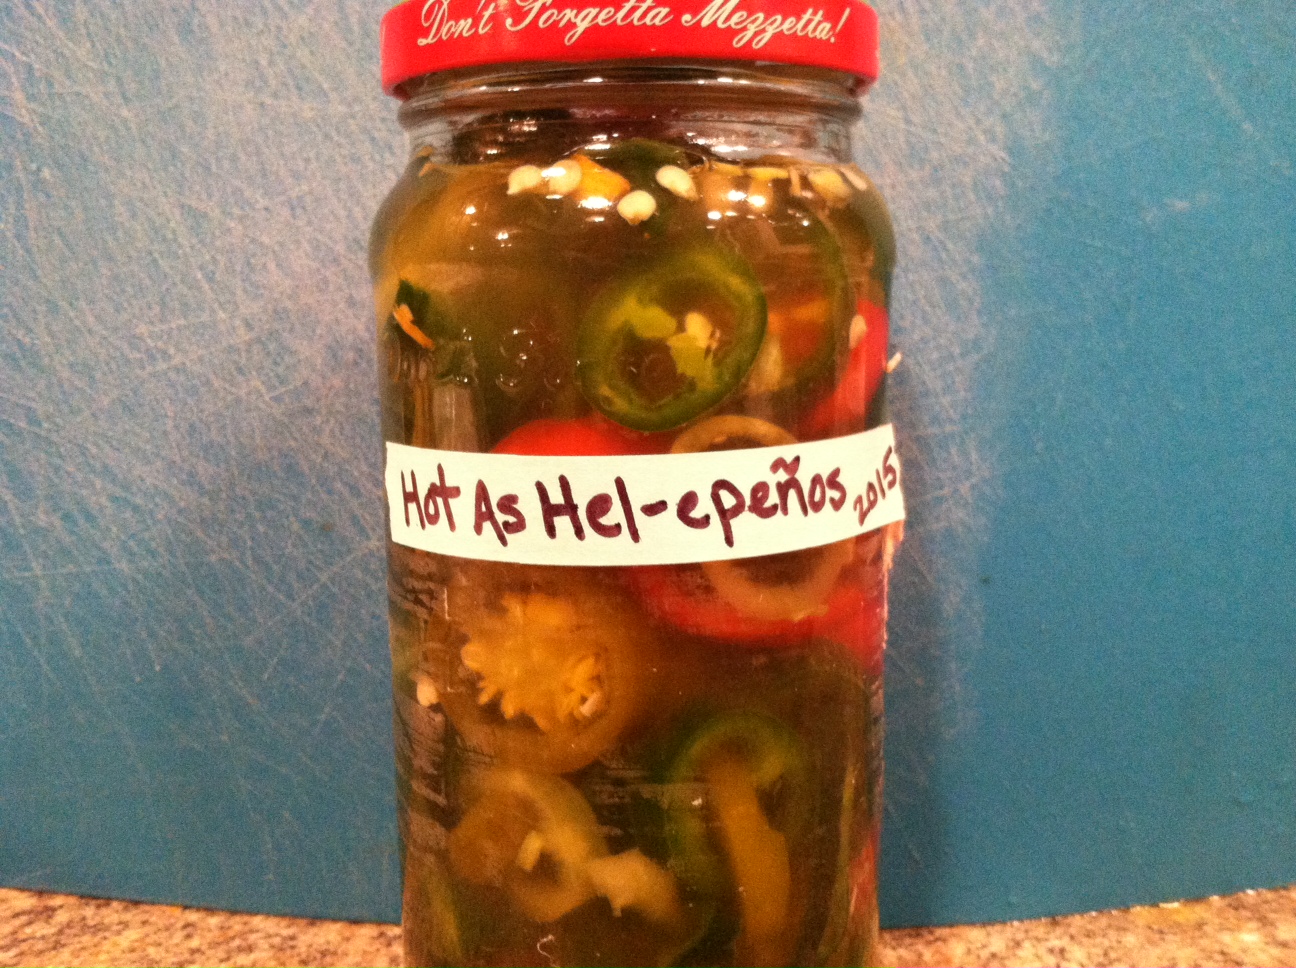
Put the jar in the fridge, and it will be there until you’re ready to use them!

These peppers can make a great little gift, especially if you layer multi-colored peppers in a clear jar. They are quite pretty. These peppers can be eaten as is, on pizza, in soups or chili, and more. It will keep in the refrigerator for several months.

photo 1(1) copy

For a great way to bring back the warm thoughts of summer during the bitter cold of winter, try planning out your garden for spring! Go to websites like Pepper Joe’s Gardening Tips, Hot Pepper Seeds, or the Almanac to find answers to questions, tips on what types of species grow best where you live, organic and heirloom seeds, and more.


[amd-zlrecipe-recipe:38]

Creamy Tomato Basil Soup


For those who do not know, late summer is when the garden bounty is rolling in, including tomatoes and herbs like basil. Home gardeners are likely giving away baskets of fresh veggies and herbs to friends, family, and neighbors. Those who know how and have the time & inclination are putting up the excess for the long, cold winter ahead by canning, drying, and freezing.

basil (1)

I planted a few basil seeds in late April, and had no idea they would take off so well! They were tiny seedlings when I had them in a pot in the window, but when I put them outside they just flourished! Now I have a basil bush just outside my front door. It is wonderfully convenient to just run out and grab a few leaves.

This tomato soup recipe is stunningly simple. Don’t let its simplicity fool you though, it is also amazingly delicious. There is nothing quite so amazing as fresh, local produce simply prepared. Orange goo in a can doesn’t even come close.

With only 3 ingredients, this soup is so easy a five-year-old could probably make it. And, honestly, you don’t even need the basil, you can just make a simple creamy tomato soup by leaving it out. I added it because you can only eat so much pesto in one week. 🙂

tomato (2)

And the final bonus, it is both vegetarian and vegan, as well as gluten free! If you just blended it all, I bet it could be made raw too! It is very healthy, as well as Paleo and Mediterranean. There isn’t a diet I know of on which you cannot eat this soup. If you don’t have or don’t like coconut milk, you can omit it for a regular tomato soup, or use cows milk, almond milk, etc instead.

photo

Ingredients:

  • 1/2 can coconut milk (6-7 oz)
  • 4-5 large ripe tomatoes
  • Handful of basil leaves
  • Optional: olive oil, salt & pepper

photo 1

Step 1: Open the coconut milk and mix it up with a spoon. Pour half into a pot and begin heating. Dice up your tomatoes into quarters and add to the pot. Bring to a simmer, and cook for 10-12 minutes.

photo 2

Step 2: You can stop here if you don’t mind your soup a little chunky and don’t want to add basil, it has a nice rustic texture at this point. Would be great served with some whole-grain bread. But if you want it creamy and smooth, pop it into the blender and give it a whirl.

tomato (1)

Step 3: Add the handful of basil, and blend again.

tomato (4)

(Note: be sure to have the lid on the blender firmly. Otherwise, you end up with a hot, orange mess all over your stove. Not that I would know from experience…)

tomato (3)

Pour your hot, finished creamy tomato soup into 2 bowls, top with sea salt & black pepper and a drizzle of olive oil if you like. This makes a little less than 1 quart of soup, and can easily be doubled to use the whole can of coconut milk. Simply add more tomatoes.

Enjoy!

[amd-zlrecipe-recipe:37]

Sweet Potato & Eggplant Vurgers


Veggie burgers have so much more potential than a frozen patty of flour, preservatives, and mushy veggie starch. I’ve written previous articles on making burgers out of pinto beans and quinoa, or incorporating broccoli slaw. A veggie burger is as simple as some cooked vegetables and some thing(s) to bind everything together into a patty.

IMG_8822

This recipe combines some of end-of-summer stars and healthy whole grain oats into a sweet and tasty patty that can be eaten on its own, in a bun or wrap, or over a salad of greens or grains. As always, substitute in whatever other veggies you have and like for those you don’t have or enjoy.

IMG_8818

Ingredients:

  • 1 small-med eggplant
  • 2 medium sweet potatoes
  • 1/2 red onion, diced
  • 1/2 cup shredded radishes
  • 1 cup whole oats and/or flour
  • 2 tbsp spices of choice
  • 1/4 cup olive oil

IMG_8819

Step 1: Dice up the eggplant, onion, and sweet potato. Peel the sweet potato if you don’t want pieces of peel in your burgers. You can pre-boil the potato if you want it to cook faster, or you can put it into a pan with a lid and slow-cook prior to adding the eggplant and onion. Cook all veggies until soft enough to mash with a fork.

IMG_8821

Step 2: In a large bowl, mash all the veggies together with a fork or potato masher. Add the oats & shredded radish, and mix until it begins to become sticky, such that you can shape patties from it. You can also add an egg if you need extra binding.

IMG_8823

For spices, I added in some garlic salt, paprika, and black pepper.

IMG_8824

Step 3: In a frying pan, pour the oil and heat it to medium. Shape the patties into small rounds with your hands. Fry the patties a few at a time, making sure they aren’t touching. Fry until crispy and brown, about 5-6 minutes each side.

IMG_8825

Step 4: Place the patties on a wire rack or paper towels to drain extra oil off the patties.

IMG_8827

You can use these just as you would a regular burger and top with pickles, lettuce, tomato, hot peppers, ketchup, mayo, etc.

IMG_8829


Lean Green Tuna Salad


We all have hectic days where we just don’t have time to pack a lunch with heart-shaped cheeses, individually peeled grapes, and 3-4 servings of vegetables included. Whether for yourself or some back-to-school young’uns, packing so many lunches all year long can get tiresome.

But don’t give up! As stated over and over again in financial writing, bringing a lunch is nearly always cheaper than a similar meal out at a restaurant, or even “fast casual” food places. While articles like the Simple Dollar point out that there is a large margin of what a brown bag lunch may cost, just keep track yourself for one week and you will soon see.

Even if you have the smallest of fast-food options (maybe half a $6 sandwich, and half the next day, for a total per day of $3, not including any drinks or extras), it is easy to create incredibly cheap meals for yourself at home, or even pack lunches which you can assemble wherever you are when it’s time to eat. Sometimes for even less than $1 a day!

IMG_0579

And with a little creativity, you can create these easy, cheap meals, and actually make them healthy too!  We’re talking several levels above ramen noodles, folks. Just check out my “less than 5” section for a plethora of ideas.

More ideas:

IMG_0574

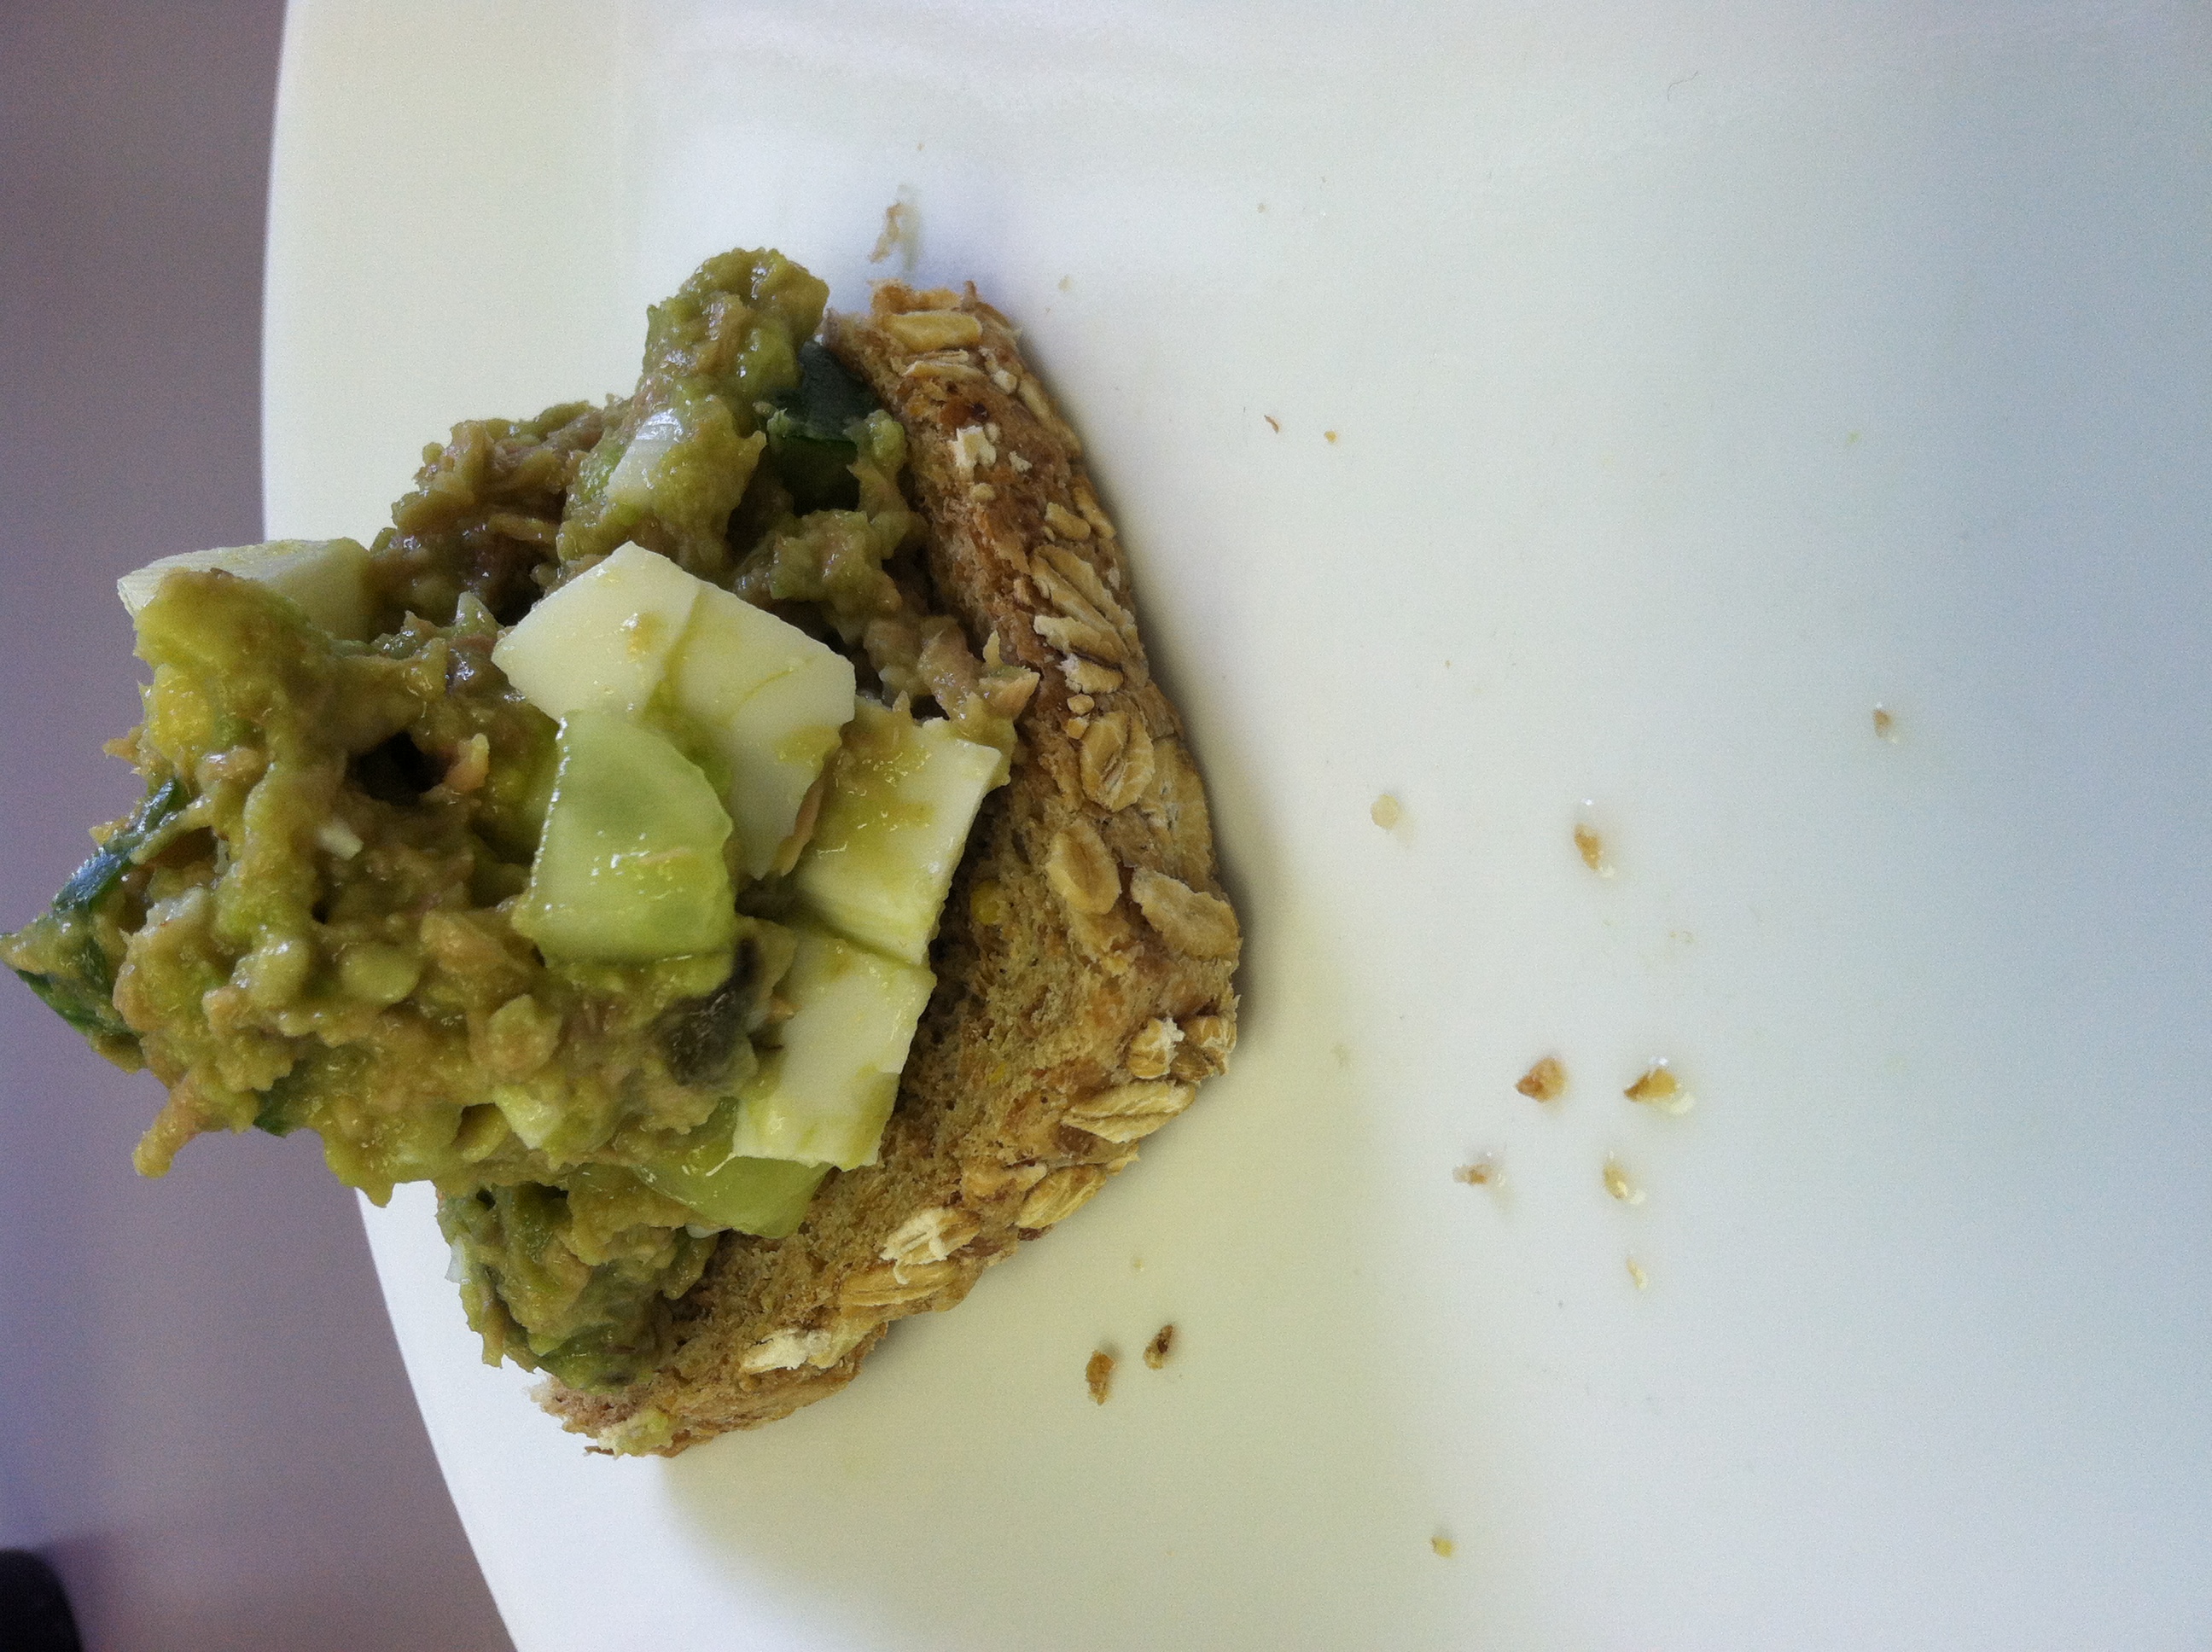
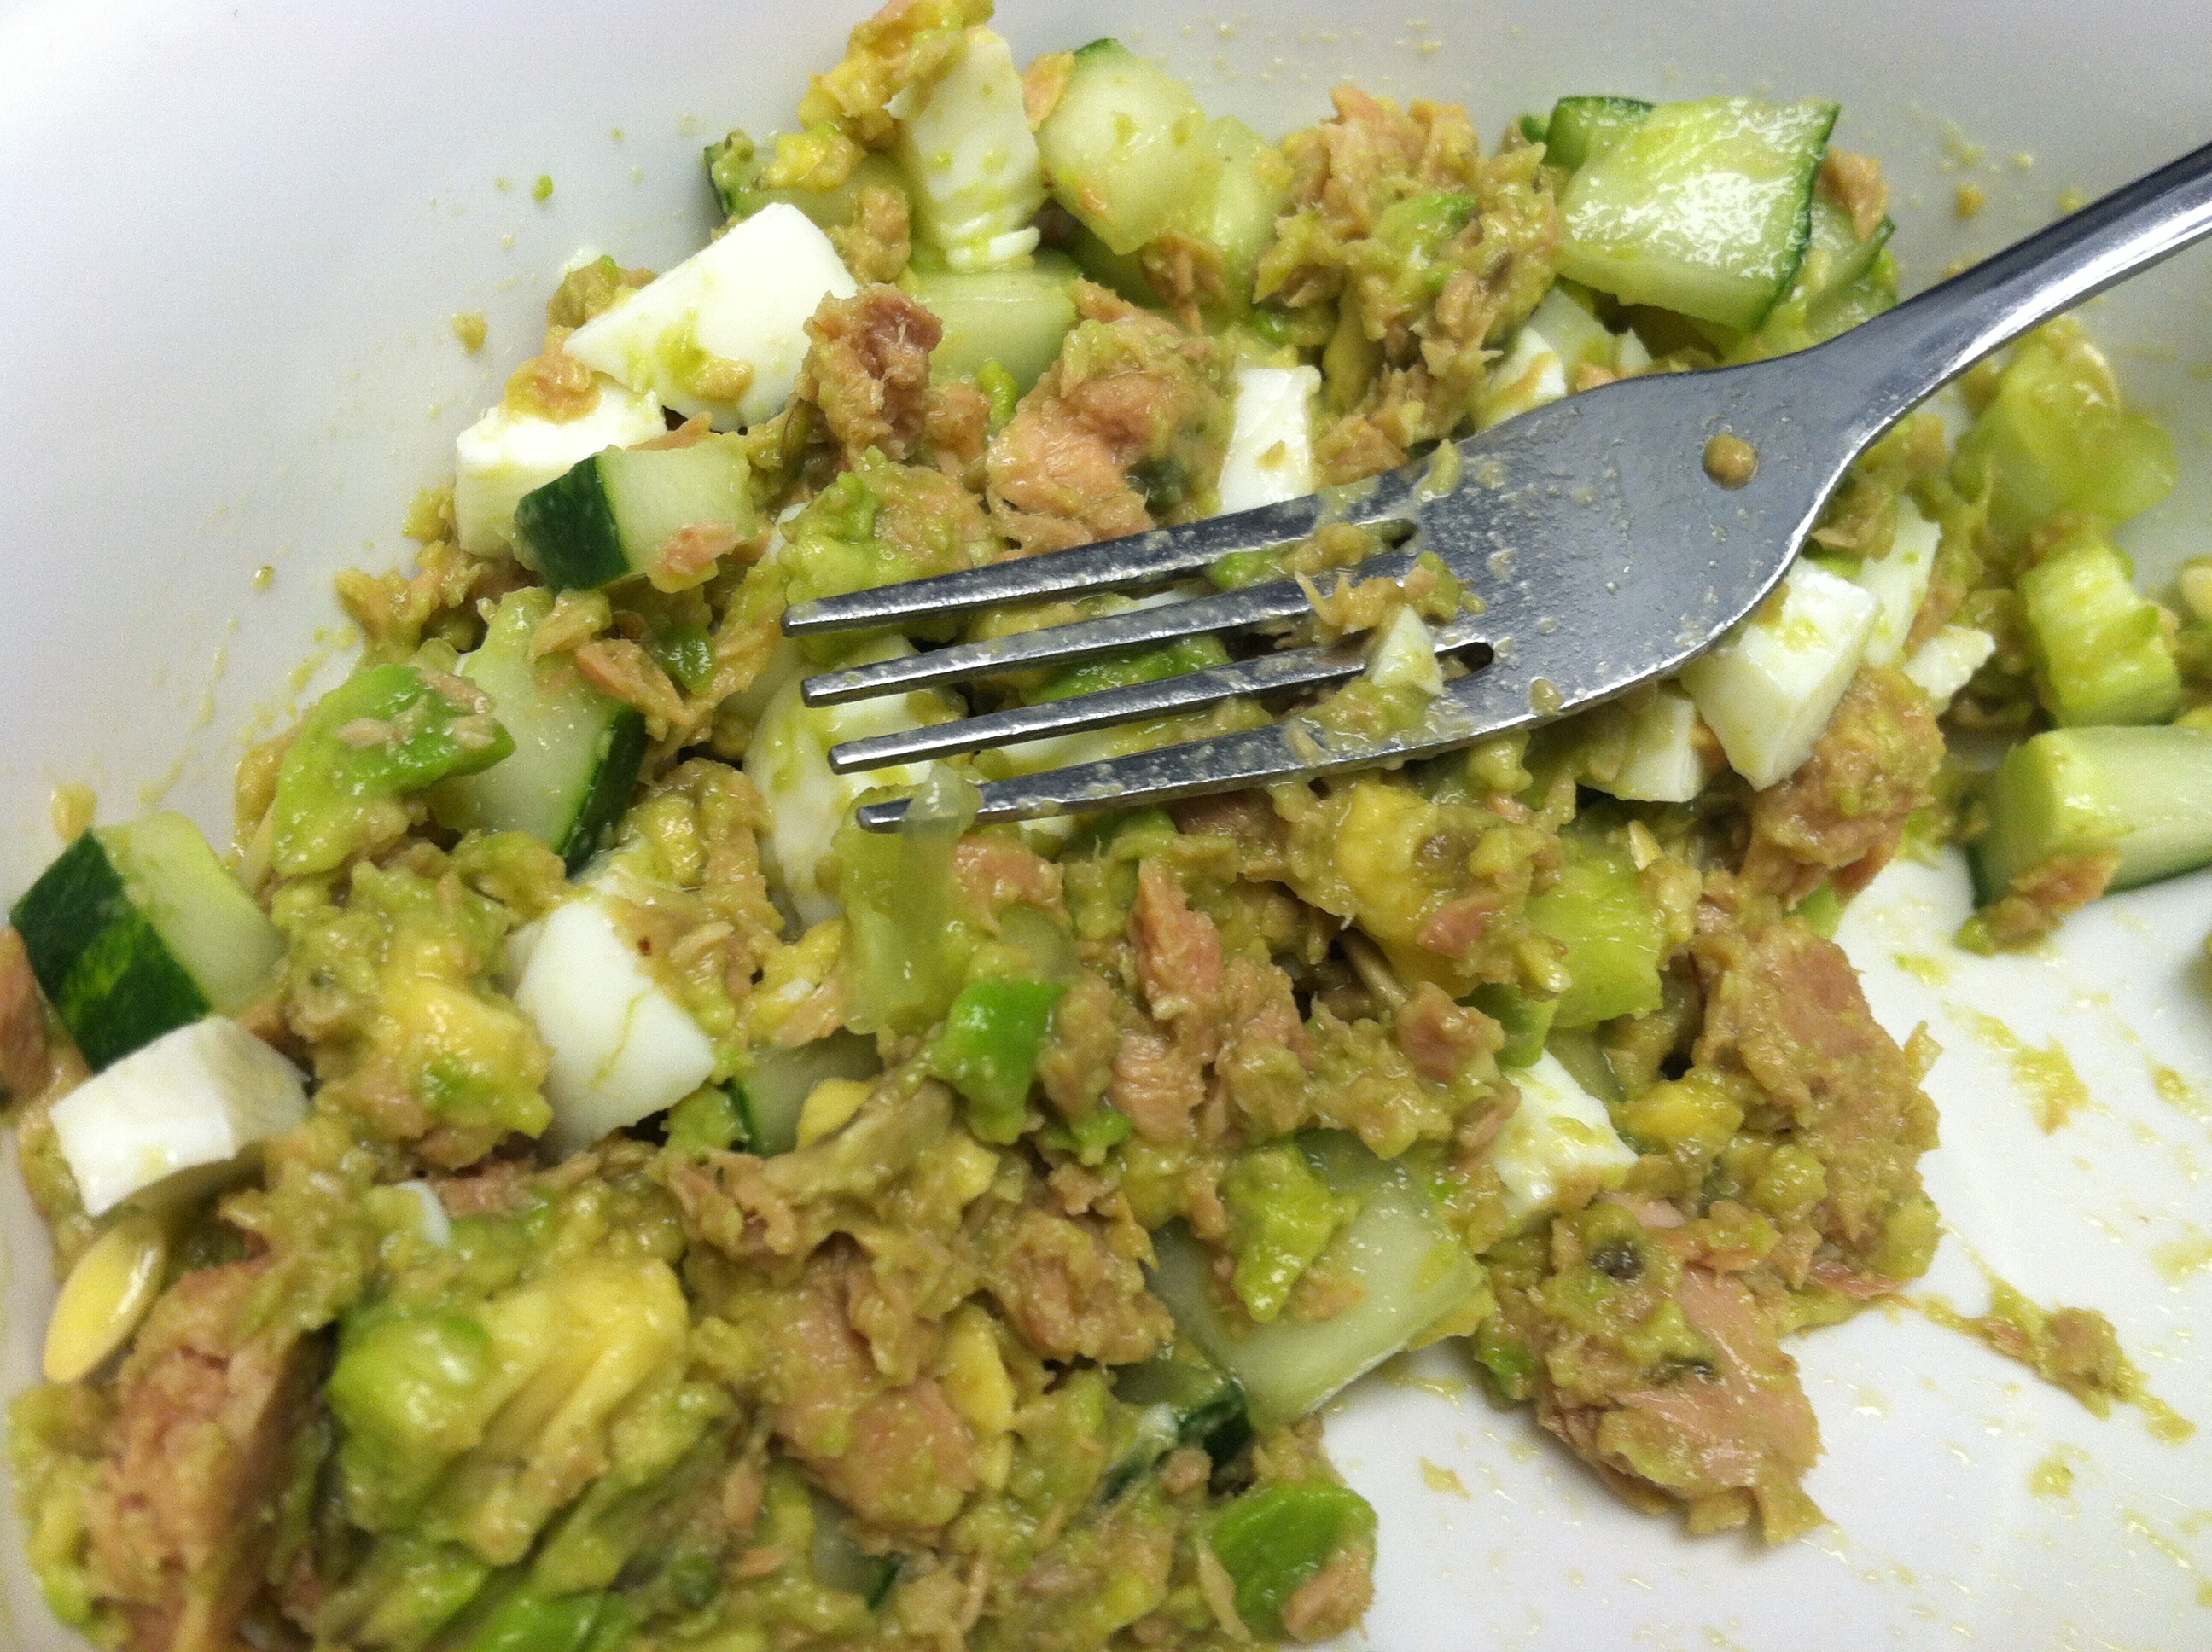
This recipe is a healthified tuna salad. By adding several kinds of vegetables you bulk up the salad with fiber and vitamins, and adding an egg gives the already 16g of protein an extra 6g boost. If you’re truly hard core, you can even forego the mayonnaise and just add lemon juice for a dash of flavor.

This is borderline vegetarian, if you are lacto-ovo vegetarian. It is extremely healthy, especially if you omit mayo. You can pack all the ingredients in a cooler and assemble at your desk or at school. If you buy tuna on sale, you can get it for $0.30 a can. 1/2 avocado + 1/2 cucumber is slightly less than $1.

Add another $0.50 or so for one egg and a few cents for lemon juice and any seasonings, and you have a hefty lunch/appetizer/dinner for about $2. Add a few big leaves of romaine for a dinner of tuna salad wraps, or serve over a big bed of lettuce with some nuts and berries for a more filling option.

Ingredients:

  • 1 can or pouch chunk tuna in water
  • 1 hard boiled egg
  • 1/2 cucumber, diced
  • 1/2 avocado
  • 2 tbsp lemon juice
  • 2 tbsp mayonnaise

IMG_0576

Step 1: Open the tuna and drain. Rinse the cucumber and dice into small chunks. You could use celery here, or peas, or shredded carrot. Whatever vegetable you like to add bulk and nutrition.

IMG_0577

Step 2: Cut the avocado in half and scoop out the seed. In a bowl, combine the tuna, lemon juice, and mayo. Mix well. Add the cucumber and avocado, smash it around until well combined. Dice the boiled egg, and mix that in.

Season with garlic salt and black pepper if so desired. Serve with slices of bread, a wrap or pita, or whole wheat crackers.

[amd-zlrecipe-recipe:35]