Category Archives: Vegetarian

Broccoli-Cheddar Soup Bread Bowl

Broccoli cheddar soup is definitely one of my favorite go-to soups. It is relatively easy and quick to make, and I almost always have frozen broccoli on hand. I’ve tried several ways, adding and taking out ingredients as I had them available, but this batch was the best by far. It was thick, smooth, and creamy, with a perfect balance of flavors. I had some large bread rolls, so I hollowed them out to use as bread bowls, and it was a perfect meal. Try it yourself!
 
Ingredients:
  • 2 cups chicken stock (veggie stock for veg/vegan)
  • 1 cup milk (plant milk for veg/vegan)
  • 1 cup frozen broccoli florets
  • 1/2 cup sour cream or plain yogurt
  • 1/2 cup shredded sharp cheddar
  • 3-4 tbsp butter/margerine
  • Salt & black pepper
 

Step 1: In a sauce pot, bring butter, chicken stock, and milk to a simmer. Cook the broccoli for 5-10 minutes in a pan or microwave, until heated through and soft.

Step 2: In a blender, combine the soup, spices, cheese, and sour cream. [You can use an immersion blender if you’re fancy enough to have one]. Reserve 1 cup if you want broccoli chunks in the finished soup. Blend until smooth and return to the pot. Heat through, about 5 minutes.

Step 3: Hollow out a large round bread roll by cutting at an angle with a sharp knife all along the edges. Pull the middle out, and fill with hot soup. Sprinkle a little cheddar on top, and enjoy!


This soup was so good I had to have two bowls. Luckily the bread roll was big enough that I had plenty left for dipping. If you’d like to make this vegetarian soup vegan, just use a plant milk and omit the cheese, or maybe use some vegan cheese product instead.

 
What’s your favorite soup to eat in a bread bowl?


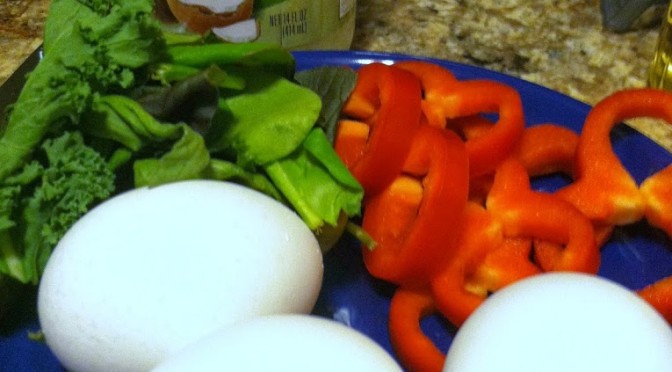
Three egg omelets

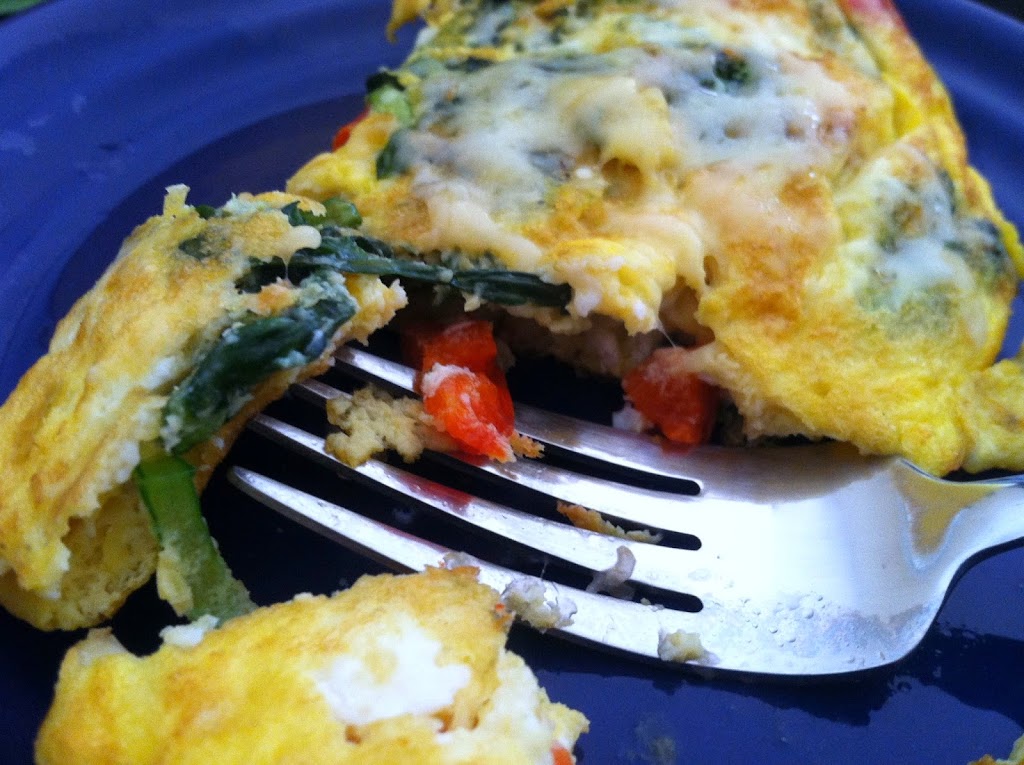
Omelets are an always popular breakfast item. Usually reserved for the weekends or a restaurant, I wanted to show you how easy they can be. As explained in my Ham & Greens Frittata post, the difference between and omelet and a frittata is that a frittata has all the ingredients mixed into the eggs, it is all cooked together, and not folded up. An omelet is partly cooked, and then the ingredients are added in and the eggs are folded around the other ingredients. Most are intimidated by the flip, or fold technique. However, with a few simple tricks you can make a fluffy protein half-moon like a pro chef in no time.

Ingredients:
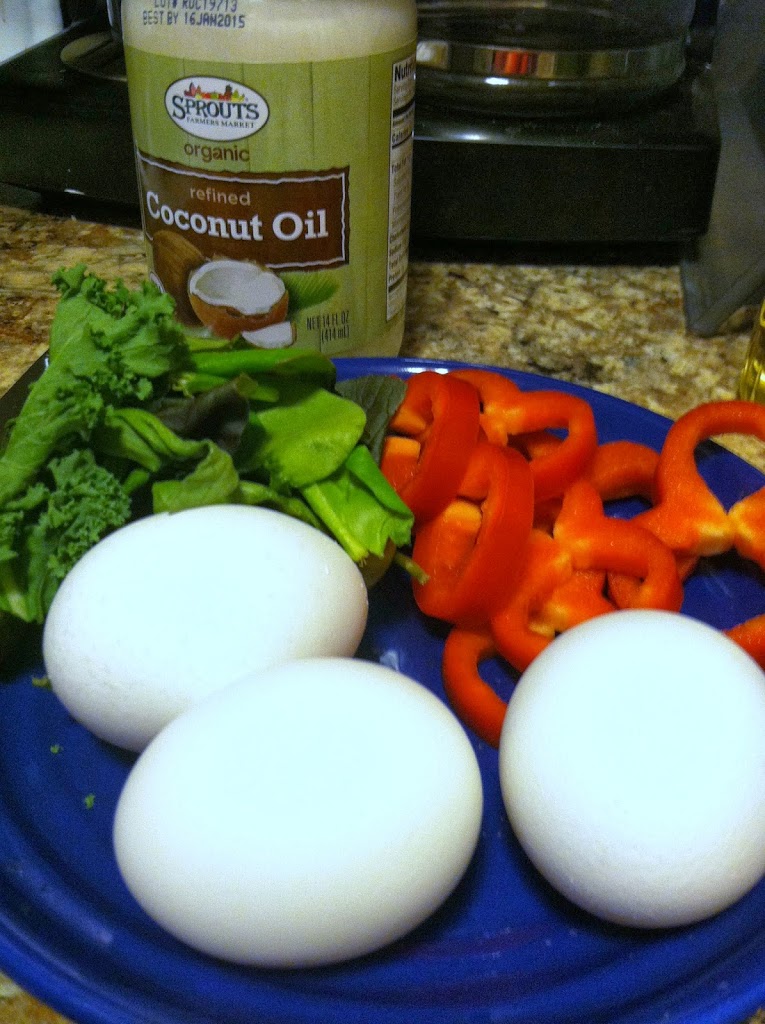
3 eggs (large, fresh, and room temperature if you can)
1/2-1 cup chopped veggies of choice
Meat and or cheese if you like
Vegetable spray, olive oil, or here I use coconut oil for the pan

Step 1: Add 1 tbsp coconut oil (olive oil, etc) to a warm frying pan. Saute and veggies or fully cook any meat you are adding. Set to the side to keep warm.

Step 2: Break all three eggs into a bowl and lightly whisk. You can use one or two whole eggs and the rest egg whites if you are concerned about cholesterol, or use egg substitutes. They should work just the same.

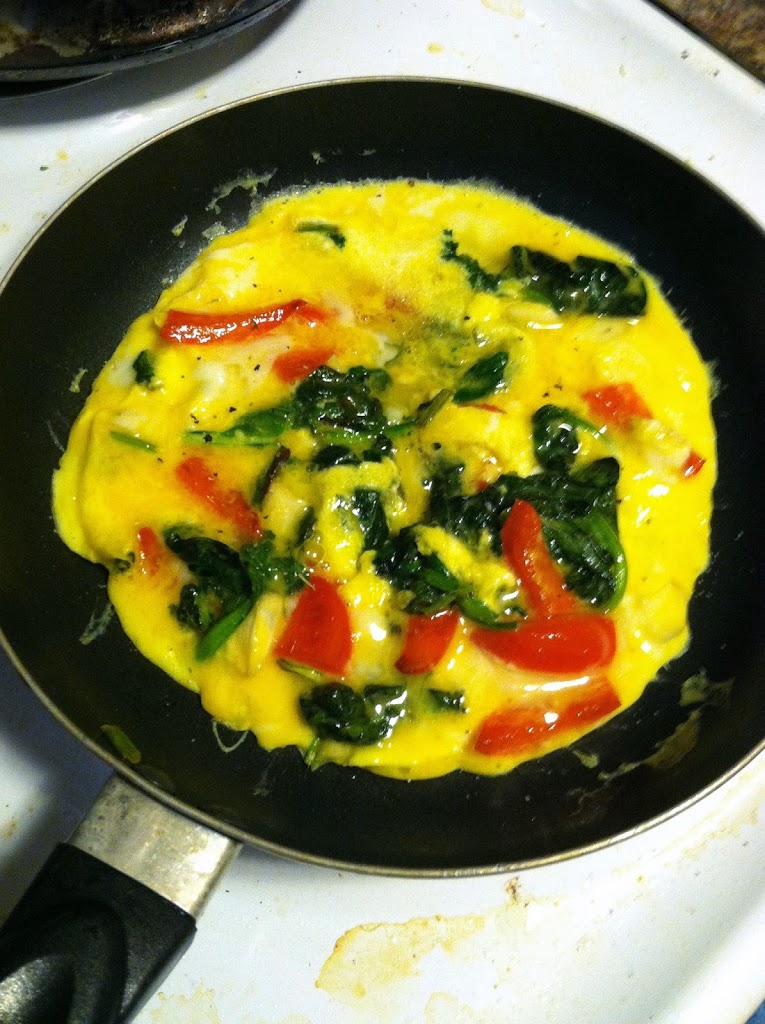
Step 3: Now the (not so) tricky part. Pour the eggs into the pan. You can wait to add the other ingredients until the last minute, or just add them on top of the eggs like I did. When the egg starts to cook (you will know by the change in color and texture) push it down the sides of the pan with a spoon or spatula. Mix up the egg in the center a little too. This helps to get the egg to cook on the bottom.

Step 4: Wiggle the pan around as you use the spoon or spatula to push the cooked egg to the center, and tilt it to get the uncooked egg to run up the sides. Repeat until most of the egg is cooked. Then, using a spatula or spoon, flip the egg in half, covering the fillings. It’s a great idea to add a sprinkle of cheese first for a gooey inside at the end!

Step 5: Let cook for another few minutes, then flip and cook a few more. This is just to ensure that all the egg inside heats enough to cook fully.

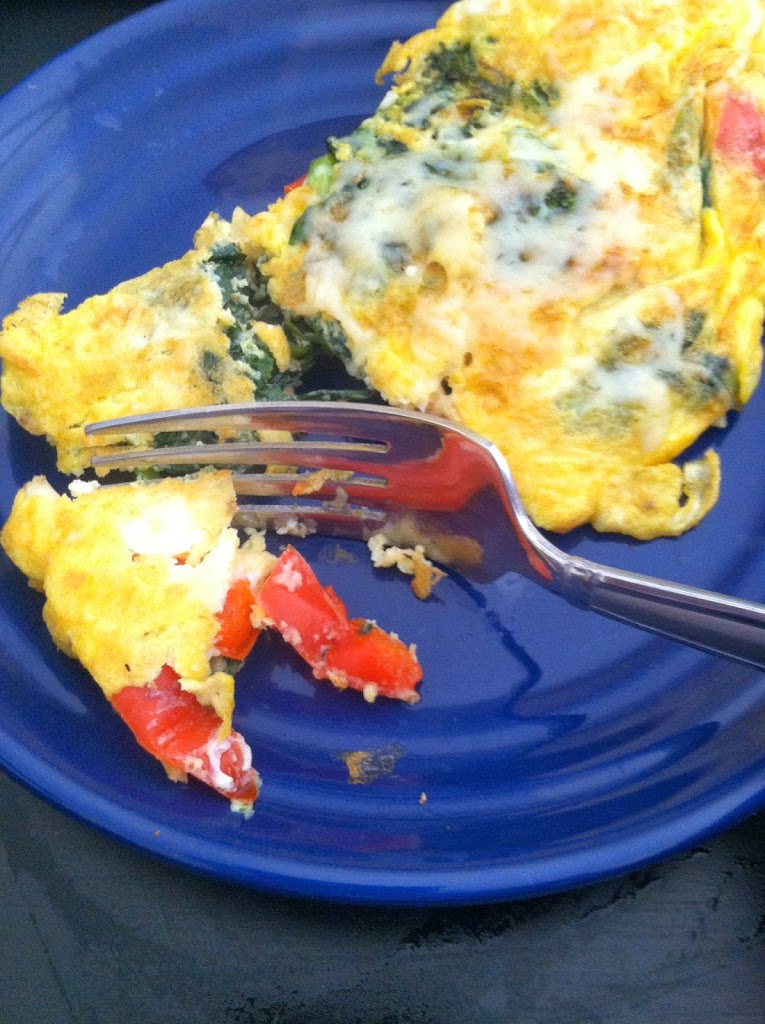
Sprinkle with a bit of cheese, and enjoy! You can use whatever type of vegetables or beans you like here. Onion, mushroom, greens, zucchini, and peppers work great


Of course, for the carnivore in the house I had to make a ham & bacon one too. All breakfast meats are amazing in omelets as well. Get creative, try any combination that sounds good. And don’t worry about not getting the half-flip perfect. Worst case scenario, you still have some delicious scrambled eggs.
Either way, break an egg and enjoy!


What is your favorite dish to make with eggs?

Mediterranean Vegetable Panini


Anything “Mediterranean” has been a buzzword lately. Claims abound that if you eat like someone from the Mediterranean, you will lose weight. I’m not completely sure where “the Mediterranean” even is, but I picture somewhere on the coast of Greece or Italy. The diet involves lots of fresh vegetables like eggplant, peppers, zucchini, mushrooms, etc. as well as health fats from olive oil, fish, and avocado.

Combined with low amounts of red meat, sugar, and saturated fat plus an active lifestyle, it is claimed that you will suffer less cardiovascular problems, health issues in general, and live longer. I’m sure the sun, sand, and surf of the Mediterranean Sea doesn’t hurt… While there is always going to be conflicting information about diets because of marketing and such, here are a few websites for some information: WebMD – Mediterranean Diet Weight Loss Effectiveness?; Mayo Clinic – Mediterranean Diet & Heart Health; US News Best Diet – Mediterranean Diet: What you need to know.

This sandwich was inspired by Udis Bread. They have an eggplant panini that is absolutely amazing, it is a huge slice of eggplant grilled, with grilled red bell pepper and goat cheese. I had bought an eggplant and didn’t know what to do with it, so I decided to try my own version of an eggplant panini. I also had a red bell pepper and some zucchini, so I decided to go all veggie-licious. You can sub in whatever vegetables you like, ones that hold up to grilling are the best. Also I don’t have a ‘real’ grill, so the hand dandy George Foreman did the heavy lifting. You could also use a pan and just put a lid on top of the sandwich weighted down with something to grill it.

Ingredients:
1 1/4″ thick slice eggplant
2 (or 1 really big) slices of zucchini
2/3 red bell pepper, seeded
Handful of spinach
2 tbsp hummus
thick slice cheese (I had white cheddar)

Step 1: Brush or spray grill with olive oil so the veggies don’t stick. Grill eggplant, zucchini, and bell pepper for about 10-15 minutes, until softened and beginning to char.

Step 2: Layer the veggies, hummus, and cheese onto some bread. Spray the grill again, and press the sandwich for 2-5 minutes, just to heat through.


I actually took this in for lunch, and though a little moist from the hummus it held up well.

You can use whatever kind of bread you like, or try a wrap or pita pocket. 


Warning: it may be a better idea to wait until you are ready to eat the sandwich to add hummus. The bottom of the sandwich was a little squishy. If you get rid of the cheese, then this sandwich is also vegan.


Under 100 Calories per Bowl: Cruciferous Vegetable Soup


I’m always a big fan of recipes that help “clean out the fridge or pantry“, and if they are healthy as well then bonus! We all have some assorted cans, boxed, half bag of frozen mixed vegetables, etc. that have been sitting around since approximately we moved into whatever abode we inhabit.

Even the most strict, list-making, meal-planning, leftover-eating of us have odds and ends we need to try to use up before expiration dates. It is especially hard with produce. I have a bad habit of buying everything that’s on sale, I want to cook eventually, sounds healthy… and then I have a fridge packed full of five-day-old veggies beginning to wilt and lose nutrients. Sad face. 

That’s why this soup is fantastic! You can mix and match what vegetables you add based on what you have waiting to be used, and choose whatever protein and grain is in the half-empty box in your cupboard. There is of course a few caveats.

You need a huge ratio of veggies to other stuff, and a large portion of it must be water IF you are going for a filling, vegetarian, healthy, low-cal, low-fat soup.

Try to choose mostly cruciferous vegetables and/or leafy greens, as those pack the most nutrients and fiber for the least carbs and calories. Cruciferous vegetables include cauliflower, broccoli, brussels sprouts, etc. Limit the beans and grains to one cup each to keep calorie counts low. If you have a “meat tooth” feel free to throw in some cooked shredded chicken or steak.

Ingredients:

  • 1 whole head green cabbage, shredded
  • 1/2 head cauliflower, cut into florets
  • 1/2 bunch kale, chopped
  • 1 cup fresh spinach
  • 1 cup barley
  • 1 cup pinto beans
  • 1 can diced tomatoes
  • Garlic salt
  • Lots of water (stock or bouillon for extra flavor)

Step 1: Chop all your veggies and add to the crock pot. Add the grain (barley) and protein (beans) as well as diced tomatoes. You can sub fresh chopped tomato or tomato sauce, or forget the tomatoes. I just super love diced tomatoes in all the things.

Step 2: Cook on low for 4-6 hours, until veggies, barley and beans are tender. Add any other seasonings you like. Enjoy for under 100 calories per bowl as often as you are hungry!


*Disclaimer: I do not recommend crash diets like the cabbage soup diet where this is all you eat all day, but I do believe that soup before a full meal will help dampen hunger and make it easier to eat healthy and manage a healthy weight, and broth based soups should be incorporated into your meal plans to keep total grocery costs for the week low.

The Art of Ethiopian: Part 4 – Cheese, Greens, & Injera


This is the fourth and final post in my Art of Ethiopian Cuisine post series. From a 100%-not-Ethiopian-American, I must say this all tasted really dang good. And it doesn’t take too much hands-on work time. If I had had a real Ethiopian over to try it, I’m not sure what their opinion would be. But if you want the “Americanized” easy version, these recipes are sure to do the trick!


The Art of Ethiopian Cuisine: Part 1 – Beef & Pork
The Art of Ethiopian Cuisine: Part 2 – Chicken & Fish
The Art of Ethiopian Cuisine: Part 3 – Potatoes & Lentils
The Art of Ethiopian Cuisine: Part 4 – Cheese, Greens, & Injera

Ayib

The cheese is called “Iab or Ayib” and is like a cottage cheese/ricotta hybrid. You usually need it to temper the heat in these types of dishes, but my recipes leave out the Berberi spices you will notice. If you like super hot foods, feel free to pick some up and sprinkle it into all these stews. Because I don’t have hours or days to make it the proper way, THIS recipe from Whats4Eats comes close to approximating Iab.  

Ingredients (Ayib):

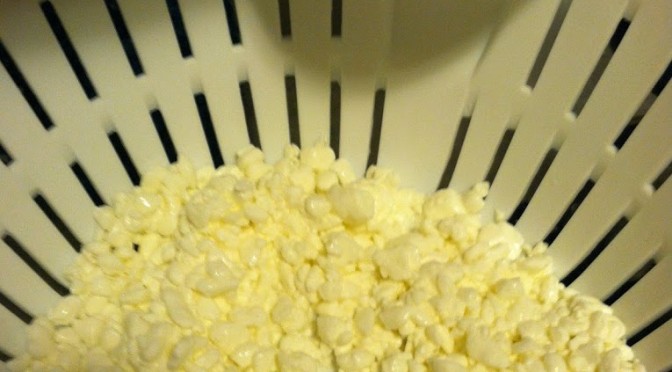
  • 1 cup large curd cottage cheese
  • 2 tbsp plain Greek yogurt
  • 1 tbsp lemon juice
  • Sprinkle sea salt

Step 1: Rinse the cottage cheese in cold water and let it drain. Press dry with paper towels if you like. I tried that and the towel got cheese curds stuck all over it so try at your own risk.

Step 2: In a bowl, mix the cheese curds, yogurt, lemon juice, and salt. Refrigerate until serving.

Gomen Wat

The greens are called “Gomen Wat” (guess Wat…again) and the recipe I used is based off the one HERE on my trusty AllRecipes site. I didn’t have collard greens, so I used what I had, which was kale. I bet you could use spinach instead as well, any leafy green will do.

Ingredients (Gomen Wat):

  • 2 cups chopped kale
  • 2 cups water/stock
  • 1 tbsp turmeric
  • 1 tsp ground ginger
  • 3-4 tbsp lemon juice
  • 2 cloves garlic, chopped
  • Sea salt
Step 1: Put the greens, spices, and liquids in a small crock pot. Cook on low for 1-3 hours. 

Make sure to stir every now and then. The greens will wilt and take up less room. I like my greens extra tangy to counteract the bitter. I also sprinkle them with a healthy dose of fresh coarse ground sea salt. Keep on low until you serve.


Injera

And of course, the cornerstone of the meal, that which holds it all together and is both plate and utensil, the Injera bread. Usually it is made from pure Teff flour and allowed to ferment and rise for three days. I unfortunately had neither the grain nor the time. So I based mine off this cheat recipe HERE from Whats4Eats, which does not need either. It rather ingeniously uses club soda and lemon for both the bubbles and the tang.

Ingredients (Injera):

  • 2 cups flour
  • 1 tbsp baking powder
  • 2 tbsp lemon juice
  • 2 cups club soda

As you can see, I had lemon-lime club soda so at first I didn’t use the lemon juice. Several other recipes I found also use vinegar if you don’t have lemon.

Step 1: Combine all ingredients and stir just until all flour is incorporated. The club soda will bubble quite a bit. 

Step 2: On a hot, sprayed griddle, pour about 1/2 cup of batter. 

Step 3: Typically injera is only cooked on one side, but I found that this better was just thick and pancake-y enough that I had to let it mostly cook, then flip for a final minute or two. There were still bubbles, which approximates injera.

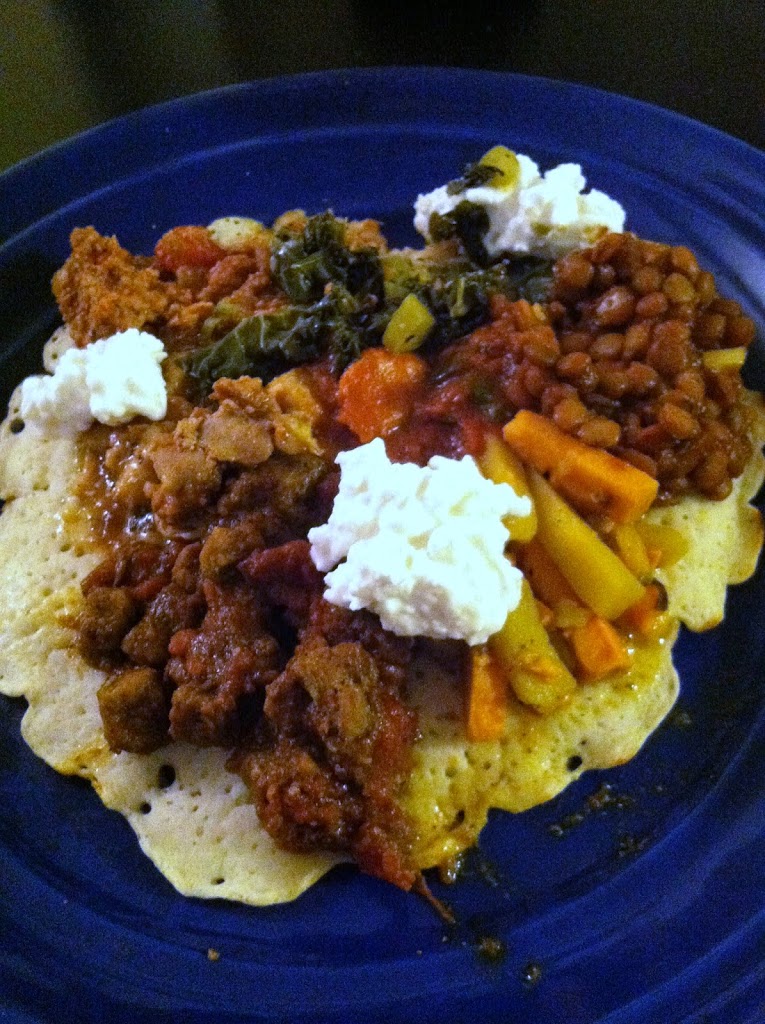
However the consensus was that this dough was thicker and sweeter than usual. So these are the Americanized Ethiopian pancake version of injera. And actually some said they prefer it, so perhaps this is a better way to ease an American palate into ethnic cuisine.And this was the final meal.

Ground beef, pork, chicken, fish, lentils, potatoes, greens, cheese and my injera pancakes. You of course don’t have to cook all these at the same time, but I encourage you to at least make some injera and try one or two stews. You may find that you crave the flavors of Ethiopia from now on! And by cooking all this at home, you control the ingredients, so this meal turns out to be quite healthy, and very filling.


What’s your favorite ethnic cuisine?


The Art of Ethiopian: Part 3 – Potatoes & Lentils


Welcome to part three of my four-part Art of Ethiopia Cuisine post series! If you’ve been following along, you already know how to make Minchet-Abesh Alicha, Doro Wat, Yasa Tibs, and know Injera is just around the corner!

The stars of this post were considered side dishes to us meat-eaters, but could easily stand alone in an all-vegetarian meal. This is all about the tubers and lentils.

Lentils for Lent, ha. That should be a thing too.

Lentil stew is called “Mesir Wat” (remember Wats?) and the recipe I based mine off of is HERE at A Spicy Perspective. The two potato stew starring both Yukon classics and sweet potatoes was of my own invention.

I had had something similar at the Nile, an Ethiopian restaurant near me, and was trying to replicate it. I think it’s pretty darn close. I made a small batch, but you could easily scale it up to however many potatoes you want to use.

The Art of Ethiopian Cuisine: Part 1 – Beef & Pork
The Art of Ethiopian Cuisine: Part 2 – Chicken & Fish
The Art of Ethiopian Cuisine: Part 3 – Potatoes & Lentils
The Art of Ethiopian Cuisine: Part 4 – Cheese, Greens, & Injera

Ingredients (2 Potato Stew):

  • 1 sweet potato
  • 2 large baking potatoes
  • 1 cup water/stock
  • Garlic salt
  • 1 tsp turmeric
  • 1 tbsp curry powder
  • 1 tbsp cornstarch

Step 1: Dice the potatoes into tiny pieces. The smaller the pieces, the faster they will cook. Just try to make the pieces uniform in size.


Step 2: I used my rice cooker for this. Because I’m in love with this appliance. You can use a small slow cooker too, or a small sauce pot on the stove. Put the potatoes in, and add the spices and liquid.

Cook on low for at least 30 minutes, or until ready to serve.

About 10 minutes prior to dinner, add the cornstarch. Make sure it mixes in well, no-one wants a cornstarch bomb. This will thicken the sauce, but is not absolutely required.


Ingredients (Mesir Wat):

  • 1 cup lentils (any color, I had brown)
  • 1.5 cups water/stock
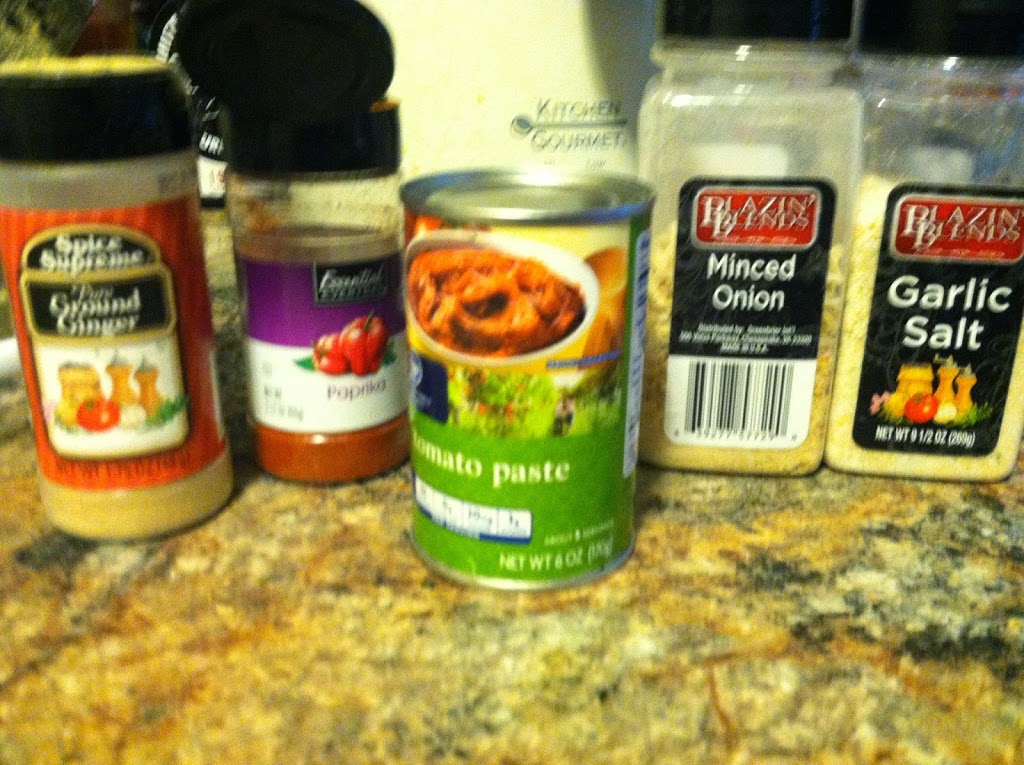
  • 1 small can tomato paste
  • 1 tsp ground ginger
  • 1 tbsp minced onion
  • 1 tsp garlic salt

Step 1: Combine all ingredients in a small slow cooker, or sauce pot on the stove.

Step 2: Cook over low heat, stirring occasionally, for at least 30-60 minutes, until lentils are soft and fully cooked.

You can leave them in there foreeeeeever, just keep stirring occasionally so they don’t stick and burn on the bottom, and add more liquid as needed.


These were really tasty, I liked the slight tomato and garlic flavor.

Thickened up nicely after about 1 hour in the crock pot. I like lentils a lot, and this would be tasty with some added veggies as a meal unto itself!

More to come: Cheese, Greens & Injera

Quick Homemade Balsamic Vinaigrette on a Hawaiian Salad

Salad is ubiquitously known as a diet super-staple. One can NEVER have too many leafy greens. I’m pretty sure it’s physically impossible to eat enough volume to overdose on any given nutrient in leafy greens (disclaimer: not fact-checked, just widely accepted opinion). But a bowl full of greens can get boring pretty fast. Even with the plethora of toppings and novel ingredients available, it’s important to dress your salad well. Just like a new pair of shoes, a new dressing can perk up a ho-hum meal. Making your own vinaigrette is easy and healthier than bottled dressings, because you determine what goes into it and can choose the freshest ingredients. Get a re-useable bottle and try it yourself! You’ll never go back once you realize how much fun you can have experimenting with different spices, flavors, vinegars, oils, and juices.

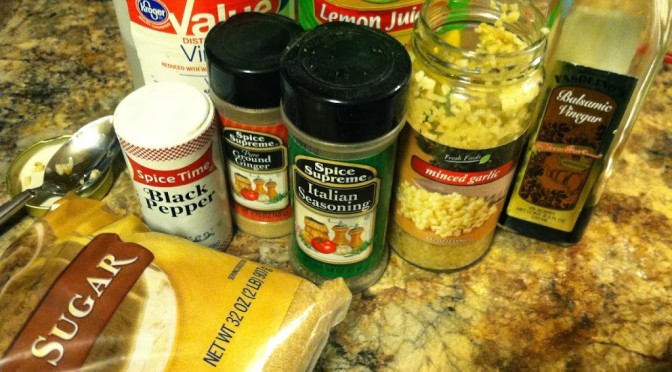
Ingredients:
1/4 cup balsamic vinegar
1/4 cup plain vinegar
3/4 cup olive oil
1 tbsp diced garlic
1 tbsp brown sugar
2 tbsp lemon juice
1 tsp Italian seasoning
1 tsp ground ginger
Dash black pepper

Step 1: Assemble your dressing ingredients. You basically need a 1:2 or 1:3 ratio of sour to oils, and any spices you like. You can add sweetness like raspberry or sugar, or extra tang from citrus.

Step 2: Mix everything in a glass jar and shake it up well! You want to create an emulsion, where the droplets of non-oil are suspended inside the oil. Oil and hydrophobic things mix, while water-based things (like vinegar) won’t mix with the oil. Make sure you shake well just before adding to your salad.

Step 3: Pour a few tbsp over your salad and enjoy! This dressing here was perfect on my Hawaiian Salad.

Ingredients in Hawaiian Salad:
1 cup spinach
2 slices ham, diced
1/4 cup pineapple
3 baby carrots, julienned
Sprinkle of mozzarella

So the next time your lettuce-tomato-cucumber combo gets a little bland, whip out a glass bottle and spice it up!


What’s your favorite way to top a salad?


Easy-peasy mini pizzas

These adorable appetizers are sure to be a big hit with a crowd! They are also easy & quick enough for any weeknight dinner, and kids are sure to love them too. You could even build a “top-it-your-way” bar with various (quick-cooking or pre-cooked) toppings, veggies, and cheeses.

Ingredients: 
Bagel thins, cut in half
Jar of pasta, pizza, or marinara sauce
Fresh grated parmesan
*Any other toppings you want!

Step 1: My mom insists everything is better with some fresh grated Parmesan. I’m beginning to believe her.

Step 2: Spread the sauce on the bagel thins. Top with cheese (and/or veggies, pepperoni, sausage, etc) and pop into a toaster oven. You can also use a baking sheet in a real oven, or a toaster on its side.

Step 3: Arrange prettily and serve! Told you they are easy-peasy!


What do you put on your pizza?


Pi Day: Blackberry Pie

Happy Pi Day!

Since it is March 14 (or 3.14) it is international Pi Day, the day to celebrate the number pi. The Roman symbol above is how we write pi in math class. It is defined as the circumference of a perfect circle divided by its diameter, or the distance around the outside divided by the distance perfectly halfway across.

Conveniently, Albert Einstein was also born on March 14th. But as for the number, possibly it’s biggest (and only) claim to fame is that it is infinite. There is quite literally no end to the digits if you calculate it out exactly. 

The digits of pi have inspired people to memorize strings of thousands of numbers, competitions, “the million digits of pi”, create poetry and music with these numbers. There is even a PiDay organization with a website that has all kinds of fun facts and stories about Pi.

There is a video of a Pi Rap by Amy McConnell. Several businesses jump on any excuse for a holiday with special Pi Day Deals. There’s even a trainer to help you memorize more digits of Pi!

If you want to know more about how Pi Day began, and how Americans celebrate, check out CNN’s article “How America celebrates Pi Day“.

A clever t-shirt showing how “PIE” in a mirror is 3.14 Pi!

In honor of this unique number I’m posting a special recipe, for pie of course!

Because blackberries were on sale this week, that is the fruit I chose. However, you can use any berry or fruit you like, including frozen.

Ingredients:

  • 2 pie crusts (I cheated and store-bought. If you’re baking-savvy or brave, you can try making your own pie crust, like this one from Pioneer Woman)
  • 4 cups blackberries
  • 1 cup sugar
  • 1/2 cup flour
  • 1 tsp salt
  • 2 tbsp milk
  • 3 tbsp butter (or Country Crock)

Step 1: Let the dough thaw for 10-20 minutes on the counter top, if it broke at all smush it back together with your fingers.

Step 2: Combine all ingredients but butter and milk in a large bowl to coat the berries with flour and sugar. Pour into your bottom crust. Place little chunks of butter around on the top.

Step  3: Place the other crust on top, and make sure to cut some hole to vent. I of course had to go full-nerd and cut “3.14” into the pie.

Step 4: Brush the top with milk (or egg) to make sure it gets nice a golden. Bake on a baking sheet in the middle of the oven at 400 for 12-15 minutes, until nice and bubbly and golden.

 Cut yourself a nice slice along the radius and enjoy!


This is so amazing warm out of the oven, topped with vanilla ice cream or cool whip. It’s warm and sweet and melty… MMMM! It is also amazing as breakfast with a cup of hot coffee. =)

And because you desperately need to know the millionth digit of Pi:

3.14159265358979323846264338327950288419716939937510582097494459230781640628620899862803482534211706798214808651328230664709384460955058223172535940812848111745028410270193852110555964462294895493038196442881097566593344612847564823378678316527120190914564856692346034861045432664821339360726024914127372458700660631558817488152092096282925409171536436789259036001133053054882046652138414695194151160943305727036575959195309218611738193261179310511854807446237996274956735188575272489122793818301194912983367336244065664308602139494639522473719070217986094370277053921717629317675238467481846766940513200056812714526356082778577134275778960917363717872146844090122495343014654958537105079227968925892354201995611212902196086403441815981362977477130996051870721134999999837297804995105973173281609631859502445945534690830264252230825334468503526193118817101000313783875288658753320838142061717766914730359825349042875546873115956286388235378759375195778185778053217122680661300192

Just kidding. But if you really do want to know all one million go here. 


Are you doing anything to celebrate Pi Day?

Why Asparagus can make your pee smell weird


A common occurrence among those who eat healthfully or adventurously is finding certain foods have strange side effects. If you’ve ever eaten asparagus, in however small an amount, you may know what one of these side effects are. If you are not affected by asparagus after-effects, congratulations!

There are two possibilities: either you do not metabolize asparagus in such a way as to create the smelly compounds, or you cannot smell the compounds once created. 

Both of these are true, the most recent study in the Oxford Journal of Chemical Senses found differences both among those who did or did not produce smelly urine, and among those who could and could not smell the difference. The authors state “The biological basis for the inability to produce the metabolite in detectable quantities is unknown, but the inability to smell the odor is associated with a single nucleotide polymorphism (rs4481887) within a 50-gene cluster of olfactory receptors”. 

The Chemistry of Asparagus

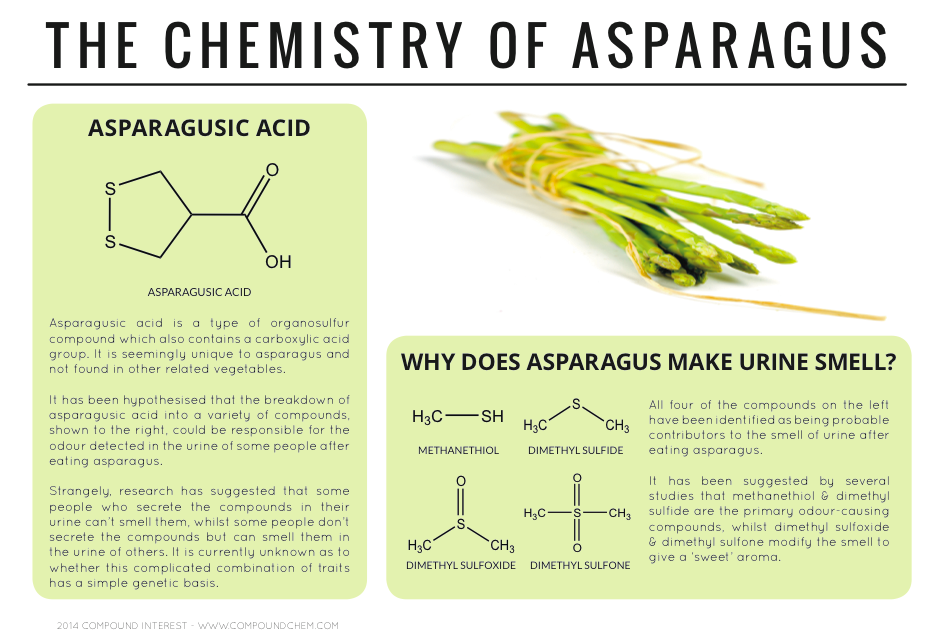
Going from smell-less veggie to smelly urine is a chemical process. According to Dr. Roshini Raj, MD, assistant professor of medicine at New York University Langone Medical Center and author of What the Yuck?!, “Your body breaks down asparagus during digestion into sulfur-containing chemicals that give your urine a distinctive odor.” The mysterious pre-smell compound is called asparagusic acid, because as far as we know, it is only found in asparagus. When metabolized, it produces several sulfated volatile chemicals.

Photo from Compound Interest: “Why Does Asparagus Make Urine Smell?” 2/10/2014

For a chemical to be “volatile” means that is has a low enough boiling point that it is a gas at room temperature. This means that the chemicals can leave the liquid urine and travel through the air to your nose. The original asparagusic acid is not volatile, so that’s why the vegetable itself doesn’t have the same “cabbage-y” smell. This smell has been noted for centuries, by some as famous a Ben Franklin. As yet, there is no way to eliminate this side effect other than by not eating this spring delicacy. But you don’t want to do that!

Health Benefits of Asparagus

Whether you grow your own or buy it at a store/farmer’s market, asparagus is a great choice when it is early spring and in season. It is very low in calories, with only 20 calories per 100 g (about 4-5 spears). It also takes your body more calories to digest it than you gain because it is high in digestion-regulating, LDL-reducing fiber. Fresh asparagus is a great source of anti-oxidants like carotenes, lutein, and xanthins, as well as vitamins like thiamin, niacin, riboflavin (all the Bs), C, A, and E. 

One cup of asparagus contains just over 100% of your daily recommended vitamin K, which helps prevent bone damage and neuronal harm, helping avoid neurological diseases like Alzheimer’s. It is also high in folate, which some people struggle to get enough of, especially pregnant mothers. Folate is necessary for DNA synthesis in all of your cells. Finally, it has several trace minerals and electrolytes our bodies need for blood pressure regulation, enzyme function, and respiration, like copper, iron, calcium, manganese, and potassium.

How to Grow Asparagus, or Choose it at the Store 

Asparagus plants are slow-growing annuals that blossom in spring. Plant asparagus crowns by early spring, after the last frost. They will grow into tall, branched stems with fine, fern-like needles called phylloclades. A fully-grown plant can reach five feet tall! The edible spears we all know and love emerge from the extensive root system, and are harvested yearly in early spring.

The first year after planting seeds or seedlings you should not harvest, but allow plants to grow. The following year and up to 25 years beyond, enjoy fresh asparagus every spring! Typically, young shoots are harvested when 7-9 inches tall. Don’t cut them below the soil, or pull them out with your hands, as they need to regrow next season. You can create “blanched” or white asparagus by mounding soil around shoots as soon as they emerge, preventing sunlight from allowing photsynthesis. They will have a lighter, delicate flavor but no chlorophyll benefits. 

While asparagus may be found in stores year-round, it is in season and at its peak in the early spring (Jan-June). Select stalks which are plump, not withered, and a vibrant green (unless you buy the white kind). Make sure the tips are tightly closed. Avoid wide ridges in the stems, dull color, or dried-out looking ends. This indicates old, tough stalks or too long in storage between harvest and shelf.

How to cook asparagus

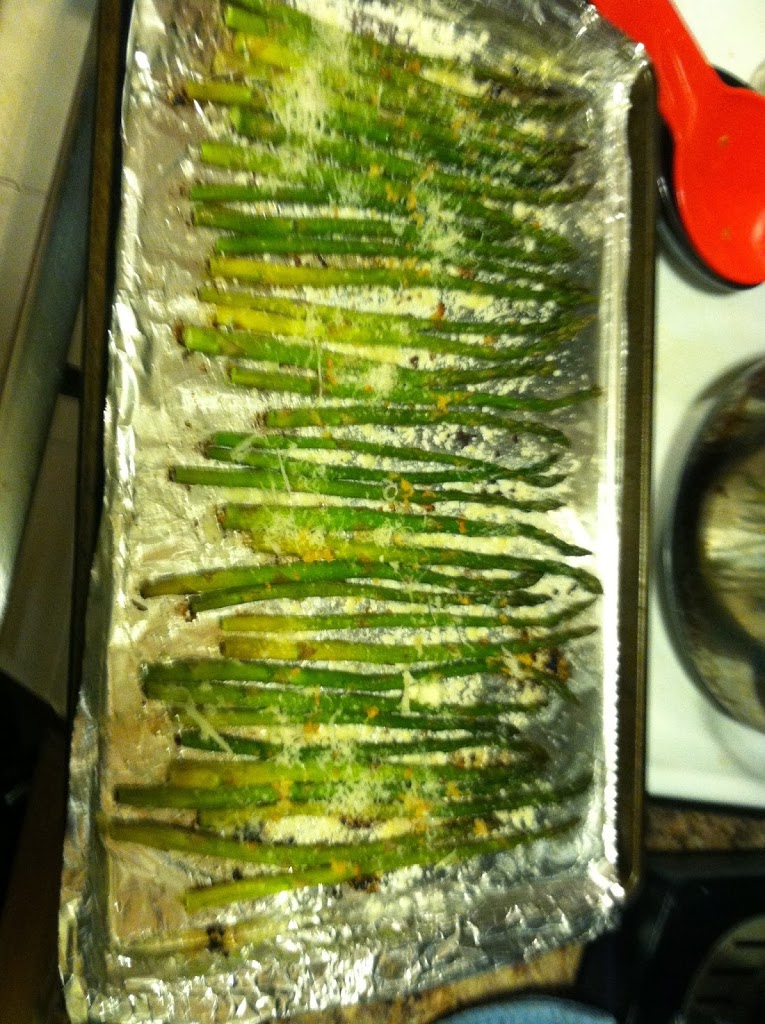
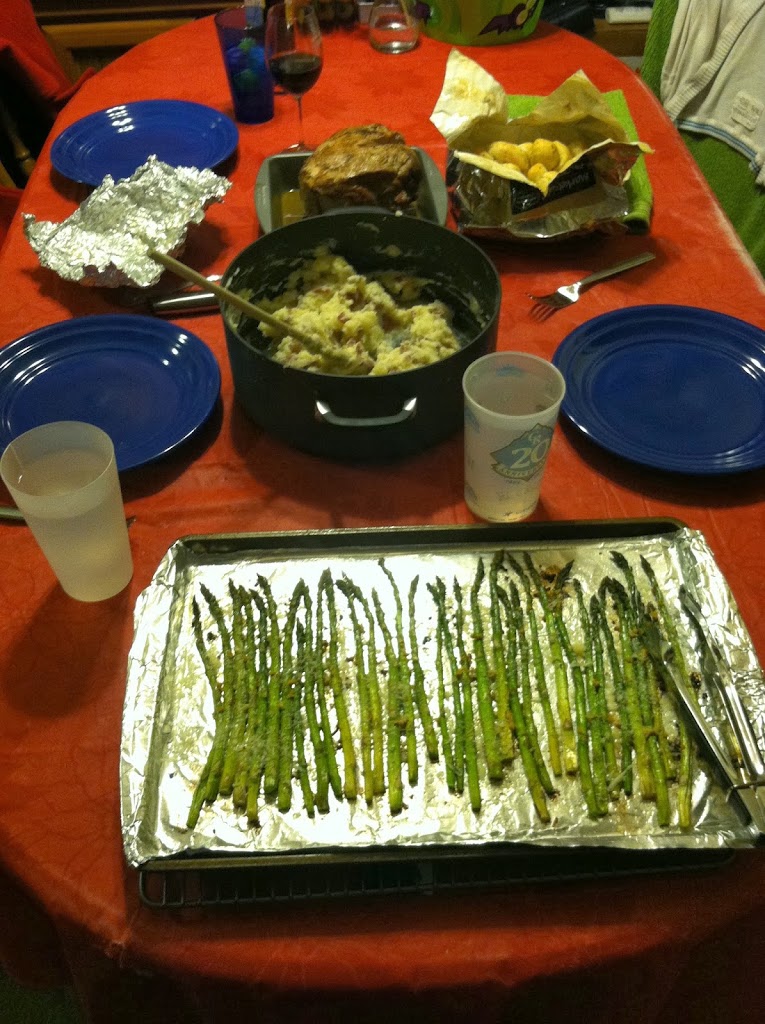
Asparagus can be eaten raw, and often is alone or with part of an appetizer. There are several methods to cook: gently steam for 10-15 minutes, bake, or pan fry with a bit of oil. Italian dressing makes a fantastic marinade to fry stalks. You could also drizzle on olive oil, seasoning, and bake them in an oven at 400 for 20 minutes. Sprinkle with some fresh Parmesan cheese to really make them sing. Try it in Vegetarian Stuffed Peppers, as a topping baked on a pizza, or in a Breakfast Strata.

Boiling is the least favorable option, only because it pulls some of the beneficial minerals and vitamins out and you lose those in the cooking water. But you will still get a lot of the nutrients as well as the fiber. However you cook your asparagus, enjoy it now while it’s at its peak!


To read more: 

Everyday Health: “Why Does Asparagus Make Pee Smell Funny?“
Smithsonian: “Why Asparagus Makes Your Urine Smell“
Today I Found Out: “Why Asparagus Makes Pee Smell“
WebMD: “Why Your Pee Smells Funny After Eating Asparagus“
SELF Nutrition Data: Asparagus
World’s Healthiest Foods: Asparagus
Nutrition and You: “Asparagus Nutrition Facts“


What’s your favorite way to eat asparagus?