Category Archives: Fish

Recipes for various fish

Salmon Latkes


Latkes, the Yiddish word for potato pancakes, have a long history in Jewish tradition.  According to history, the tradition is more about the oil used to fry the cakes than the potato pancakes themselves.  The Maccabees freed the holiest Temple in Jerusalem from the takeover of King Antiochus.  After ridding the temple of all idols, they lit the menorah with a little purified olive oil.  It seemed there was enough to last only one day.

But then, a miracle happened.  The lamp burned for eight days and nights.  Just long enough to press fresh oil.

And thus, olive oil is a sacred tradition during Hannukah, the eight days and nights celebrated in 2015 from Sunday December 6 – Monday December 14.  Any food fried in oil can be commemorative of the Miracle of the Oil, in fact donuts are a very popular Hannukah food, as are matzoh and other kinds of fritters.

IMG_2468

This recipe takes the classic potato latke and adds in canned salmon for a protein-filled, full meal on its own.  They can be served alone, or atop a bed of lettuce, or covered in applesauce, salsa, relish, or any other condiments you like.  Feel free to experiment, there are no rules saying you have to use potatoes and potatoes only.

Grate in some onion, carrots, or beets.  Try regular flour, chickpea flour, matzoh, or breadcrumbs as the binding agent. Fry them in olive oil, coconut, or even bake them in the oven.  But no matter what you do, do make sure to use a high quality oil, share with your loved ones, and be thankful for all you have!

Salmon Latke Ingredients

Ingredients:

  • 1 cup mashed potatoes
  • 2 can salmon, drained
  • 2 eggs
  • 1/2 – 1 cup breadcrumbs
  • 1 tsp Italian seasoning
  • 1 1/2 tsp garlic salt
  • 2 tbsp olive oil

Mixing salmon latke ingredients

Step 1: Either make mashed potatoes from scratch, use leftover mashed potatoes from a previous meal, or use boxed/instant potatoes to make approximately 1 cup cooked. Open the canned salmon and drain.

Salmon latkes in pan

Step 2: Mix the potatoes, salmon, eggs, and seasonings in a bowl. Add breadcrumbs until the mixture is moist but able to stick together. Form into patties, this should make about 4-8 depending on thickness and size.

Fried salmon latkes

Step 3: Add 2 tbsp oil to a frying pan and heat to medium.  Add the patties, working in batches if you made more than will fit.  Leave some room between each latke so they can heat and cook evenly.

IMG_2465

Step 4: Fry about 4-6 minutes, then flip.  Each side should get a nice golden brown color.  Remove to a paper-towel-lined plate to drain off any excess oil.

IMG_2467

Top however you would like and serve! I covered mine in sriracha and homemade green tomato salsa and it was positively delicious.


Slow Cooker New England Clam Chowder


One of the things I was most excited about when moving to New England was of course the seafood! The beautiful thing about being near the sea is the abundance of affordable and fresh seafood. From salmon to crab to scallops to, of course, lobster, Connecticut is a playground for those who are pescatarian.

This recipe is a simple one for New England Clam Chowder, the whitish creamy version.  Not the icky, reddish, tomato-based Manhattan style. Did you know that in 1939, a bill was introduced by State Rep. Cleveland Sleepe in Maine to make it illegal to add tomatoes to chowder?! Oh yeah, New England takes its clam chowder seriously.

IMG_2279

The recipe here calls for cooking the potatoes and clams most of the day in a slow cooker, then creating a roux and adding it in just before serving.  I have added in my own Polish/Slovak flair by switching the cream for sour cream, creating what we call a “zapraska” (used to make Hungarian chicken paprikush soup) to deepen the flavor of the roux and lend a creamier final flavor.

You could instead cook all the ingredients but the sour cream together all day, and then simply add small amounts of hot liquid to the sour cream and flour until thickened and stir it in just before serving.  That would be the ultimate hands-off chowder recipe.

Ingredients:

  • 12 oz clams, fresh or frozen, preferably in their own juice
  • 2-3 tbsp olive oil or butter
  • 2 large baking potatoes
  • 1 onion
  • 2-3 cloves garlic
  • 2-3 ribs celery
  • 8 oz fish sauce or clam juice
  • 8 oz sour cream
  • 1/4 cup flour or cornstarch

Ingredients for slow cooker new england clam chowder

Step 1: Dice the potatoes and put into the slow cooker. Add the entire contents of the clams (or fresh and add the clam juice). Add water to cover. (Add more for thinner soup, add just enough to cover potato pieces for thicker soup). Put the slow cooker on “low” for at least 2 hours, or up to 8 hours.

IMG_2276

Step 2: Dice the celery, garlic, and onion into small pieces. Add the oil and veggies to a frying pan, and cook for 7-10 minutes, until translucent.

IMG_2277

Step 3: Add the flour to the pan with the oil, stir for 2-3 minutes. Then add the fish sauce and a little water from the slow cooker until it forms a thick paste. Mix in the sour cream, and whisk it all together well. This is the roux (pronounced “roo”) you will add to thicken the soup.

IMG_2278

Step 4: Add your roux to the slow cooker and mix well.  Now your soup is ready to serve! Add more flour and less water to thicken, or add more water to make a thinner soup.  Serve with nice hearty rolls and/or a fresh green salad.


Swiss & Lox on Toast


As you may know, I am a huge fan of salmon, especially smoked salmon in the form of lox. Lox is amazing on bagels and toast, or crackers, or pasta. Salmon is known as a great source of lean protein, and omega-3 fatty acids.

This is a great, quick breakfast or snack, or even light lunch option. Look for sales especially, as I got this 4 oz pack of salmon for only $1.50, and the cheese for less than $1.  The salmon I bought was pre-seasoned with black pepper and dill and who know what other goodies, but you can use whatever kind you like. You can also use any kind of spreadable cheese here, and fresh herbs if you have em.

Ingredients:

  • 1 ounce lox
  • 1 tbsp swiss cheese
  • 1 slice wheat bread
  • Optional: squeeze of lemon juice

IMG_7751

Step 1: Spread 1 tbsp of your cheese on the bread, toasted or not.

IMG_7753

Step 2: Top with a heap of lox. If desired, squirt on some lemon or lime juice, a sprinkle of sea salt, or fresh diced herbs. Enjoy!


Couscous & Beans with White Fish


This post contains affiliate links. See Partnership page for more.

Since I made my own canned pinto beans, I’ve kept them in the refrigerator so that there’s little risk of botulism growing. This means that I’ve also been coming up with ways to use them up quickly, so beans have been featuring in meals all week in various ways.

I made a Red Beans & Rice that was absolutely delicious and will be part of my usual meal rotation now, and used my beans in stuffed bell peppers. Now I am considering a pinto bean hummus. Is that blasphemy? I don’t care.

This is a great way to get your fiber for the day and sneak in some extra veggies. Even if you don’t like fish, this blend of flavors and textures may change your mind.

Ingredients:

  • 3/4 cup couscous (cooked)
  • 3/4 cup beans
  • 1/2 cup frozen diced peppers and onions
  • 1/2 cup spinach
  • 1 3 oz white fish fillet
  • 2 tbsp lemon juice or vinegar
  • Salt & pepper & paprika

IMG_7468

Step 1:  To cook couscous, take about 3/4 cup water and heat in microwave 2-3 minutes, until near boiling. Pour over 1/2 cup couscous and let sit, covered, for 10-15 minutes.

IMG_7469

Step 2: Meanwhile, in a pan combine the frozen veggies, spinach, and beans. Cook 5-7 minutes, stirring often so nothing sticks. The spinach should wilt to a fraction of its size, and the veggies will soften. Fluff the couscous with a fork, and pour veggies on top.

IMG_7470

Step 3: In the same pan, add the white fish and spray lemon juice over it. Sprinkle with salt and pepper and cook 4-5 minutes. Flip, and cook the other side another 2-3 minutes, until it is fully white and flakes easily with a fork. Add more lemon juice if you want.

IMG_7472

Step 4: Put the fish on top of the whole bowl, sprinkle with more seasonings, and dig in!

IMG_7474


[amd-zlrecipe-recipe:2]

Pistachio-crusted baked salmon


You may have heard that nuts of all kinds are good for you, in small amounts. They all contain healthy protein, and some level of good fats. A personal favorite since I was a kid, pistachios are a great choice. Grown in bunches on bushy trees, pistachios are available year round.

Regular consumption of pistachios in the diet helps to lower total as well as bad LDL cholesterol and increases good HDL cholesterol levels within the blood. They are a part of the Mediterranean diet, which is high in heart-healthy fats such as olive oil and avocado, as well as vegetable-heavy and fish friendly.

Research studies suggest that Mediterranean diet that is rich in dietary-fiber, mono-unsaturated fatty acids, and antioxidants help to prevent coronary artery disease and strokes by favoring healthy blood lipid profile. Pistachios also contain many antioxidants, carotenes, multiple minerals, B vitamins, and vitamin E.

IMG_4786

Though a good thing, you can get too much. They contain about 550 calories per 100 grams, so as with most good things you need to exercise restraint. A tough task indeed when you have a bowl for shells and a bag of nuts. I know I’ve looked down to see a pile of shells much larger than I thought possible many a time.

While I love pistachios plain in the shell, I also love combining multiple heart-healthy options into a tasty health bonanza. What could be more heart-healthy than a salmon fillet?! With tons of omega-3 fatty acids and protein of its own, salmon is one of my favorite types of fish to cook and eat. Since I also already had pistachios lying about, they seemed a natural match.

IMG_4788

And since I have just done a post about sweet Brown Sugar & Maple Apple Glazed Salmon, this recipe will take the fish in the savory direction.

Ingredients:

  • 2 4-oz salmon fillets
  • 1/4 cup crushed pistachios
  • 1/3 cup bread crumbs
  • 2 tbsp plain yogurt (or mayo)
  • Cooking oil

IMG_4787

Step 1: Shell and crush the pistachios. I put them in a plastic bag and slammed them with my rolling pin. Put on a flat plate with the bread crumbs. You could use crushed crackers or flour here too.

IMG_4789

Step 2: Smear 1 tbsp yogurt onto each fillet. Don’t be afraid to get messy and use your hands.

IMG_4792

Step 3: Place the yogurt-smeared side down on the nut and bread mixture and press. This creates the crunchy coating on the fish. The yogurt helps keep the moisture in while the nuts give it texture and great flavor.

IMG_4795

Step 4: Spray an oven-safe baking pan with cooking oil, and place the fillets inside. Bake at 350 for 15-20 minutes, until fish is light pink and flakes easily with a fork.

IMG_4799

The fish cooks up nice and juicy, with just a hint of nutty flavor and a crisp outer coating. You can use a beaten egg or milk or mayonnaise in place of yogurt, and other types of nuts, or none at all if you have allergies.

IMG_4800

As you can see, I served mine with a baked potato and sweetly addictive and stunningly easy Mexican street corn.

IMG_4803

So do your heart and your taste buds a favor, and cook this up for dinner soon!

IMG_4805

Brown Sugar and Maple-Apple Glazed Salmon


Salmon is one of my favorite kinds of fish. As I’ve said before, white fish are awesome because they are so versatile, but salmon can hold many bolder flavors while also bringing its own flavor profile to the table. With the mainstream becoming more aware of its amazing protein punch and heart-healthy omega-3s, salmon is increasingly becoming a popular protein option for any meal.

Salmon has a stronger fishy taste than some, but that definitely depends upon how you cook it and what you serve it with. There are so many good options for salmon; including grilling, broiling, sauteing, and baking.

Salmon can easily be paired with something savory or sweet. One of my favorite things to incorporate is brown sugar. The sweet, caramely notes work wonders to bring out the fish’s unique layers of taste. And to go with brown sugar, butter and apples are natural accompaniments.

Ingredients:

  • 2 3-oz salmon fillets (or one big 6 oz-er)
  • 2 tbsp brown sugar
  • 2 tbsp butter
  • 1 medium firm apple (such as Gala or Fuji)
  • 1/4 cup apple juice or cider
  • 2 tbsp maple syrup

Veggie Rice

  • 3/4 cup uncooked rice
  • 1 small zucchini
  • 1 cup fresh spinach
  • Garlic salt to taste

IMG_4559

Step 1: Dice the apple into small bite-sized pieces. In a frying pan over medium heat, add the butter, apple juice, apples, and maple syrup. Bring to a boil, and simmer 3-5 minutes.

Step 2: Add the salmon fillets and cook 5 minutes. Flip, then sprinkle with brown sugar. Cover and simmer 5-10 more minutes, until sugar is slightly caramelized and the fish is cooked through. It should be light pink in color and flake easily with a fork.

IMG_4560

If you’d like to make this rice as a side, dice up the zucchini. Either in a rice cooker or a sauce pot, add the rice, zucchini, spinach, and 1 1/2 cups of water or stock. In a rice cooker, mix and turn on. Fluff before serving.

If using a pot, bring to a boil, and then simmer on low with the cover on for 20 minutes. Fluff with a fork, and serve alongside salmon with garlic salt to taste.

IMG_4562

The salmon is flaky and sweet, with a sugar glaze and apple flavor. The apples become soft and sweet, almost like having dessert with your dinner!

IMG_4563

Lemon Pollock with Olive Tapenade


Fish is healthy and delicious, especially white fish like Alaskan pollock, but it can be bland or boring. Some think this is a negative, but I see it as a huge perk. Fish is the perfect neutral, like a flattering beige sweater or couch. You can dress it up however you like, and it goes well with all types of spices, cooking styles, toppings, and side dishes.

Tapenade is a classical Provençal French dip slash topping. It has also been growing in popularity in other areas of the world, like Greece and the US. The base ingredient is olives. The rest of the ingredients vary by location and chef. Typically, capers, olive oil, garlic, and anchovy fillets are also involved. But there are plenty of variations in which you don’t need anchovy, or no olive oil. (I had sardines, not anchovy, so I used that instead. And it turned out fine.)

Ever since I bought a jar of pimiento and a jar of kalamata olives, I’ve been wanting to make olive tapenade. I finally put it on my meal plan, and made it with some white fish fillets. It was indeed everything I ever dreamed it would be!

It is an amazing topping for fish, but I imagine there are so many other possible uses. Spread on crusty bread slices, a condiment for a sandwich, in pasta like pesto, a dip for crudites, a stuffing for poultry, or as a salad dressing. The possibilities are endless! And it keeps for some time in the fridge, as long as you pour a thin layer of olive oil on top to preserve it. So make a big batch.

25599
Photo from Joyful Abode

Ingredients:

  • 3 white fish fillets
  • 1/4 cup lemon juice
  • 4 tbsp fish sauce
  • Salt + pepper
  • 1 cup rice
  • 1 can diced tomatoes

Olive Tapenade

  • 2-4 tbsp olive oil
  • 1/2 cup olives, pits removed
  • 3 garlic cloves
  • 1 anchovy or sardine fillet
  • 4 tbsp lemon juice

IMG_2665

Step 1: In a frying pan, place the three fish fillets and cover with lemon juice & fish sauce. Cover with a lid and let cook for 5-7 minutes, then flip. When fish is fully white and flakes easily with a fork, it is ready. Season as desired.

IMG_2672

Step 2: While fish cooks, place olives in a blender or food processor. Meanwhile, boil the rice in 1 cup water and 1 can of diced tomatoes, not drained for 20-25 minutes, until fully cooked.

IMG_2673

Step 3: Blend the olives. Add the garlic, sardine, lemon juice, and a few tbsp olive oil. Blend, adding extra juice or oil as needed to make it smooth.

IMG_2686

Step 4: Place a scoop of rice on a plate, add a fish fillet and a smear of the tapenade topping.

IMG_2688

I got a little creative with the plating. Which do you think looks best?

IMG_2693

The fish is tart and moist yet firm, and is a perfect canvas for the olive masterpiece. The level of saltiness will depend on which type of olive(s) you use, I had a combination of green pimiento and kalamata. You can omit the sardine or anchovy fillet if you don’t have it or don’t like it, but I think it adds an extra layer of “seafood” taste, and since they were packed in tomato paste they also added a subtle tomato flavor.

This is a great, healthy alternative to something like mayonnaise or hummus, with lower fat and carb content yet a huge hit of flavors. Take a walk on the Mediterranean side and try some tapenade today.


Silly American attempts to make Salmon Nigiri

.
I absolutely adore sushi. There are few types I dislike. Something about the soft buttery fish and rice with copious soy sauce just makes me swoon. I know I violate rules by using as much sauce as I do, but I’m over it. Low blood pressure and all that. I flipping love soy sauce okay?
.
Oh, and not all sushi is raw fish. Common misconception. Actually the majority of sushi is not raw. You must have nigiri or sashimi to be sure it’s raw. And even then… probably some exceptions. The blog The M Resort has a handy guide for keeping sushi terminology straight. The main ones are sushi, maki, nigiri, and sashimi. I won’t even try to overwhelm you or myself with all the different nuances of flavor, texture, color, and types of fish, or vinegars, additives, and temperature’s effects on rice.
.
Sushi = any Japanese style fish roll, may or may not be raw, include vegetables, or be rolled in seaweed (nori).
Maki = rolled sushi using a bamboo mat. Typically rolled in seaweed, but can also use thinly sliced cucumbers.
Nigiri = raw slices of fish served over a hand-rolled slab of rice, no nori. Some sushi chefs add wasabi between the fish and rice.
Sashimi = raw slices of fish served without rice, as naked as it gets. Try it with wasabi and soy sauce mixed together.
So one day I’m grocery shopping, and see a gorgeous salmon fillet on sale that needs used today. As often happens when at the grocery store, just seeing one item sparks an idea, and today’s idea was “why not try to make my own sushi at home?” Don’t mind if I do. I did recently purchase a rice cooker (which I also flipping love) so hopefully that would make the process even easier.
.
I did nothing special to the fish itself, as I wanted its natural flavor. I did try to doctor up the rice, and made my own dipping sauce. I also had some dumplings in the freezer, which I thawed and fried to make a lovely lunch.
.
Ingredients:
1 8 oz salmon fillet
1 cup white rice
1 1/2 cup water
1/4 cup vinegar
1 tbsp sugar
1 tbsp salt
.
Garlic-Ginger Dipping Sauce:
1/4 cup soy sauce
1/4 cup fish sauce
1 tsp diced garlic
1 tsp sriracha
1 in piece ginger, peeled and sliced
1 tsp sugar
2 tbsp olive oil
1 tbsp cornstarch
.
Step 1: Put the rice and water in the rice cooker and cook. Alternatively, cook the rice in the microwave or stove-top according to package directions.
Step 2: White rice is cooking, mix all dipping sauce ingredients in a small bowl, and heat 3 minutes in microwave. Whisk well and set aside.
Step 3: Slice the fish fillet as thinly as possible on the diagonal. Once rice is cooked, let cool to room temperature. Add vinegar, sugar, and salt and mix well.
Step 4: Take a tbsp of rice, and form into an oblong oval shape with your fingers. Press a thin slice of fish onto the rice and place on plate. Repeat with all fish slices.
Step 5: Fry dumplings according to package if you have them. Place dipping sauce on a plate with the nigiri.
Step 6: Enjoy! While not as good as a sushi restaurant, it was dang good for my first attempt. You better believe anytime fresh fish is on sale I will be trying this again.
.
You could use really any type of filleted fish, and if you want to get real crazy, buy some nori (seaweed) sheets and make rolls. Add in avocado, carrots, cucumber, cream cheese… the possibilities are endless. Sushi is a great vegetarian and vegan option, you can even make dessert sushi! Give it a try.
.
What’s your favorite type of sushi?

The Art of Ethiopian: Part 2 – Chicken & Fish


This is part two of a four-part series on Ethiopian cooking, the American way. Since I am such an expert (I know someone from Ethiopia. Plus I’ve eaten it like… four times) I decided to share my versions of some of my favorites.

The recipes are fairly straightforward, you just need to obtain the spices, and be patient. All said, the cooking for this dinner party probably took about 6 hours. The dishes took twice that long. 😉

The Art of Ethiopian Cuisine: Part 1 – Beef & Pork

The Art of Ethiopian Cuisine: Part 2 – Chicken & Fish
The Art of Ethiopian Cuisine: Part 3 – Potatoes & Lentils
The Art of Ethiopian Cuisine: Part 4 – Cheese, Greens, & Injera

Part 2: Chicken and Fish

Sounds like the punchline of a bad Lent joke. Appropriate for April I guess. (Is April still when Lent happens?) But since the earlier post had already covered the ‘red’ meats of beef and pork, this one is for the “white meats”. Sorta.

Chicken stew in Ethiopian is called Doro Wat. I’ve figured that most things that say “Wat” mean meat stew, whereas “Tibs” means meat and vegetables stewed together. As in “Yasa Tibs” meaning my fish, tomato & spinach stew.

The recipe I based the Doro Wat from is found HERE from NomNomPaleo, while the inspiration for the fish is found at Allrecipes HERE. 


Ingredients (Doro Wat):

  • 3-4 pounds chicken (bone in will give you better flavor, I used a mix of 2 thighs and 2 boneless skinless breast)
  • 1/2 cup diced onion
  • 2 tbsp butter
  • 1 cup chicken stock
  • 2 tbsp turmeric
  • 1 tbsp garam masala
  • 1 tbsp ginger powder


Step 1: Add stock to chicken in a pan, and cook over low heat until no pink is left. Cut the breast into bite-sized cubes.


Step 2: In a separate pan, add butter and diced onions. Cook until the onions are soft and translucent. Add 1 cup diced onion to the chicken.


Step 3: Add the rest of the spices, and simmer for 30 minutes or until serving. Add more stock if liquid starts to evaporate.


Ingredients (Yasa Tibs):

  • 1-2 small tilapia (or other white fish) fillets
  • 1 cup fresh spinach leaves
  • 1 tbsp garam masala
  • 1 small can tomato paste
  • 1 tbsp olive oil
  • 1/4 cup fish sauce (or vinegar if you don’t have it)
  • 2 tbsp lemon juice
  • Garlic salt to taste
  • Squirt of Sriracha or Tabasco, if you like


Step 1: Cut the fish into bite-sized pieces. Cook in a pan with olive oil until white and flaky.

Step 2: Add all sauces, spices, and spinach. Simmer at least until spinach is wilted, until serving.

This one is delightfully salty and tangy from the fish sauce and acidic lemon juice. And probably the healthiest stew thus far, with little to no fat and a spinach nutrition boost.


Up next: 
Part 3 – Potatoes & Lentils

Tropical Shrimp Tacos

Since the weather has been chilly and snowy, I’m feeling the urge for all things tropical. Dreams of sunshine, beaches, pineapples, little umbrella drinks, and fresh produce keep me going through the seemingly endless winter months. Pineapple is one of my favorite fruits and always makes me think tropical, so I decided to make something with a pineapple marinade. A quick check of the freezer showed me I had a bag of shrimp, so shrimp tacos it is. Toppings included my perfect refried beans and the marinade was nearly the same as the perfect pancake syrup, with a few additions.


Ingredients:
1 pound shrimp
Tropical Shrimp Marinade (below)
Toppings of your choice: rice, beans, coleslaw, onions, peppers, fruit compote, avocados, salsa, ranch, go crazy!

Tropical Shrimp Marinade:
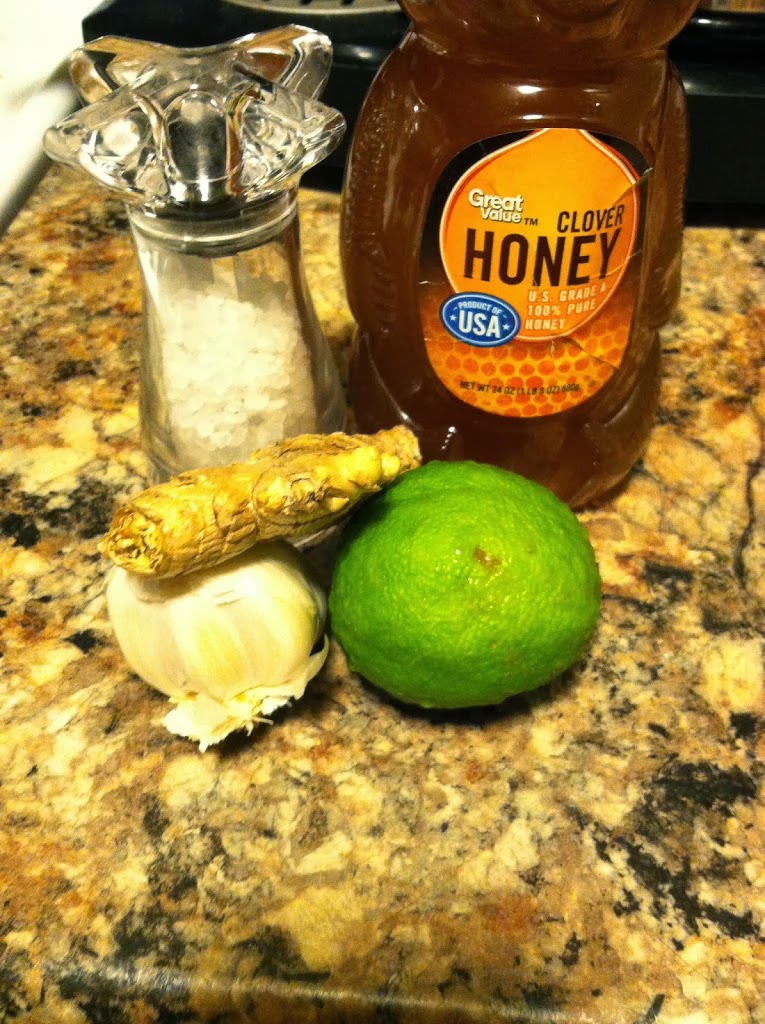
Juice of 1 lime
1 inch fresh ginger, peeled and chopped
3 cloves garlic, chopped
1/4 cup honey
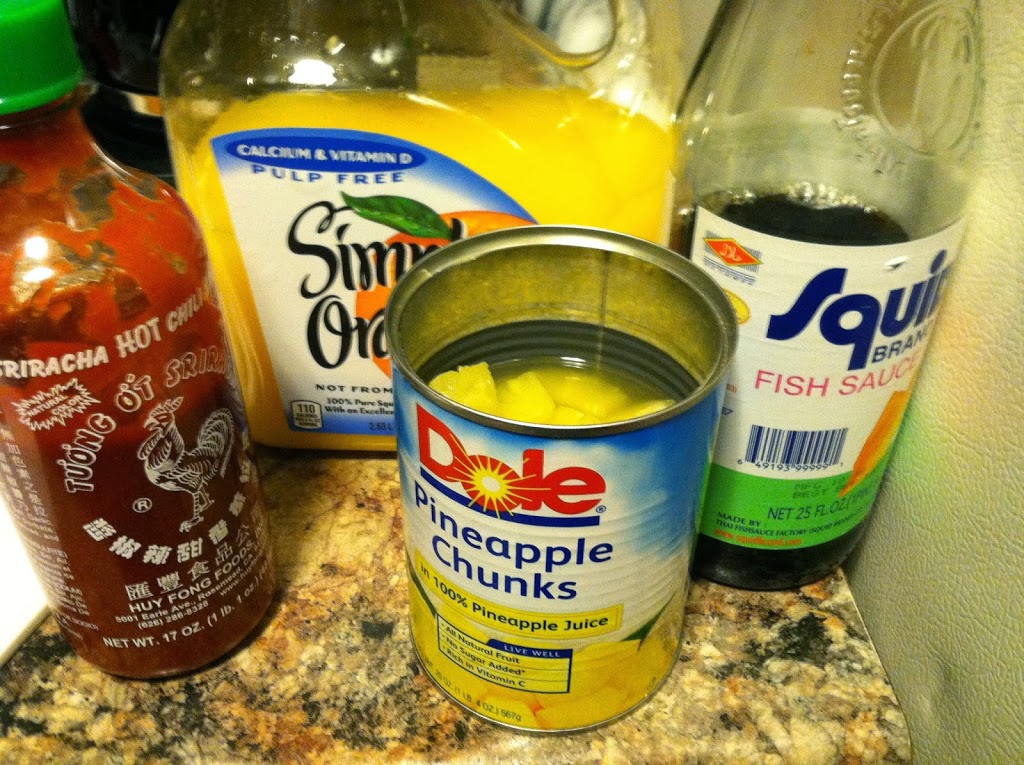
4 tbsp fish sauce (or soy sauce)
1/2 cup orange juice
1/2 can of pineapple chunks plus juice
Squirt of sriracha

Step 1: Mix all your ingredients in a small bowl.

If you don’t have a garlic press (like me) you can just use a fork to smash the garlic.

Give the marinade a whisk to incorporate the honey and Sriracha and mix everything together. (PS, you can save the marinade to use it one more time. I put a pair of pork chops in for the next day, and they were also delightful! Served over some extra rice I made. Efficiency.)

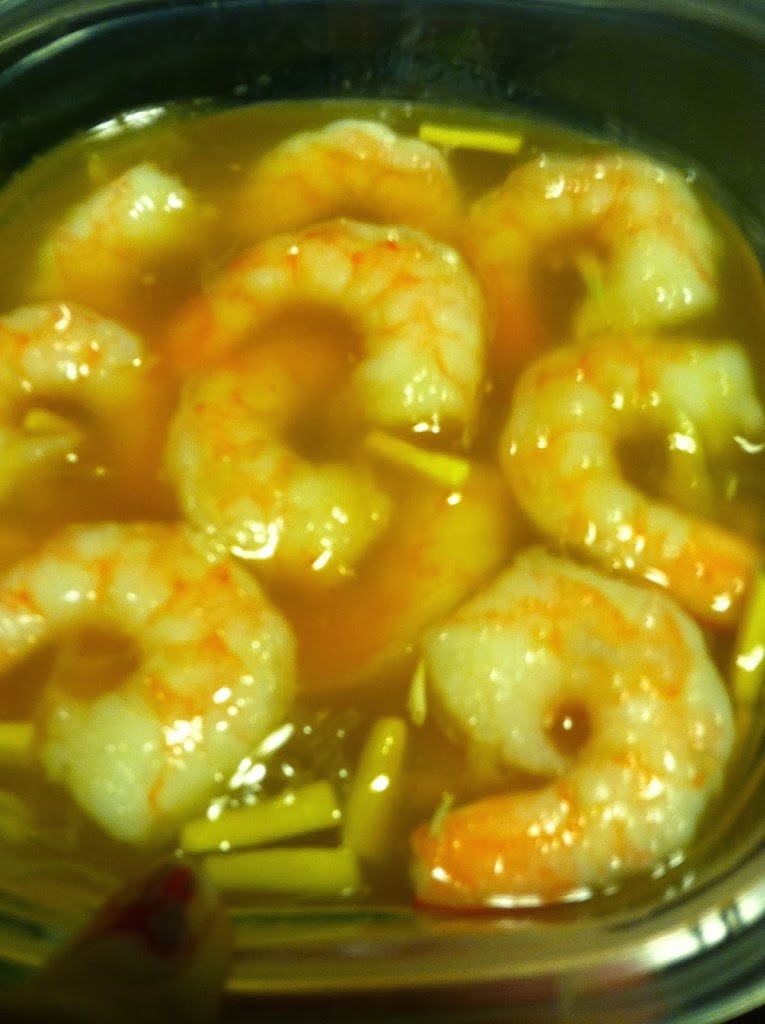
Step 2: Peel off the tails and let the shrimp marinate overnight or during the day, at least 4-6 hours.

Step 3: In a frying pan, cook the shrimp over medium heat on one side until it begins to get brown and crispy. Flip and cook another 5-10 minutes.

You want that gorgeous color and crunchy covering. I stir fried bell peppers, onions, corn, and the rest of the can of pineapple chunks to go with the shrimp. I also made some plain rice, and my Perfect Refried Beans to round out the meal.

Layer all your toppings in, and enjoy! I loved the sweetness of the pineapple, and the shrimp don’t have a fishy taste at all. If I had cabbage I would have made coleslaw and a chipotle ranch sauce, but I guess I’ll save that for another time.

 
What’s your favorite thing to do with shrimp?