Category Archives: Healthy

Rice is Nice: 15 Recipes for Rice


According to Wikipedia (which we all know is the single most accurate and respected source of information in this era) “Genetic evidence has shown that rice originates from a single domestication 8,200–13,500 years ago[4] in the Pearl River valley region of China.[5] ” So rice has been around, domesticated by people, for at LEAST 8000 years! Rice was spread to Europe through West Asia, then to the Americas by European colonization.

Today, rice is the most important grain in regards to human nutrition, beating out both wheat and corn, as it supplies nearly 1/5 the calorie intake worldwide. One-fifth of all calories eaten anywhere in the world comes from rice. Wow.

And I can certainly see why. Rice is delicious as a side dish and endlessly versatile. It is able to grow in many different climates, in large amounts. Literally any vegetable cooked up and mixed with rice is great, it complements all meats, and you can pour nearly any sauce over it with great results.

It’s awesome in soup, burritos, as a side or main dish, sushi, dessert (rice pudding anyone?), heck on its own with some soy sauce as a snack. Rice can also be ground into flour and used in bread, baking, or as a thickener. Rice paper, noodles, and wrappers are staples in Asian cuisines as well.

Ways to prepare rice

To cook rice, it is typically boiled or steamed to cause it to absorb water. This can be done rapidly in a large amount of water which is then drained off, or more slowly in an amount of water similar to the amount of rice. Once cooked, the rice can be further processed by frying in oil to make fried rice.

Soaking rice before cooking may improve cooked texture, decrease cooking time, conserve fuel, minimize exposure to high temperature, and reduce stickiness.

Electric rice cookers are also very popular in Asian countries and increasingly so in the US. This is one of my favorite ways to make rice; you simply add 2x the amount of water (ex: 1 cup rice + 2 cups water) and flip the switch. You can do whatever else you need to do, and 40 minutes later your rice is ready!

Rice Cooker

White vs. Brown rice

Rice grains with the chaff removed is what we know as brown rice, and it has the bran and germ still attached. When you remove the germ, you get white rice. If you remove every layer, you have “Musenmai”, a Japanese style of rice, ready to boil.

According to the USA Rice Federation, rice contains no trans fats or saturated fats, no sodium or cholesterol. It is also a staple for those with celiac disease because of the lack of gluten. In 2004 the U.N. declared the International Year of Rice, in an effort to promote awareness of how important a crop rice is and its role in alleviating poverty and malnutrition worldwide.

Vitamin A deficiency is a very real health concern in nations which get the majority of their calories from rice. Research into how to make rice more nutritious led to “Golden Rice“. This rice is genetically engineered to contain the precursor for Vitamin A, beta-carotene. The beta-carotene turns the rice yellowish gold, hence the name.

I recently had a friend tell me that she wished she knew more things to make with rice, because she knows rice is delicious and good for you. So this post is inspired by her, to inspire all you home cooks out there with some Jasmine, wild, or brown rice, and confusion as to what to do with it tonight.


SIDE DISHES

Rice is an excellent side dish, and I’m sure you know many more possibilities than this list, but here are some rice sides ideas.

cream of mushroom soup over rice

1. Cream of Mushroom rice: Boil a batch of rice. For extra oomph, use half milk when preparing the rice. Open a can of cream of mushroom soup, and pour over, mix into rice, season with salt & pepper, and serve.

2. Mexican Rice: Prepare 1-2 cups rice, mixing in 1 can diced tomatoes with green chilies in place of 1 cup water. Add 1/2 cup corn, and/or 1/2 cup black beans. Serve.

3. Burritos: Rice is a perfect addition to most Mexican dishes. Take a tortilla, fill it with meat (if you want), beans of any kind, cooked veggies, and warm fresh rice. Wrap up and scarf down.

4. Risotto: In a pan, melt 4 tbsp butter. Add 1 cup raw rice, and 1/4 cup chicken broth. Heat to medium, just a simmer, and stir. As stock evaporates, continue adding more in 1/4 cup increments, until you add 1 1/2 cups. After 30-40 minutes, the rice will be soft and risotto-like. Add vegetables while cooking if desired. You can also use cream.

5. Cilantro-Lime Rice: Prepare 1-2 cups rice. When fully cooked, add in 2 tbsp sea salt, 1/4 cup lime juice, and 3 tbsp chopped cilantro. Mix well and serve.

cilantro lime rice

Or, whip up a batch of plain white rice as a base for:

MAIN DISHES

Rice can be included with other items to make a hearty, nutrient-dense main dish. Here are some ideas.

6. Chicken & Rice Soup: in a large pot, combine a few pounds of chicken (bone-in is best for the flavor), a cup or two of diced veggies, a can of beans, and a cup of rice with just enough water to cover with an inch or two. Simmer 30-60 minutes and enjoy.

7. Fried rice: Fried rice is super simple, and you can make it into anything. Add veggies & an egg for a vegetarian version, or mix in some chicken, pork, or steak strips.

8. Red Beans & Rice: Cook up a batch of white rice, add Cajun seasonings and sausage if you like, and one can of red beans. Frugal, filling, and delicious.

9. Bean & rice burgers: In a large bowl, combine 1 cup cooked rice (any kind) with 1 can of beans (any kind) and mash together. Add 2-3 tbsp oil, and flour until it sticks together. Shape into patties and cook in an oiled frying pan on both sides.

10. Broccoli cheddar rice: In a slow cooker or pot, combine 1 cup rice, 1 cup milk, 1 cup shredded cheddar cheese, and 1 cup frozen broccoli. Simmer 30-50 minutes, mix well and enjoy. You can add cooked shredded chicken for a meat eater one pot meal.

slow cooker broccoli cheddar rice


11. Porcupine meatballs
: a Slovak classic; mix 1 pound ground beef, 1 cup cooked rice, 1 can tomato sauce, and spices (garlic salt, Mrs. Dash, black pepper…) in a bowl. Shape into meatballs, and cook on a cookie pan at 350 for 30-45 minutes. Serve with extra tomato sauce and mashed potatoes.

12. Stuffed peppers: (or zucchini, mushrooms, cabbage rolls,  grape leaves…) for this recipe, you take the above recipe for porcupine meatballs, and stuff it into a vegetable. Wrap it in cooked cabbage leaves, pile it onto portobellos, or stuff hollow bell peppers. Bake at 350 for 30-50 minutes, until the outer veggie is tender.

13. Chicken & Rice casserole: the absolute easiest way is to take 2 boneless skinless chicken breasts, dice into chunks, and put into a 8×8 oven-safe pan. Mix in 1 cup uncooked rice, 1 cup milk or chicken stock, and 1 cup diced vegetables. Cover with foil and bake at 350 for 1 hour, uncover and sprinkle with cheese and bake another 5 minutes until crisp.

14. Sushi: as my salmon nigiri post shows, even an unskilled cook can manage an attempt at sushi. Prepare the white rice with vinegar and spices, and cover with fish of your choice. Seaweed optional.

cooked white rice and salmon for nigiri

DESSERT

15. Rice pudding: a classic dessert with endless variations, you can make this stove-top or in the oven. The basics are: simmer rice in milk 30-60 minutes, stirring regularly. Add cinnamon, sugar, any other sweeteners or flavorings (like almond extract, vanilla, maple syrup) and possibly eggs, chill and serve sprinkled with cinnamon.


And there you have it, one of the most versatile grains in the known world, with over 15 ideas of how to cook with it tonight. If you have unique ideas not mentioned here, please feel free to share!


Smart snacking: Peanut Butter & Nutella Rice Cake


When you get a snack attack, sometimes you just gotta satisfy it. Sometimes you crave sweet, sometimes salty, sometimes crunchy. What happens when you want all three but don’t want to break the calorie bank?

You combine a classic “boring” dieter snack (rice cakes) with a wonderful and delicious thing (Nutella) and a tasty-but-also-good-for-you something (peanut butter). Genius.

Ingredients:

  • 2 large rice cakes (any flavor, I used cinnamon apple here)
  • 1 tbsp Nutella or other chocolate spread
  • 1 tbsp peanut butter
Step 1: Spread peanut butter on one rice cake. Spread Nutella on the other.
Step 2: Mash the two cakes together to make a delightful, guilt-free sandwich snack.
Enjoy!

…

Lemon Pollock with Olive Tapenade


Fish is healthy and delicious, especially white fish like Alaskan pollock, but it can be bland or boring. Some think this is a negative, but I see it as a huge perk. Fish is the perfect neutral, like a flattering beige sweater or couch. You can dress it up however you like, and it goes well with all types of spices, cooking styles, toppings, and side dishes.

Tapenade is a classical Provençal French dip slash topping. It has also been growing in popularity in other areas of the world, like Greece and the US. The base ingredient is olives. The rest of the ingredients vary by location and chef. Typically, capers, olive oil, garlic, and anchovy fillets are also involved. But there are plenty of variations in which you don’t need anchovy, or no olive oil. (I had sardines, not anchovy, so I used that instead. And it turned out fine.)

Ever since I bought a jar of pimiento and a jar of kalamata olives, I’ve been wanting to make olive tapenade. I finally put it on my meal plan, and made it with some white fish fillets. It was indeed everything I ever dreamed it would be!

It is an amazing topping for fish, but I imagine there are so many other possible uses. Spread on crusty bread slices, a condiment for a sandwich, in pasta like pesto, a dip for crudites, a stuffing for poultry, or as a salad dressing. The possibilities are endless! And it keeps for some time in the fridge, as long as you pour a thin layer of olive oil on top to preserve it. So make a big batch.

25599
Photo from Joyful Abode

Ingredients:

  • 3 white fish fillets
  • 1/4 cup lemon juice
  • 4 tbsp fish sauce
  • Salt + pepper
  • 1 cup rice
  • 1 can diced tomatoes

Olive Tapenade

  • 2-4 tbsp olive oil
  • 1/2 cup olives, pits removed
  • 3 garlic cloves
  • 1 anchovy or sardine fillet
  • 4 tbsp lemon juice

IMG_2665

Step 1: In a frying pan, place the three fish fillets and cover with lemon juice & fish sauce. Cover with a lid and let cook for 5-7 minutes, then flip. When fish is fully white and flakes easily with a fork, it is ready. Season as desired.

IMG_2672

Step 2: While fish cooks, place olives in a blender or food processor. Meanwhile, boil the rice in 1 cup water and 1 can of diced tomatoes, not drained for 20-25 minutes, until fully cooked.

IMG_2673

Step 3: Blend the olives. Add the garlic, sardine, lemon juice, and a few tbsp olive oil. Blend, adding extra juice or oil as needed to make it smooth.

IMG_2686

Step 4: Place a scoop of rice on a plate, add a fish fillet and a smear of the tapenade topping.

IMG_2688

I got a little creative with the plating. Which do you think looks best?

IMG_2693

The fish is tart and moist yet firm, and is a perfect canvas for the olive masterpiece. The level of saltiness will depend on which type of olive(s) you use, I had a combination of green pimiento and kalamata. You can omit the sardine or anchovy fillet if you don’t have it or don’t like it, but I think it adds an extra layer of “seafood” taste, and since they were packed in tomato paste they also added a subtle tomato flavor.

This is a great, healthy alternative to something like mayonnaise or hummus, with lower fat and carb content yet a huge hit of flavors. Take a walk on the Mediterranean side and try some tapenade today.


Slow Cooker Red Pozole with Pork


So I’ve been tutoring a high school kid in Biology for a year. He’s great, as are his parents. And his mother is a large part Native American. She is an amazing cook, I often show up to tutor and/or leave to tempting smells wafting from the kitchen. They are kind enough to ask me to share their dinner with them quite often.

As I love cooking myself, typically I have dinner already started in the Crock pot or at least plans, so I decline. However, one night she was serving up this thick, red stew that smelled too irresistible. This was my first introduction to pozole.

IMG_2065

Pozole means “foamy”; also spelled “pozolli” or “posole”. It is a traditional stew originally from Mexico, which once had ritual significance due to its use of maize, called hominy. The word “hominy” comes from the Powhatan language word for prepared maize. (Maize is corn).

Hominy is a very interesting thing. To make it, you take regular corn kernels, dry it, and then treat it with an alkaline agent to break down the cellulose in the corn. The result is puffy, chewy, soft kernels that look a little bit like corn-shaped popcorn.

Well, this tomato-pork-hominy stew was unlike anything I’d ever had, so of course I had to ask for the recipe. She had gotten it from the Denver Post a few years back, and was more than happy to share it with me.

red posole with pork

The red pozole with pork is the recipe I used and show here, but there is also one for Green Pozole with Chicken. I’ll save that for another day.

IMG_1883

I wanted to try this right away, but I forced myself to be patient. Normally I just center my grocery shopping around sales, but this time I kept an eye out for the ingredients I needed. Anytime I want to make something with a unique or expensive ingredient I try to wait to maximize my food dollars. As soon as I saw hominy on sale at the local Save-A-Lot I snagged a can.

As is my way, I took the recipe, tweaked it a bit to what I like and what I had in the house, and it turned out wonderful! I don’t like spicy foods, so I left out the peppers, but I did throw in a pinch of dried chipotle pepper to keep the Native American feel of the recipe. If you want to go all the way and buy the exact spices called for, be my guest. But I omitted the Mexican oregano, and used regular paprika, not Spanish. I also added a can of red beans for extra fiber and filling power.

Slow cooker red pozole with pork:

  • 1.4 pound pork roast
  • 2-3 tbsp garlic powder
  • 1/2 tbsp cumin
  • Pinch chipotle pepper
  • 1 tbsp chili powder
  • 2 tbsp paprika
  • 1 whole white onion, diced
  • 1 can diced tomatoes, with liquid
  • 1 can red beans, drained
  • 1 29oz can hominy
  • 6 chicken bouillon cubes and ~24 oz water
  • 3 tbsp flour
  • 1 bottle beer (Colorado native)

IMG_2048

Step 1: In slow cooker, mix flour, beer, spices, diced onion, and tomato.

IMG_2049

Step 2: Heat water in the microwave for 2-3 minutes, dissolve the bouillon cubes and add to crock pot. Or just use chicken stock.

IMG_2050

Step 3: Dice the pork roast into bite-sized cubes. I had a 1.4-pound roast defrosted, so I used that. But you could use chops also.

IMG_2052

Peel or cut off fatty pieces to make it more lean.

IMG_2053

Step 4: Add the pork and hominy to the slow cooker. Cook on low 6-8 hours, or high 2-4 hours.

IMG_2062

The finished product is a complex but light stew, with an amazing depth of flavor. You can obviously add more spice to your taste, but I loved it the way it was. I also didn’t have ground cumin, so the little pieces were annoying at the bottom, but the flavor they added was worth it.

IMG_2066

I made some biscuits to serve with the posole, and my s.o. loved it too. The recipe suggests shredded cabbage, radish, cilantro, cheese, or sour cream as garnishes. If you add extra flour or cornstarch you can make it thicker, add more stock to make it more soup-like.


What’s your favorite slow cooker meal?


Turkey & Veggie Tacos

.
Tacos are always a popular meal choice. They are great for so many reasons:
  • Frugal – use up whatever meat or vegetables are in the house
  • Green – use up vegetables before they go bad & reduce waste
  • Customizable – you can please meat eaters and vegetarians
  • Healthy – easy to add tons of extra veggies and fiber with beans
Unfortunately, tacos are also very easy to go overboard with and make into fatty cholesterol nightmares. If you use fatty ground beef and heap on cheese and sour cream, your arteries will not thank you. The good news is, there are simple swaps you can make that don’t have a huge impact on overall taste but will have an impact on how huge your waistline is in 20 years….
  • Use ground turkey, pork, or chicken instead of beef
  • Better yet, don’t use meat at all! Use tofu or lots of beans instead
  • Make sure to cram in as many sneaky veggies as possible
  • Swap unflavored Greek yogurt for sour cream
These simple switches seem small, but have big long-term impact. You don’t have to go cold-turkey health nut all at once. Try one at a time and see what works for you.
.
These turkey tacos are super-charged with healthy greens and multiple veggies. But once rolled up in a warm tortilla, you would never know there is so little fat and far fewer calories than your typical taco. My meat eater s.o. even had to admit that they are delicious!
.
Ingredients:
1 pound ground turkey
1 tortilla
1 onion, diced
1 cup diced bell peppers
1/2 head kale
Refried beans
1/2 cup cooked rice
1 tbsp plain Greek yogurt
Sprinkle shredded cheese
Seasoning: garlic salt, cumin, Nature’s Season
Step 1: Brown the ground turkey in a pan. While that is cooking, dice up your veggies. You could use whatever vegetables are in season and that you like, try eggplant, asparagus, spinach, sweet potato…
Step 2: Drain the grease from the meat and season it to your liking. Add in the veggies, hardest ones first. Cook until onion and peppers are soft, and kale is wilted.
Step 3: Open a can of refried beans, or make your own. Heat up in a frying pan or microwave.
Step 4: Warm up a tortilla in the microwave for 10-30 seconds. Layer on the turkey and veggies, 1/4 cup cooked rice, a few tbsp of beans, 1 tbsp Greek yogurt, and a sprinkle of shredded cheddar. Roll it up and enjoy! Alternatively you could use a hard taco shell, or spread over tortilla chips as a fun appetizer.
.
Tacos are so endlessly customizable. I love topping mine with salsa, guac, diced avocado, lettuce, spinach, black beans, shredded carrots… the possibilities are endless. They can be extremely frugal too, rice, beans, and tortillas are all easily found for under $1, and make a very filling and healthy meal. It’s super easy to make them vegetarian or vegan too.
What’s your favorite taco toppings?

Less than 5: Big-kid Ramen

Another in my “Less than 5” recipe series. All recipes beginning with that title will have less than 5 ingredients and/or cost less than $5. Bonus for ones that also take less than 5 minutes. =)
 
Ramen used to be the greatest after-school snack ever. Then in college, it was pretty much a daily staple. At 10-20 cents per pack, the good people of Ramen keep poor college kids worldwide from starving. When I started graduate school, and started taking this blog more seriously, I figured Ramen was no longer part of my life. I had graduated to frittatas, lasagna, and white bean chicken chili. Big kid food. 
But then in my masters study, my Taiwanese advisor had Ramen for lunch nearly every day. She just fancied it up by adding a handful of fresh spinach and an egg. Well of course I had to try it, as the chicken-salt smell of Ramen is hard to resist. Adding veggies ups the nutritional value (which previously was negative zero) and an egg or tuna will bump up the protein.

It turns out to make a decently healthy meal, for way less than a dollar per serving. Ever since then, when I have a random Ramen craving, I give in with the justification that at least it’s “big kid” Ramen. Now you can too!

 
Ingredients:
  • 1 package Ramen noodles
  • 1 cup frozen mixed vegetables or spinach
  • Optional: 1 egg, thinly sliced meats, shrimp, tuna
  • Spices (I used parsley, parmesan, and red chili pepper for kick)

Step 1: Heat the noodles and 2-3 cups water for 3 minutes in the microwave, or pour in boiling water. Let stand for 3 minutes.

Step 2: Add the vegetables and egg. Break the yolk so it doesn’t explode. Microwave another 3 minutes.

Step 3: Stir in seasoning packet and spices, enjoy!

The chili flakes gave it a nice bite of heat, and I like the frozen mixed veggies because of the corn and carrots’ sweetness. You can get creative with this. Use tofu, beans, tuna, chicken. Any cooked vegetable will work well. I’m partial to the chicken flavoring only, but there are beef and shrimp flavorings too.

For 0.10 (noodles) + 0.10 (egg) + 0.10 (frozen veg) = $0.30 

Not a bad meal!


What do you put in your Ramen?

Mediterranean Vegetable Panini


Anything “Mediterranean” has been a buzzword lately. Claims abound that if you eat like someone from the Mediterranean, you will lose weight. I’m not completely sure where “the Mediterranean” even is, but I picture somewhere on the coast of Greece or Italy. The diet involves lots of fresh vegetables like eggplant, peppers, zucchini, mushrooms, etc. as well as health fats from olive oil, fish, and avocado.

Combined with low amounts of red meat, sugar, and saturated fat plus an active lifestyle, it is claimed that you will suffer less cardiovascular problems, health issues in general, and live longer. I’m sure the sun, sand, and surf of the Mediterranean Sea doesn’t hurt… While there is always going to be conflicting information about diets because of marketing and such, here are a few websites for some information: WebMD – Mediterranean Diet Weight Loss Effectiveness?; Mayo Clinic – Mediterranean Diet & Heart Health; US News Best Diet – Mediterranean Diet: What you need to know.

This sandwich was inspired by Udis Bread. They have an eggplant panini that is absolutely amazing, it is a huge slice of eggplant grilled, with grilled red bell pepper and goat cheese. I had bought an eggplant and didn’t know what to do with it, so I decided to try my own version of an eggplant panini. I also had a red bell pepper and some zucchini, so I decided to go all veggie-licious. You can sub in whatever vegetables you like, ones that hold up to grilling are the best. Also I don’t have a ‘real’ grill, so the hand dandy George Foreman did the heavy lifting. You could also use a pan and just put a lid on top of the sandwich weighted down with something to grill it.

Ingredients:
1 1/4″ thick slice eggplant
2 (or 1 really big) slices of zucchini
2/3 red bell pepper, seeded
Handful of spinach
2 tbsp hummus
thick slice cheese (I had white cheddar)

Step 1: Brush or spray grill with olive oil so the veggies don’t stick. Grill eggplant, zucchini, and bell pepper for about 10-15 minutes, until softened and beginning to char.

Step 2: Layer the veggies, hummus, and cheese onto some bread. Spray the grill again, and press the sandwich for 2-5 minutes, just to heat through.


I actually took this in for lunch, and though a little moist from the hummus it held up well.

You can use whatever kind of bread you like, or try a wrap or pita pocket. 


Warning: it may be a better idea to wait until you are ready to eat the sandwich to add hummus. The bottom of the sandwich was a little squishy. If you get rid of the cheese, then this sandwich is also vegan.


No pain no gain? — Delayed-Onset Muscle Soreness (DOMS)


Anyone who has ever begun a weight-lifting regimen, shoveled a long driveway, or lifted something heavy only to be sore the next day (or two, or three…) is familiar with the concept of delayed-onset muscle soreness (DOMS).

This is the constant ache in your muscles that you feel 24-48 hours after doing something strenuous to which you are not accustomed. To be clear, it is not the same as the sharp, immediate pain of a pull or strain, nor is it the same as the muscle fatigue you feel while working out.

What causes DOMS?

There is some misinformation on the internet and in common knowledge that a build up of lactic acid or lactate, created through aerobic respiration, causes muscle soreness. While it is true that a build-up or inability to get rid of lactate can hinder workouts, this is not the cause of DOMS. This is caused by microscopic tears in the muscles during the “eccentric“, or lengthening, portion of an exercise. This causes the muscle to forcefully contract while it lengthens.

The opposite is the “concentric” portions of an exercise. Examples of eccentric moves include walking or running down hills, the lengthening portion of a bicep curl, the downward portion of a squat or lunge, or jumping. It is believed these microtraumas to the muscle fibers combined with inflammation and swelling cause the associated pain.
.
I once had a “leg day” where I did over 200 squats/lunges per leg, and was then limping around for three days after. Hopefully that was just a ‘beginning to build muscle’ stage and won’t be the norm.

Unfortunately, there is not much you can do to prevent this soreness, especially if it is a new activity. When you first begin letting weights or playing a sport, there is going to be some amount of discomfort. There are a few things you can try to prevent or ease soreness.

To ease muscle aches:

  1. Take an anti-inflammatory like ibuprofen or Aleve. This will help calm the ‘pain’ signals to your brain and decrease any swelling so you heal faster.
  2. Take a hot/cold shower. Let me explain. If you take a very cold shower or bath right after the workout, anecdotal evidence says it may help decrease how sore you are later. The next day, if sore, try a soothing hot bath to ease achy muscles.
  3. Try foam rolling. These rolling-pin looking foam tubes are designed to relax the tissue layer surrounding muscles and easy achy soreness. Here’s a Yahoo article about it.
  4. Massage the sore areas. It may hurt a lot while happening, but some swear that it gets rid of pain faster after.
  5. Active recovery. Do light exercise like yoga, walking, or swimming. This makes the muscles continue to move, gets blood flowing through the sore areas, and hopefully help them heal quicker. 
  6. Take Vitamin C before and/or after a workout. Vitamin C is an antioxidant, and may help prevent muscle damage caused by free radicals created when muscles work hard.
  7. Try a creme like IcyHot or Bengay to soothe deep muscle soreness.
  8. Drink lots of water and green tea. Staying well-hydrated is always a good idea, but your muscles can be up to 70% water, so keeping them hydrated means keeping them able to work.

While time is really the only thing guaranteed to help make muscle soreness go away, hopefully this article will inspire you to be safe and smart, and ease your way into weights.

Please, DO NOT use this soreness as an excuse to just stop working out! It just means you pushed a little too hard this time.

In fact, some think that DOMS is a necessary part of building new muscles. Here’s an article from fitness magazine Runner’s World on “Why Delayed Onset Muscle Soreness Is a Good Thing” by Mackenzie Lobby. 
.
Your muscles will build themselves back up and get bigger and stronger, especially with repeats of those motions (so keep legs, arms & shoulders days on the schedule). The severity of the soreness will decrease over time as your muscles build and adapt to the exercises.

Eventually whatever left you sore and weak will be no problem at all. Rest and recover, then get back out there!

Regular movement is the number one best thing you can do for your heart, blood pressure, and overall health and wellbeing. 
.
For more information you can see This PDF from the American College of Sports Medicine.

Do you have any advice for sore muscles?

Under 100 Calories per Bowl: Cruciferous Vegetable Soup


I’m always a big fan of recipes that help “clean out the fridge or pantry“, and if they are healthy as well then bonus! We all have some assorted cans, boxed, half bag of frozen mixed vegetables, etc. that have been sitting around since approximately we moved into whatever abode we inhabit.

Even the most strict, list-making, meal-planning, leftover-eating of us have odds and ends we need to try to use up before expiration dates. It is especially hard with produce. I have a bad habit of buying everything that’s on sale, I want to cook eventually, sounds healthy… and then I have a fridge packed full of five-day-old veggies beginning to wilt and lose nutrients. Sad face. 

That’s why this soup is fantastic! You can mix and match what vegetables you add based on what you have waiting to be used, and choose whatever protein and grain is in the half-empty box in your cupboard. There is of course a few caveats.

You need a huge ratio of veggies to other stuff, and a large portion of it must be water IF you are going for a filling, vegetarian, healthy, low-cal, low-fat soup.

Try to choose mostly cruciferous vegetables and/or leafy greens, as those pack the most nutrients and fiber for the least carbs and calories. Cruciferous vegetables include cauliflower, broccoli, brussels sprouts, etc. Limit the beans and grains to one cup each to keep calorie counts low. If you have a “meat tooth” feel free to throw in some cooked shredded chicken or steak.

Ingredients:

  • 1 whole head green cabbage, shredded
  • 1/2 head cauliflower, cut into florets
  • 1/2 bunch kale, chopped
  • 1 cup fresh spinach
  • 1 cup barley
  • 1 cup pinto beans
  • 1 can diced tomatoes
  • Garlic salt
  • Lots of water (stock or bouillon for extra flavor)

Step 1: Chop all your veggies and add to the crock pot. Add the grain (barley) and protein (beans) as well as diced tomatoes. You can sub fresh chopped tomato or tomato sauce, or forget the tomatoes. I just super love diced tomatoes in all the things.

Step 2: Cook on low for 4-6 hours, until veggies, barley and beans are tender. Add any other seasonings you like. Enjoy for under 100 calories per bowl as often as you are hungry!


*Disclaimer: I do not recommend crash diets like the cabbage soup diet where this is all you eat all day, but I do believe that soup before a full meal will help dampen hunger and make it easier to eat healthy and manage a healthy weight, and broth based soups should be incorporated into your meal plans to keep total grocery costs for the week low.

The Art of Ethiopian: Part 4 – Cheese, Greens, & Injera


This is the fourth and final post in my Art of Ethiopian Cuisine post series. From a 100%-not-Ethiopian-American, I must say this all tasted really dang good. And it doesn’t take too much hands-on work time. If I had had a real Ethiopian over to try it, I’m not sure what their opinion would be. But if you want the “Americanized” easy version, these recipes are sure to do the trick!


The Art of Ethiopian Cuisine: Part 1 – Beef & Pork
The Art of Ethiopian Cuisine: Part 2 – Chicken & Fish
The Art of Ethiopian Cuisine: Part 3 – Potatoes & Lentils
The Art of Ethiopian Cuisine: Part 4 – Cheese, Greens, & Injera

Ayib

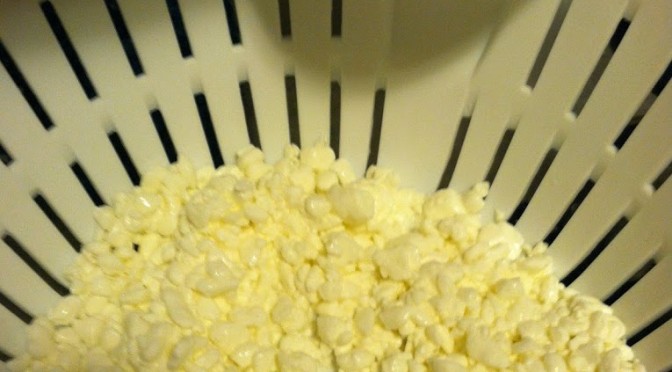
The cheese is called “Iab or Ayib” and is like a cottage cheese/ricotta hybrid. You usually need it to temper the heat in these types of dishes, but my recipes leave out the Berberi spices you will notice. If you like super hot foods, feel free to pick some up and sprinkle it into all these stews. Because I don’t have hours or days to make it the proper way, THIS recipe from Whats4Eats comes close to approximating Iab.  

Ingredients (Ayib):

  • 1 cup large curd cottage cheese
  • 2 tbsp plain Greek yogurt
  • 1 tbsp lemon juice
  • Sprinkle sea salt

Step 1: Rinse the cottage cheese in cold water and let it drain. Press dry with paper towels if you like. I tried that and the towel got cheese curds stuck all over it so try at your own risk.

Step 2: In a bowl, mix the cheese curds, yogurt, lemon juice, and salt. Refrigerate until serving.

Gomen Wat

The greens are called “Gomen Wat” (guess Wat…again) and the recipe I used is based off the one HERE on my trusty AllRecipes site. I didn’t have collard greens, so I used what I had, which was kale. I bet you could use spinach instead as well, any leafy green will do.

Ingredients (Gomen Wat):

  • 2 cups chopped kale
  • 2 cups water/stock
  • 1 tbsp turmeric
  • 1 tsp ground ginger
  • 3-4 tbsp lemon juice
  • 2 cloves garlic, chopped
  • Sea salt
Step 1: Put the greens, spices, and liquids in a small crock pot. Cook on low for 1-3 hours. 

Make sure to stir every now and then. The greens will wilt and take up less room. I like my greens extra tangy to counteract the bitter. I also sprinkle them with a healthy dose of fresh coarse ground sea salt. Keep on low until you serve.


Injera

And of course, the cornerstone of the meal, that which holds it all together and is both plate and utensil, the Injera bread. Usually it is made from pure Teff flour and allowed to ferment and rise for three days. I unfortunately had neither the grain nor the time. So I based mine off this cheat recipe HERE from Whats4Eats, which does not need either. It rather ingeniously uses club soda and lemon for both the bubbles and the tang.

Ingredients (Injera):

  • 2 cups flour
  • 1 tbsp baking powder
  • 2 tbsp lemon juice
  • 2 cups club soda

As you can see, I had lemon-lime club soda so at first I didn’t use the lemon juice. Several other recipes I found also use vinegar if you don’t have lemon.

Step 1: Combine all ingredients and stir just until all flour is incorporated. The club soda will bubble quite a bit. 

Step 2: On a hot, sprayed griddle, pour about 1/2 cup of batter. 

Step 3: Typically injera is only cooked on one side, but I found that this better was just thick and pancake-y enough that I had to let it mostly cook, then flip for a final minute or two. There were still bubbles, which approximates injera.

However the consensus was that this dough was thicker and sweeter than usual. So these are the Americanized Ethiopian pancake version of injera. And actually some said they prefer it, so perhaps this is a better way to ease an American palate into ethnic cuisine.And this was the final meal.

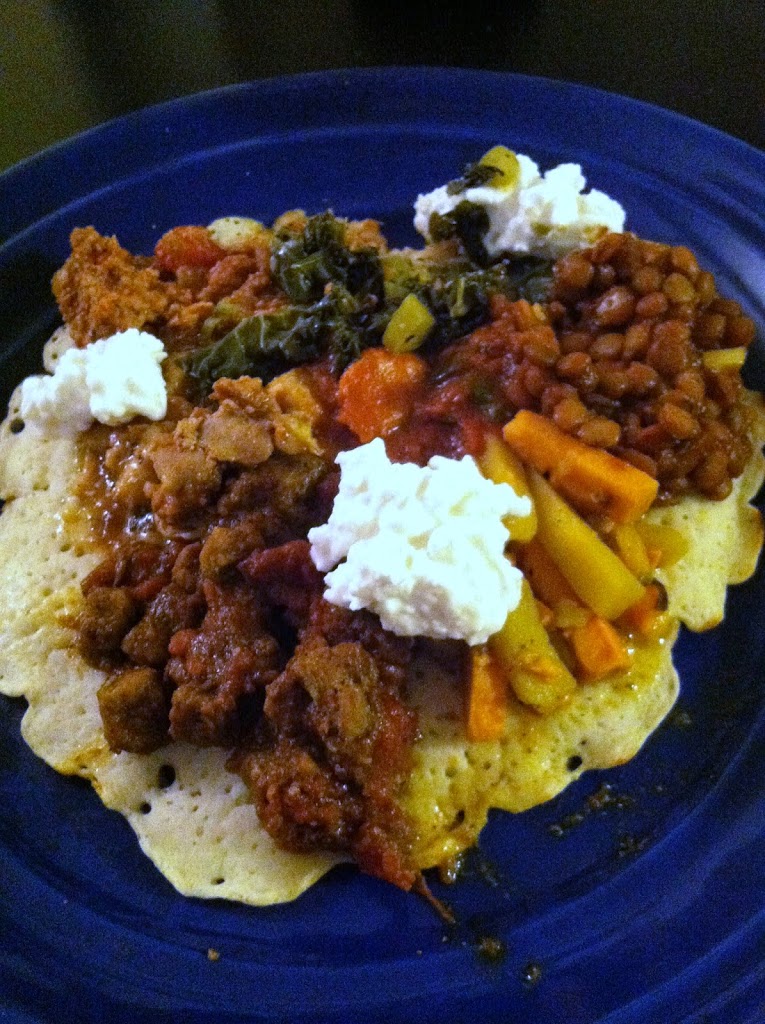
Ground beef, pork, chicken, fish, lentils, potatoes, greens, cheese and my injera pancakes. You of course don’t have to cook all these at the same time, but I encourage you to at least make some injera and try one or two stews. You may find that you crave the flavors of Ethiopia from now on! And by cooking all this at home, you control the ingredients, so this meal turns out to be quite healthy, and very filling.


What’s your favorite ethnic cuisine?