Category Archives: Main Dishes

Silly American attempts to make Salmon Nigiri

.
I absolutely adore sushi. There are few types I dislike. Something about the soft buttery fish and rice with copious soy sauce just makes me swoon. I know I violate rules by using as much sauce as I do, but I’m over it. Low blood pressure and all that. I flipping love soy sauce okay?
.
Oh, and not all sushi is raw fish. Common misconception. Actually the majority of sushi is not raw. You must have nigiri or sashimi to be sure it’s raw. And even then… probably some exceptions. The blog The M Resort has a handy guide for keeping sushi terminology straight. The main ones are sushi, maki, nigiri, and sashimi. I won’t even try to overwhelm you or myself with all the different nuances of flavor, texture, color, and types of fish, or vinegars, additives, and temperature’s effects on rice.
.
Sushi = any Japanese style fish roll, may or may not be raw, include vegetables, or be rolled in seaweed (nori).
Maki = rolled sushi using a bamboo mat. Typically rolled in seaweed, but can also use thinly sliced cucumbers.
Nigiri = raw slices of fish served over a hand-rolled slab of rice, no nori. Some sushi chefs add wasabi between the fish and rice.
Sashimi = raw slices of fish served without rice, as naked as it gets. Try it with wasabi and soy sauce mixed together.
So one day I’m grocery shopping, and see a gorgeous salmon fillet on sale that needs used today. As often happens when at the grocery store, just seeing one item sparks an idea, and today’s idea was “why not try to make my own sushi at home?” Don’t mind if I do. I did recently purchase a rice cooker (which I also flipping love) so hopefully that would make the process even easier.
.
I did nothing special to the fish itself, as I wanted its natural flavor. I did try to doctor up the rice, and made my own dipping sauce. I also had some dumplings in the freezer, which I thawed and fried to make a lovely lunch.
.
Ingredients:
1 8 oz salmon fillet
1 cup white rice
1 1/2 cup water
1/4 cup vinegar
1 tbsp sugar
1 tbsp salt
.
Garlic-Ginger Dipping Sauce:
1/4 cup soy sauce
1/4 cup fish sauce
1 tsp diced garlic
1 tsp sriracha
1 in piece ginger, peeled and sliced
1 tsp sugar
2 tbsp olive oil
1 tbsp cornstarch
.
Step 1: Put the rice and water in the rice cooker and cook. Alternatively, cook the rice in the microwave or stove-top according to package directions.
Step 2: White rice is cooking, mix all dipping sauce ingredients in a small bowl, and heat 3 minutes in microwave. Whisk well and set aside.
Step 3: Slice the fish fillet as thinly as possible on the diagonal. Once rice is cooked, let cool to room temperature. Add vinegar, sugar, and salt and mix well.
Step 4: Take a tbsp of rice, and form into an oblong oval shape with your fingers. Press a thin slice of fish onto the rice and place on plate. Repeat with all fish slices.
Step 5: Fry dumplings according to package if you have them. Place dipping sauce on a plate with the nigiri.
Step 6: Enjoy! While not as good as a sushi restaurant, it was dang good for my first attempt. You better believe anytime fresh fish is on sale I will be trying this again.
.
You could use really any type of filleted fish, and if you want to get real crazy, buy some nori (seaweed) sheets and make rolls. Add in avocado, carrots, cucumber, cream cheese… the possibilities are endless. Sushi is a great vegetarian and vegan option, you can even make dessert sushi! Give it a try.
.
What’s your favorite type of sushi?

Chicken & Cheese Enchiliadas

.
It’s no secret that I love all Mexican foods. I’ve written about how I made the perfect refried beans, many variations on tacos, and the simple pizza-like toastadas. I’ve been meaning to tackle a particularly intimidating recipe for a while: enchiladas.
.
You may not think enchiladas are intimidating, but for whatever reason I kept thinking it would be hard to make these. Then the s.o. requested it, I had a big stack of tortillas in the fridge, and so I was like, ok it’s time.
Turns out, they weren’t so scary after all. And damn delicious.
.
Ingredients:
2 boneless, skinless chicken breasts
7 tortillas
2 tbsp taco seasoning
2 tbsp butter
1/2 cup refried beans
1 cup shredded cheese mix
1 can tomato sauce
1-2 tbsp sriracha
I used large flour tortillas here, I know corn is the norm. But trust me, no one was upset about these. Give it a try, or go ahead and use corn if that’s what you have.
Step 1: Cook the chicken either in the oven, frying pan, or poach in boiling water. Use two forks to shred it finely. Cook in a pan with a little butter and taco seasoning.
Step 2: In each tortilla, spread a few tbsp beans, a handful of shredded chicken, and sprinkle on some cheese. Roll up, and place with the seam-side down in a sprayed oven-safe pan.
Step 4: Once the pan is full, sprinkle more cheese over top, then pour the tomato sauce over everything. Use as much as you need to cover the tops, but not to soak them. (Sidenote, I hate the taste of regular enchilada sauce at restaurants, that’s why I went the homemade tomato sauce version. If you like it or have a jar of enchilada sauce at home, feel free to use that.)
Step 5: Squirt on a thin layer of sriracha and/or hot sauce, and bake at 350 for 30-40 minutes.
We ended up having two each, and the leftovers didn’t last more than a day. These could be made in the crock pot as well, simply assemble and leave on low all day. Make sure to add extra sauce so they don’t burn if you go that route.
Serve with a little sour cream on top to cut the spice if that’s your thing.
.
You could make the vegetarian by adding extra grilled veggies or tofu instead of chicken, and just feel free to add in some onions and peppers regardless of what else is in there.
.
What’s your favorite Mexican food?

Slow Cooker Red Pozole with Pork


So I’ve been tutoring a high school kid in Biology for a year. He’s great, as are his parents. And his mother is a large part Native American. She is an amazing cook, I often show up to tutor and/or leave to tempting smells wafting from the kitchen. They are kind enough to ask me to share their dinner with them quite often.

As I love cooking myself, typically I have dinner already started in the Crock pot or at least plans, so I decline. However, one night she was serving up this thick, red stew that smelled too irresistible. This was my first introduction to pozole.

IMG_2065

Pozole means “foamy”; also spelled “pozolli” or “posole”. It is a traditional stew originally from Mexico, which once had ritual significance due to its use of maize, called hominy. The word “hominy” comes from the Powhatan language word for prepared maize. (Maize is corn).

Hominy is a very interesting thing. To make it, you take regular corn kernels, dry it, and then treat it with an alkaline agent to break down the cellulose in the corn. The result is puffy, chewy, soft kernels that look a little bit like corn-shaped popcorn.

Well, this tomato-pork-hominy stew was unlike anything I’d ever had, so of course I had to ask for the recipe. She had gotten it from the Denver Post a few years back, and was more than happy to share it with me.

red posole with pork

The red pozole with pork is the recipe I used and show here, but there is also one for Green Pozole with Chicken. I’ll save that for another day.

IMG_1883

I wanted to try this right away, but I forced myself to be patient. Normally I just center my grocery shopping around sales, but this time I kept an eye out for the ingredients I needed. Anytime I want to make something with a unique or expensive ingredient I try to wait to maximize my food dollars. As soon as I saw hominy on sale at the local Save-A-Lot I snagged a can.

As is my way, I took the recipe, tweaked it a bit to what I like and what I had in the house, and it turned out wonderful! I don’t like spicy foods, so I left out the peppers, but I did throw in a pinch of dried chipotle pepper to keep the Native American feel of the recipe. If you want to go all the way and buy the exact spices called for, be my guest. But I omitted the Mexican oregano, and used regular paprika, not Spanish. I also added a can of red beans for extra fiber and filling power.

Slow cooker red pozole with pork:

  • 1.4 pound pork roast
  • 2-3 tbsp garlic powder
  • 1/2 tbsp cumin
  • Pinch chipotle pepper
  • 1 tbsp chili powder
  • 2 tbsp paprika
  • 1 whole white onion, diced
  • 1 can diced tomatoes, with liquid
  • 1 can red beans, drained
  • 1 29oz can hominy
  • 6 chicken bouillon cubes and ~24 oz water
  • 3 tbsp flour
  • 1 bottle beer (Colorado native)

IMG_2048

Step 1: In slow cooker, mix flour, beer, spices, diced onion, and tomato.

IMG_2049

Step 2: Heat water in the microwave for 2-3 minutes, dissolve the bouillon cubes and add to crock pot. Or just use chicken stock.

IMG_2050

Step 3: Dice the pork roast into bite-sized cubes. I had a 1.4-pound roast defrosted, so I used that. But you could use chops also.

IMG_2052

Peel or cut off fatty pieces to make it more lean.

IMG_2053

Step 4: Add the pork and hominy to the slow cooker. Cook on low 6-8 hours, or high 2-4 hours.

IMG_2062

The finished product is a complex but light stew, with an amazing depth of flavor. You can obviously add more spice to your taste, but I loved it the way it was. I also didn’t have ground cumin, so the little pieces were annoying at the bottom, but the flavor they added was worth it.

IMG_2066

I made some biscuits to serve with the posole, and my s.o. loved it too. The recipe suggests shredded cabbage, radish, cilantro, cheese, or sour cream as garnishes. If you add extra flour or cornstarch you can make it thicker, add more stock to make it more soup-like.


What’s your favorite slow cooker meal?


Turkey & Veggie Tacos

.
Tacos are always a popular meal choice. They are great for so many reasons:
  • Frugal – use up whatever meat or vegetables are in the house
  • Green – use up vegetables before they go bad & reduce waste
  • Customizable – you can please meat eaters and vegetarians
  • Healthy – easy to add tons of extra veggies and fiber with beans
Unfortunately, tacos are also very easy to go overboard with and make into fatty cholesterol nightmares. If you use fatty ground beef and heap on cheese and sour cream, your arteries will not thank you. The good news is, there are simple swaps you can make that don’t have a huge impact on overall taste but will have an impact on how huge your waistline is in 20 years….
  • Use ground turkey, pork, or chicken instead of beef
  • Better yet, don’t use meat at all! Use tofu or lots of beans instead
  • Make sure to cram in as many sneaky veggies as possible
  • Swap unflavored Greek yogurt for sour cream
These simple switches seem small, but have big long-term impact. You don’t have to go cold-turkey health nut all at once. Try one at a time and see what works for you.
.
These turkey tacos are super-charged with healthy greens and multiple veggies. But once rolled up in a warm tortilla, you would never know there is so little fat and far fewer calories than your typical taco. My meat eater s.o. even had to admit that they are delicious!
.
Ingredients:
1 pound ground turkey
1 tortilla
1 onion, diced
1 cup diced bell peppers
1/2 head kale
Refried beans
1/2 cup cooked rice
1 tbsp plain Greek yogurt
Sprinkle shredded cheese
Seasoning: garlic salt, cumin, Nature’s Season
Step 1: Brown the ground turkey in a pan. While that is cooking, dice up your veggies. You could use whatever vegetables are in season and that you like, try eggplant, asparagus, spinach, sweet potato…
Step 2: Drain the grease from the meat and season it to your liking. Add in the veggies, hardest ones first. Cook until onion and peppers are soft, and kale is wilted.
Step 3: Open a can of refried beans, or make your own. Heat up in a frying pan or microwave.
Step 4: Warm up a tortilla in the microwave for 10-30 seconds. Layer on the turkey and veggies, 1/4 cup cooked rice, a few tbsp of beans, 1 tbsp Greek yogurt, and a sprinkle of shredded cheddar. Roll it up and enjoy! Alternatively you could use a hard taco shell, or spread over tortilla chips as a fun appetizer.
.
Tacos are so endlessly customizable. I love topping mine with salsa, guac, diced avocado, lettuce, spinach, black beans, shredded carrots… the possibilities are endless. They can be extremely frugal too, rice, beans, and tortillas are all easily found for under $1, and make a very filling and healthy meal. It’s super easy to make them vegetarian or vegan too.
What’s your favorite taco toppings?

How to cook a whole Brisket


Beef brisket is by far one of my favorite cuts of meat. Brisket comes from the chest area of a cow, and is chock full of connective tissue called collagen. This is what can cause meat to be tough and chewy. This is also why brisket requires a loooooooong cooking time. Chefs and home cooks will all have varying opinions on the best rubs, sauces, and ways to cook brisket.

In my opinion, there really isn’t a wrong way, as long as brisket is being served I’m a happy camper! 

If you’re intimidated by trying to cook such a large chunk of meat (since stores usually sell it by the whole brisket, i.e. the entire chest muscle) you can probably ask a store butcher to cut it into smaller sizes. But let me assure you, if I can pull this off in my tiny apartment kitchen, you sure can too!

Do be aware that a whole brisket is typically upwards of ten pounds. Though some part of that is the “fat cap“, a thick band of fat connected to the meat, and you probably want to cut that off before eating. But leave it on for the cooking part, as it helps keep the meat tender and juicy, and tasting awesome! 

If I had a huge grill, I would use that baby on low and slow all day. Since I don’t have that, I made due with baking in the oven. And I’m totally not mad about that. I used mustard as the base for the rub, to get it to stick, and to add flavor. And made the rub from some spices I had around the house. You can change it up to use whatever spices you want, add some BBQ sauce, get creative.


Ingredients:

  • 1 14 pound beef brisket
  • 1 cup yellow mustard
  • 1 cup pork rub spices
  • 1/4 cup dried onion
  • 1/4 cup garlic salt
  • Ground white pepper
  • Black pepper
  • Paprika

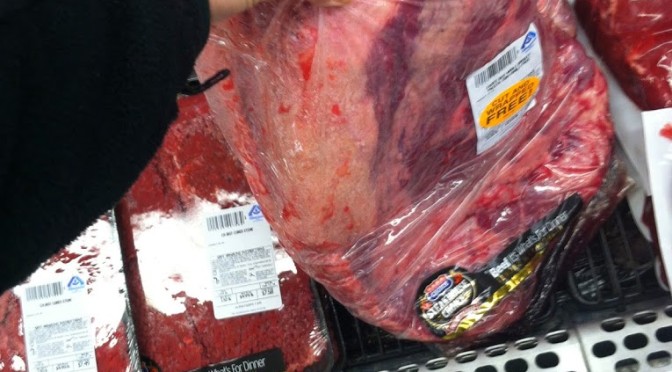
This is what the brisket looks like a the store. Quite the hunk of beef.

Ready and waiting to become a masterpiece.

Step 1: Smear a healthy amount of mustard all over the brisket, flip it, and cover the other side too. Use your hands and get all around the edges and in the crevices.

Step 2: In a small bowl, mix together all the spices.

Sprinkle the spice mixture liberally all over the meat. This is very thick, so it’s pretty dang difficult to over-season at this stage. Rub it all over so you get a crispy, flavor-filled crust.

Beautiful.

Step 3: Place the brisket in an oven-safe pan with the fat cap upwards, so all the delicious melting fat will drip through your meat and keep it moist. Cover with foil and place into an oven set at 275. Add a cup of water or beef broth to keep it moist.

Now the hard part. Wait. This baby needs to cook for about 6-8 hours, low and slow.

When there is no longer any pink, or if you have a meat thermometer make sure it reads 150 or more, your brisket is ready to be enjoyed!

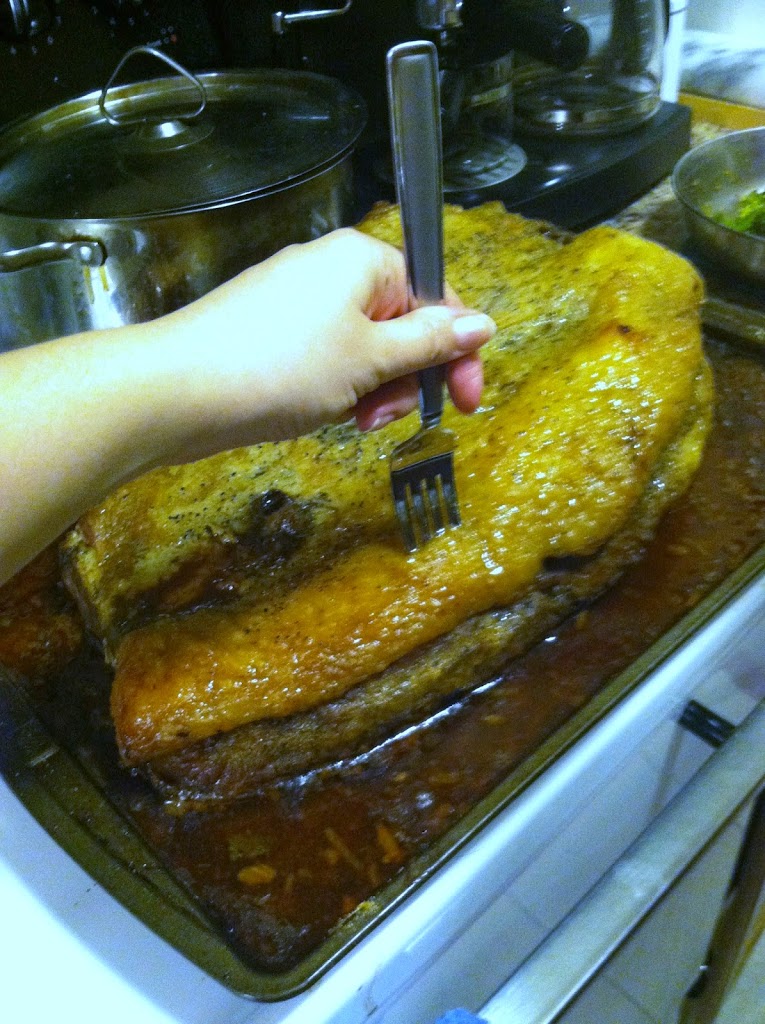
This. Meat. Is. Amazing.

I served the brisket with roasted whole new potatoes and onion, and steamed broccoli the first night. There were leftovers all week, and no one was upset about that. Made some pulled brisket BBQ sandwiches, brisket salad, just ate chunks of the salty, beefy goodness cold. 

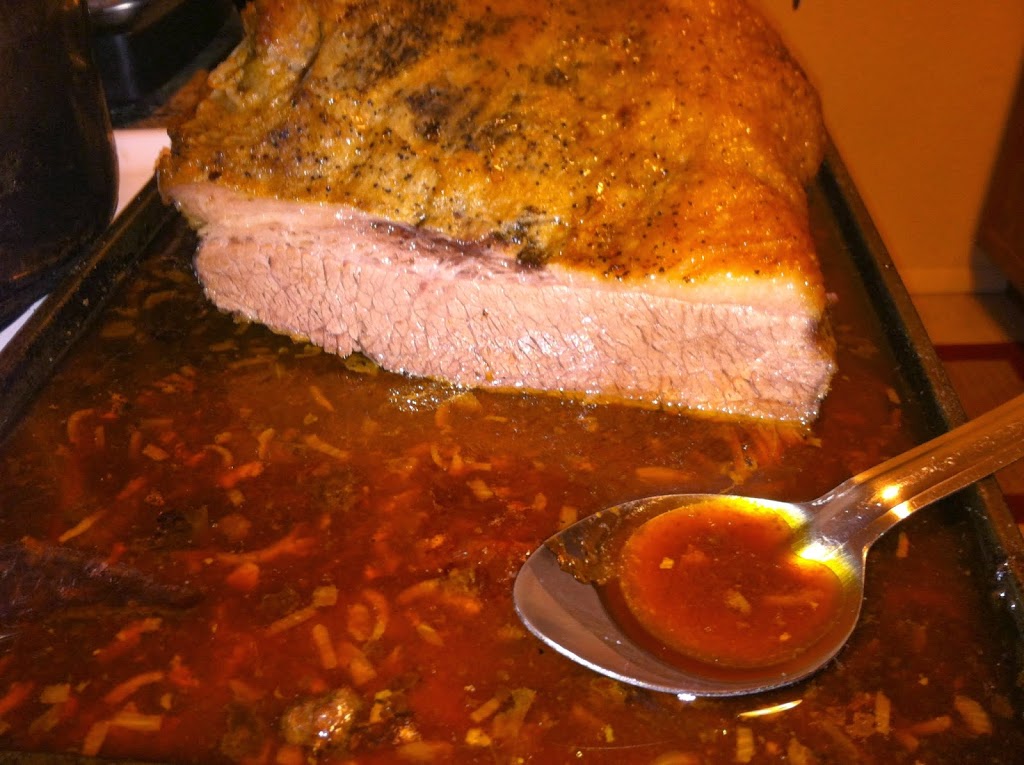
The drippings were delicious too, but had a lot of the melted fat in it.

That didn’t stop us from using the drippings as a gravy!

Wooooooooooooooooooooooooooooooooow was this good. Makes me consider changing careers to be a cattle farmer, just so I can have this once a month. Then I’d probably also have a heart attack within a decade… Worth.


Have you ever made brisket? How do you cook it?


Save

The Art of Ethiopian: Part 4 – Cheese, Greens, & Injera


This is the fourth and final post in my Art of Ethiopian Cuisine post series. From a 100%-not-Ethiopian-American, I must say this all tasted really dang good. And it doesn’t take too much hands-on work time. If I had had a real Ethiopian over to try it, I’m not sure what their opinion would be. But if you want the “Americanized” easy version, these recipes are sure to do the trick!


The Art of Ethiopian Cuisine: Part 1 – Beef & Pork
The Art of Ethiopian Cuisine: Part 2 – Chicken & Fish
The Art of Ethiopian Cuisine: Part 3 – Potatoes & Lentils
The Art of Ethiopian Cuisine: Part 4 – Cheese, Greens, & Injera

Ayib

The cheese is called “Iab or Ayib” and is like a cottage cheese/ricotta hybrid. You usually need it to temper the heat in these types of dishes, but my recipes leave out the Berberi spices you will notice. If you like super hot foods, feel free to pick some up and sprinkle it into all these stews. Because I don’t have hours or days to make it the proper way, THIS recipe from Whats4Eats comes close to approximating Iab.  

Ingredients (Ayib):

  • 1 cup large curd cottage cheese
  • 2 tbsp plain Greek yogurt
  • 1 tbsp lemon juice
  • Sprinkle sea salt

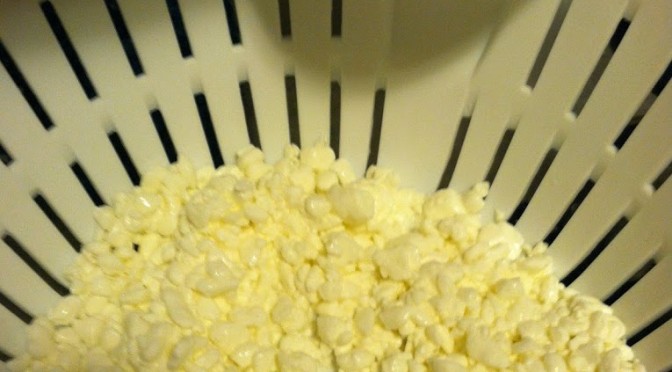
Step 1: Rinse the cottage cheese in cold water and let it drain. Press dry with paper towels if you like. I tried that and the towel got cheese curds stuck all over it so try at your own risk.

Step 2: In a bowl, mix the cheese curds, yogurt, lemon juice, and salt. Refrigerate until serving.

Gomen Wat

The greens are called “Gomen Wat” (guess Wat…again) and the recipe I used is based off the one HERE on my trusty AllRecipes site. I didn’t have collard greens, so I used what I had, which was kale. I bet you could use spinach instead as well, any leafy green will do.

Ingredients (Gomen Wat):

  • 2 cups chopped kale
  • 2 cups water/stock
  • 1 tbsp turmeric
  • 1 tsp ground ginger
  • 3-4 tbsp lemon juice
  • 2 cloves garlic, chopped
  • Sea salt
Step 1: Put the greens, spices, and liquids in a small crock pot. Cook on low for 1-3 hours. 

Make sure to stir every now and then. The greens will wilt and take up less room. I like my greens extra tangy to counteract the bitter. I also sprinkle them with a healthy dose of fresh coarse ground sea salt. Keep on low until you serve.


Injera

And of course, the cornerstone of the meal, that which holds it all together and is both plate and utensil, the Injera bread. Usually it is made from pure Teff flour and allowed to ferment and rise for three days. I unfortunately had neither the grain nor the time. So I based mine off this cheat recipe HERE from Whats4Eats, which does not need either. It rather ingeniously uses club soda and lemon for both the bubbles and the tang.

Ingredients (Injera):

  • 2 cups flour
  • 1 tbsp baking powder
  • 2 tbsp lemon juice
  • 2 cups club soda

As you can see, I had lemon-lime club soda so at first I didn’t use the lemon juice. Several other recipes I found also use vinegar if you don’t have lemon.

Step 1: Combine all ingredients and stir just until all flour is incorporated. The club soda will bubble quite a bit. 

Step 2: On a hot, sprayed griddle, pour about 1/2 cup of batter. 

Step 3: Typically injera is only cooked on one side, but I found that this better was just thick and pancake-y enough that I had to let it mostly cook, then flip for a final minute or two. There were still bubbles, which approximates injera.

However the consensus was that this dough was thicker and sweeter than usual. So these are the Americanized Ethiopian pancake version of injera. And actually some said they prefer it, so perhaps this is a better way to ease an American palate into ethnic cuisine.And this was the final meal.

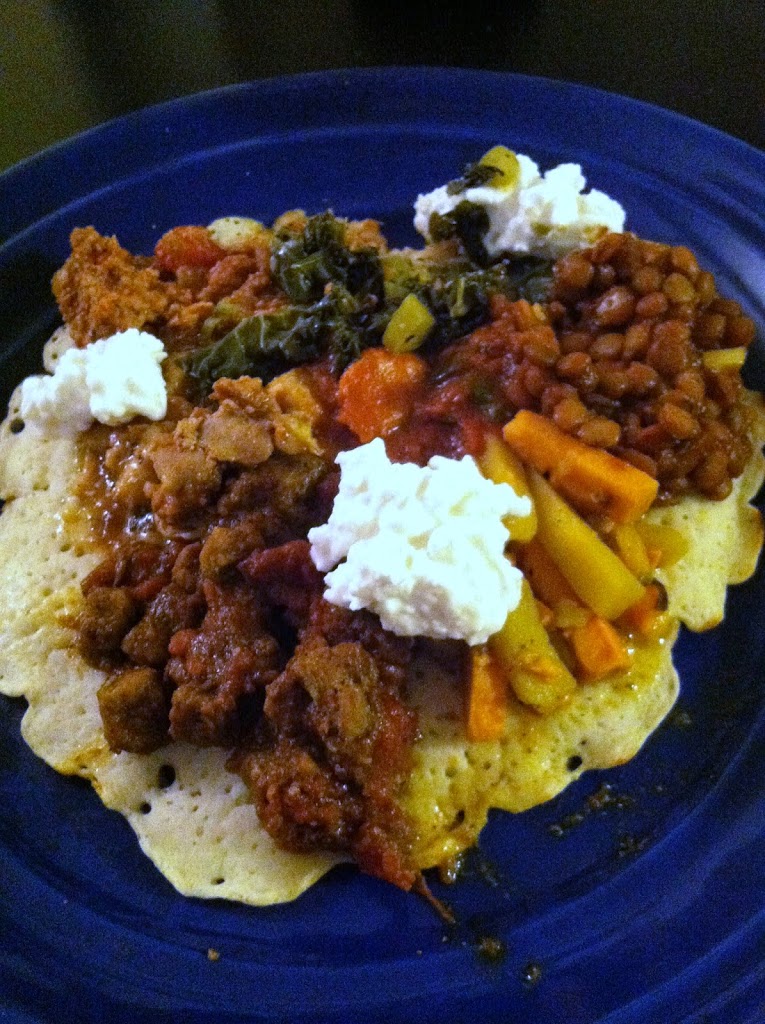
Ground beef, pork, chicken, fish, lentils, potatoes, greens, cheese and my injera pancakes. You of course don’t have to cook all these at the same time, but I encourage you to at least make some injera and try one or two stews. You may find that you crave the flavors of Ethiopia from now on! And by cooking all this at home, you control the ingredients, so this meal turns out to be quite healthy, and very filling.


What’s your favorite ethnic cuisine?


The Art of Ethiopian: Part 3 – Potatoes & Lentils


Welcome to part three of my four-part Art of Ethiopia Cuisine post series! If you’ve been following along, you already know how to make Minchet-Abesh Alicha, Doro Wat, Yasa Tibs, and know Injera is just around the corner!

The stars of this post were considered side dishes to us meat-eaters, but could easily stand alone in an all-vegetarian meal. This is all about the tubers and lentils.

Lentils for Lent, ha. That should be a thing too.

Lentil stew is called “Mesir Wat” (remember Wats?) and the recipe I based mine off of is HERE at A Spicy Perspective. The two potato stew starring both Yukon classics and sweet potatoes was of my own invention.

I had had something similar at the Nile, an Ethiopian restaurant near me, and was trying to replicate it. I think it’s pretty darn close. I made a small batch, but you could easily scale it up to however many potatoes you want to use.

The Art of Ethiopian Cuisine: Part 1 – Beef & Pork
The Art of Ethiopian Cuisine: Part 2 – Chicken & Fish
The Art of Ethiopian Cuisine: Part 3 – Potatoes & Lentils
The Art of Ethiopian Cuisine: Part 4 – Cheese, Greens, & Injera

Ingredients (2 Potato Stew):

  • 1 sweet potato
  • 2 large baking potatoes
  • 1 cup water/stock
  • Garlic salt
  • 1 tsp turmeric
  • 1 tbsp curry powder
  • 1 tbsp cornstarch

Step 1: Dice the potatoes into tiny pieces. The smaller the pieces, the faster they will cook. Just try to make the pieces uniform in size.


Step 2: I used my rice cooker for this. Because I’m in love with this appliance. You can use a small slow cooker too, or a small sauce pot on the stove. Put the potatoes in, and add the spices and liquid.

Cook on low for at least 30 minutes, or until ready to serve.

About 10 minutes prior to dinner, add the cornstarch. Make sure it mixes in well, no-one wants a cornstarch bomb. This will thicken the sauce, but is not absolutely required.


Ingredients (Mesir Wat):

  • 1 cup lentils (any color, I had brown)
  • 1.5 cups water/stock
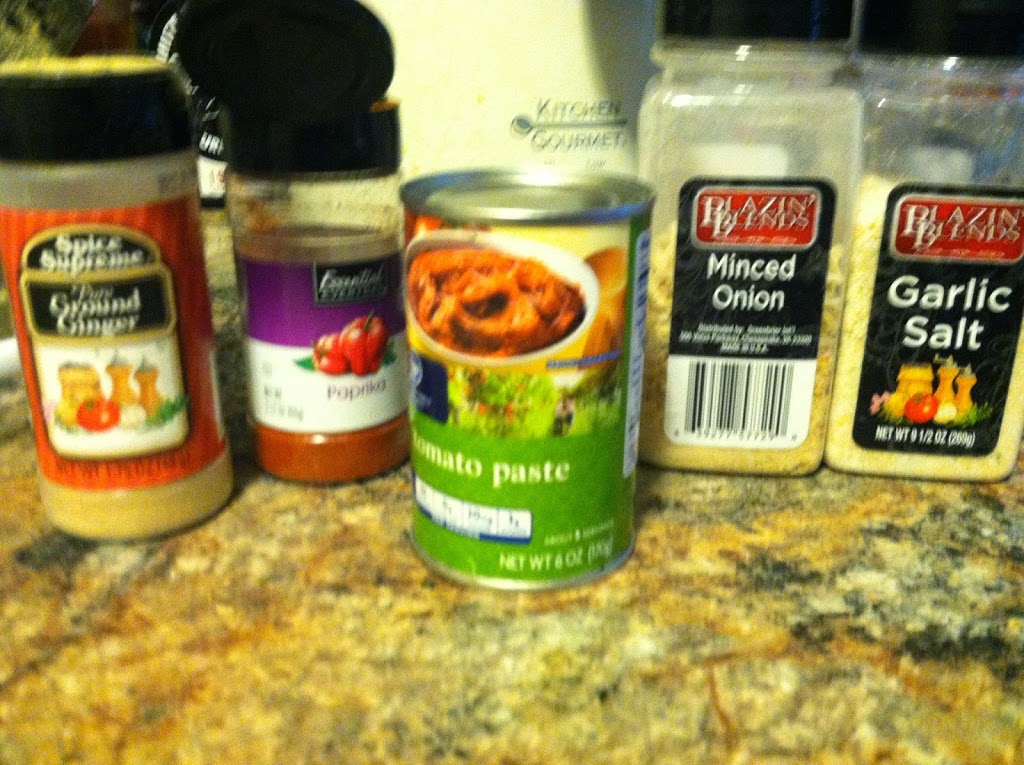
  • 1 small can tomato paste
  • 1 tsp ground ginger
  • 1 tbsp minced onion
  • 1 tsp garlic salt

Step 1: Combine all ingredients in a small slow cooker, or sauce pot on the stove.

Step 2: Cook over low heat, stirring occasionally, for at least 30-60 minutes, until lentils are soft and fully cooked.

You can leave them in there foreeeeeever, just keep stirring occasionally so they don’t stick and burn on the bottom, and add more liquid as needed.


These were really tasty, I liked the slight tomato and garlic flavor.

Thickened up nicely after about 1 hour in the crock pot. I like lentils a lot, and this would be tasty with some added veggies as a meal unto itself!

More to come: Cheese, Greens & Injera

The Art of Ethiopian: Part 2 – Chicken & Fish


This is part two of a four-part series on Ethiopian cooking, the American way. Since I am such an expert (I know someone from Ethiopia. Plus I’ve eaten it like… four times) I decided to share my versions of some of my favorites.

The recipes are fairly straightforward, you just need to obtain the spices, and be patient. All said, the cooking for this dinner party probably took about 6 hours. The dishes took twice that long. 😉

The Art of Ethiopian Cuisine: Part 1 – Beef & Pork

The Art of Ethiopian Cuisine: Part 2 – Chicken & Fish
The Art of Ethiopian Cuisine: Part 3 – Potatoes & Lentils
The Art of Ethiopian Cuisine: Part 4 – Cheese, Greens, & Injera

Part 2: Chicken and Fish

Sounds like the punchline of a bad Lent joke. Appropriate for April I guess. (Is April still when Lent happens?) But since the earlier post had already covered the ‘red’ meats of beef and pork, this one is for the “white meats”. Sorta.

Chicken stew in Ethiopian is called Doro Wat. I’ve figured that most things that say “Wat” mean meat stew, whereas “Tibs” means meat and vegetables stewed together. As in “Yasa Tibs” meaning my fish, tomato & spinach stew.

The recipe I based the Doro Wat from is found HERE from NomNomPaleo, while the inspiration for the fish is found at Allrecipes HERE. 


Ingredients (Doro Wat):

  • 3-4 pounds chicken (bone in will give you better flavor, I used a mix of 2 thighs and 2 boneless skinless breast)
  • 1/2 cup diced onion
  • 2 tbsp butter
  • 1 cup chicken stock
  • 2 tbsp turmeric
  • 1 tbsp garam masala
  • 1 tbsp ginger powder


Step 1: Add stock to chicken in a pan, and cook over low heat until no pink is left. Cut the breast into bite-sized cubes.


Step 2: In a separate pan, add butter and diced onions. Cook until the onions are soft and translucent. Add 1 cup diced onion to the chicken.


Step 3: Add the rest of the spices, and simmer for 30 minutes or until serving. Add more stock if liquid starts to evaporate.


Ingredients (Yasa Tibs):

  • 1-2 small tilapia (or other white fish) fillets
  • 1 cup fresh spinach leaves
  • 1 tbsp garam masala
  • 1 small can tomato paste
  • 1 tbsp olive oil
  • 1/4 cup fish sauce (or vinegar if you don’t have it)
  • 2 tbsp lemon juice
  • Garlic salt to taste
  • Squirt of Sriracha or Tabasco, if you like


Step 1: Cut the fish into bite-sized pieces. Cook in a pan with olive oil until white and flaky.

Step 2: Add all sauces, spices, and spinach. Simmer at least until spinach is wilted, until serving.

This one is delightfully salty and tangy from the fish sauce and acidic lemon juice. And probably the healthiest stew thus far, with little to no fat and a spinach nutrition boost.


Up next: 
Part 3 – Potatoes & Lentils

The Art of Ethiopian cuisine: Part 1 – Beef & Pork

Happy April! 

Spring has officially begun, and soon enough we will feel it every day in the weather. It’s time for snow melting, sunshine, green grass, boatloads of flowers, chickadees and bunny rabbits.

So ethnic food is a perfect fit! (Wait, what?) Uhhh yeah, you haven’t heard of Ethnic Food April?!? Totally a thing. I just made it so.

Since moving to Colorado, I’ve been exposed to new cuisines pretty often. I’ve become hooked on Ethiopian. A student in my year is from Ethiopia, and she has both shown us local restaurants and cooked a unique Ethiopian dinner in her home for us.

I recently decided to attempt to replicate a full Ethiopian meal at home! This will be a series of posts, all from a ginormous dinner party I threw. 

Also fittingly, this is my 200th blog post!

Wow, I didn’t know I had so many things to talk about. It seems like not too long ago I was excited about my 100th Post wherein I brined and baked a whole pheasant! (Not as hard to do as it sounds, but just as delicious as you might think).

My how time flies. Like pheasants. Anywho, sorry to sidetrack you, on to the Ethiopian!

The Food

Ethiopian cuisine, if you have never had it, mostly consist of various stews, eaten with your hands and the help of a unique flatbread called Injera. The bread is made from a unique grain called Teff, and fermented for several days. It is slightly sour, bubbly, and spongy. It is a very unique experience the first time you try it, but it becomes an addiction.

The stews vary from purely vegan (lentils, sweet potato, etc) through various types of meats (beef, lamb, pork) and mixtures. They lay the bread on a huge middle plate, then scoop piles of deliciously spiced concoctions onto it, which you then scoop up and eat with more pieces of injera and your hands.

If you’ve never tried it, I highly recommend it! It is even more fun as a social experience. 

The Art of Ethiopian Cuisine: Part 1 – Beef & Pork

The Art of Ethiopian Cuisine: Part 2 – Chicken & Fish
The Art of Ethiopian Cuisine: Part 3 – Potatoes & Lentils
The Art of Ethiopian Cuisine: Part 4 – Cheese, Greens, & Injera

Part 1: Beef and Pork

So the ground beef stew is called Minchet-Abesh Alicha. The recipe I used was based off the recipe HERE from Food.com.

Meanwhile, apparently pork stew isn’t really an Ethiopian thing (at least not that I could find much online) but the recipe I ended up sorta following can be found HERE from Thomas the Accidental Gourmet. As far as I can tell, they don’t eat pork in Ethiopia.

But in America we sure do. So I decided any meat can be stew-ified and went ahead.

Ingredients (Minchet-Abesh Alicha):

  • 1 pound ground beef
  • 1 can diced tomatoes
  • 1/2 cup diced onions
  • 2 tbsp butter
  • 1/2 cup chicken stock/water
  • Garlic salt
  • 2-3 tbsp chili powder
  • 2 tbsp garam masala
  • 1 tsp coriander
  • 1 tsp cumin
  • 1 tbsp nutmeg
  • 1/2 tbsp cinnamon


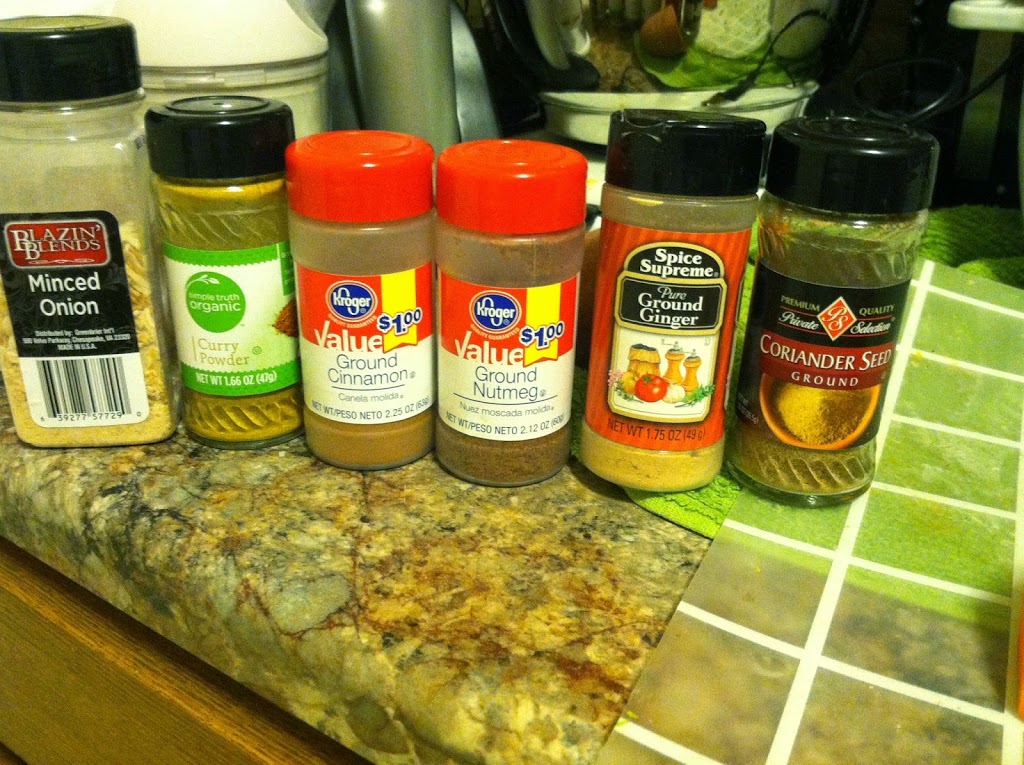
The spices really make the dishes shine. But there is plenty of room for substitution. If you don’t have some spices, or don’t want to shell out for them, don’t worry about it and use whatever spice mixture you like. It’s the bread that really makes the meal unique!


Step 1: Brown the ground beef and drain. (I actually used ground turkey, shhh don’t tell!) Add either 1/2 cup onions to butter and cook until translucent, or use dried onion flakes, about 2 tbsp. Mix with the ground beef. 

Step 2: Add all spices you are using, stock or water, and diced tomatoes. Simmer for at least 30 minutes, the longer the better. All the spices blend together and infuse the meat.

Your house/apartment will smell divine! This was probably the favorite of all the dishes cooked.

Ingredients (Pork Stew):

  • 4 pork chops (or 1 small roast) diced
  • 1/2 cup stock/water
  • 2 tbsp turmeric
  • 2 tbsp curry powder
  • 1/2 can diced tomatoes

Step 1: Dice the pork, brown in a pan with the stock. Add in the spices and bring to a simmer.

Step 2: Add the diced tomatoes, or 1 small can tomato paste. Simmer another 10 minutes or until ready to serve.

This is what the finished meal looked like:


The ground beef stew is mid-left, pork is on the upper right. Wait until the injera post, where you get to learn how to make Ethiopian “pancakes”…

Up next: Chicken & Fish!

Ten minute chili mac


Who doesn’t love a little comfort food now and then?I know I do! I believe in life with moderation in all things. Eat well most of the time, be active most of the time, indulge a little some of the time!

Not only is this chili mac super easy and fast, it is also ridiculously cheap. To bare-bones it, just get the store brand mac n cheese and the frugal-est can of pre-made chili and mix the two. This recipe is just one step up from there by making your own quick chilli. You can use the chili alone, or top hot dogs or baked potatoes too.

Ingredients:

  • 1 box macaroni & cheese
  • 1/2 cup shredded cheese (cheddar for extra oomph)
  • 1 can kidney beans
  • 1 can diced tomatoes
  • 1 pound ground beef or turkey
  • 1 small can tomato sauce (6 oz)
  • 1/4 cup chili powder

Step 1: Prepare the macaroni by boiling and draining pasta. You can choose to make your own pasta and cheese sauce if you don’t want the preservatives or seasonings from the packaged version.

Step 2: While noodles boil, brown the ground meat and drain fat. In a sauce pot, combine the meat, diced tomatoes with juice, chili powder, drained kidney beans, and tomato sauce. Bring to a boil, then simmer for 5 minutes to 2 hours.

Step 3: If you’re using this just as chili for a meal or topper, longer simmering is better. But basically as soon as flavors combine and it is heated through you can add into the macaroni. Just pour it all in there, and give it a good stir.

You can add in any spices you want too, hot sauce if you like that kinda thing, garlic powder, black pepper, salt, etc…

There you have it, a thick, hearty comfort food that is sure to please your palate and fill your tummy. Depending on if you hit sales and buy store brand or not, you can easily feed six-eight for under $3!

Enjoy!


What’s your favorite comfort food?