Category Archives: Breakfast

Smoothie Freezer Bags


Happy 500th Post! Time flies when you’re having fun  😉

Let me describe for you a typical American’s morning.  We wake up to the alarm going off, maybe hit “snooze” once or twice or ten times.  Realize what time it is, maybe freak out about everything we need to do today. Finally coerce ourselves out of bed (probably with the promise of coffee soon).

We stumble into the kitchen and autopilot the caffeine of choice (hot tea, cocoa, Moutain Dew, but probably coffee. So much coffee).  Glance at the clock, think “oh crap I’m gonna be late!” run back to our room, look through closets and drawers trying to find something to wear that is appropriate / cute / in season / matches the weather / doesn’t smell like rotten garbage / still fits.

Finally clothed, we rush to the bathroom.  We shave, shower, do our makeup, brush our hair, bonus points for time to blow dry or style it, brush our teeth (hopefully!). Now with negative two minutes to go until we need to leave, we rush out the door, maybe with second coffee in to-go mug in hand, and off to work we go… And don’t even get me started on the ridiculous circus that is a morning when there are children involved!

Where is the breakfast in all this rush?

You know your entire life your mom always said breakfast is the most important meal of the day, and of course she is right. A healthy breakfast helps you wake up, gets your metabolism revved to create and repair cells, pump blood and oxygen, filter out the bad stuff, and move your muscles all day.

It keeps you from getting hangry right around ten or eleven am and making a trip to the vending machine / coffee shop / donuts in the break room and gets you through until lunchtime. It keeps your neurons firing so you can think and be your best all day.

But you just don’t have the time!

I get it. I’ve been there a million times. Drive through bagels, donuts or muffins from heaven when someone has a birthday or there’s a meeting and its catered, a granola bar hidden in a desk drawer. Some days you gotta do what you gotta do.

But there is a better way.

Enter: The Smoothie Freezer Pack!

Smoothie freezer bags

Oh yes, this thing is a busy persons’ dream. Just pull it out, dump in a blender with some milk or juice, push “go” and walk away for a few minutes. Pour it into a glass or travel mug and you have a real food, super healthy, breakfast of champions with almost no work! It just takes a few moments of prep and a bit of planning ahead.  Don’t get scared now, I believe in you.

On a weekend or whenever you grocery shop, just stock up on 5 bananas, 2-5 other fruits you like, and some sort of green (spinach is a good starter, but you can also use kale, swiss chard, beet greens, mustard greens, etc). Then grab some plastic zip top baggies and a knife, and here we go!

Smoothie Pack Ingredients

Step 1: Cut up all your fruits. You will notice avocados, and that may worry you. But trust me, if you’ve never tried it, avocado is AMAZING in smoothies! And it is a super way to sneak in some healthy fats and a creamy texture that no one will even know is there! It will be our secret 😉

Freezer Smoothie Bags

Step 2: In each baggie, add 2-3 types of fruits, one whole banana, and a big ol’ handful of greens. I used avocados, pears, peaches, blueberries, pineapple, spinach, and beet greens. Try different combinations until you find what you like the best.

Smoothie Bags

Step 3: Zip up the baggies, and pop them in the freezer. That’s it! Now all you need to do when you want breakfast in a hurry is take out a bag, pour it into a blender. Then add about 1/2 – 1 cup of liquid of choice, I recommend milk, juice, green tea, or kefir, and blend until smooth.

Smoothie to go

These smoothie packs can also be a great after-workout refresher, or a snack / treat anytime you want a blast of healthy fruits and veggies. You can add some protein powder or a tablespoon of peanut butter for an extra protein punch. Now go forth and conquor your day!


What is your favorite smoothie mix? Do you have a super quick breakfast you love? Share here!

Save

Save

Mexican Breakfast Strata


Don’t you just love it when you make something that takes literally just a few minutes, but turns out amazingly delicious and also very impressive looking?  Me too!  So the other day, my coworkers and I realized that it was someone’s birthday.  We had totally forgotten, and felt terrible, so we decided the following day would be birthday breakfast!  Obviously, I volunteered to cook something.  Problem was, I didn’t think that through…

The next morning, I checked the fridge, and didn’t see much besides some eggs.  But whatever I made had to be transportable; sunny side up doesn’t travel well, and reheated scrambled eggs is icky.  Then I saw a half loaf of bread and the light bulb went on: Strata!  Strata is a breakfast casserole based mostly on eggs and bread.  You can add anything at all pretty much, and it makes a delicious layered meal.

Upon checking the freezer, I found some turkey bacon, and a half bag of frozen corn and peppers/onions.  Since I always keep cans of diced tomatoes and different types of beans around, it just made sense that a Mexican themed strata came together.  Full disclosure: I had no idea how this would come out!  I threw it all together, popped it in the oven, and got in the shower.

Once it was done, I covered it in tin foil, wrapped it in towels to keep it warm, and stuck it in a reusable bag to take it to the office.  An hour later, after a round of “Happy Birthday” which was satisfactorily embarrassing for the coworker in question, came the moment of truth.  I pulled out the pan, uncovered the casserole, and the whole room erupted in “Oh my GOSH that looks amazing!” and “that smells SO good, what is it!?”.  Once we dug in, the compliments just kept rolling.  Almost everyone had seconds, and we finished the whole pan between 6 people!

All this is not to brag, but mostly to convince you that even though it might sound complicated, it is really not.  Even if the combination sounds weird, it does work well.  Just give it a try and see.  You can make strata for the first time on a weekend just to be safe and make sure you have time to get it just right, as long as you make it.  And then tell me I’m right.  🙂

IMG_3606

Ingredients:

  • 8-10 eggs
  • 1/2 cup milk
  • 1/2 loaf of bread
  • 1/2 pound turkey bacon
  • 1 cup peppers and onions
  • 1/2 cup frozen or canned corn
  • 1 1/2 cup salsa or 1 can diced tomatoes with chilies
  • 1 cup black beans (or other type)
  • Optional: shredded cheddar cheese
  • Optional: fresh or dried oregano

IMG_3607

Step 1: In a large bowl, break all the eggs and scramble them well with a fork.  Add the milk and mix well.  Tear the bread into rough chunks.  You can also use a few days’ old bread for this, just add a splash more milk.  Some recipes call for leaving the bread overnight to soak, but I just made it right away and it turned out great, so it’s up to you.

IMG_3608

Step 2: In a frying pan, cook your bacon.  You can also use ham, sausage, and/or chorizo instead.  Or just omit the meat entirely to keep it vegetarian.

IMG_3609

Step 3: Add the vegetables and beans to the pan.  Heat well, and cook until peppers and onions are tender.

IMG_3610

Step 4: Spray a large 9×13 pan with cooking oil or spread with butter.  Pour in the bread and egg mixture.  Add optional cheese if using.

IMG_3612

Step 5: Pour the meats and vegetables and beans into the bread and eggs.  Mix it all together well.  You can also choose to keep it layered like a breakfast lasagna, if you have the time for that.

IMG_3614

Step 6: Bake the whole shebang in a 350 degree oven for about 35-45 minutes.  If you cover it with foil, it will bake faster, if you do not use foil, it will brown on top faster.

IMG_3615

Step 7: For the most impressive presentation, sprinkle with a little more cheddar and fresh oregano springs right when you take it out of the oven.  The cheese will melt from the heat.  Serve immediately, and try to keep yourself from devouring the whole pan in one sitting.


[amd-zlrecipe-recipe:52]


Happy Easter!


Happy Easter everyone!  I hope today is filled with family and food and cute woodland creatures, and maybe some chocolates too.  But don’t get too crazy.  Remember, Easter & Halloween are dentists’ favorite holidays.

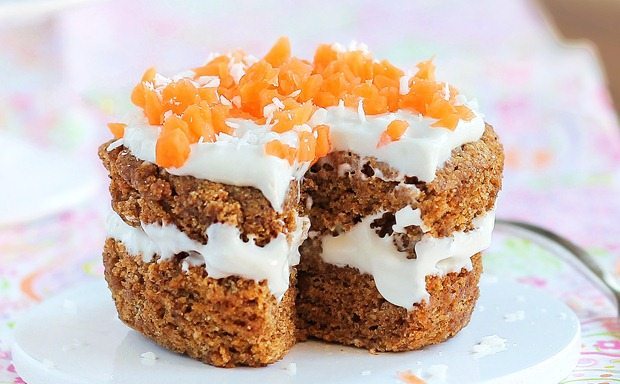
I will be enjoying the day with family, having an egg hunt, dying hard boiled eggs, eating some ham, and yeah probably having more than a few pieces of candy. 🙂  (Oh, and don’t tell, but I totally want to surprise everyone with this unbelievably easy [microwave only!] carrot cake recipe and healthy cream cheese frosting!  I really hope it is as delicious as it sounds.)

Enjoy the roundup below of creative, healthy ideas to make this the best Easter ever!


Natural Easter Egg Dyes from Rodale’s Organic Life

natural easter egg dye

How to Make Vibrant Naturally Dyed Eggs

50 Non-Candy Egg Stuffer Ideas

40 more Non-Candy Ideas

40 Egg-cellent Non-Candy Easter Egg Fillers

No One Will Guess These Easter Brunch Recipes Are Healthy

Easter Brunch

If they're going to be on your Easter table, they should totally look pretty. Get the recipe from Delish.

And of course, we can’t forget the CANDY!

50 Homemade Easter Candy Recipes

50 Homemade Easter Candy Recipes

15 Healthy Easter Desserts


Image at the top of page from HERE.

Peach Oatmeal with Kefir


Some of you reading this may be thinking “what in the heck is kefir“?, and, “How do you pronounce that?”, or maybe, “Oatmeal is awful boring goop.”

Well, I have heard it pronounced both “kef-eer” and “keef-er” and I don’t have a strong opinion on which is correct.  If anyone knows for sure feel free to comment below.  But call it whatever you want, what it is a superfood that has many proven health benefits of kefir supported by research.  It is essentially fermented milk.

Now, before you go all “ewww, fermented stuff is gross!” hear me out.  This is a drink which has been around for many many years, used by different herding cultures and passed down through the ages.  Many peoples mostly lived on milk from their herds as they were nomadic, and they would store milk in leather pouches for days at a time.  This would gradually ferment into a sour, thicker, yogurt-like liquid that they could store even longer.  These people were known for their health and vigor.  “Elie Metchnikoff, a Nobel-prize winning biologist at the Pasteur Institute, first suggested that lactobacilli might counteract the putrefactive effects of gastrointestinal metabolism in 1908. ” (source)

The fermented milk would contain chunks of symbiotic cultures of various lactobacilli (a type of bacteria), yeasts, and other microorganisms which are useful for healthy digestion.   For those with a scientific curiosity: “Microorganisms present in the grains include lactic acid bacteria, Lactococcus lactis subsp. lactis, Streptococcus thermophilus, Lb delbrueckii subsp. bulgaricus, Lb helveticus, Lb casei subsp. pseudoplantarum and Lb brevis, a variety of yeasts, such as Kluyveromyces, Torulopsis, and Saccharomyces, acetic acid bacteria among others. ” (source)

Kefir has antibiotic and antifungal properties. It’s been used in the treatment of a variety of conditions, including metabolic disorders, atherosclerosis, and allergies, tuberculosis, cancer, poor digestion, candidiasis, osteoporosis, hypertension, HIV and heart disease. It may also help restore a better balance to the gut flora, alleviating conditions such as diarrhea, constipation, gas, and bloating.  Many lactos-intolerant people also find they are able to drink kefir without difficulty, as the fermentation breaks down much of the problematic sugars in the milk.  If you’re interested, feel free to read about the differences between kefir and yogurt .

In addition to beneficial bacteria and yeast, kefir contains many vitamins, minerals, amino acids and enzymes.  Among these small health benefits are: calcium, phosphorus, magnesium, B2 and B12, vitamin K, vitamin A and vitamin D, and many amino acids.  In particular, tryptophan, one of the essential amino acids abundant in kefir, is well known for its relaxing effect on the nervous system.  Kefir in the diet can have a particularly calming effect on the nerves due to this and other salts important for a healthy nervous system.


Peach Kefir Oatmeal Ingredients

So now that I’ve hopefully convinced you to give kefir a chance, how do you get it into your diet?  Well, of course one option is to just eat/ drink it as if it were yogurt, as a snack or part of a meal.  You can also use it like milk and pour over cereals for breakfast.  You can whip it up into a smoothie just as you would with water or milk.  Or you can try this delicious recipe to make Kefir Oatmeal!

Ingredients:

  • 1/2 can of peaches (in juice or water, not syrup, or home canned)
  • 1/2 cup water
  • 1/2 cup oats
  • 2 tbsp – 1/4 cup kefir
  • Optional: Sprinkle of cinnamon

Peach Oatmeal with Kefir

Step 1: Pour the oats and water into a bowl with the peaches, and microwave on high about 3 minutes.  You can also cook this in a slow cooker on low overnight, or simmer on the stove top for 5-7 minutes.  Feel free to use any type of fruit you have and like here, frozen berries work well, as do bananas, pears, cherries, or apples.

Cinnamon vanilla peach kefir oatmeal

Step 2: Sprinkle on some cinnamon if using, stir well.  Let the oatmeal sit and soak for a few minutes.  When it is cooled enough that you can put your finger in it and not get burned, add the kefir and mix it in.  (You don’t want to boil alive all the healthy micro organisms we just talked about!)

You can also make this at night, and let it sit at room temperature, covered, overnight for some extra fermentation.  You will get great digestive benefits from both the whole grain oats and fiber as well as the beneficial bacteria.  Add more or less kefir to your own tastes based on how sour you like it.  If you absolutely must, you can add in some maple syrup or honey, but I like it just plain as is.  Enjoy!

Green Tea Matcha Latte


Now, I know matcha powder has been around in culinary circles for a long time, being used in everything from baked goods to ice cream to beverages.  And it has been around long before that in Japan as a highly antioxidant-rich drink of choice.  Matcha goes back many centuries in China and Japan, where it was first made as dehydrated and crushed bricks of tea leaves for storage and travel.  Zen Bhuddists drank this tea in a ceremony prior to afternoon meditations, and found it enabled them greater clarity and sustained energy unlike anything before.

Powdered tea was made in very small batches, such that the expense meant only royalty could enjoy it.  However, a new harvesting method soon enabled more efficient processing, and as the price became more affordable matcha became available to the public.  By the 16th century, all levels of people took part it drinking tea and tea ceremonies to some extent.  To learn more about how to make the perfect cup of matcha green tea, and for a brand review and comparison, check out this site.

Frothy green tea latte

Many claim matcha is a great replacement for coffee because it is so high in antioxidants, yet still packs quite a punch, as one teaspoon of matcha contains 70 mg of caffeine (approximately the equivalent of a half a cup of coffee, which typically contains about 160 mg).  If you make or order a “koika” or “thick tea” this is made with twice the amount of matcha powder, and thus twice the caffeine content.  A high quality matcha powder will be bright green, and smell earthy and complex.  This is a fun drink to serve up for St. Patrick’s Day, or the day after when caffeine is maybe needed…

This recipe is a very simple one, which you could easily make at home, bleary eyed first thing in the morning.  Which is great, because that is when I made it!  I chose to use vanilla flavored milk, you could also use a vanilla bean or vanilla flavoring, or try something else like mint leaves or peppermint extract.  Or you can leave your latte plain and savor the complex flavors of the matcha.  I also used one medjool date as my sweetener, try agave nectar or pure maple syrup for something different.

Ingredients for a sweetened vanilla Matcha Latte

Ingredients:

  • 1 teaspoon quality matcha powder
  • 1 medjool date, pitted
  • 1/4 cup water
  • 3/4 cup almond or soy milk
  • Optional: use flavored milk, or add the seeds from one vanilla bean or 1 tsp of vanilla flavoring

Dates in boiling water

Step 1: Put the water in a small sauce pan with the cut up, pitted date and bring to a boil.  This just softens the date in order to make it blend more easily.  Pour the hot water into the blender and blend on high for 30-45 seconds.

Matcha latte in a blender

Step 2: Add the milk to the sauce pan and bring to a simmer.  Add the teaspoon of matcha to the blender.

Foamy matcha latte

Step 3: Add the hot milk, and blend together for 30-60 seconds to make it nice and frothy.  You can of course whisk it instead, purists use a bamboo whisk, but I am far too lazy for that. 😉

IMG_3401

Step 4: Pour into a mug, and enjoy!  The blender makes a light, bubbly layer on top, and enables the incorporation of the date.  It would be much harder to crush it up yourself, so if you are using a whisk you should probably use a different, liquid sweetener.  This is best enjoyed immediately, still steaming from the stove.


[amd-zlrecipe-recipe:49]


Mediterranean Breakfast Sandwich

…

Though this sandwich does involve eggs, I hesitate to call it a “breakfast sandwich” because it would taste amazing any time of day.  Like my other recipes with Mediterranean in the title (such as my Mediterranean Meatloaf Muffins, Stuffed Mushroom Caps, Cashew Chicken, Vegetable Panini, or Chicken & Couscous), this recipe uses lots of healthy veggies, mostly bell peppers and avocado.  You could easily substitute or add in eggplants, zucchini, any type of olives, greens, or caramelized onions too.

Recipe makes 2 large sandwiches.  You can also turn these into wraps, or serve in a lettuce leaf, if you are avoiding carbs.

Ingredients:

  • 2 large eggs
  • 1/2 jar roasted red bell peppers
  • 1 fresh avocado
  • 2 tbsp olive oil
  • Salt & pepper
  • 4 slices wheat bread
  • 2 slices cheese
Step 1: In a frying pan, heat the olive oil to sizzling.  Crack the eggs in, and fry 2-3 minutes, until whites are cooked.

Step 2: Flip the egg once all the whites have cooked.  Take the roasted peppers and add those to the pan.  The longer you cook the egg, the more solid and less runny the yolks become.

Step 3: Once the eggs are cooked and peppers are heated through, place one egg and 1-2 pieces of pepper onto each of 2 slices of bread.

Step 4: On two other slices of bread, add the cheese slice and half of the avocado.  Press the two halves of each sandwich together.

Step 5: If you need to, add 1 more tbsp olive oil.  Put the sandwiches into the pan, and cook for 4-5 minutes on both sides, until nice and browned and the cheese is melty.

 Slice the sandwiches in half, and enjoy!

…

Eggs in a Green Nest


One of the hardest hurdles when transitioning to healthier eating, at least for the majority of people, is eating leafy greens.  We all know that leafy greens are the healthiest things out there.  They contain tons of vitamins, minerals, and antioxidants.  They cost us next to zero calories to consume.  Greens are full of digestible and indigestible fiber to keep your digestive system strong and healthy.

So why do they taste so bad?

Foods which to us taste bitter have an array of compounds in them that naturally protect the delicate leaves from insects who would love to snack at the salad bar of nature.  It is these compounds which tend to be so beneficial for our health.  Unfortunately, humans usually dislike the bitter taste at first.  Fortunately, you can re-train your taste buds to enjoy bitter, and there are many cooking techniques to make bitter foods more palatable.

Adding small amounts of high quality fat like olive oil, or a sour taste like vinegar or lemon juice, can help temper the bitterness of greens.  Sea salt or other salty sources like hard cheeses also helps mask the harsher flavors and draw out the sweeter notes.  My recipe for simply sauteed power greens uses these techniques to create a delicious side dish that even most greens-haters can enjoy.

Greens and Egg

In this simple breakfast recipe, I combine those techniques with fresh eggs for a superstar breakfast that is ready in under 10 minutes, packed with vitamins and nutrients and protein, and will keep you happy and full all morning long.  Enjoy over some brown rice or with whole wheat toast for a well rounded meal.


Ingredients:

  • 1-2 fresh organic eggs, if possible
  • 1 large bunch greens (kale, collards, mustard greens, etc) or a mixture of greens to make about 1 – 1 1/2 cups
  • 1-2 tbsp olive oil
  • 2 tbsp lemon juice or apple cider vinegar
  • 1 tbsp hard, salty cheese such as Parmesan
  • Optional: 1-2 slices wheat bread or 1/2 cup brown rice

Greens in Pan with Egg

Step 1: Rinse your greens to remove any dirt, and slice into thin strips or shred by hand.  Add the oil to the pan, then the greens, and drizzle with lemon juice.  Cover with a lid, and steam the greens for 5-7 minutes.  Optional: you can add a chopped clove or two of garlic

Greens and Egg Yolk and Toast

Step 2: Mix the greens, they should be bright and slightly wilted now.  Use a spoon or spatula to make a small indent in the pile of greens, and crack an egg into the hole.  Cover again, and steam for another 5-7 minutes.  The longer you cook the egg, the more well-done the yolk becomes.  5-7 minutes will leave it slightly runny, as in above photo.

Once the egg is cooked to your desired done-ness, remove to a plate and serve!  I sprinkled a little hard cheese over the egg, which gives it the perfect salty balance to the tart & bitter greens.  You can also use sea salt for the same effect.

You can easily increase this recipe to feed several more people, simply increase the volume of greens and crack in one to two eggs per person.  This is delightful plain with toast, or you could serve with black beans, salsa, hot sauce, relish… whatever floats your culinary boat.


Homemade Salted Caramel Creamer


How many of you start your day off with a nice hot cup of coffee?

I know my hand is raised!  Coffee in the morning is as natural as breathing at this point, and is one vice I will never give up.  Yes, I know that caffeine is a drug, and it is possible to live without coffee, but honestly, … why?  Kidding… sort of.

One of several items in my house that has come under scrutiny lately though, is my coffee creamer.  I usually buy the store version of whatever flavor sounds good at the time or is on sale (french vanilla, hazelnut, mocha, peppermint…).  But if you check out the ingredients list, you will find things like: high fructose corn syrup, palm oil, sugar,  carrageenan, and tons of other substances I can’t spell or pronounce (and I’m a scientist).

Do I really want a cup or so of these things every week?  Do I want polysorbitol whatever building up in my body?  Do I know what the long-term effects of all these chemistry experiments (not to mention the cocktails of pesticides & hormones found in CAFO cows’ milk) are going to be?

NOPE.

The alternatives?

Stop using creamer & drink black coffee? HAHAHAHAHAHA… nope.

Make it myself?  Challenge accepted.

IMG_3001

I started with whole, organic milk*.  Then I threw in some sugar (it has to be palatable, otherwise I could just use plain milk.  But my palate is still just a little too young to fully appreciate the “coffee-ness” of coffee).  A dash of vanilla and salt to draw out all the flavor, and we have a winner!

*Note: This is of course not a recipe for those who are lactose intolerant or trying to avoid dairy.  I am experimenting with various non-dairy milks too, and if I create a winning recipe I will share it!

This took me approximately ten minutes, basically just long enough to caramelize the sugar.  Then just mix it all up in a large jar (I use mason jars, but you could use any container, even an empty container from previous creamer) and you’re good to go for a few weeks.  With a waaaay shorter, and completely pronounceable, ingredients list.

sea salt and caramel and creamer

Ingredients:

  • 1 cup heavy cream
  • 1 cup whole milk
  • 1 cup sugar
  • 2-3 tbsp water
  • 1/2 tbsp sea salt
  • 1 tbsp vanilla

IMG_2988

Step 1: Add the sugar and water to a pan.  Slowly bring it to just a simmer, and stir constantly for about 10 minutes.  You don’t want the sugar to burn!

IMG_2989

Step 2: As the sugar caramelizes, it will become thicker and opaque.  Measure out the cream and vanilla, and slowly pour it into the pan while mixing constantly.

IMG_2992

This creates a lovely caramel-like sauce.

IMG_2994

Step 3: Pour the caramel into your jar and let it cool.  If there is some lingering sugar in the pan, either add the milk and whisk until dissolved, or add a few tbsp water and whisk to dissolve.  Pour the milk into the bottle as well.

IMG_3005

Step 4: Add in a few tsp of salt, to taste, and shake it all up.  Done!

Salted caramel creamer ingredients

Now all you have to do is pull this guy off the refrigerator door, shake it up once or twice, and add a few tbsp to your morning cuppa.  It’s so delicious, you may be tempted to drink it straight from the jar… not that I’d know 😉

salted caramel creamer and coffee

Enjoy your healthy, natural creamer!  I will definitely be experimenting with more flavors in the future too.
Anyone have a favorite creamer recipe?  Have you ever tried making your own creamer, or would you consider it?


Cranberry Orange Muffins


One of the best things about fall is all the wonderful scents and flavors that come into season.  Of course the powerhouse is Pumpkin Spice, undisputed king of the fall flavors.  But I’m more of a fan of the littler-known seasonal delights, like nutmeg, fall squash, citrus, and cranberries.

IMG_7535

And of course, cranberries & oranges go together like peanut butter and jelly in the fall. Cranberry & orange tastes great on chicken, pork, or fish, they go together in relish for your Thanksgiving turkey, or baked into bread, cookies, and of course muffins!

These muffins are light and moist, with a lovely sweet tang from the juice and the berries. Perfect for snacking, quick breakfasts, or midday snacks. These muffins can also be frozen in single layers and popped into baggies for an on-the-go treat later. Simply microwave or pop in a toaster oven for a warm fluffy breakfast.

IMG_7517

Ingredients:

  • 1 large orange
  • 1 cup orange juice
  • 1 egg
  • 2 tbsp vegetable oil
  • 1 cup fresh, dried, or frozen cranberries
  • 2 cups flour
  • 1/2 cup brown sugar
  • 1 tsp baking powder
  • 1 tsp baking soda

IMG_7518

Step 1: In a large bowl, mix together all the dry ingredients (flour, sugar, baking powder & soda, ) and in another bowl mix all the wet ingredients (egg, oil, juice). You can juice an actual orange for the juice if you have the ability.

IMG_7520

Step 2: Grate the peel of one orange, and mix it into the wet ingredients. Mix the wet into the dry ingredients, and fold together until moist. Add in the cranberries. If you’re using frozen cranberries, thaw and drain them first so your batter doesn’t get too watery.

IMG_7523

Step 3: Either spray muffin tins with cooking oil or line them with muffin papers. Pour about 1/3 cup of batter into each opening. Bake at 350 F for 25-30 minutes, until the muffins are browning on the top and a toothpick inserted in the middle comes out clean.

IMG_7528

Remove your lovely muffins and let them cool enough to take out of the pan. Then enjoy at least one (or three, I won’t tell!) while they’re still warm.  MMMM MMM! So delicious with coffee, hot tea, or some fresh hot chocolate.

IMG_7529


[amd-zlrecipe-recipe:46]

Spaghetti Squash & Kale Stir Fry


For those who are unsure of trying new “health craze foods” like kale or spaghetti squash, let me assure you, they are SUPER easy to cook and incorporate into your repertoire.  By now the interwebs are bursting at the seams with kale related recipes, so that’s a good place to start.  You can pretty much use it anywhere you would use lettuce or spinach, sometimes coating in oil or steaming first since it is much more hardy in texture.

As for spaghetti squash, this baby is coming into its own in the fall. I have written before about my “spaghetti” and turkey meatballs, where you use the strands of squash just like noodles for the same texture but way more filling fiber and nutritious vitamins than wheat pasta. You can try starting this trick by using half-and-half squash and pasta, then working up from there according to taste.

Cooking a squash is as easy as 1-2-3 with a microwave. Simply cut the squash in half, and lay cut-side down on a plate in the microwave. Add about a 1/2 inch of water, and microwave 5 minutes. Flip the squash over, and microwave again. If it is soft when poked with a fork, you’re good to go, otherwise continue flipping and microwaving a few minutes at a time.  When it is done, you can take a fork and drag it down the sides, pulling out the flesh in spaghetti-like strings.

Hence the name.

You can of course also bake it cut-side down in a shallow oven-safe pan with a little water, 45-60 minutes or until softened. These preparation methods work well for pretty much all types of winter squash as well, from spaghetti to acorn to butternut.

Kale and Spaghetti Squash

For this recipe, spaghetti squash, kale, and other yummy veggies come together in a warming, filling fall favorite. You can make this in a frying pan or in the oven, and once made can be stirred into omelets, served alone or with sauce, or like I did wrapped into a burrito!

Ingredients:

  • 1/2 small spaghetti squash
  • Handful kale (about 1 cup)
  • 2 slices bacon — optional
  • 1 tbsp olive oil — if not using bacon
  • 1/4 white onion, sliced
  • 1/4 pint mushrooms
  • Nuitritional yeast
  • Sprinkle of sea salt

Step 1: In a frying pan, add the onions and bacon if using. (Otherwise, cook onions in olive oil). Cook 1 minute, then add the mushrooms and kale, and flip the bacon. Cook, stirring, about 5-7 minutes. Then add in the spaghetti squash. Cook until everything is heated through.

Spaghetti Squash & Kale Burrito

Step 2: Now you can enjoy as is, add some sauce, scramble some eggs into it for a lovely omelet, or wrap it up into a burrito!