Category Archives: Healthy

Stovetop Popcorn


As a certified popcorn addict, I can tell you that this stuff is like crack, only a hundred million times better and healthier. Bagged microwave popcorn can’t hold a candle to this. Just try it once, and you are likely hooked for life. Fair warning.

Popcorn is also a healthy snack option. As a whole grain, it is after all just a kernel of corn, it delivers about 2 g fiber per 3 cups popped, and contains more antioxidants than some kinds of vegetables. You do have to watch the amount of extras though, have a light hand with the oil or use an air popper, and don’t drown the popcorn in salt (like I do) if you’re watching your sodium.

You will need a large metal pot that you are okay with becoming “the popcorn pot”. I kid you not, my mother and I both have one, and popcorn is the only thing allowed to be cooked in this pot. It is that special, people.

To watch the video on my stovetop popcorn step-by-step how to, click HERE or scroll to the bottom of the page.

Ingredients:

IMG_7853

Step 1: Put the oil, kernels, and salt in the popcorn pot. Swirl it around so that the kernels are evenly distributed in a thin layer.

IMG_7854

Step 2: Put the stove to medium heat, and try hard to wait patiently. When you begin to hear the “plink” of corn popping, you can occasionally swirl the pot around to keep popped kernels from burning and mix it all up.

IMG_7860

Once you don’t hear any popping for a count of 5-10, your popcorn is ready! Be careful when you remove the lid, there will be steam. Pour into a large bowl and dive in. Best piping hot from the stove.

IMG_6873

You can then dress up your popcorn (not that it needs it, I can eat my weight in this stuff) with a whole slew of toppings. Try adding spices like Cajun spice mix, nuts or dried fruits, topping with a sprinkle of Parmesan cheese, or tossing with some candies and melted chocolate (very cute as a Christmas gift in a tin).
Vegan Four Bean Salad


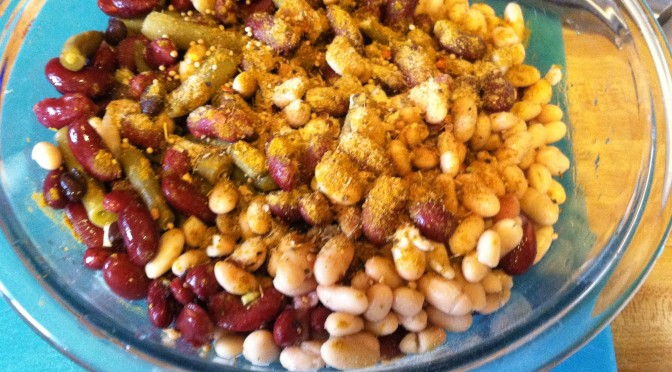
This dish was cooked up (pun intended) for a work potluck I had. I wanted a dish that didn’t take too much time and effort, since I would put it together the day of, maybe even the night before. And it needed to be something that made a lot, to feed a lot of people, but on a penny budget.

In comes my old best friends, beans, to the rescue! Beans are delightful, cheap, and filling. They come in endless variety too, so when you put several kinds together you get a healthy, hearty, and also pretty dish.

This is a very easily customizable adaptation of your typical “three-bean” salad, in that I simply added an extra type of beans. Here I used canned, but you can slash the cost even further by starting with dried beans, and cooking them in a crock pot on low overnight to rehydrate. Then drain and refrigerate until needed.

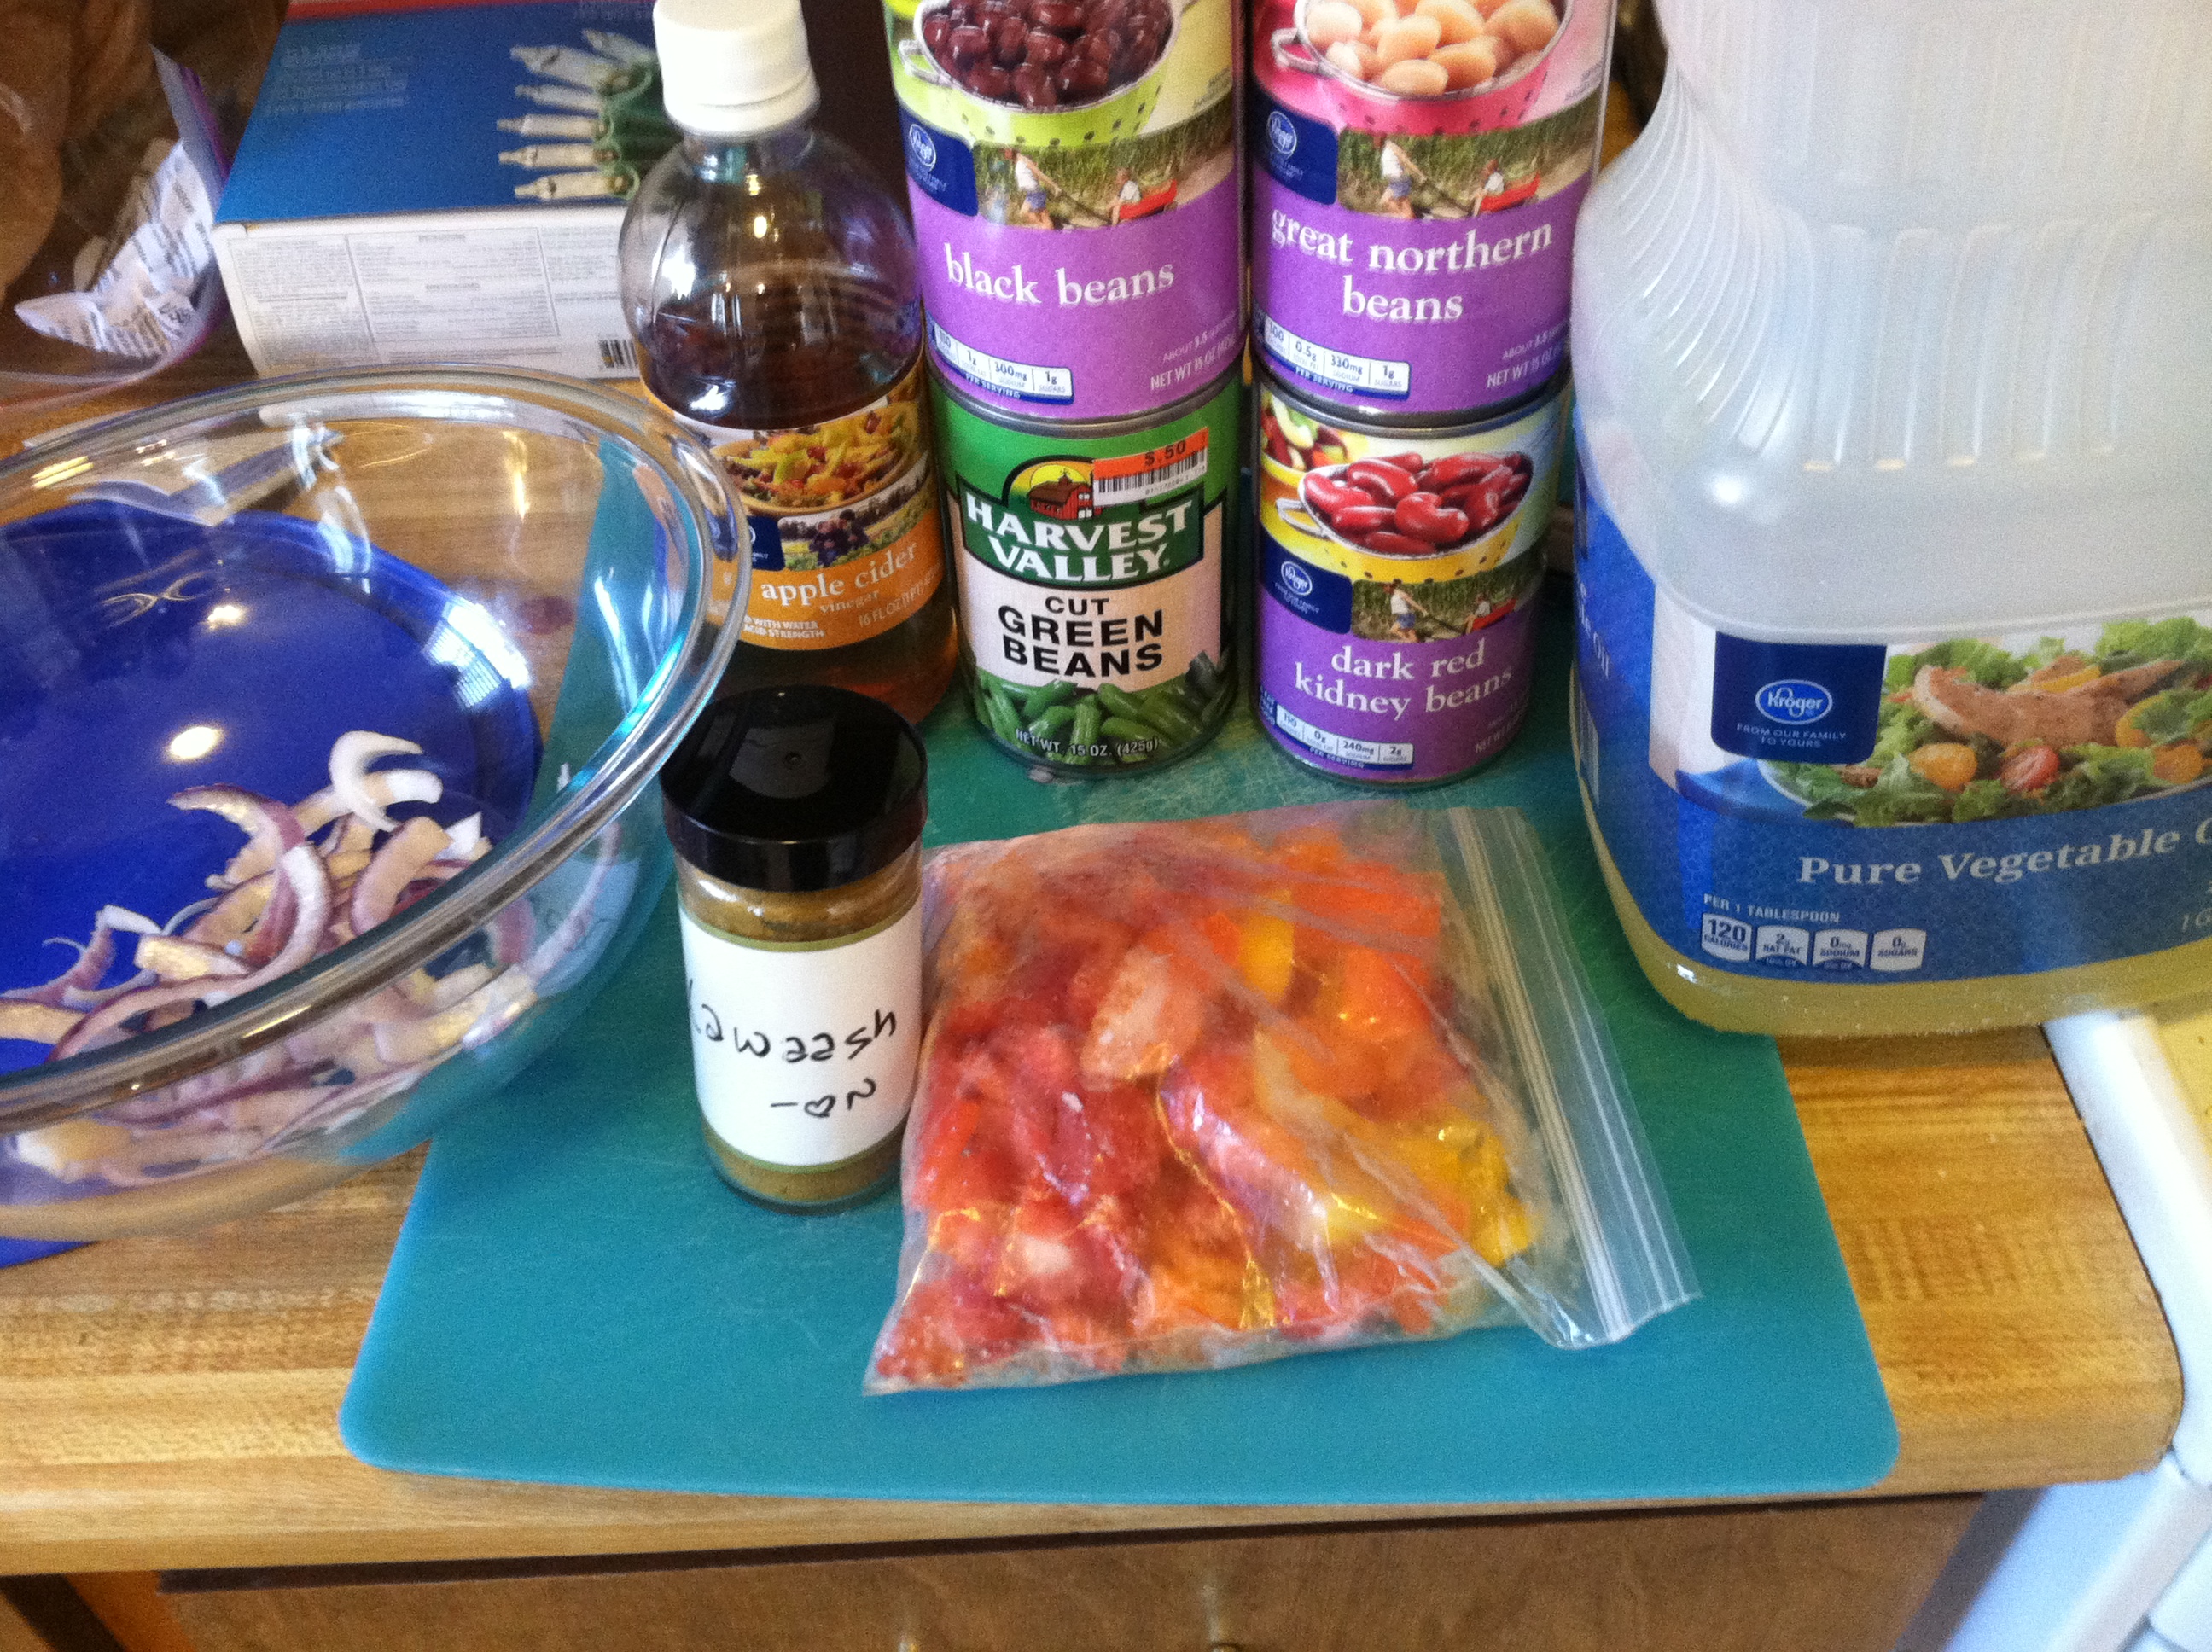
Ingredients:

IMG_6948

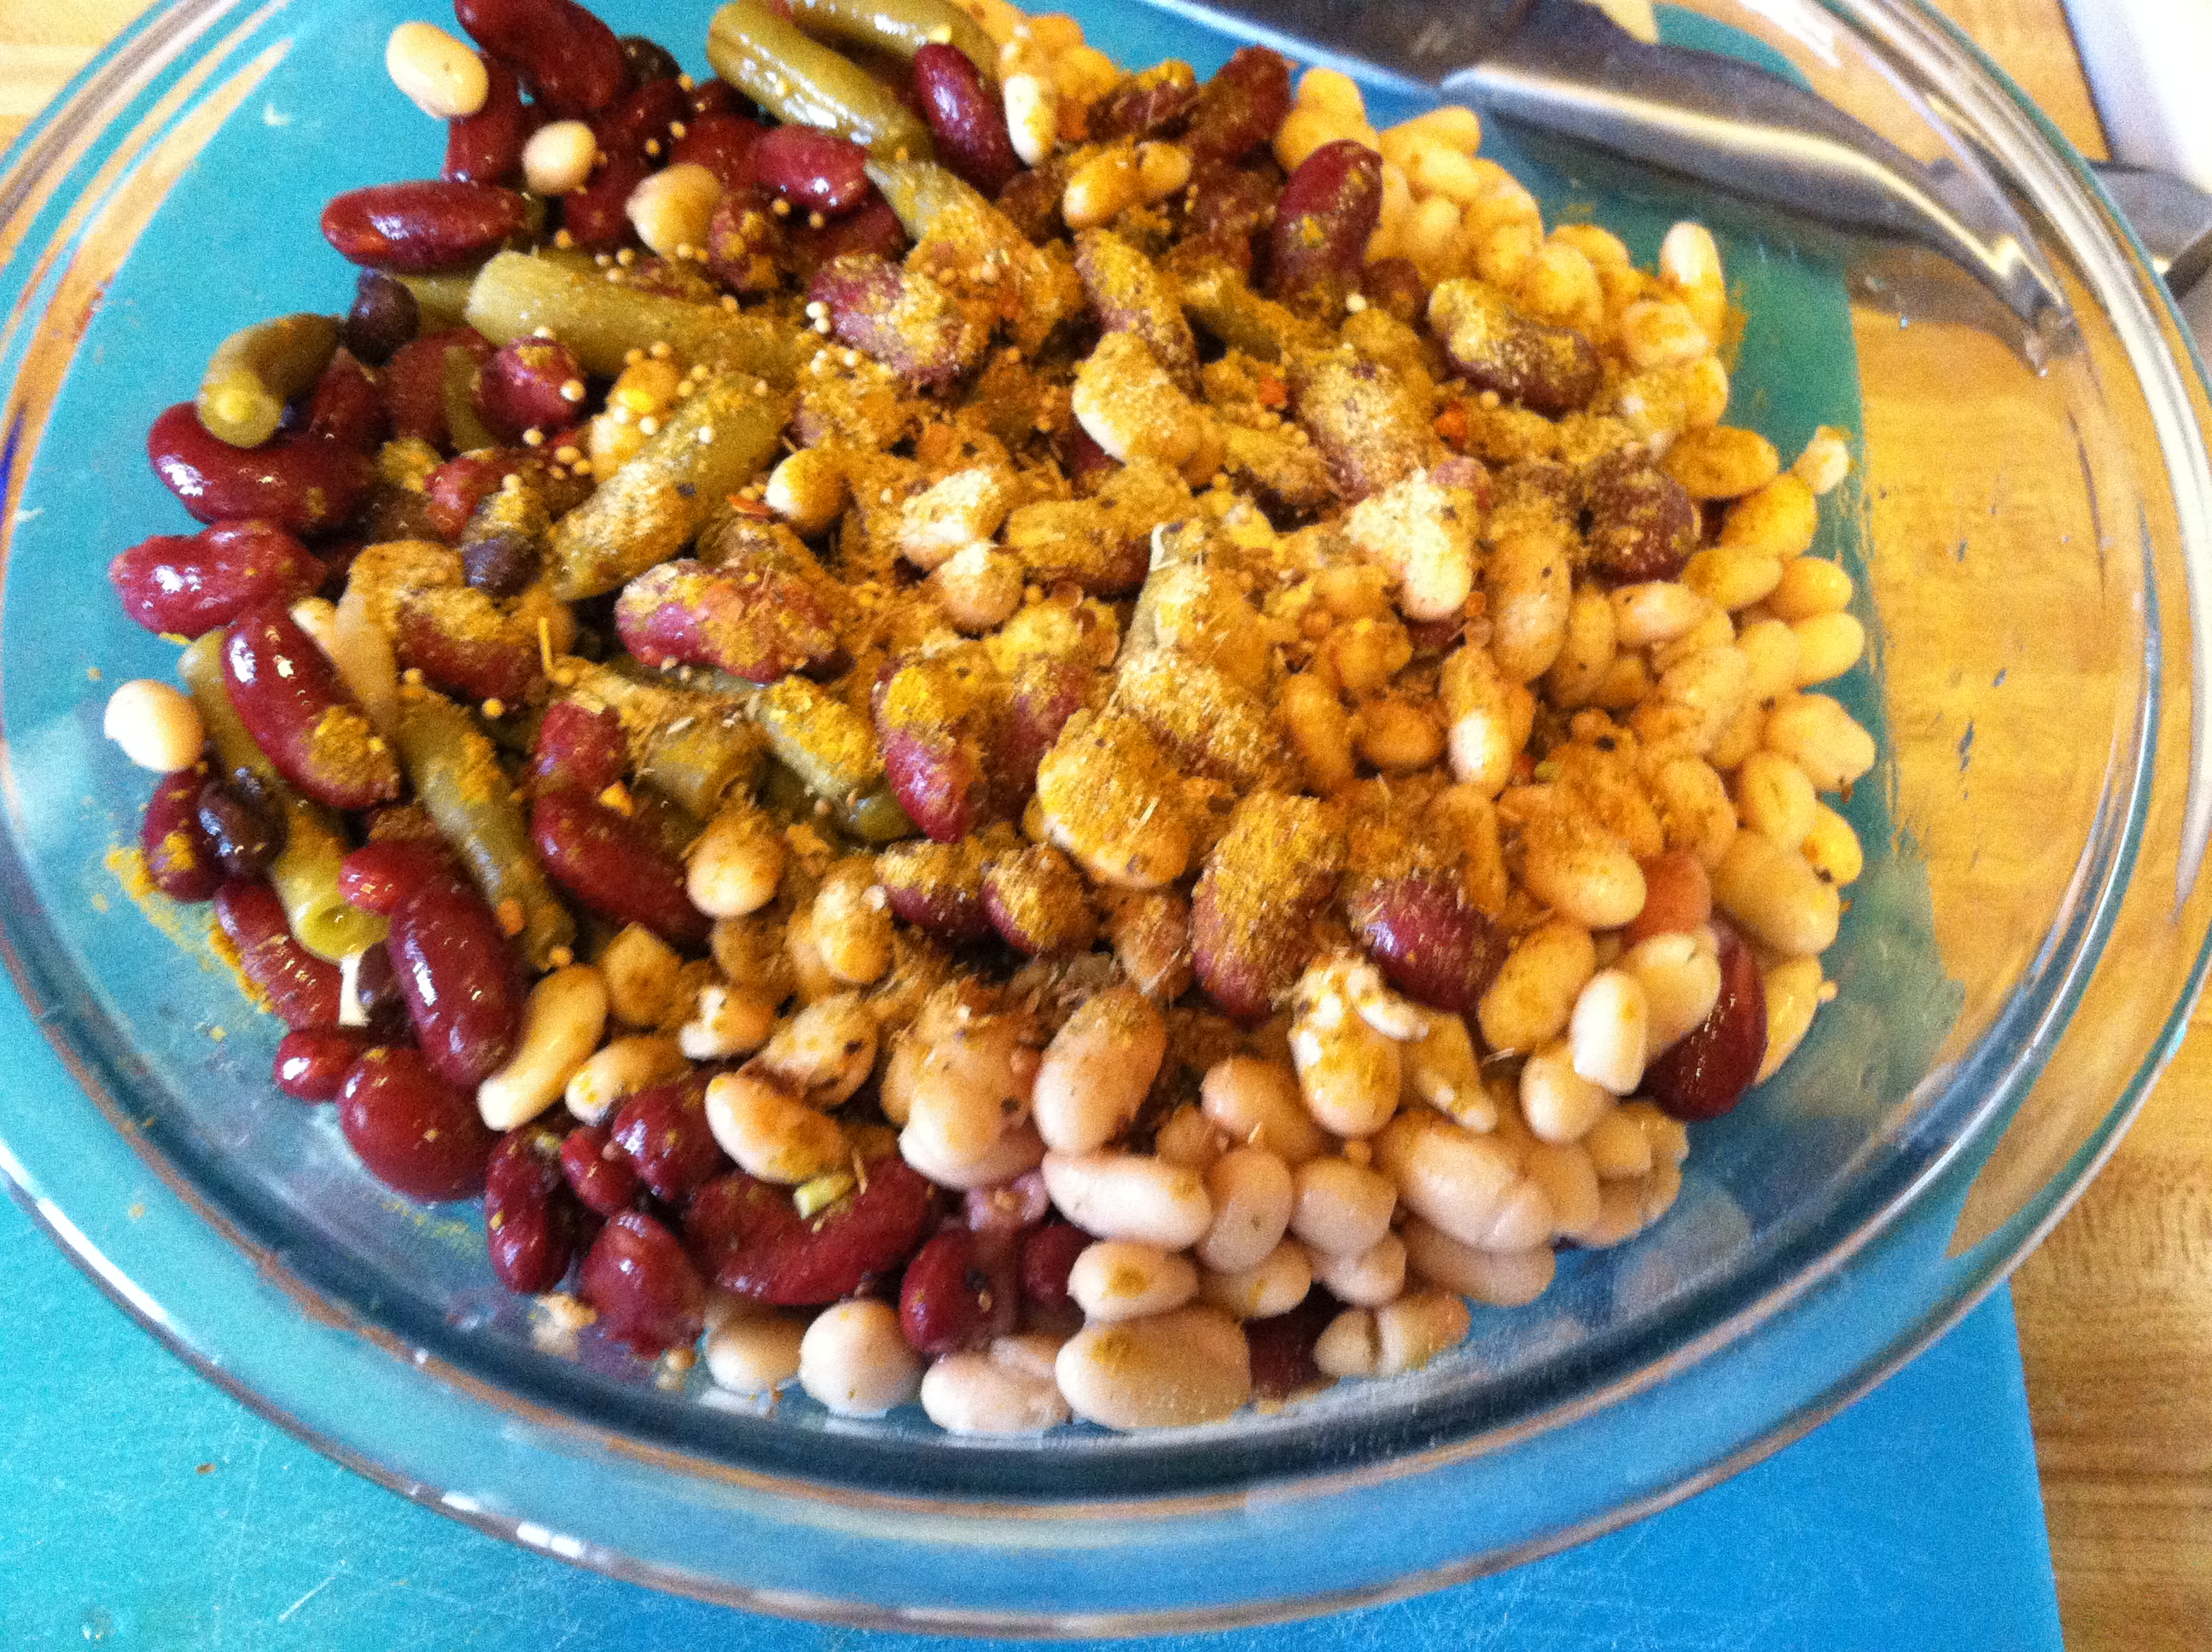
Step 1: Open all the cans, put the beans in a colander and rinse them several times with cold water. This helps remove some of the excess sodium and any preservatives that might have been in the canned juices. Mix in a large bowl with the peppers and onion.

IMG_6949

Step 2: Combine the vinegar and oil, and pour over the mixture. Add the spices, and mix everything up.


This post contains links to Amazon Affiliate Products. When you purchase items using these links, I make a small commission to keep this blog going, without affecting the price you pay. Thank you!

Book Review: Plant-Powered For Life by Sharon Palmer, RD


Do you want to feel vibrantly alive? Do you want to be in the peak health of your life, no matter your age? Do you want to enjoy a constant kaleidoscope of rotating colors, flavors, textures, and aromas in your meals? Do you want to do your fellow mankind, animals, and the planet a huge favor?

Living a plant-powered life can give you all that and more.

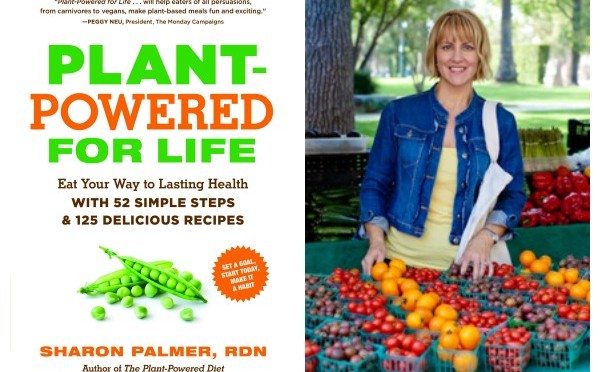
I had the great honor of being asked to read and write a review for “Plant-Powered For Life“, the recently-released second book by Registered Dietician Nutritionist Sharon Palmer. Also the author of “The Plant-Powered Diet“, an avid blogger and speaker, and with hundreds of hands-on hours helping people empower their life and better their health through diet, Ms. Palmer knows her food.

Plant-Powered-for-Life-Feature--290x160

This is an insightful, instructive book which focuses on a whole-lifestyle approach to better health through better eating. It is exactly the kind of book I have been looking for. It includes tons of practical tips from how and what to shop for at the grocery store, to ways to prepare and cook different vegetables, to 125 plant-powered recipes.

There are also gorgeous full-sized photos of various recipes and produce sprinkled throughout every chapter. The food looks so tasty, it would make even the most hard-core carnivore crave a Farro and White Bean Burger, Thai Lettuce Wrap, or Strawberry Soy Lassi.

IMG_7839

She begins the book simply, by asking the reader to create a plant-powered life goal. There is a whole spectrum from die hard carnivores simply aiming to include more plants in their daily diet, to going full-blown vegan. You choose how vibrantly plant-powered you want your life to become.

Since I am a lifelong omnivore, I’d like to add more veggies into my diet every day, as well as having a minimum of one meatless day per week. I will keep packing in more and more veggies, until they begin to supplant the meat naturally.

image4-8-3-

The book is broken down into 52 chapters, and each is a call to action about changing one small segment of your life. You can choose to take on one chapter per week for a year-long journey to plant power, or you can skip around to whatever chapters best fit in your life and speak to you.

Included in each chapter is 2-3 plant-powered recipes. These recipes feature seasonal produce, and a rainbow of variety. Ms. Palmer repeatedly makes the point that eating varied, whole, plant-based foods is the most ideal diet humans can follow.

Each fruit, vegetable, legume, or grain has a unique mixture of micro- and macro-nutrients that contribute to vibrant health. We need a rotating variety of these vitamins and minerals to achieve and maintain ideal health.

SharonPalmer

All the recipes have suggestions for substitutions or variations; for example, if you follow a gluten-free diet for dietary reasons there are substitutions included to make the recipe gluten-free. Most have very brief ingredient lists, and prep/cook times under an hour. I have already found at least a dozen recipes I am super excited to try and get into my weekly meal rotation!

I am so happy to have this handy plant-based eating guide slash cookbook on my kitchen shelf. I’m sure I will refer to it for advice, ideas, and inspiration for years to come. Count me in for eating more plants this year!

IMG_7837

The best part of this article, is that Ms. Palmer’s team has been generous enough to enable me to give one lucky reader a copy of their very own! Below is a Rafflecopter giveaway; you can earn up to four entries, plus an extra one each day you Tweet about us!

IMG_7838

This giveaway begins at midnight MST on Sunday January 25, and ends Sunday February 22nd at noon MST.
a Rafflecopter giveaway

Couscous & Beans with White Fish


This post contains affiliate links. See Partnership page for more.

Since I made my own canned pinto beans, I’ve kept them in the refrigerator so that there’s little risk of botulism growing. This means that I’ve also been coming up with ways to use them up quickly, so beans have been featuring in meals all week in various ways.

I made a Red Beans & Rice that was absolutely delicious and will be part of my usual meal rotation now, and used my beans in stuffed bell peppers. Now I am considering a pinto bean hummus. Is that blasphemy? I don’t care.

This is a great way to get your fiber for the day and sneak in some extra veggies. Even if you don’t like fish, this blend of flavors and textures may change your mind.

Ingredients:

  • 3/4 cup couscous (cooked)
  • 3/4 cup beans
  • 1/2 cup frozen diced peppers and onions
  • 1/2 cup spinach
  • 1 3 oz white fish fillet
  • 2 tbsp lemon juice or vinegar
  • Salt & pepper & paprika

IMG_7468

Step 1:  To cook couscous, take about 3/4 cup water and heat in microwave 2-3 minutes, until near boiling. Pour over 1/2 cup couscous and let sit, covered, for 10-15 minutes.

IMG_7469

Step 2: Meanwhile, in a pan combine the frozen veggies, spinach, and beans. Cook 5-7 minutes, stirring often so nothing sticks. The spinach should wilt to a fraction of its size, and the veggies will soften. Fluff the couscous with a fork, and pour veggies on top.

IMG_7470

Step 3: In the same pan, add the white fish and spray lemon juice over it. Sprinkle with salt and pepper and cook 4-5 minutes. Flip, and cook the other side another 2-3 minutes, until it is fully white and flakes easily with a fork. Add more lemon juice if you want.

IMG_7472

Step 4: Put the fish on top of the whole bowl, sprinkle with more seasonings, and dig in!

IMG_7474


[amd-zlrecipe-recipe:2]

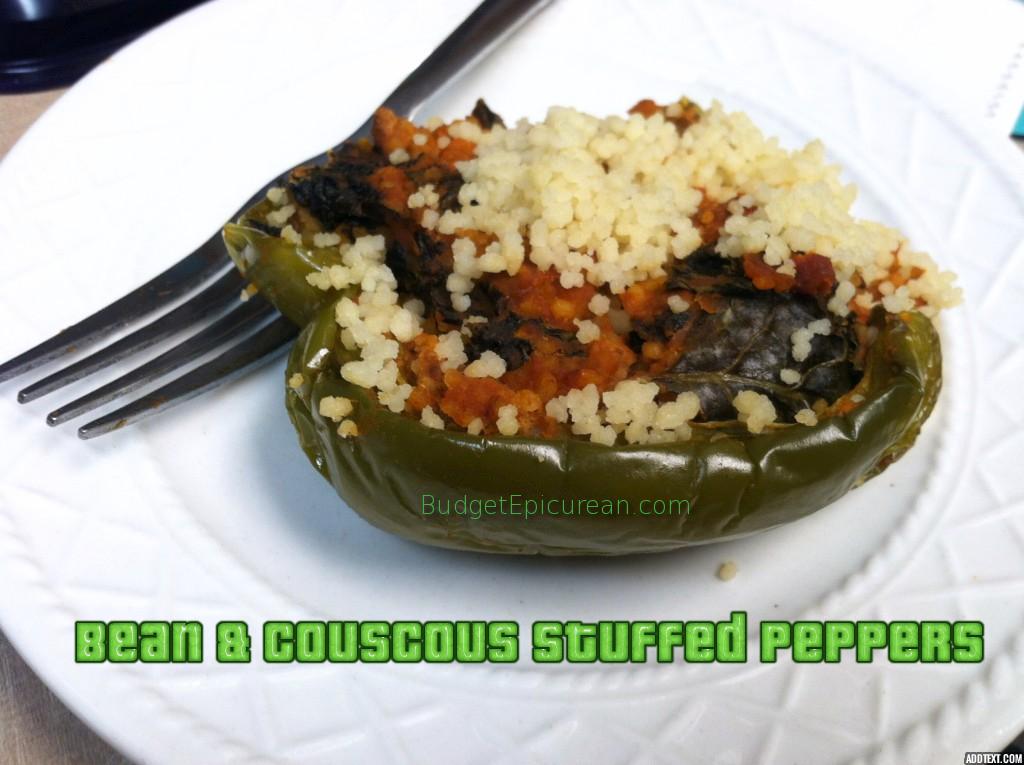
Bean & Couscous Stuffed Peppers


So you might know I’ve been on a bit of a bean kick lately. I love how affordable (read: cheap!) dried beans are and so I’ve been trying to incorporate them more into my daily cooking.

I’ve already found that I can indeed can my own beans. For mere cents per jar this is a great savings over buying them at the store for 60-90 cents per can.

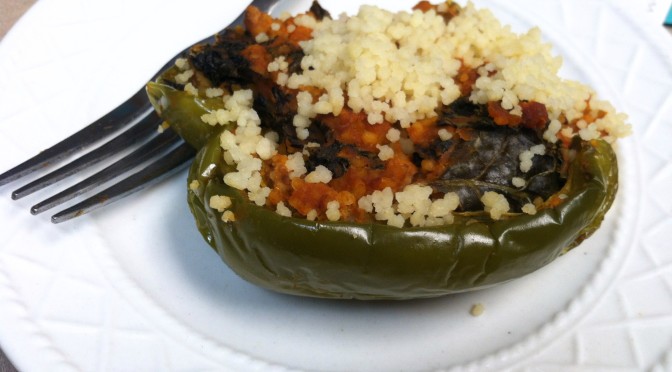
I had already made Red Beans & Rice, and I totally love beef & rice stuffed peppers, and couscous stuffed peppers. I figured beans are a natural option for stuffing, since they are high in fiber and protein, and are good at binding together other ingredients. This is another recipe that turned out accidentally vegan. I’m on a roll and I like it!

addtext_com_MjAwOTM3MTY4NDgy

Ingredients:

  • 3 bell peppers any color
  • 1 cup cooked couscous
  • 2/3 cup cooked beans, mashed
  • 1 can tomato sauce, or 1/2 cup pizza/pasta sauce
  • Handful torn kale
  • Garlic salt or other seasonings to taste

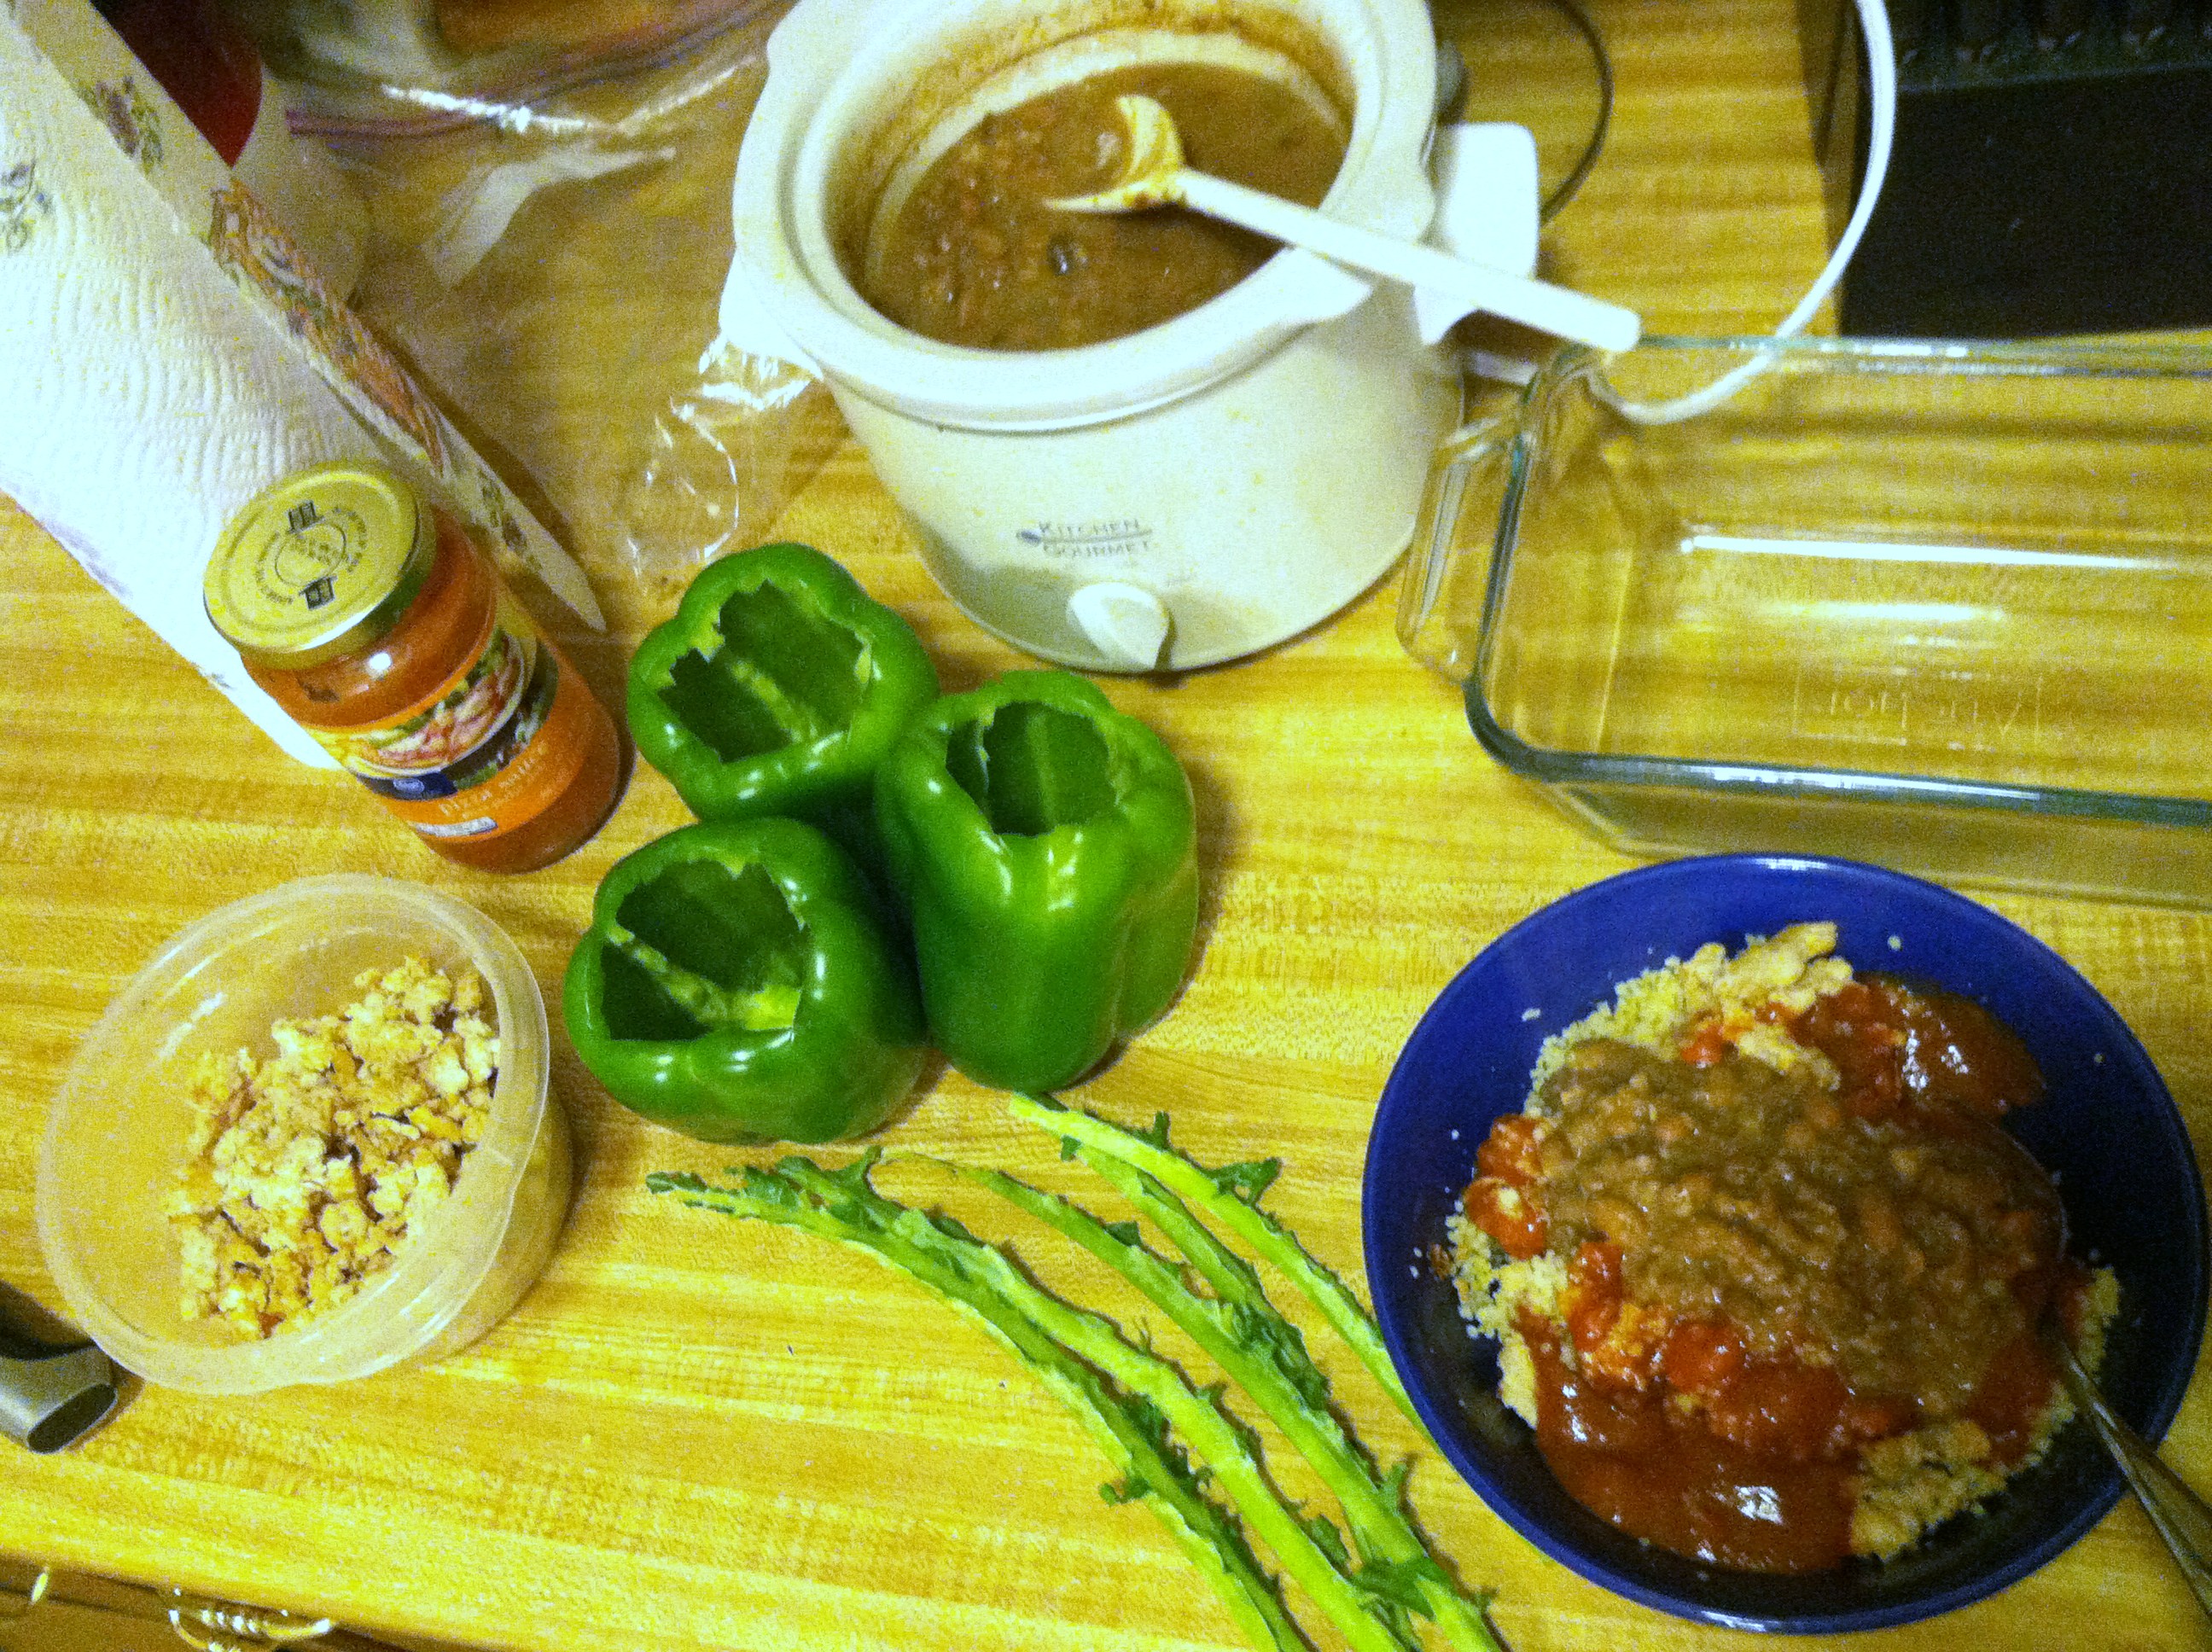
IMG_6925

Step 1: If you haven’t already, cook the couscous by covering with boiling water, then waiting 5-10 minutes to absorb. Fluff with a fork. I cooked the beans overnight in a crock pot, then mashed them.

IMG_6926

Step 2: Cut the tops off the peppers and discard seeds. In a bowl, mix the couscous, beans, sauce, seasonings, and kale. Stuff 1/3 of the mixture into each pepper. If you reserve a little sauce you can pour that on top.

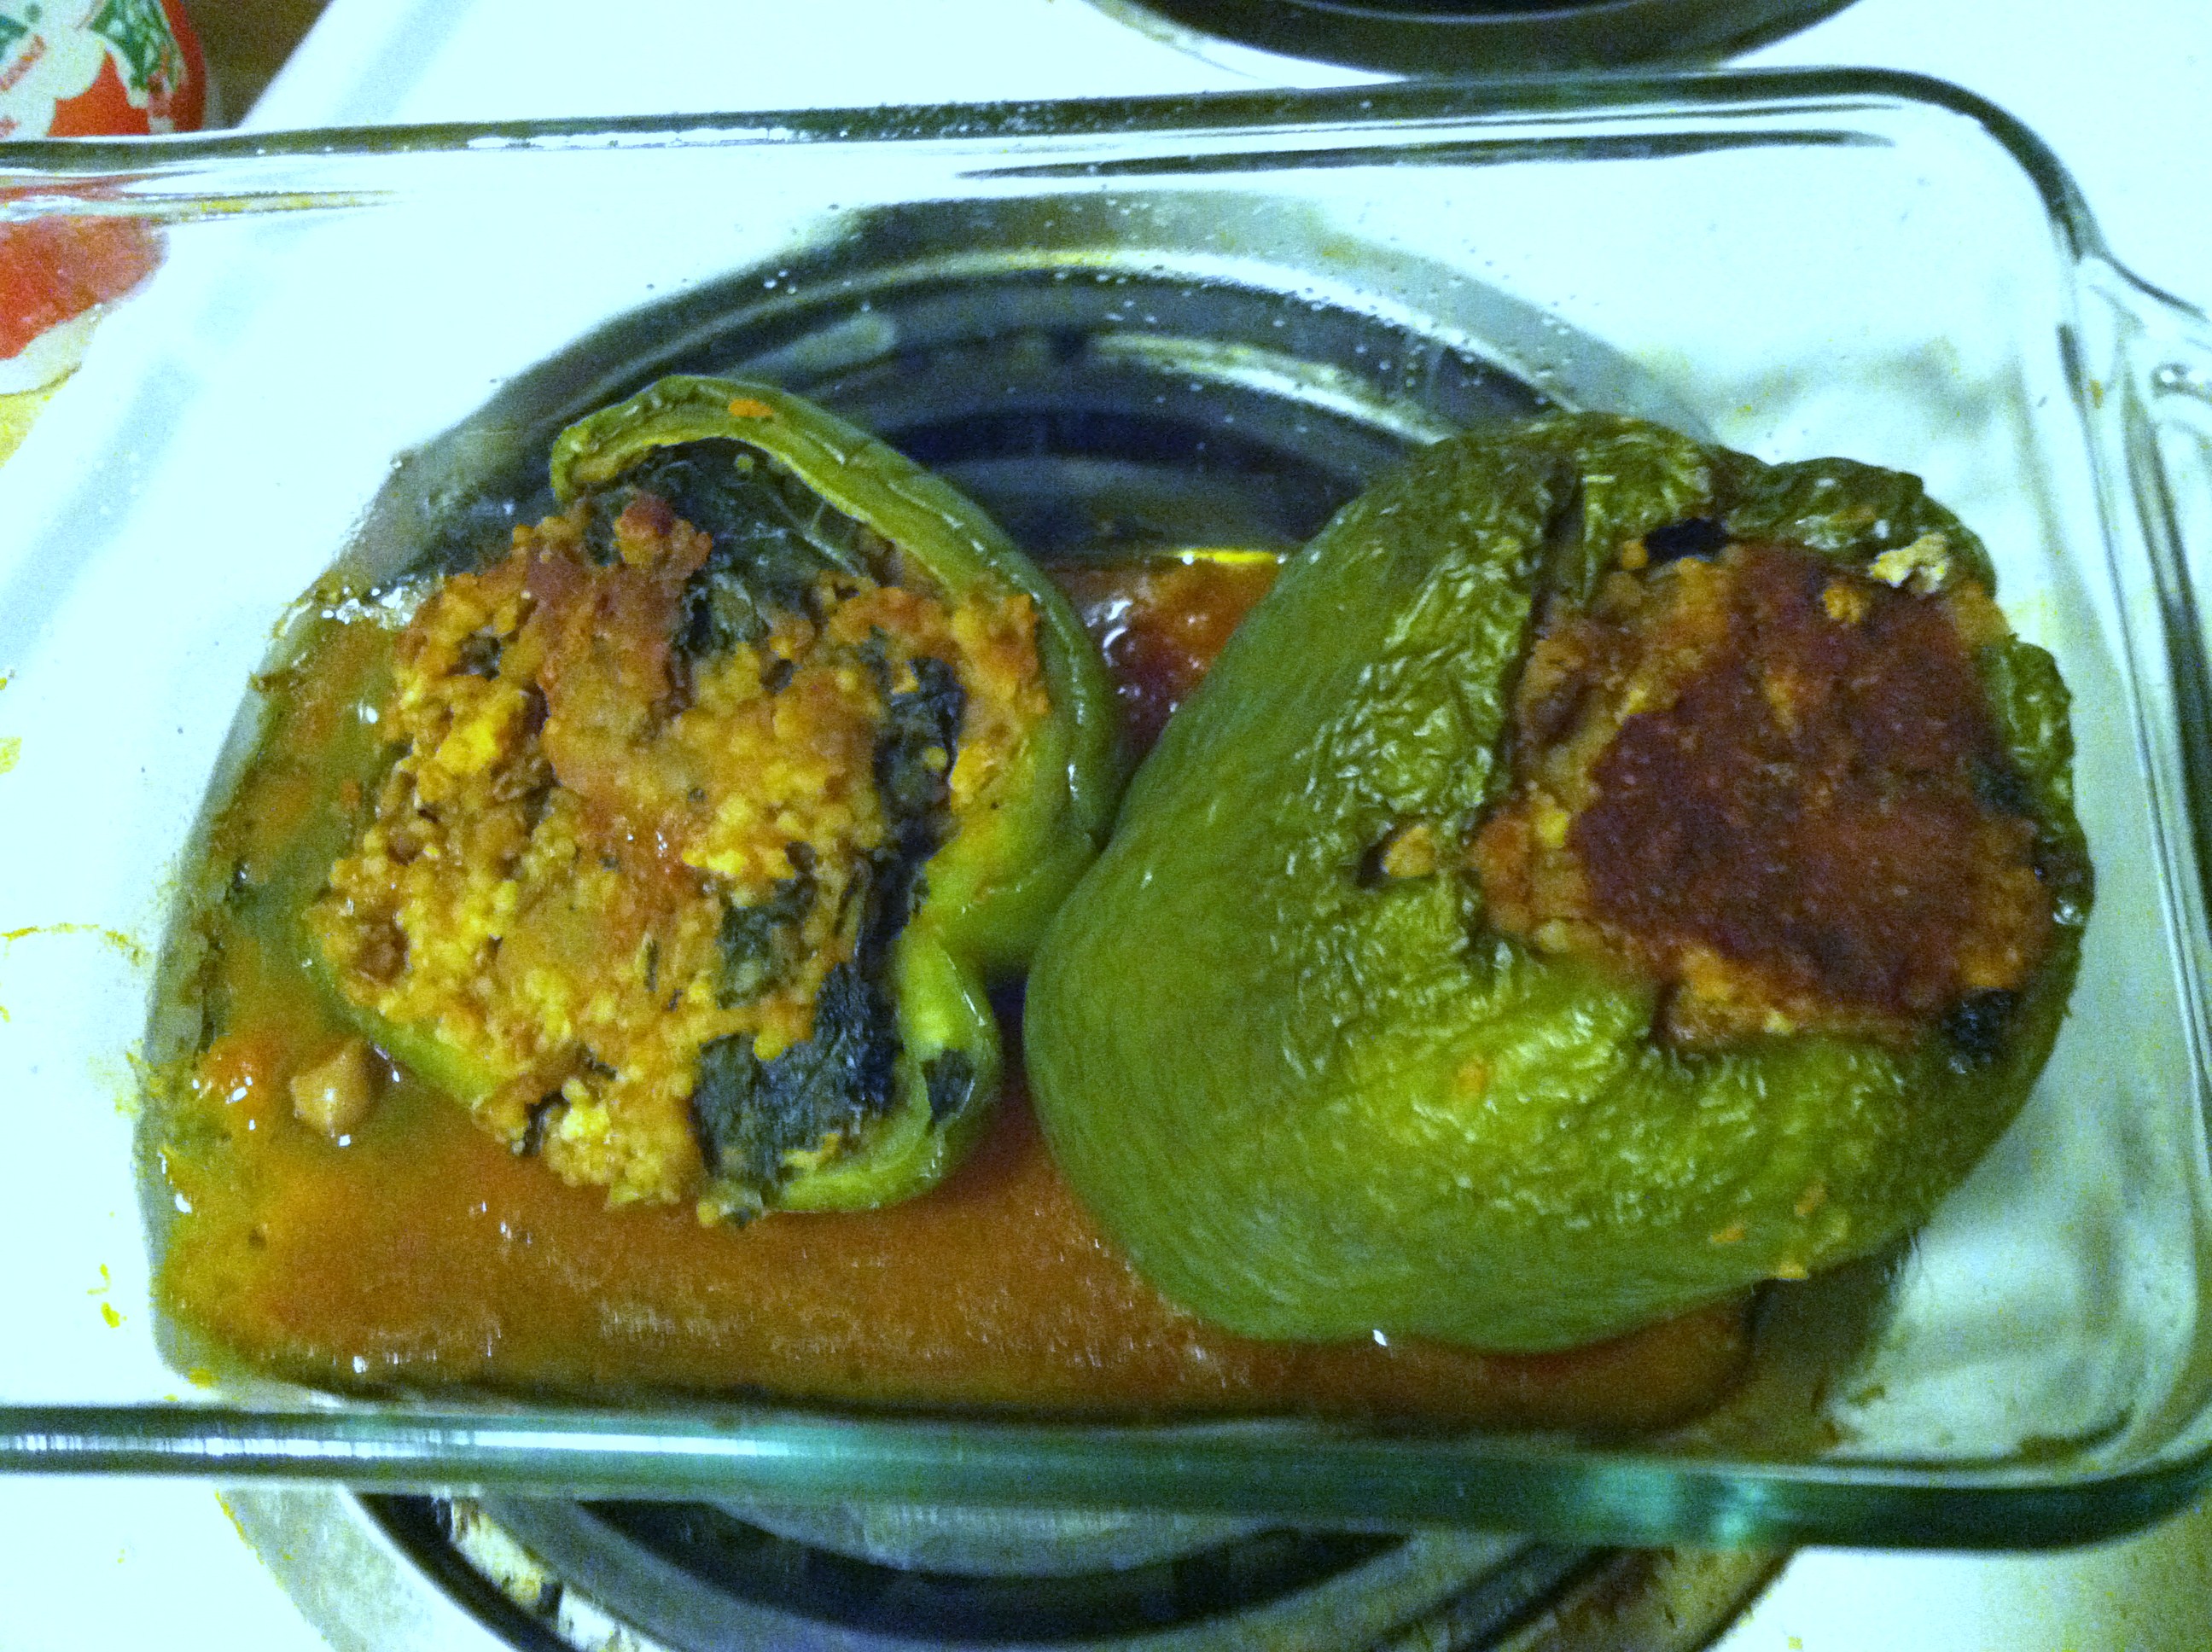
IMG_6933

Step 3: Bake at 350 for 25-30 minutes, or until the outside of the peppers becomes soft to the touch and easily pierced with a fork.

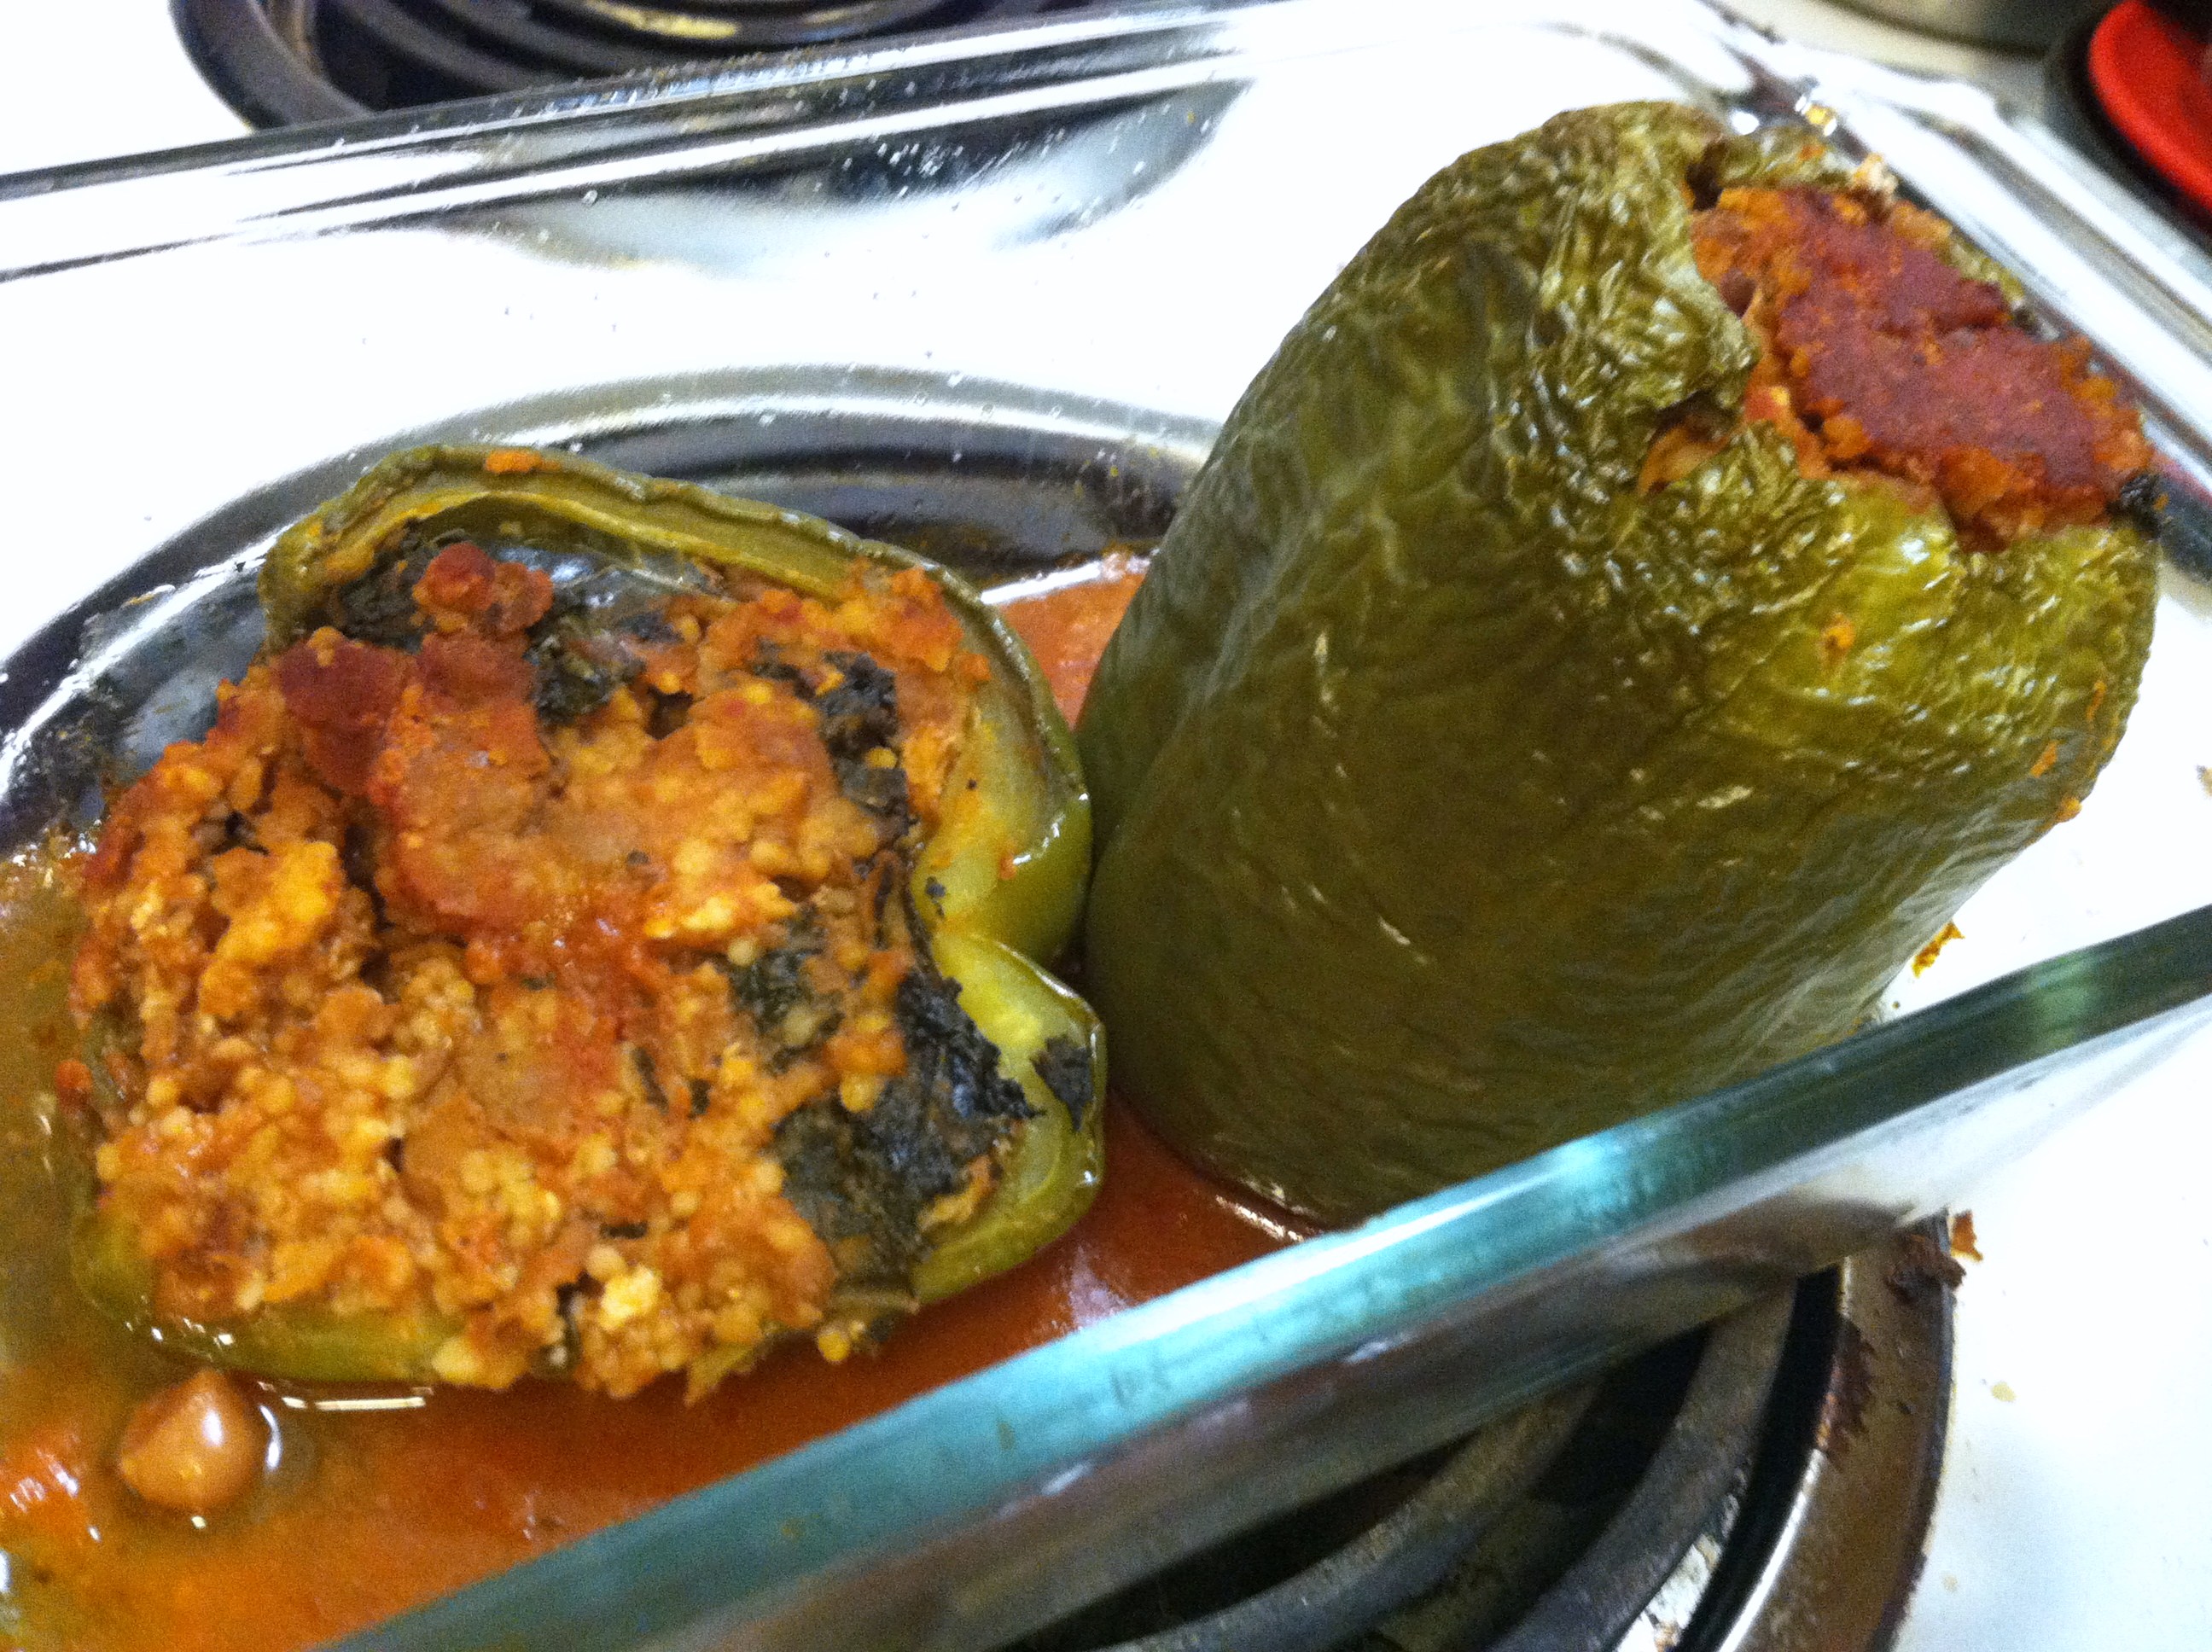
IMG_6935

These are amazing hot out of the oven or reheated the next day. Recipe can easily be doubled for a big family or to make meals for the whole week.


[amd-zlrecipe-recipe:5]

Recipe Review: Food Babe’s “Ravishing Red Juice”


For those of you who don’t know, the “Food Babe” aka Vani Hari, is a food activist, passionate foodie and educator, and creator of fabulous health-promoting recipes. Any questions you have about your food, or questions you didn’t even know you should have asked, check her out.

You may know that I have a juicer, and am trying to incorporate more fresh juice into my diet, if only as an easy way to get more veggie goodness. I love me some vitamins and phytonutrients! So one day I was reading through some of Food Babe’s writings, and found her juicing advice and recipes. There was one in particular that intrigued me: The Ravishing Red Juice.

Getting its ravishing red color mainly from beets, this juice has blood-cleansing capabilities, immune-boosting ginger, and hair/skin/nail magic from carrots. Toss in some cooling cucumber and power greens, this baby is the complete package! And for those who don’t like juices because of the bitterness, SUGAR is made from BEETS! So yeah, this juice basically has all the ingredients to totally rock.

I altered Vani’s recipe slightly by throwing in half a lemon because I had a bag and I love citrus in everything, and leaving out the apple since I had none of those and the beet sweetened it enough for me. If you want your juice even more palatable throw in the apple, sure. Other than that, let the good times roll!

IMG_6342

Ingredients:
  • 2 thick carrots
  • 1 big red beet
  • 2 stalks celery
  • 1 cucumber
  • 2 inches of fresh ginger root
  • 3 full kale leaves
  • Handful of parsley

IMG_6344

Step 1: Wash all your veggies well and shake off excess water. Cut up the veggies, and get your juicer and two glasses ready.

IMG_6345

There are two ways to do this. You can either juice everything into one big cup then split it up (or drink a mega-juice!) or you can split up all the ingredients into two even piles.

IMG_6348

Step 2: Alternating between hard ingredients (like carrots, cucumber, lemon) and softer ingredients (kale, parsley), juice all your veggies. The beets give up this glorious, deep magenta-red juice that gives the drink its name.

IMG_6350

Step 3: Mix your drink to ensure no pulpy chunks, and enjoy! The slight tang of ginger and lemon effectively erases any bitterness from the palate. The beet juice is delightfully sweet, but not overpowering. And if you want it overly sweet, like I said add in some apples or even berries.


To health, wealth, and vitality.

<3 BE


Pistachio-crusted baked salmon


You may have heard that nuts of all kinds are good for you, in small amounts. They all contain healthy protein, and some level of good fats. A personal favorite since I was a kid, pistachios are a great choice. Grown in bunches on bushy trees, pistachios are available year round.

Regular consumption of pistachios in the diet helps to lower total as well as bad LDL cholesterol and increases good HDL cholesterol levels within the blood. They are a part of the Mediterranean diet, which is high in heart-healthy fats such as olive oil and avocado, as well as vegetable-heavy and fish friendly.

Research studies suggest that Mediterranean diet that is rich in dietary-fiber, mono-unsaturated fatty acids, and antioxidants help to prevent coronary artery disease and strokes by favoring healthy blood lipid profile. Pistachios also contain many antioxidants, carotenes, multiple minerals, B vitamins, and vitamin E.

IMG_4786

Though a good thing, you can get too much. They contain about 550 calories per 100 grams, so as with most good things you need to exercise restraint. A tough task indeed when you have a bowl for shells and a bag of nuts. I know I’ve looked down to see a pile of shells much larger than I thought possible many a time.

While I love pistachios plain in the shell, I also love combining multiple heart-healthy options into a tasty health bonanza. What could be more heart-healthy than a salmon fillet?! With tons of omega-3 fatty acids and protein of its own, salmon is one of my favorite types of fish to cook and eat. Since I also already had pistachios lying about, they seemed a natural match.

IMG_4788

And since I have just done a post about sweet Brown Sugar & Maple Apple Glazed Salmon, this recipe will take the fish in the savory direction.

Ingredients:

  • 2 4-oz salmon fillets
  • 1/4 cup crushed pistachios
  • 1/3 cup bread crumbs
  • 2 tbsp plain yogurt (or mayo)
  • Cooking oil

IMG_4787

Step 1: Shell and crush the pistachios. I put them in a plastic bag and slammed them with my rolling pin. Put on a flat plate with the bread crumbs. You could use crushed crackers or flour here too.

IMG_4789

Step 2: Smear 1 tbsp yogurt onto each fillet. Don’t be afraid to get messy and use your hands.

IMG_4792

Step 3: Place the yogurt-smeared side down on the nut and bread mixture and press. This creates the crunchy coating on the fish. The yogurt helps keep the moisture in while the nuts give it texture and great flavor.

IMG_4795

Step 4: Spray an oven-safe baking pan with cooking oil, and place the fillets inside. Bake at 350 for 15-20 minutes, until fish is light pink and flakes easily with a fork.

IMG_4799

The fish cooks up nice and juicy, with just a hint of nutty flavor and a crisp outer coating. You can use a beaten egg or milk or mayonnaise in place of yogurt, and other types of nuts, or none at all if you have allergies.

IMG_4800

As you can see, I served mine with a baked potato and sweetly addictive and stunningly easy Mexican street corn.

IMG_4803

So do your heart and your taste buds a favor, and cook this up for dinner soon!

IMG_4805

Brown Sugar and Maple-Apple Glazed Salmon


Salmon is one of my favorite kinds of fish. As I’ve said before, white fish are awesome because they are so versatile, but salmon can hold many bolder flavors while also bringing its own flavor profile to the table. With the mainstream becoming more aware of its amazing protein punch and heart-healthy omega-3s, salmon is increasingly becoming a popular protein option for any meal.

Salmon has a stronger fishy taste than some, but that definitely depends upon how you cook it and what you serve it with. There are so many good options for salmon; including grilling, broiling, sauteing, and baking.

Salmon can easily be paired with something savory or sweet. One of my favorite things to incorporate is brown sugar. The sweet, caramely notes work wonders to bring out the fish’s unique layers of taste. And to go with brown sugar, butter and apples are natural accompaniments.

Ingredients:

  • 2 3-oz salmon fillets (or one big 6 oz-er)
  • 2 tbsp brown sugar
  • 2 tbsp butter
  • 1 medium firm apple (such as Gala or Fuji)
  • 1/4 cup apple juice or cider
  • 2 tbsp maple syrup

Veggie Rice

  • 3/4 cup uncooked rice
  • 1 small zucchini
  • 1 cup fresh spinach
  • Garlic salt to taste

IMG_4559

Step 1: Dice the apple into small bite-sized pieces. In a frying pan over medium heat, add the butter, apple juice, apples, and maple syrup. Bring to a boil, and simmer 3-5 minutes.

Step 2: Add the salmon fillets and cook 5 minutes. Flip, then sprinkle with brown sugar. Cover and simmer 5-10 more minutes, until sugar is slightly caramelized and the fish is cooked through. It should be light pink in color and flake easily with a fork.

IMG_4560

If you’d like to make this rice as a side, dice up the zucchini. Either in a rice cooker or a sauce pot, add the rice, zucchini, spinach, and 1 1/2 cups of water or stock. In a rice cooker, mix and turn on. Fluff before serving.

If using a pot, bring to a boil, and then simmer on low with the cover on for 20 minutes. Fluff with a fork, and serve alongside salmon with garlic salt to taste.

IMG_4562

The salmon is flaky and sweet, with a sugar glaze and apple flavor. The apples become soft and sweet, almost like having dessert with your dinner!

IMG_4563

Asian Chicken Salad

.
.
This salad has a delightful combination of ginger, lemon, and orange. The crunchy ramen noodles combine with the greens, chicken, and citrus is sure to delight. Have an Asian night at home, or bring a big bowl to your next pot luck.
Ingredients:
  • 1 large chicken breast
  • 1 inch piece fresh ginger
  • 3-4 garlic cloves
  • 2 tbsp mustard
  • 4 tbsp soy sauce
  • 1 package Ramen noodles
  • 2 cups lettuce or greens
  • 2 mini oranges
  • 2 tbsp slivered almonds
  • 2 tbsp butter or margarine
  • Fresh pineapple

Dressing:
  • 1 tbsp apple cider vinegar
  • 1 tbsp lemon juice
  • 2 tbsp olive or vegetable oil
Step 1: Dice the garlic, and cut the ginger into slivers. Peel and section the oranges.
Step 2: Put 2 tbsp butter or margarine in a pan, and toast the almond slivers for 2-3 minutes. Add in the ramen noodles, and more butter if needed, and toast. Keep the seasoning packet for another use. Remove to a plate.
Step 3: Dice the chicken breast into cubes. Add to the pan along with the ginger, garlic, soy sauce, and mustard. Cook, stirring occasionally, for 5-7 minutes, or until chicken is fully cooked.
Step 4: Slice the pineapple into chunks for topping. Add in the cores of the pineapple to the pan and simmer.
Step 5: For each salad, add the dressing ingredients to a small bowl and whisk. Pile 1-2 cups greens on a plate, and top with pineapple chunks, orange slices, the toasted noodles and almonds, cooked chicken, and dressing.
The buttery crunchy noodles are so tasty, and the fruit adds a sweet note. The gingery, salty, garlicky chicken is delicious and could be used in so many other dishes as well.
Simply omit the chicken or use tofu instead to make this dish vegetarian. If you have actual glass noodles or other Asian noodles, you could also use those. If you don’t have or like almonds, try peanuts or cashews.

Mock-Caprese Goat Cheese Bruschetta

….

Bruschetta is a classic Italian appetizer or snack, consisting of bread rubbed with garlic and topped with chopped tomato, olive oil, salt and pepper. Outside of Italy, bruschetta has become a word used for toast topped with just about anything. The most popular is diced tomato with olive oil and mozzarella or other cheese.

Caprese salad, or “insalata Caprese” is another Italian antipasto, or appetizer. Created to resemble the colors of the Italian flag, red, white and green, it consists of thick slices of tomato, fresh mozzarella cheese, and fresh basil leaves. Normally topped with olive oil and balsamic vinaigrette.

Since these are two of my favorite Italian appetizers, I decided to combine them into one delicious bite. However,  at the time I had no fresh mozzarella. Nor basil. Hence, the “mock-caprese”. However, you could use realistically any white cheese, and any fresh herb, and I’m sure it would be tasty.

Ingredients:

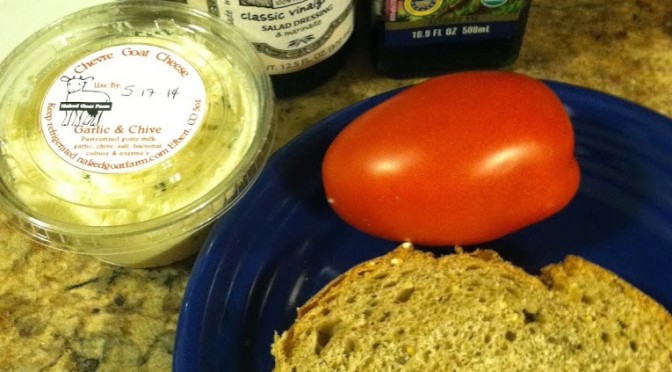
  • 1 thick slice farmhouse bread (or other whole wheat slice)
  • 1 fat, fresh Roma or beefsteak tomato
  • 2 tbsp garlic & chive goat cheese (or 1 thick slice mozzarella)
  • 1 tbsp olive oil
  • 1 tbsp balsamic vinegar
Step 1: Spread the goat cheese over the slice of bread, either with or without toasting it first.
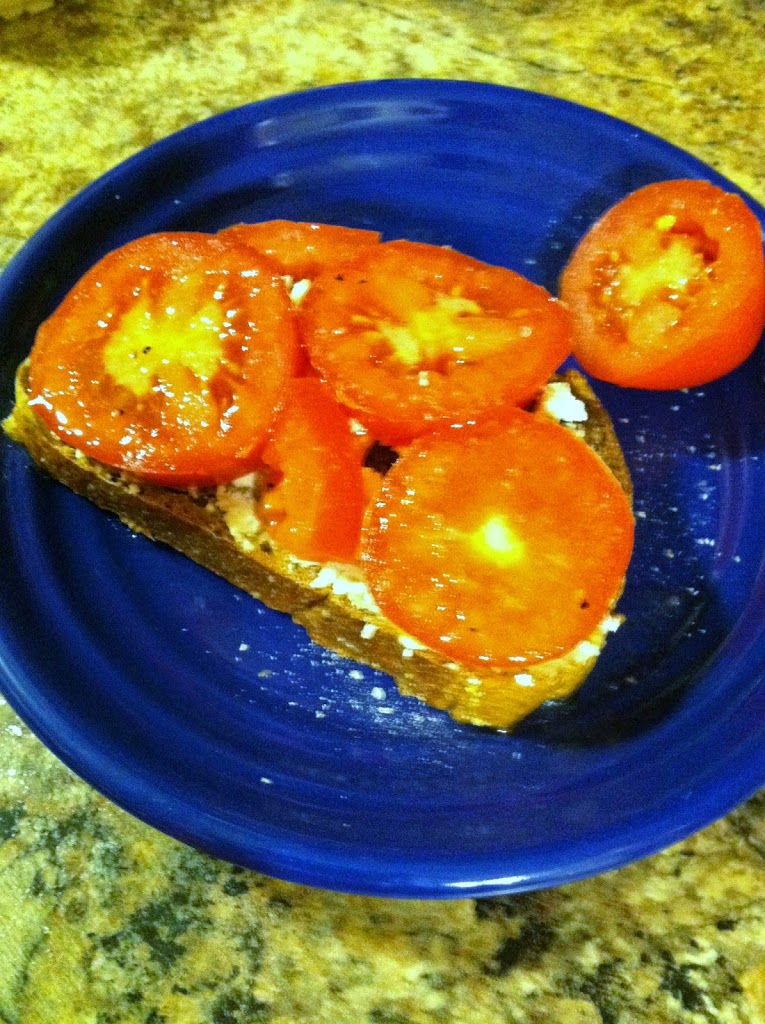
Step 2: Slice the tomato into thick rings and put on top of the cheese.
Step 3: Drizzle with olive oil and balsamic. If using fresh herbs, layer them on top now.

You could easily scale this up for a lovely party appetizer, or make as few as will satisfy a snacking crave.