Category Archives: Main Dishes

Cashew Ginger Chicken Stir Fry


You know my biggest topics I love to talk about are: 1) Healthy food, 2) Delicious & New foods, and 3) Affordable food, right?  Well, if you didn’t you do now.

Not much lights me up more than finding or creating a recipe that is good for you, quick and easy to make, and also draws rave reviews from a somewhat finicky eater.  Stir fry is almost always one of those meals.  Stir fry is always in my top ten for one simple reason: you can put just about anything in it.

Seriously.  Chicken, beef, pork, shrimp, scrambled eggs, fish, tofu, tempeh.  Broccoli, cabbage, mushrooms, carrots, zucchini, water chestnuts.  Ginger, soy sauce, fish sauce, vinegar, onions, garlic, nuts.

All of the above.

Sure, there are sometimes occasional fails (for the love of god, do not put oregano into your stir fry, just trust me. Also this is proof I’ve loved stir fry at least since 2011, and how far both my cooking and writing have come since then!).  But the majority of the time, the recipe of Protein + Veggie + Rice + Sauce = Magic.

IMG_3649

For this particular recipe, I had just made a batch of My Homemade Pickled Ginger and it had aged in the refrigerator a week or two, so I was eager to try it out.  I also had some black sesame seeds which had been a Christmas gift and I still hadn’t yet used.  Combine that with a cheap $1 store bagged mix of broccoli slaw, free green onions that grow wild in my yard, a cup of brown rice, and some other ingredients I always have on hand, and I had a super quick, super cheap, and super satisfying dinner.

A few notes on substitutions:  If you do not like cashews or don’t buy them because of cost, you can easily substitute peanuts or almonds.  Or if you’re allergic, definitely omit them!  (You could add a sprinkle of nutritional yeast for a boost of vitamins if you like).  If you don’t like onions, use chives, or parsley, or just don’t add it in.  I used brown rice because I like the texture and I like the nutrition as compared to white, but you can totally use white rice, or a 1/2 and 1/2 mixture!  You can use shredded or powdered ginger instead of fresh.  And if you don’t like bagged store mixes, feel free to shred your own broccoli, cabbage, and/or carrots.

Cashew Ginger Chicken Ingredients

Ingredients:

  • 1 cup cooked brown rice
  • 1 cup cooked diced or shredded chicken
  • 1 bag broccoli slaw mix
  • 2 tbsp olive oil or coconut oil
  • 1/4 cup chicken stock (or veggie stock or water)
  • Optional: 1/2 cup sliced mushrooms
  • 2 tbsp sliced pickled ginger
  • 1/4 cup soy sauce
  • 2 tbsp crushed cashew pieces
  • 2 tbsp chopped green onion/chives
  • 1 tbsp sesame seeds

IMG_3643

Step 1: Put the bagged slaw mix and mushrooms in a large pan with the olive oil and stock or water and cover.  Bring to a boil, and then simmer for 5-7 minutes.  Once the veggies are softened, remove the lid and add the soy sauce and ginger.  Add in the chicken, mix well to coat, and let the liquid evaporate until most is gone.

IMG_3647

Step 2: Put about 1/2 cup cooked rice and 1/2 the cooked mixture on a place in whatever way visually pleases you.

IMG_3651

Step 3: Sprinkle the crushed cashews and green onions on top.  Add a sprinkle of sesame seeds, and enjoy!

Mexican Breakfast Strata


Don’t you just love it when you make something that takes literally just a few minutes, but turns out amazingly delicious and also very impressive looking?  Me too!  So the other day, my coworkers and I realized that it was someone’s birthday.  We had totally forgotten, and felt terrible, so we decided the following day would be birthday breakfast!  Obviously, I volunteered to cook something.  Problem was, I didn’t think that through…

The next morning, I checked the fridge, and didn’t see much besides some eggs.  But whatever I made had to be transportable; sunny side up doesn’t travel well, and reheated scrambled eggs is icky.  Then I saw a half loaf of bread and the light bulb went on: Strata!  Strata is a breakfast casserole based mostly on eggs and bread.  You can add anything at all pretty much, and it makes a delicious layered meal.

Upon checking the freezer, I found some turkey bacon, and a half bag of frozen corn and peppers/onions.  Since I always keep cans of diced tomatoes and different types of beans around, it just made sense that a Mexican themed strata came together.  Full disclosure: I had no idea how this would come out!  I threw it all together, popped it in the oven, and got in the shower.

Once it was done, I covered it in tin foil, wrapped it in towels to keep it warm, and stuck it in a reusable bag to take it to the office.  An hour later, after a round of “Happy Birthday” which was satisfactorily embarrassing for the coworker in question, came the moment of truth.  I pulled out the pan, uncovered the casserole, and the whole room erupted in “Oh my GOSH that looks amazing!” and “that smells SO good, what is it!?”.  Once we dug in, the compliments just kept rolling.  Almost everyone had seconds, and we finished the whole pan between 6 people!

All this is not to brag, but mostly to convince you that even though it might sound complicated, it is really not.  Even if the combination sounds weird, it does work well.  Just give it a try and see.  You can make strata for the first time on a weekend just to be safe and make sure you have time to get it just right, as long as you make it.  And then tell me I’m right.  🙂

IMG_3606

Ingredients:

  • 8-10 eggs
  • 1/2 cup milk
  • 1/2 loaf of bread
  • 1/2 pound turkey bacon
  • 1 cup peppers and onions
  • 1/2 cup frozen or canned corn
  • 1 1/2 cup salsa or 1 can diced tomatoes with chilies
  • 1 cup black beans (or other type)
  • Optional: shredded cheddar cheese
  • Optional: fresh or dried oregano

IMG_3607

Step 1: In a large bowl, break all the eggs and scramble them well with a fork.  Add the milk and mix well.  Tear the bread into rough chunks.  You can also use a few days’ old bread for this, just add a splash more milk.  Some recipes call for leaving the bread overnight to soak, but I just made it right away and it turned out great, so it’s up to you.

IMG_3608

Step 2: In a frying pan, cook your bacon.  You can also use ham, sausage, and/or chorizo instead.  Or just omit the meat entirely to keep it vegetarian.

IMG_3609

Step 3: Add the vegetables and beans to the pan.  Heat well, and cook until peppers and onions are tender.

IMG_3610

Step 4: Spray a large 9×13 pan with cooking oil or spread with butter.  Pour in the bread and egg mixture.  Add optional cheese if using.

IMG_3612

Step 5: Pour the meats and vegetables and beans into the bread and eggs.  Mix it all together well.  You can also choose to keep it layered like a breakfast lasagna, if you have the time for that.

IMG_3614

Step 6: Bake the whole shebang in a 350 degree oven for about 35-45 minutes.  If you cover it with foil, it will bake faster, if you do not use foil, it will brown on top faster.

IMG_3615

Step 7: For the most impressive presentation, sprinkle with a little more cheddar and fresh oregano springs right when you take it out of the oven.  The cheese will melt from the heat.  Serve immediately, and try to keep yourself from devouring the whole pan in one sitting.


[amd-zlrecipe-recipe:52]


Cranberry Cashew Chicken Salad


Ever get really tired of a certain kind of lunch?  Like say you always take a roast beef sandwich with cheddar and mustard.  Or a tuna salad pita pocket.  Or a certain type or brand of soup.  When you eat the same thing several days in a row, you can get bored easily.  But then you also want more ‘grown-up’ options sometimes than just peanut butter and jelly, or maybe you don’t have any leftovers to choose from at the moment.

This is a super simple recipe for a great tasting and healthy chicken salad sandwich mix.  It is designed to make just enough for one large sandwich or wrap, but you can easily increase the quantities to feed a family of four or a luncheon buffet for fifty.  It has a tiny bit of sweetness, which helps kids love it too, and a nice bit of crunch to make it interesting.  No one needs to know that you snuck in an extra serving of fruits & veggies.

For maximum healthy, use plain Greek yogurt to bind it, and serve as a lettuce wrap or on whole grain bread or tortilla with extra veggie toppings.  This is a great way to use up extra chicken meat from a whole bird, and is very frugal and versatile.  Try this the next time you need lunchtime inspiration, a quick after-school snack, or a buzz-worthy picnic dish.

Ingredients for Cranberry Cashew chicken salad

Ingredients:

  • 1/2 cup shredded cooked chicken
  • 1 stalk celery, diced
  • 1/2 tbsp dried cranberry
  • 1/2 tbsp cashews or peanuts
  • 1 tbsp mayonnaise or Miracle Whip or plain Greek yogurt
  • 2 tsp mustard

IMG_3212

Step 1: Use meat from a cooked chicken (such as rotisserie) to save time, or poach 1 boneless skinless chicken breast in water or broth until no longer pink.  Shred with two forks, and use about 1/2 cup per serving you intend to make.

IMG_3211

Step 2: In a bowl, mix all ingredients together well.  This tastes even better if you let it sit overnight in the refrigerator, and will keep up to a week.  Feel free to add in your own flavorings like lemon or lime juice, use raisins instead of cranberries, or add spinach rather than celery.  If you have nut allergies, omit the cashews/peanuts, and if you still want crunch add a tbsp large breadcrumbs, fried onions, or Chinese noodles.


[amd-zlrecipe-recipe:50]

Happy Easter!


Happy Easter everyone!  I hope today is filled with family and food and cute woodland creatures, and maybe some chocolates too.  But don’t get too crazy.  Remember, Easter & Halloween are dentists’ favorite holidays.

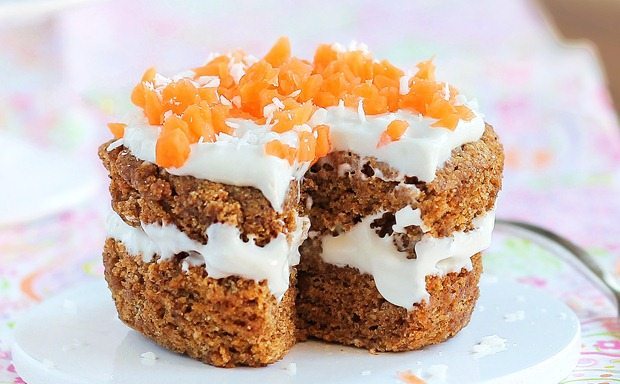
I will be enjoying the day with family, having an egg hunt, dying hard boiled eggs, eating some ham, and yeah probably having more than a few pieces of candy. 🙂  (Oh, and don’t tell, but I totally want to surprise everyone with this unbelievably easy [microwave only!] carrot cake recipe and healthy cream cheese frosting!  I really hope it is as delicious as it sounds.)

Enjoy the roundup below of creative, healthy ideas to make this the best Easter ever!


Natural Easter Egg Dyes from Rodale’s Organic Life

natural easter egg dye

How to Make Vibrant Naturally Dyed Eggs

50 Non-Candy Egg Stuffer Ideas

40 more Non-Candy Ideas

40 Egg-cellent Non-Candy Easter Egg Fillers

No One Will Guess These Easter Brunch Recipes Are Healthy

Easter Brunch

If they're going to be on your Easter table, they should totally look pretty. Get the recipe from Delish.

And of course, we can’t forget the CANDY!

50 Homemade Easter Candy Recipes

50 Homemade Easter Candy Recipes

15 Healthy Easter Desserts


Image at the top of page from HERE.

Irish Colcannon


Happy <nearly> St. Patrick’s Day!  Can you even believe it is already almost time!  For me it seems like the year is flying by, as it usually does.  The East Coast had a glimpse of spring and all its sunny, 60-degree glory, followed by chilly weather again.  Those daydreams of warm soil, hot sunshine, and tiny green buds and leaves poking up bravely into the world are becoming closer and closer to real.


Whether you make this tonight, or use leftover potatoes and cabbage later, this is a delicious and filling meal that everyone will love, regardless of heritage.

Colcannon Ingredients

Ingredients:

  • 1 head of red or green cabbage
  • 1.5-2 pounds potatoes
  • 1 pound ground beef
  • 1/2 stick butter (or 1/4 cup oil of choice)
  • 1/2 cup milk (or water, or stock)
  • Salt & Pepper
  • Optional: 1/2 an onion, diced; garlic salt

Cabbage & Potatoes

Step 1: Dice the potatoes into cubes, you can use any kind.  I leave the skins on because that is where the majority of the nutrients and minerals are found, but you could peel them.  Cut out the hard core of the cabbage, and shred the head or cut into thin strips.

Boiling potatoes

Step 2: Bring a large pot of water to a boil, and add the potatoes.  Simmer for at least 25-30 minutes, until soft when poked with a fork.

Steaming cabbage

Step 3: In a large covered pot, add the cut up cabbage with a few tbsp water or stock (or wine, or vinegar) and heat over medium heat for 10-20 minutes, until cabbage becomes soft and translucent.  If using onions, add at this time too.

Ground beef and cabbage

Step 4: In a large pan, brown the ground beef (or chicken, or turkey, or pork).  Drain off the excess fats.  You can use the same pan if you remove the cabbage.  Add the cooked softened cabbage back in.

Mashing potatoes

Step 5: Drain the potatoes, and mash it up to your desired consistency, whether totally smooth or with chunks.  Add the butter and milk (or other liquids) and mix well.

Mashed potatoes and cabbage

Step 6: Add the mashed potatoes to the pot with cabbage and ground beef and mix well.  Season to taste with salt & pepper.

Irish Colcannon in pot

That’s all there is to it!  Three classic mainstays of Irish cooking, cabbage, potatoes, and meat, together in one happy marriage.  Serve with gravy if desired.  If you are clever about cooking order, you can make this all in one pot too.  This makes a huge amount, so be sure you have plenty of people to share it with or will eat it over time.  You can of course halve or quarter the recipe as needed.

Beefy Cheesy Enchiladas


You know how some days you just don’t want to cook?  Well, I’ve had more than my usual share of those lately.  I usually have a whole list of simple “throw it together” meals just for this reason.  You know, like pasta.  Or cereal.

But the other day, even those seemed like far too much work.  I just… couldn’t.  So I figure, we can order something to go and pick it up, no problem.  Well, did I ever find a keeper.  My fiancee says, no worries, I will cook tonight!  I’m immediately intrigued.  I figure there’s now a 98% chance I’ll be eating burritos.  (Trust me, that’s maybe an under estimation).

What are you going to make?  I ask, as he starts poking around in the refrigerator.  Oh, you’ll see… is the only answer I get.  He’s a man of many mysteries.

With a glass of wine, I settled in to watch the meal unfold.  I could almost see the wheels turning in his head as he pulled out one ingredient after another.  Ground beef… frozen peppers… shredded cheddar cheese… Do we have corn tortillas?

I’m 100% sure it’s burritos now, and ask him as much.  No… not exactly. And your one guess is gone now.  Hmmm…

Ingredients:

  • 20 small corn tortillas
  • 1 cup shredded cheddar cheese
  • 1 pound ground beef
  • 1/2 bell pepper, diced
  • Jar of jalapenos
  • 2-4 tbsp butter
  • Chili powder
  • Salt & pepper
  • 2-3 tbsp flour
  • Optional: refried beans & rice

Corn tortilla for enchilada in pan

Step 1: First he browned the beef in the pan, adding in some chili powder.  After removing that and setting it aside, he diced the peppers finely, and added it to the pan with the butter and a healthy splash of juice from the jarred jalapenos (which I made last spring).

Enchiladas being prepared

Step 2: One by one, over medium-low heat, each tortilla was placed in the pan until softened (to add flavor, he said) and then moved to an aluminum pan.

Putting cheese in the enchiladas

Step 3: Each soft tortilla had a healthy handful of beef added, and a big pinch of cheese.  AHA!  You’re making enchiladas!  He smiled, you got it!  Awesome! … but I was basically right, because enchiladas are just baked burritos.

IMG_3334

(Sneak peek of the gorgeous finished product!)

You can use other fillings here too, I didn’t even have to ask but he made a few veggie burritos for me, with black beans, spinach, and mushrooms!  Try more peppers, onions, or different types of beans.

Enchiladas in pan ready for oven

Step 4: For the sauce, he simply added a few tbsp flour to the juices still left in the pan to thicken it up.  With the pepper chunks in it, he poured that over everything, and sprinkled on more cheese (of course).

IMG_3322

Step 5: Put into an oven preheated to 350 degrees, and bake for 20-25 minutes, until cheese is melty and bubbly.

IMG_3324

This is the lovely finished product!

IMG_3327

Top as you like.  We had some cilantro left from a previous Mexican night, as well as salsa, sour cream, and of course more jalapenos!

IMG_3328

Throughout the process, rice had been cooking in the rice cooker, and it went off just as the enchiladas were about done.  With a can of refried beans, the meal was complete.

IMG_3332

A fiancee-approved meal!

IMG_3330

I also had some lime wedges, which I think are just about required with Mexican food.  The tartness helps cut the spice a little.  Plus it looks nice.  🙂

I’ll need to not want to cook more often…

Mixed Winter Vegetables


Towards the end of February, it seems like nothing will ever grow again, and a juicy summer tomato is but a dream.  Most Americans just go to the supermarket and buy whatever exotic fruits or produce they are craving with no regards to whence it came, how many miles it has traveled, or how the nutrients have been degraded by early harvest and long travel time between dirt and plate.

I strongly encourage those yearning for the warmer days of spring where every corner bursts with greenery to make use of the oft-neglected seasonal produce.  Try searching Local Harvest for farmers markets near you.  Root crops store so well, while cold-tolerant crops are appearing in local markets.  If you are lucky you may even have farmers with greenhouses or cold hoops that grow tender baby greens and lettuces.

Many people cannot name 5 produce items that are in season any time of the year other than mid-summer, and maybe not even then.  During the coldest, bleakest times of winter it is especially hard to think of produce actually being able to withstand the harsh temperatures.  But in New England, there are tons of vegetables that you can find for mere pennies at the local markets, including: carrots, fingerling potatoes, beets (red and gold), rutabaga, squash, parsnips, turnips, radishes, leeks, onions, Brussels sprouts, baby micro-greens, spinach, kale, collards, and mushrooms.

This recipe makes a large meal for one, or side dish for two.  Feel free to mix up the vegetable content based on what you have available right now and what you like.  But if you are wary of these produce types, just try one and see how you like it.  You never know when you may fall in love with the sweetness of a golden beet, the carrot-like texture of parsnips, or the nuances of various radish strains.

Ingredients:

  • 1 parsnip
  • 1 leek
  • 1 carrot
  • 2 garlic cloves
  • 2 green onion
  • 1 small potato
  • 3-4 small beets
  • 3 tbsp olive oil
  • 2 tbsp lemon juice or vinegar

photo 1 (1)

Step 1: Cut the tops and bottoms off of your produce, and dice into chunks or slices.  Add the olive oil & lemon to a frying pan, and add all the vegetables.  Cover tightly, and steam 5-10 minutes.  Stir up the veggies, cover, and steam another 10 minutes or so.  You want the heat low enough that it will slowly caramelize the sugars in the vegetables, not burn them.

photo 2 (1)

Step 2: Sprinkle with salt & pepper to taste.  Either serve alone or on the side with a meat and salad.  I enjoyed mine with some roasted chicken, baby greens, and homemade sauerkraut on top.  It is so simple, yet so wonderfully tasty!


Mediterranean Breakfast Sandwich

…

Though this sandwich does involve eggs, I hesitate to call it a “breakfast sandwich” because it would taste amazing any time of day.  Like my other recipes with Mediterranean in the title (such as my Mediterranean Meatloaf Muffins, Stuffed Mushroom Caps, Cashew Chicken, Vegetable Panini, or Chicken & Couscous), this recipe uses lots of healthy veggies, mostly bell peppers and avocado.  You could easily substitute or add in eggplants, zucchini, any type of olives, greens, or caramelized onions too.

Recipe makes 2 large sandwiches.  You can also turn these into wraps, or serve in a lettuce leaf, if you are avoiding carbs.

Ingredients:

  • 2 large eggs
  • 1/2 jar roasted red bell peppers
  • 1 fresh avocado
  • 2 tbsp olive oil
  • Salt & pepper
  • 4 slices wheat bread
  • 2 slices cheese
Step 1: In a frying pan, heat the olive oil to sizzling.  Crack the eggs in, and fry 2-3 minutes, until whites are cooked.

Step 2: Flip the egg once all the whites have cooked.  Take the roasted peppers and add those to the pan.  The longer you cook the egg, the more solid and less runny the yolks become.

Step 3: Once the eggs are cooked and peppers are heated through, place one egg and 1-2 pieces of pepper onto each of 2 slices of bread.

Step 4: On two other slices of bread, add the cheese slice and half of the avocado.  Press the two halves of each sandwich together.

Step 5: If you need to, add 1 more tbsp olive oil.  Put the sandwiches into the pan, and cook for 4-5 minutes on both sides, until nice and browned and the cheese is melty.

 Slice the sandwiches in half, and enjoy!

…

Mandarin-Cherry Tuna Salad

.
.
For a quick, healthy lunch, tuna salad is always a go-to.  Pretty much all you need is a can or pouch of tuna and some lemon juice, but there are infinite ways you can spruce it up.
.
For example:
  • Add a chopped hard boiled egg
  • Toss in diced celery
  • Shred up some carrots
  • Add chunks of apple
  • Spoon in a few tbsp of relish
  • Hot sauce!

And many more options, as creative as your mind can dream up.  This particular recipe came about because the baby oranges were on sale, and we needed to use some up before they dried out and became inedible.  Oranges go great with tuna, but I wanted just a little bit more to round out the flavor.  Dried cherries were just the thing.  Feel free to use raisins or cranberries if that is what you have.

Ingredients:

  • 1 can or pouch of tuna, drained
  • 1 small orange (or 1/2 can mandarin orange slices)
  • 1 tbsp dried cherries (or cranberries or raisins)
  • 1 tbsp mayo or miracle whip
  • 1 tsp lemon juice or cider vinegar
  • 1-2 cups chopped greens, or a wrap, or 2 slices of bread
.

Step 1: Open and drain a can of tuna, mix in a bowl with the mayo and lemon juice.  Add in the cherries.

Step 2: Either wrap it up, make it into a sandwich, or serve it over a salad, topped with the orange slices.  Season to taste and enjoy!

Eggs in a Green Nest


One of the hardest hurdles when transitioning to healthier eating, at least for the majority of people, is eating leafy greens.  We all know that leafy greens are the healthiest things out there.  They contain tons of vitamins, minerals, and antioxidants.  They cost us next to zero calories to consume.  Greens are full of digestible and indigestible fiber to keep your digestive system strong and healthy.

So why do they taste so bad?

Foods which to us taste bitter have an array of compounds in them that naturally protect the delicate leaves from insects who would love to snack at the salad bar of nature.  It is these compounds which tend to be so beneficial for our health.  Unfortunately, humans usually dislike the bitter taste at first.  Fortunately, you can re-train your taste buds to enjoy bitter, and there are many cooking techniques to make bitter foods more palatable.

Adding small amounts of high quality fat like olive oil, or a sour taste like vinegar or lemon juice, can help temper the bitterness of greens.  Sea salt or other salty sources like hard cheeses also helps mask the harsher flavors and draw out the sweeter notes.  My recipe for simply sauteed power greens uses these techniques to create a delicious side dish that even most greens-haters can enjoy.

Greens and Egg

In this simple breakfast recipe, I combine those techniques with fresh eggs for a superstar breakfast that is ready in under 10 minutes, packed with vitamins and nutrients and protein, and will keep you happy and full all morning long.  Enjoy over some brown rice or with whole wheat toast for a well rounded meal.


Ingredients:

  • 1-2 fresh organic eggs, if possible
  • 1 large bunch greens (kale, collards, mustard greens, etc) or a mixture of greens to make about 1 – 1 1/2 cups
  • 1-2 tbsp olive oil
  • 2 tbsp lemon juice or apple cider vinegar
  • 1 tbsp hard, salty cheese such as Parmesan
  • Optional: 1-2 slices wheat bread or 1/2 cup brown rice

Greens in Pan with Egg

Step 1: Rinse your greens to remove any dirt, and slice into thin strips or shred by hand.  Add the oil to the pan, then the greens, and drizzle with lemon juice.  Cover with a lid, and steam the greens for 5-7 minutes.  Optional: you can add a chopped clove or two of garlic

Greens and Egg Yolk and Toast

Step 2: Mix the greens, they should be bright and slightly wilted now.  Use a spoon or spatula to make a small indent in the pile of greens, and crack an egg into the hole.  Cover again, and steam for another 5-7 minutes.  The longer you cook the egg, the more well-done the yolk becomes.  5-7 minutes will leave it slightly runny, as in above photo.

Once the egg is cooked to your desired done-ness, remove to a plate and serve!  I sprinkled a little hard cheese over the egg, which gives it the perfect salty balance to the tart & bitter greens.  You can also use sea salt for the same effect.

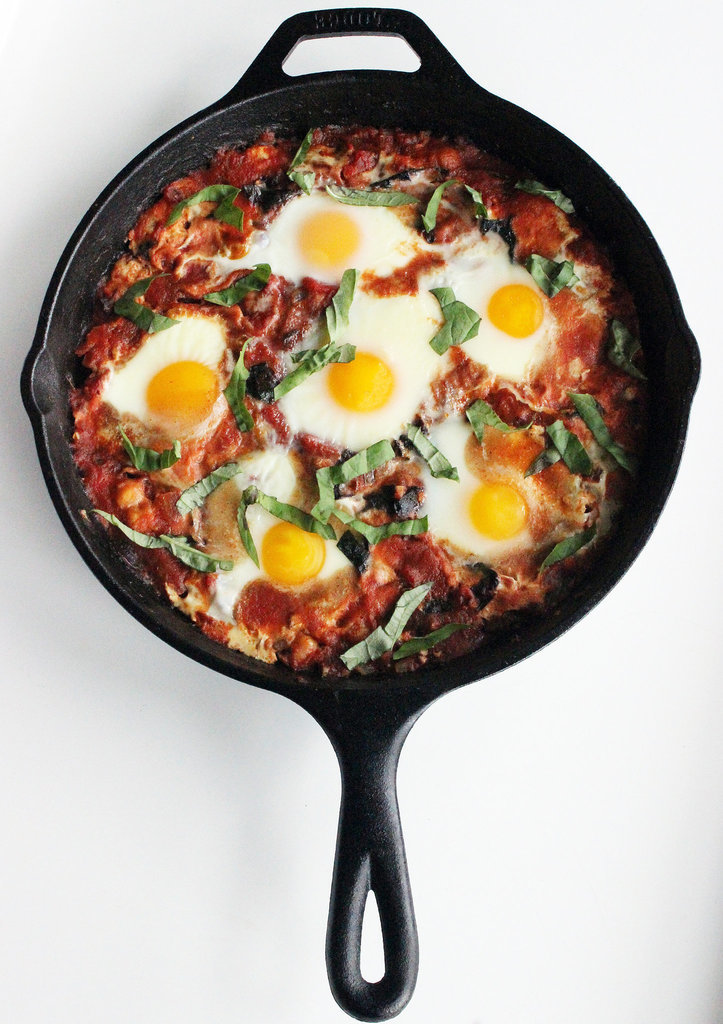
You can easily increase this recipe to feed several more people, simply increase the volume of greens and crack in one to two eggs per person.  This is delightful plain with toast, or you could serve with black beans, salsa, hot sauce, relish… whatever floats your culinary boat.