Category Archives: Finances

Articles concerning finances. This is the “budget” Epicurean after all.

Meals Under $5


We all experience some times where we are on a tight budget. Maybe that time is only during college, and you are lucky enough to get a good-paying job with degree in hand. Maybe that time is during the holidays, when food budgets are stretched with all the family get-togethers and parties. Maybe that time is your whole life. Maybe you have plenty of cash to spare, but want to use it for things other than extravagant meals.

Whatever the case, making a frugal meal definitely does not have to be tasteless and boring!

With my “Less Than 5” category, I am aiming to create and share recipes which take less than $5, less than 5 minutes to make, and/or less than 5 ingredients. Bonus points for me if all three apply!

I will update this post periodically as I continue to add more “Less Than 5” recipes. This one will be specific to meals which will cost less than $5 per serving. So if you only have a few dollars in your pocket, you are better off reading these recipes and heading to the grocery store than blowing it all at once on a dollar menu. These recipes will (mostly) be filling and somewhat healthy for pennies a plate.

money

First let’s get the classic budget recipes in a list:

  • Peanut butter & jelly sandwich
  • Macaroni & cheese (though with the price of cheese soaring, I don’t know about homemade mac n cheese anymore)
  • Ramen noodles
  • Beans & Rice
  • Tuna salad sandwich

Now these are a little bit more creative:

Do you have any recipe ideas that are less than $5? Please share in the comments!

How to: Make a simple wreath for under $10

.
This is a fun holiday craft I took on last year with really impressive results. You will be amazed by how gorgeous a piece you can make in just a little time with things you can find in your neighborhood. Could be a good kids craft or bonding time for couples. Just be careful if using real pine, the needles of some can really be sharp.
.
Since you can use real pine branches, this wreath is super cheap. Just make sure you are collecting from a tree you own or are allowed to use… Then embellish with other things from nature, or some cute colorful things you can pick up at a craft store or Goodwill.
.
You will need:
  • Several pine branches (real or fake)
  • Super glue/hot glue
  • Craft wire
  • Pine cones or other forest accessories
  • Embellishments, preferably in pretty colors like red, silver, green, or gold. You could go with any color theme you like.
  • Optional: Glitter, ribbons, etc.
Step 1: Begin forming the branches into a circular shape. Just move the branches around and piece it together into what looks best. Use the wire to hold pieces together once you like the look
Step 2: Once the branches are held together well, you can also hot glue them. Then start strategically placing your accessories. Intersperse colors with neutrals, like I did with the red fake berries and the pine cones.
Step 3: Spread glue around, and sprinkle with glitter for a little extra shine. If you don’t have a nail or hanger on your door, you can also now hot glue a thick ribbon onto the wreath to hang it.
.
And now you can enjoy your unique, homemade holiday decoration. This would also be a great frugal Christmas gift.

Home-canned peaches


When I was a kid growing up, I remember all-day-long canning sessions at my grandmother’s house. We would get the whole family together for steamy, tomato-scented days of carrying bushels of fresh tomatoes down from the giant overgrown garden, slicing and dicing, pushing them through the enormous, older-than-my-mom tabletop canning device, squeezing out seeds, stems, juice, skins, pulp.

Pouring thick red liquid into piping-hot Bell canning jars, just out of the rolling, boiling water, screwing on the lids and popping them back into that steamy water bath. Placing them in rows upon rows along the kitchen table, and listening for the “pop” “pop” “pop” of lids being sealed.

Lining those jars, still warm from the boiling water, along the shelves of the basement pantry. Knowing that meant months later, in the dead of winter, we could have huge platters of pasta with sauce that taste like summertime, and know that I helped make that happen.

IMG_5104

That may sound quaint and overly-dramatic, but canning has always stuck with me and is something I desperately hope to continue into my adult life. I think our American lives of over-abundance and convenience takes a lot of the charm, knowledge, and wisdom out of feeding ourselves. We know nothing of how “food” is created, we just go to the grocery, pick out the boxes and cans, put them in the microwave and sit down in front of the TV to “eat” it.

I love the feeling of looking at something I personally created, start-to-finish, especially if it involves food I myself grew, picked, or somehow preserved. There is nothing like it. Sometime when your store has a sale on produce you like, give it a try and see for yourself.

Not only is home preserving fun and good for the soul, it is also good for the waist and pocketbook! Canning or freezing your own food lets you control what is put into it and avoid massive amounts of sodium, preservatives, colorants, etc. in commercially preserved foods. And though canning supplies may be a healthy chunk of change to begin with, you can re-use jars and rings nearly forever, with only new lids to buy each season.

Now, there are some dangers to home canning. Always read up on proper methods on how to can or otherwise preserve food so you and yours don’t end up sick. Take a look at the CDC article on avoiding botulism,  the USDA Complete Guide to Home Canning article with tips and tricks, or Foodsafety.gov Home Canning advice.

This is my most recent adventure, when Colorado Palisade Peaches were at their prime. They are legendary for good reason, with such perfectly firm yet soft flesh and oodles of juice to drip down your chin. I of course ended up over-buying, and rather than commit the mortal sin of wasting produce, decided to can the excess.

You can use the outline of this recipe for just about any fruit, homemade salsa, or pre-cooked vegetables (like carrots, green beans, or beets). For more recipes specific to fruit types, head over to PickYourOwn.com, a wealth of home preservation tips. For tips on individual types of veggies, SimplyCanning.com has a whole library.

IMG_5110

Ingredients:

  • About 2 pounds peaches
  • 1 cup sugar
  • 2 cups water
  • 3-5 canning jars, lids, and rings
  • Large pot
  • Optional: Tongs, Funnel, Pressure canner

Step 1: Cut the peaches into slices. It is up to you if you want to peel them or can with peels on. To peel them, boil for 5 minutes, then submerge in ice water. The peels should slide off. I left the peels on cause I’m lazy and I like the extra nutrition.

IMG_5105

Step 2: Mix the sugar and water and bring to a boil. Stir in the peach slices, and simmer 5-10 minutes.

IMG_5106

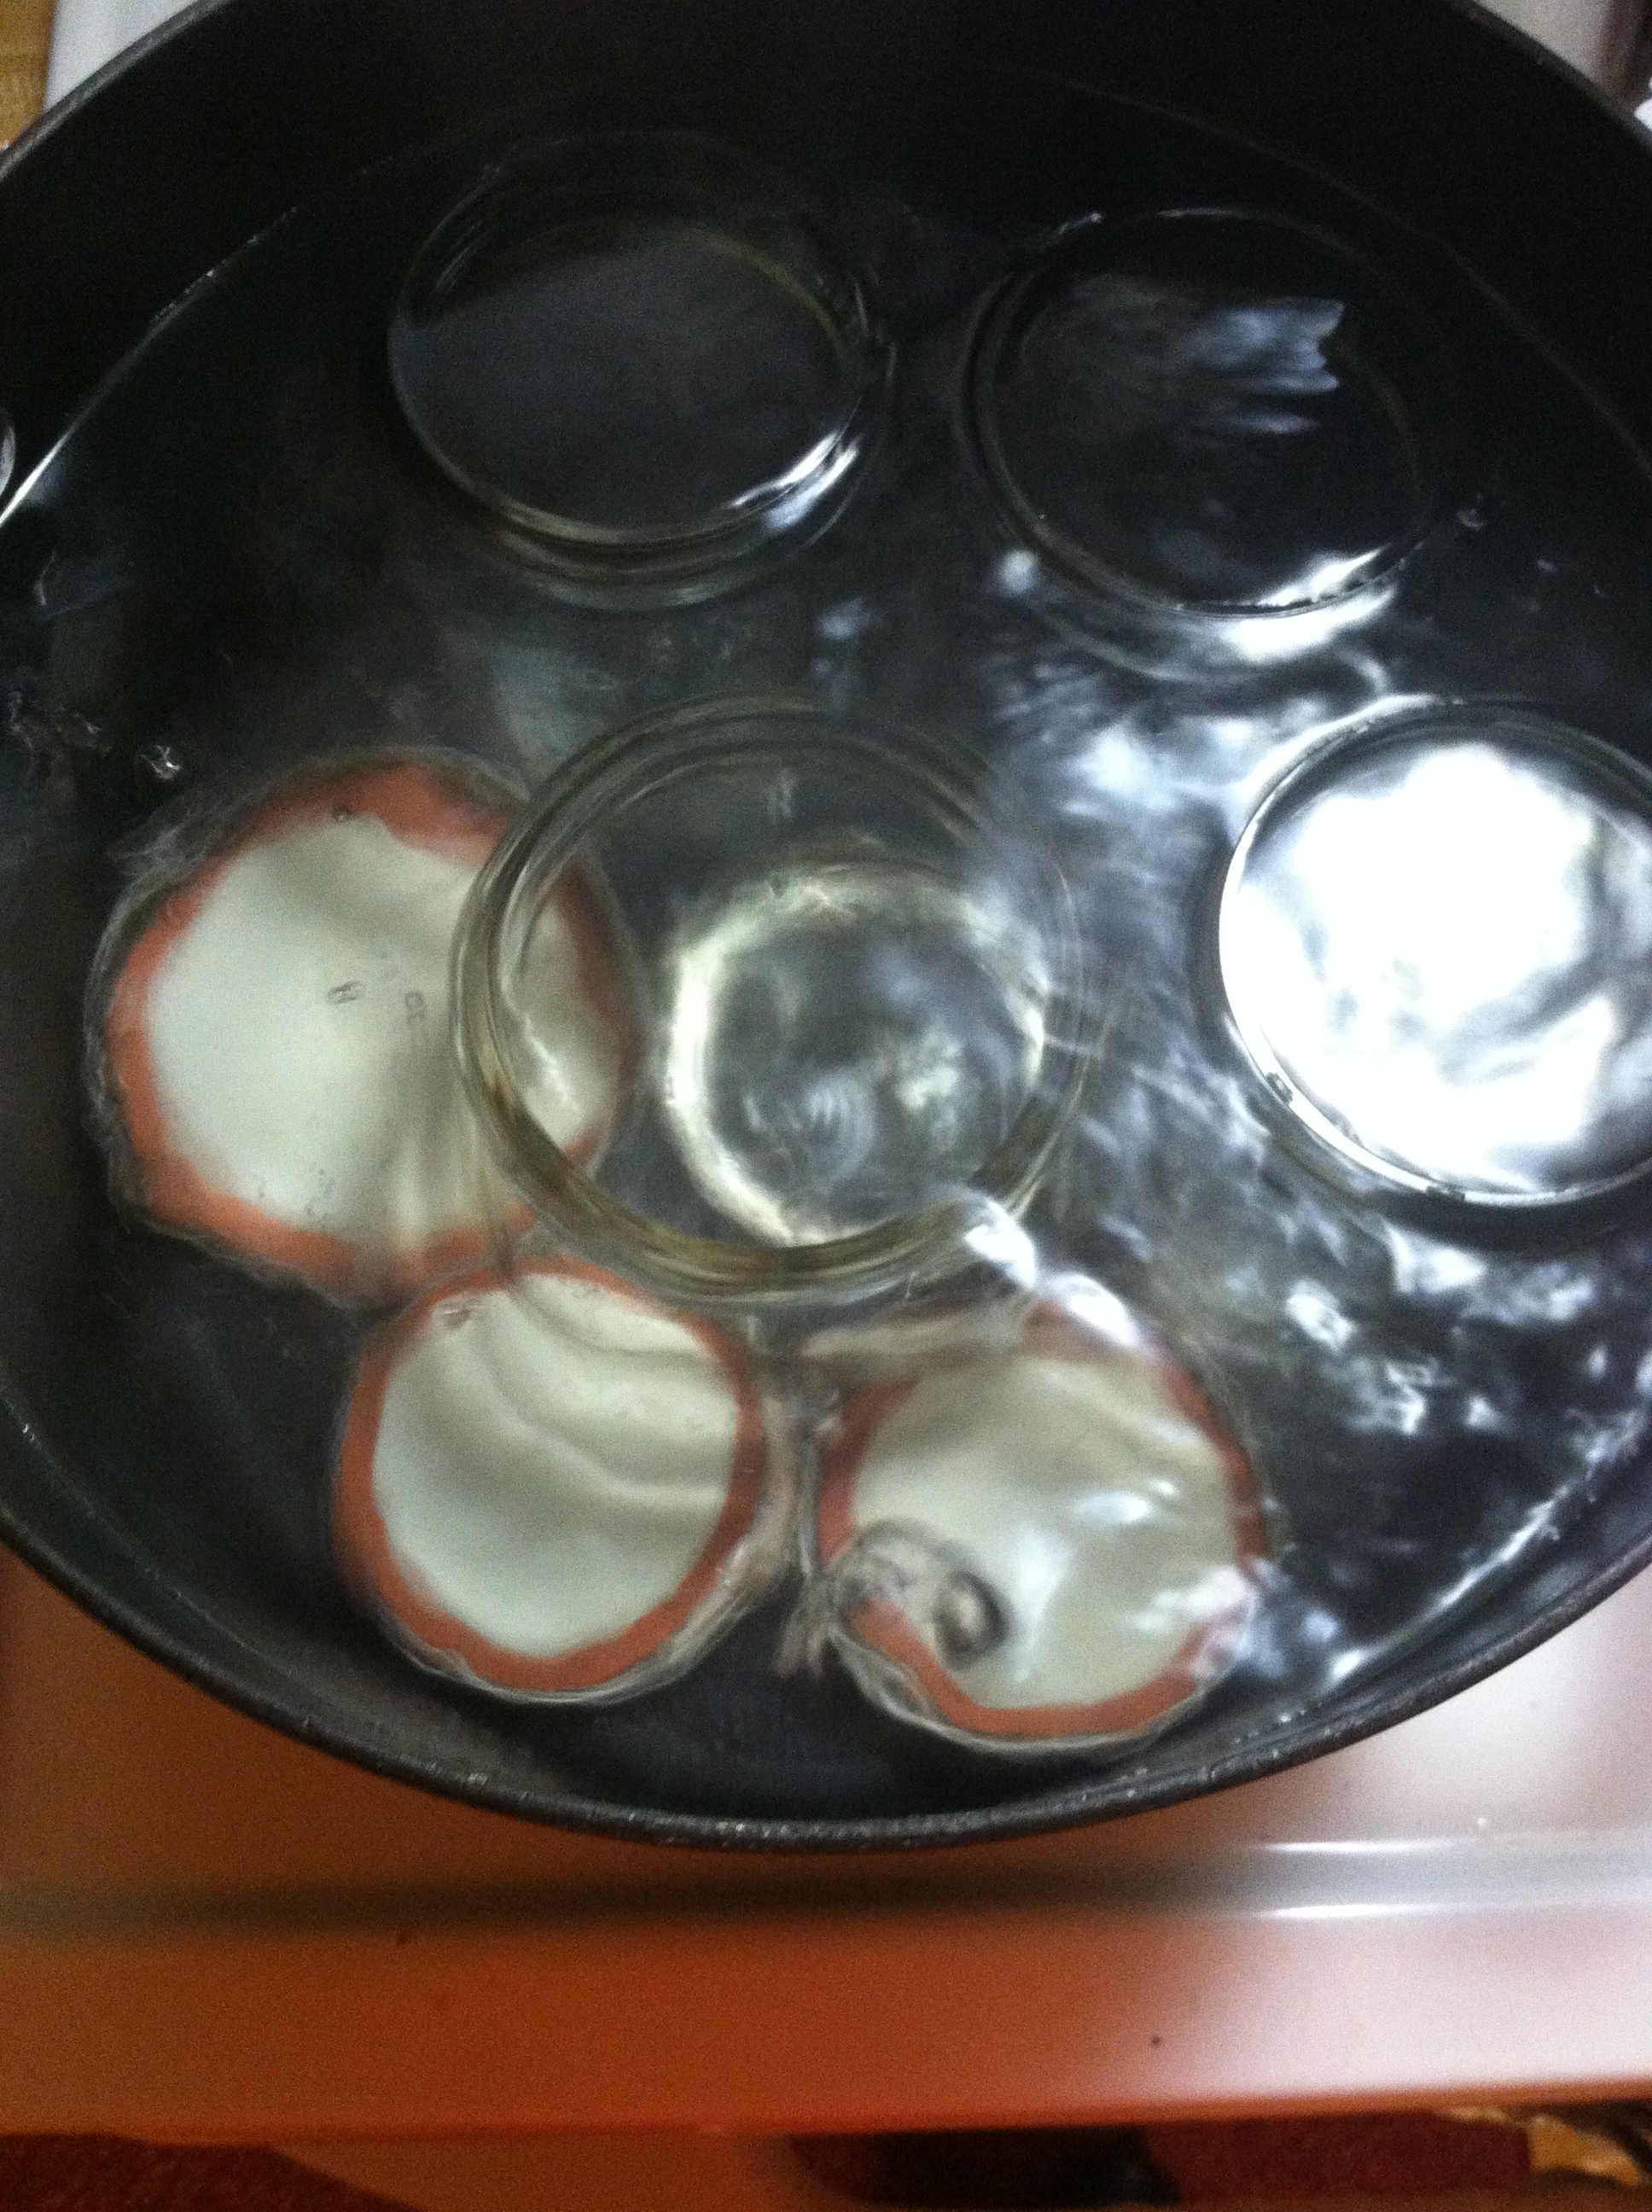
Step 3: While peaches are cooking, bring a huge pot of water to a boil with your jars, lids and rings inside. This sterilizes the jars. You can also run them through the dishwasher.

Step 4: After boiling the jars, use the tongs to pour the water out of them. Fill the jars with the peaches, using a spatula to press them down and squish in the edges. Leave 1/4-1/2 inch space, and put the lids on.

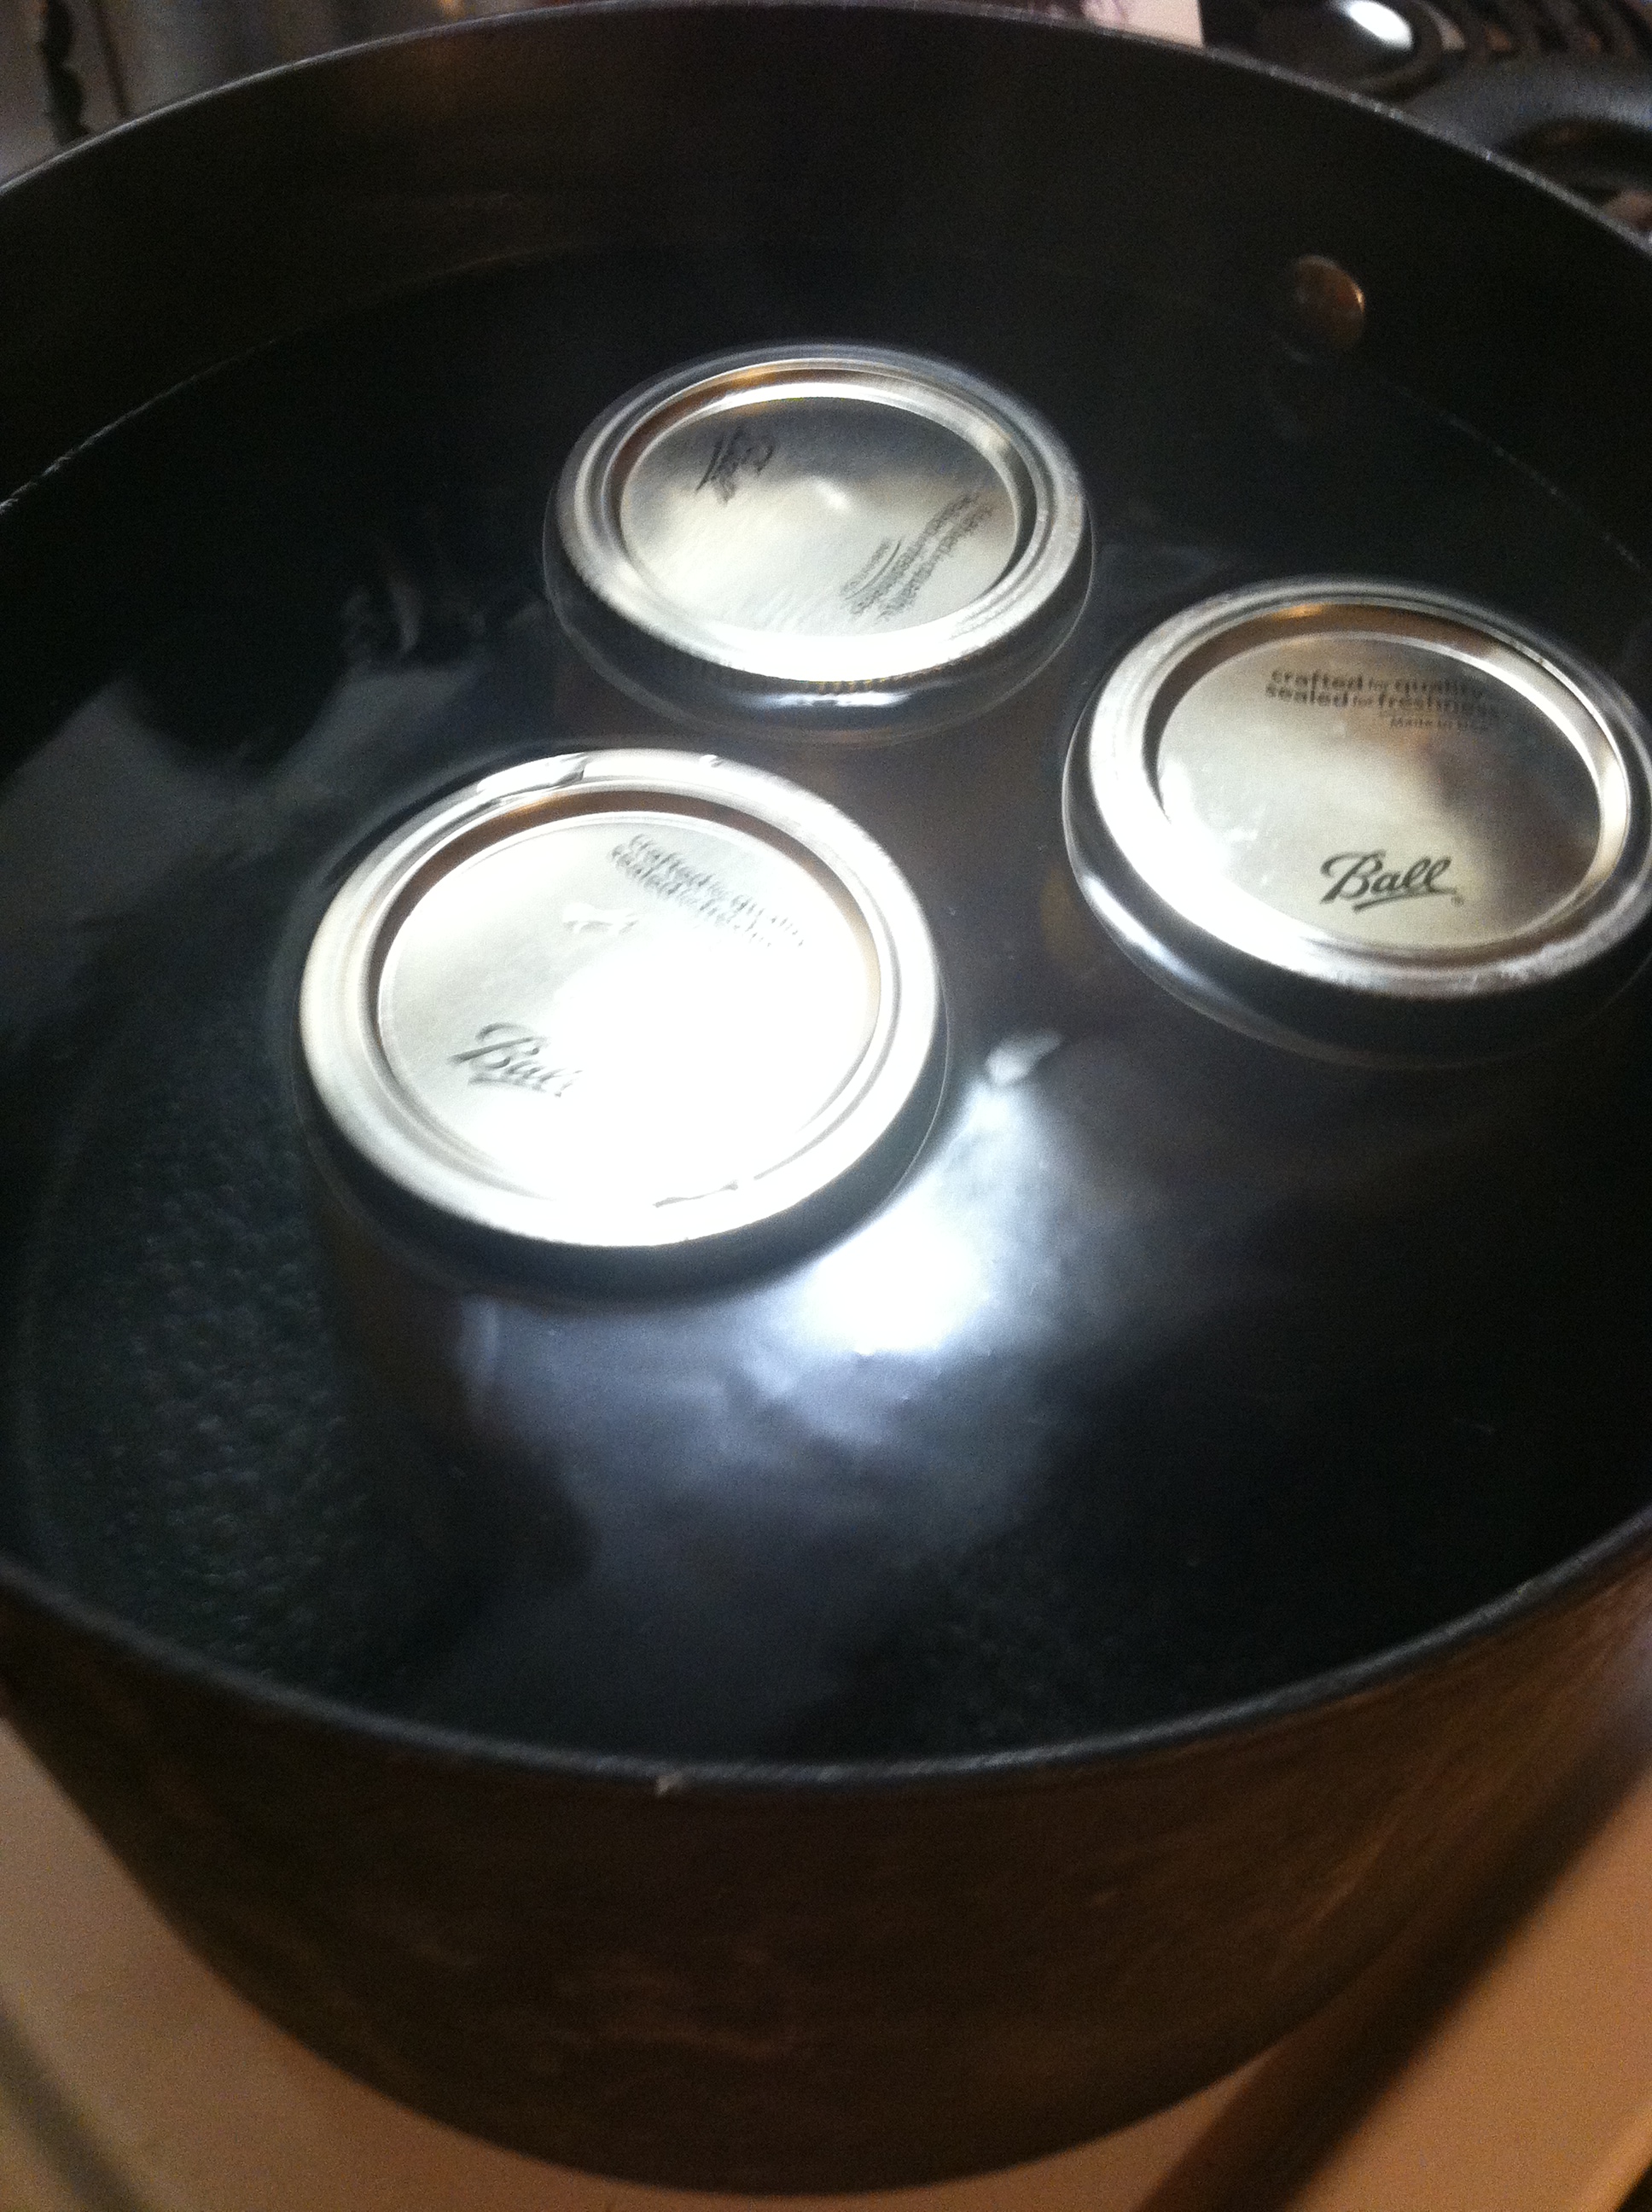
Step 5: Put the jars back into the boiling water, and process for 15-20 minutes. Make sure the jars are fully submerged. This will help kill any microbes, and seal the jars.

IMG_5108

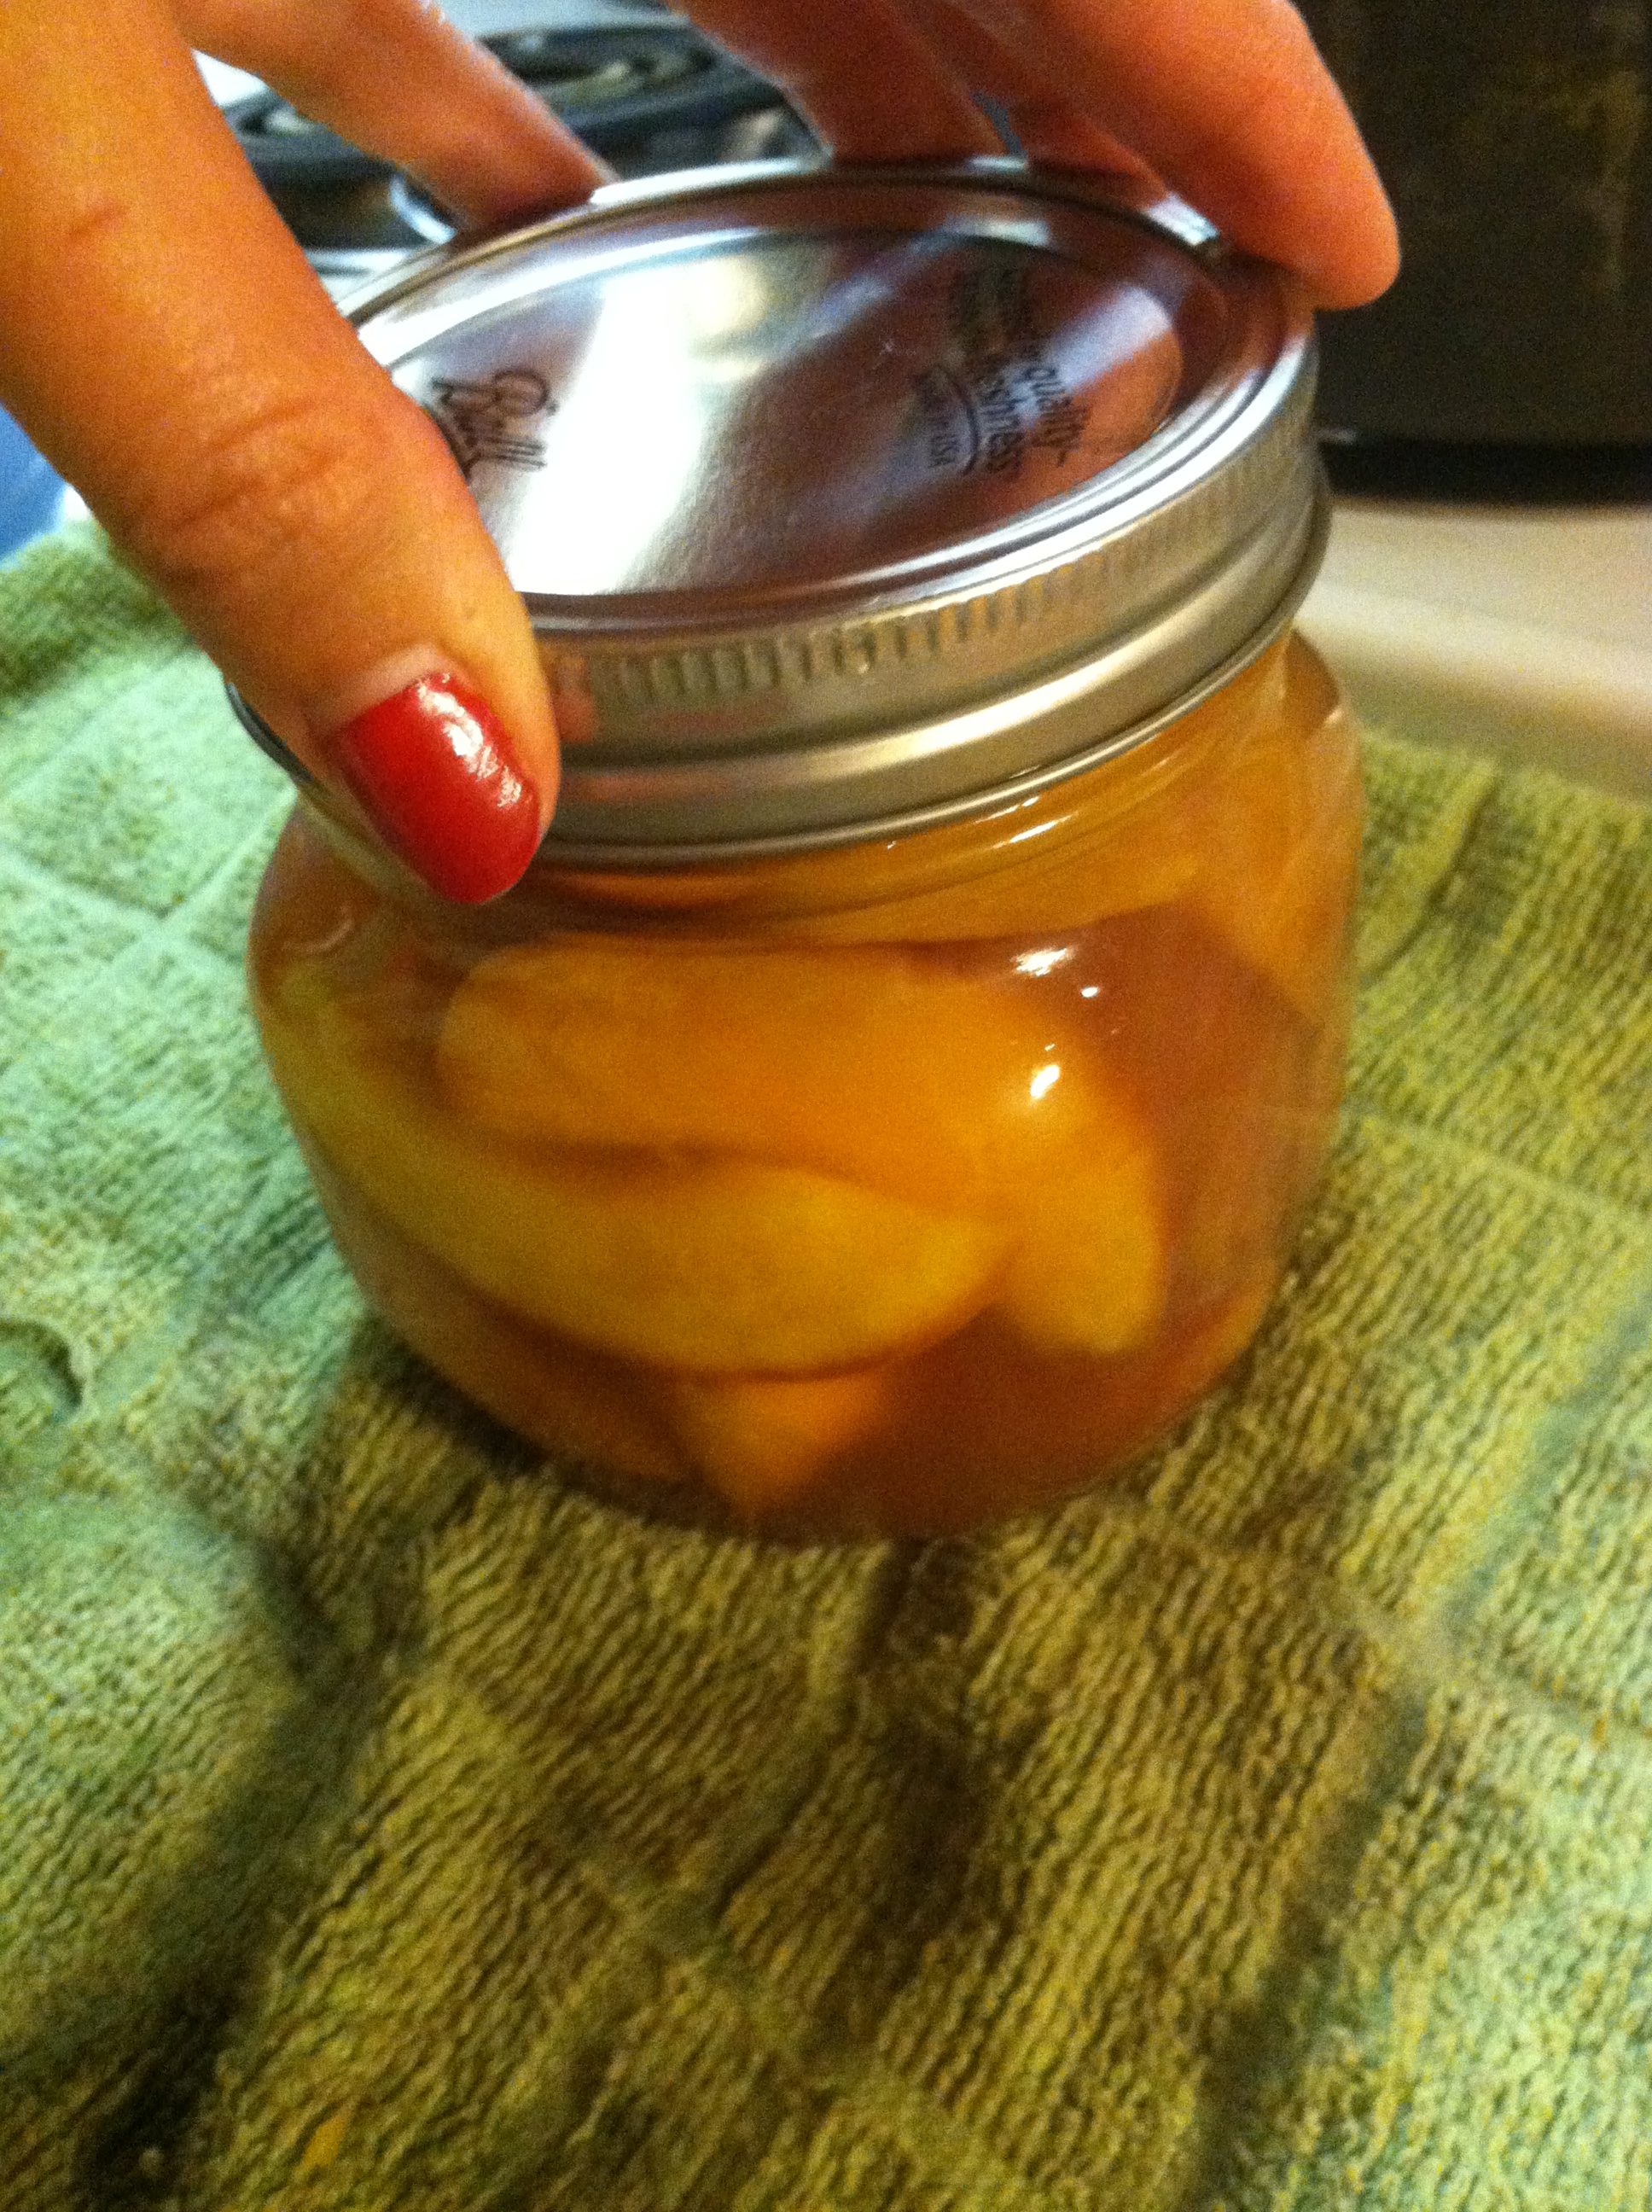
Step 6: Use the tongs to remove the jars, and place on a towel or hard surface to cool. Don’t disturb the jars for 6-12 hours, or until you hear the “pop” sound of the lid sealing. If after overnight cooling any jars have not sealed (the lid won’t be sucked in, and sort of springy when you push on it) put those jars in the refrigerator and use within one month.

It is normal for some canned fruit to change color slightly over time. But if you notice extreme discoloration, a bright red, or green color, get rid of that food immediately!

Jars processed this way should be stored in cool, dark, dry areas and are good for quite a long time. If properly processed, they are theoretically good forever. But I doubt they will last that long! 😉

Happy canning!

Turkey bacon frittata – SNAP Meal


Frittatas are one of my absolute favorite meals for breakfast. You know I love any meal which is cheap, versatile, and lets me use up bits and scraps of food left in the fridge. This is exactly one of those meals. Frittatas take well to every vegetable, meat, or grain you have sitting around waiting to be eaten. Just mix in it, let the eggs bind everything together, and you have an amazing meal that didn’t end up in the trash!
Since I already had turkey bacon, I looked around to see what else would go well in my frittata. 2 pounds of rice and a pound of lentils makes an awful lot, so I added some to add heft. I have a tiny window garden, so some fresh green onions and spinach were added too.

IMG_5167

Helpful tip: You can grow your own green onions from the store. My grocery store regularly has them on sale, three bundles for $1. Just cut the bottom most inch or two off, leaving roots intact, and plant them! Then you will have your own free green onion garden forever after. You can see I have plants in various times of growth.

Now for the fun part.

Ingredients:

  • 4 strips turkey bacon
  • 5 eggs
  • handful green onions
  • handful spinach leaves
  • 1/2 cup cooked rice
  • 1/4 cup cooked lentils
  • 2 tbsp margerine

IMG_5166

Step 1: Cook the turkey bacon about 2-4 minutes on both sides, until crispy. Take off heat and let cool on a plate until you can slice it into bite-sized pieces.

IMG_5168

Step 2: Add the rice, lentils, and vegetables. You could add in here any vegetables you have, onion, potato, celery, the possibilities are endless. Cook in the bacon grease, adding margarine if things still stick.

IMG_5169

I used a cast iron skillet here, because this recipe calls for finishing in an oven. If you don’t have cast iron, or don’t have an oven, this recipe is just as perfect for an omelet. When it says “bake in a 350 degree oven”, simply scramble everything together, let cook, then flip to cook the other side. Viola!

IMG_5170

Step 3: Scramble up the eggs in a small bowl. Simply crack them all in, being careful to not add shells. Then with a fork, whisk them quickly. The longer you whisk the more air bubbles you create, and the lighter and fluffier the eggs will be.

IMG_5171

Step 4: Add the eggs to the pan. Make sure all the ingredients are distributed around the pan. Let cook on medium heat for 3-5 minutes, until the eggs begin to set. You will see the edges becoming more opaque and if you run a spatula through it the bottoms will be cooking through.

IMG_5174

Step 5: Put the whole pan carefully into a 350 degree oven for 5-10 minutes. Just long enough to thoroughly cook the egg on top. Take it back out and let cool

IMG_5176

This frittata was absolutely delicious! I sprinkled on a little bit of garlic salt, and enjoyed one quarter of it each morning for four days in a row. This can be refrigerated and reheated later. They are quite healthy (unless of course you add four kinds of meat and tons of butter and nothing else) and very frugal. Try it, I bet you’ll love these and make them regularly.

IMG_5175

The cost of the entire frittata was $1.20! Cut into quarters, that is a cost of $0.30 per serving. You can’t do much better than that for this quality meal!


**UPDATE: The SNAP Challenge is complete, with many lessons learned! All SNAP Meal Recipes listed below:

Turkey BLT – SNAP Meal


The BLT is a classic sandwich, and when turkey bacon goes on sale for $1.99 per pound, you cannot pass it up. With a garden supplying fresh greens and tomatoes, this sandwich is otherwise quite cheap. Even if you don’t have a garden, spinach is often on sale for $1 per pound, and one roma tomato is less than 50 cents.

You can of course use more or less bacon to taste, or omit it entirely if you are vegetarian/vegan. Alternatively, you can use strips of tofu which sometimes go on sale for $1 per pound. Just drain, slice it up, and fry in a pan.

Ingredients:

  • 2 slices of bread
  • 4 slices of turkey bacon
  • 1/2 roma tomato, sliced
  • 1 small handful baby lettuce/spinach

IMG_5177

Step 1: Cut the bacon strips in half and fry in a pan. This should take 5-7 minutes per side.

IMG_5191

Step 2: On the bread, layer the bacon, tomato slices, and lettuces. Enjoy!

I had my sandwich with a small handful of grapes growing wild behind my house. It actually made enough for two sandwiches, or one thick one.

Without considering the tomato and spinach, the cost is $0.33. If you make it into two sandwiches, the cost is $0.21 each. Even if you add in a few cents for the veggies, it is crazy cheap for a delicious and healthy lunch.


**UPDATE: The SNAP Challenge is complete, with many lessons learned! All SNAP Meal Recipes listed below:

Simple Chicken Soup – SNAP meal


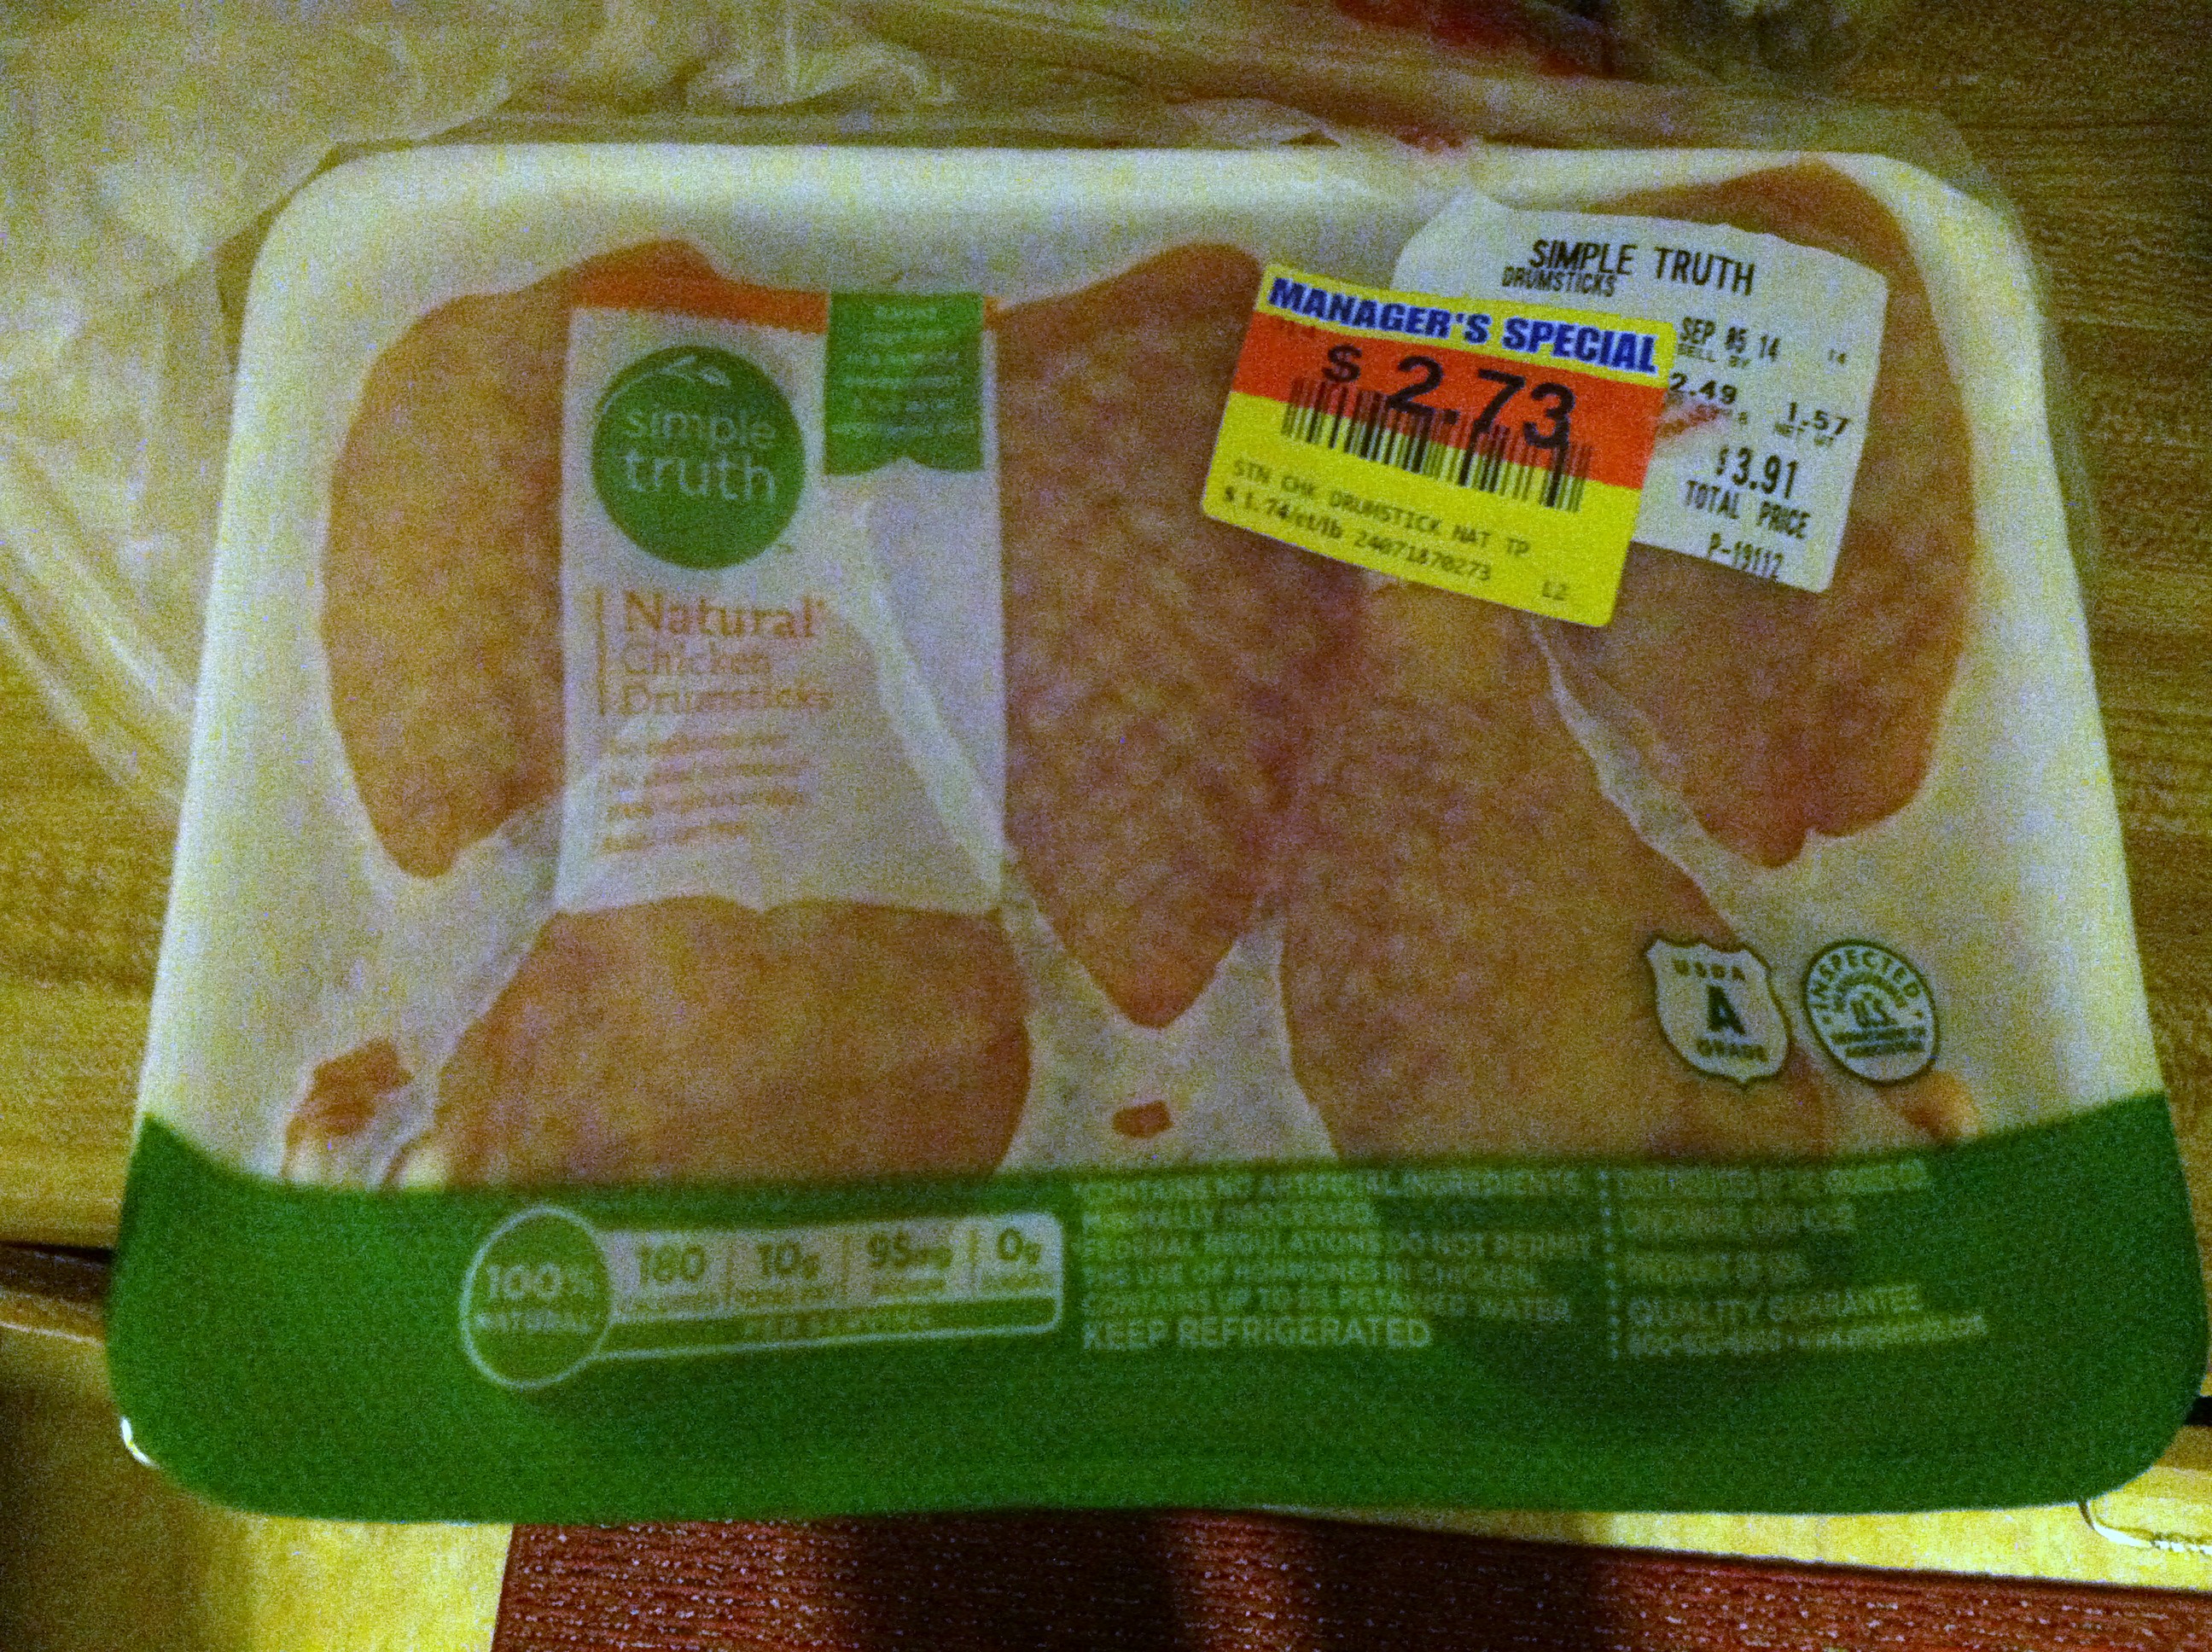
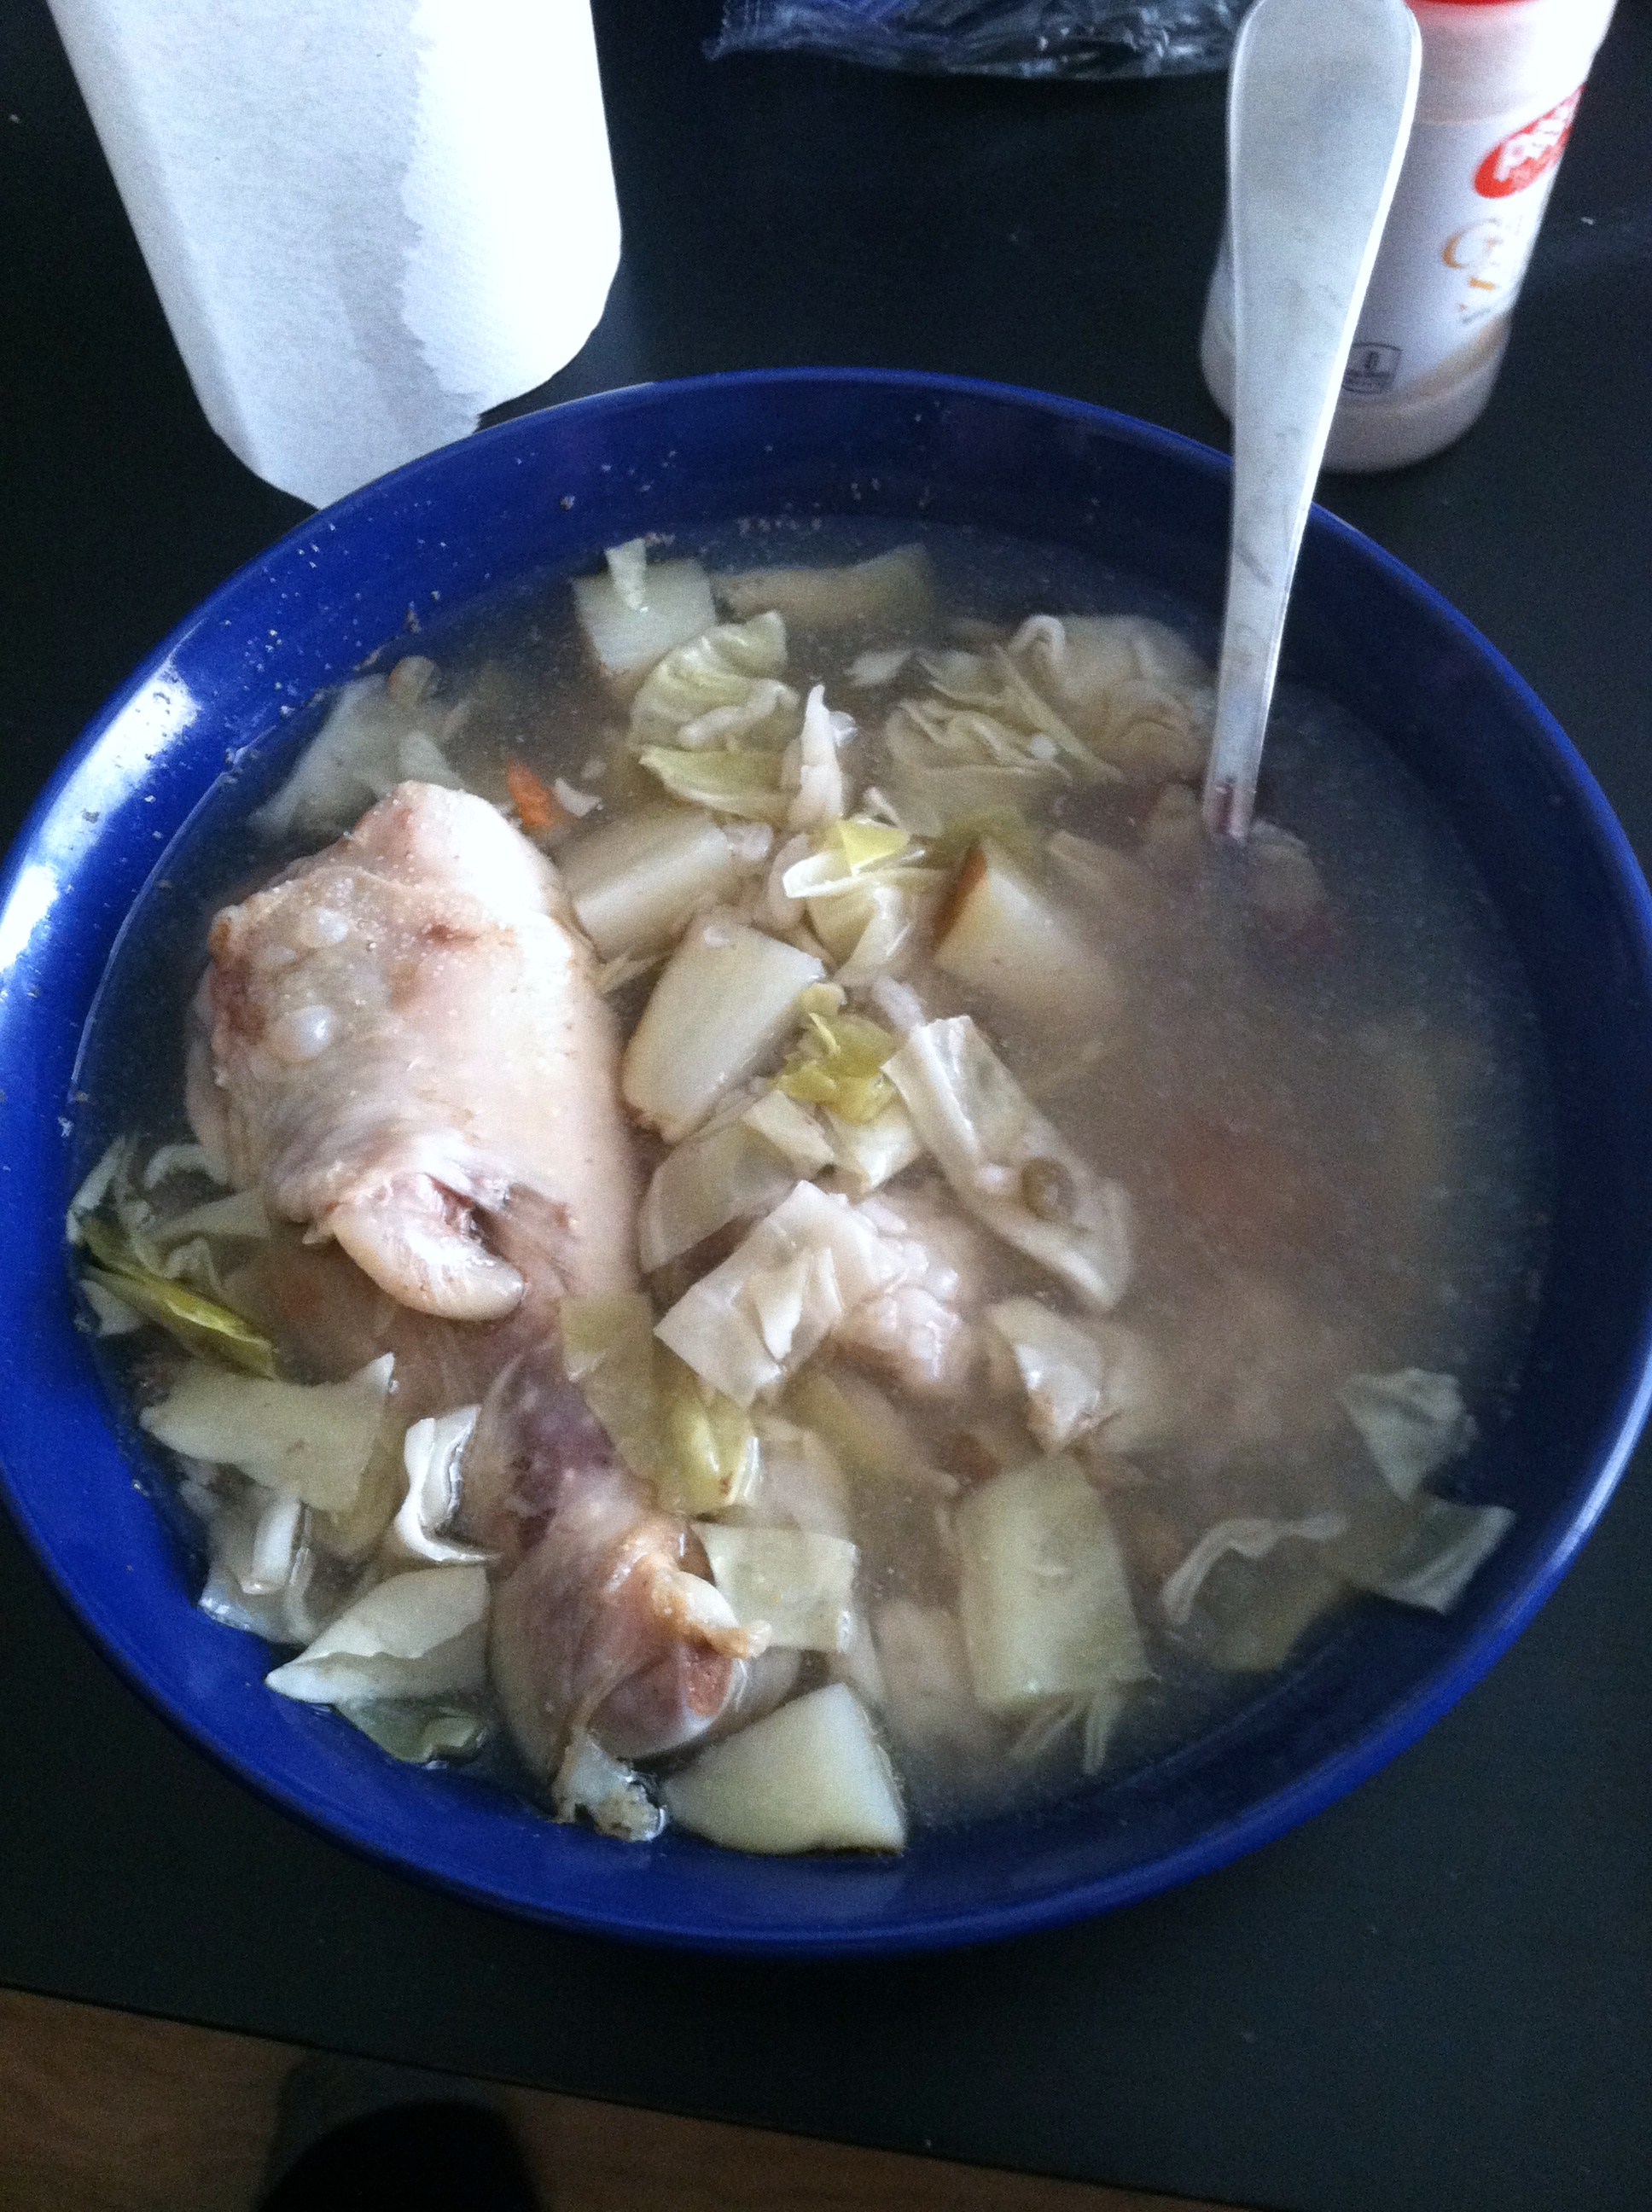
This is a super simple soup made from the vegetables I could afford, and a few chicken drumsticks which were on sale. It doesn’t take much to make a delicious, warming pot of soup. It’s healthy, cheap, and keeps you from getting sick (or sicker). It’s science.

Ingredients:

  • 2 carrots, sliced
  • 2 potatoes, diced
  • 1/3 cabbage, shredded
  • 1/2 cup rice
  • 1/2 cup lentils
  • 2 chicken drumsticks
  • About 10 cups water
  • Garlic salt to taste

IMG_5137

You can see here my meals for the day, planned out and packed to go. Oatmeal with a cut up apple for breakfast, a leftover stuffed pepper for lunch, and soup in the crock pot for dinner.

IMG_5138

Chicken often goes on sale, sometimes for as little as 88 cents per pound. When you find a really great deal, snag some extra to freeze for future use.

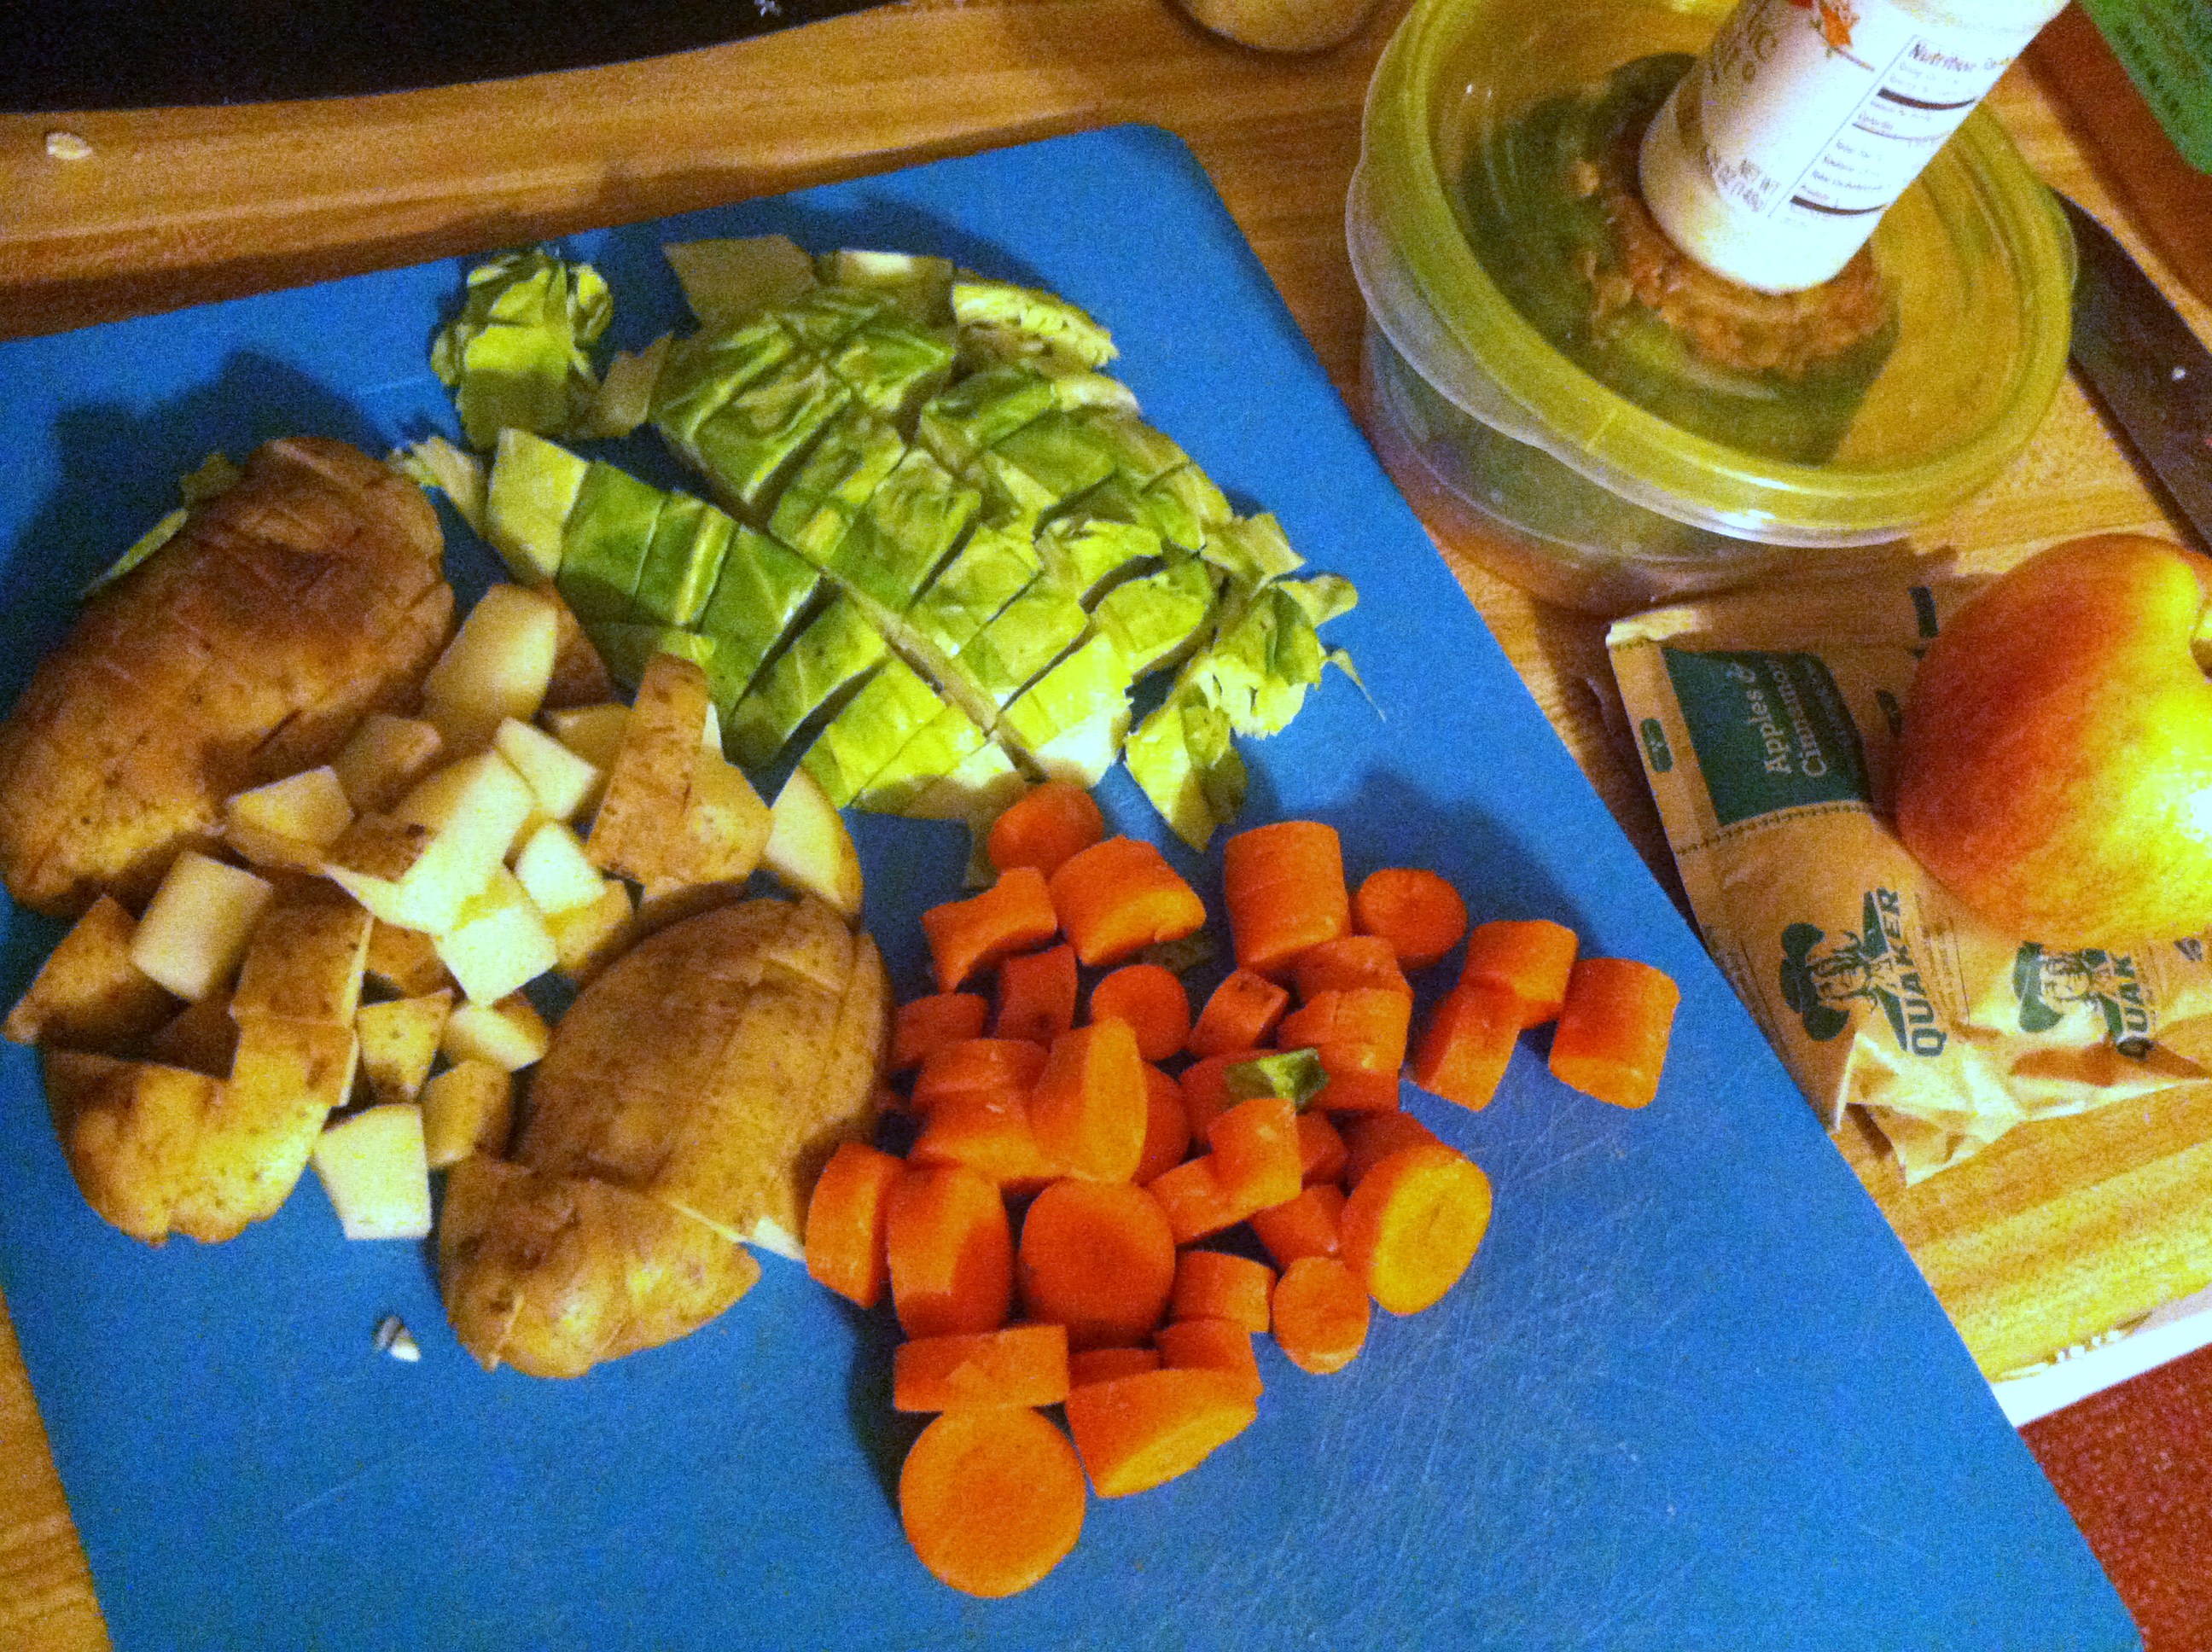
Step 1: Cut up all your veggies.

Step 2: Put them in a pot with the water, rice, lentils, and chicken, leave in crock pot on low for 4-8 hours. Or, you can simmer in a pot on the stove for 1-3 hours.

IMG_5141

This whole pot of soup is only $1.25! Plus a negligible amount from the water used and garlic salt. I ended up having about five servings, meaning each huge steaming bowl was only $0.25!

Soup is a great catch-all, you can add in any leftover vegetable odds and ends from the refrigerator. Same goes for odds and ends of meat. Meat with bones will give the broth extra flavor. This is a great use for a whole chicken, enjoy the meat other ways, then use the bones for soup stock. It’s just one more way to squeeze every last penny out of your food dollars.


**UPDATE: The SNAP Challenge is complete, with many lessons learned! All SNAP Meal Recipes listed below:

Stuffed Bell Peppers – SNAP meal


This is the first dinner I cooked during my week of the SNAP Challenge. I love stuffed bell peppers, and I usually make them with ground beef. Though I have had some success with vegetarian stuffed peppers in the past.

Given the already high and rising cost of meat, I knew I’d have to take a vegetarian route to keep these in budget. Swapping in lentils for the beef keeps this recipe high in protein content, and lowers the fat, while keeping the core tastes and hunger-crushing properties of the meal intact.

Ingredients:

  • 2 green bell peppers (use any color)
  • 1/2 cup rice
  • 1/3 cup lentils
  • 1 small can tomato sauce
  • Garlic salt

IMG_5131

Step 1: If you have a rice cooker, you can cook the lentils and rice together in it. If not, simmer the rice and lentils in a sauce pot with 2 1/2 cups water for 20 minutes.

IMG_5132

Step 2: Mix the cooked rice and lentils with the can of tomato sauce.

IMG_5133

Step 3: Cut the top off the pepper and pull out the seeds. Stuff the mixture inside, adding as much garlic salt as you like.

IMG_5134

Step 4: Bake the peppers in an oven at 350 for 20-25 minutes, until soft. Alternatively you could microwave each pepper, covered, for 8-10 minutes to soften. Another option is to put the stuffed peppers in a crock pot on low for 1-2 hours.

IMG_5135

Serve as a meal, or with a baked potato or salad on the side.

IMG_5136

I ended up eating one pepper for dinner, and the other for lunch the next day. They are quite filling, and delicious! Pretty healthy for you as well. Vegan, vegetarian, and you can make it gluten-free if you substitute in quinoa or another gluten-free grain for the rice.

IMG_5140

For approximately $0.84 per serving, you can’t do much better!


**UPDATE: All SNAP Meal Recipes listed below:

SNAP Challenge Week Lessons


So today (Tuesday) marks one week of the SNAP Challenge for me. (If you don’t know what the SNAP Challenge is or why I’m talking about it, take a peek at my earlier post).

The week went very closely according to plan. I ended up having so much leftover from the soup I made that I did not use the can of tuna. I had coffee 6 out of 7 days, but only one cup. And I only needed an extra boost from green tea on three days.

FOOD BREAKDOWN

Here is a breakdown of all the food purchased and consumed throughout the week:

Screen Shot 2014-09-22 at 7.59.07 PM

If I calculated out the exact costs for the week, it would be quite a bit less than my target, as I still had 2 eggs, 1/2 bag broccoli, all but 4 tbsp margerine, plenty of garlic salt, 6 slices turkey bacon, half a jar of peanut butter, a few slices of bread, some rice, potatoes and lentils, and 6 bags of oatmeal left! Even with the full price added in, I had $2.44 left to spend at the end of the week.

There were only a few cooking-intensive meals, then several meals consisting of leftovers. Peanut butter sandwiches were always a go-to in case I didn’t want leftovers for lunch and dinner, or just needed a hearty snack throughout the day.

SNAP MEAL PLAN

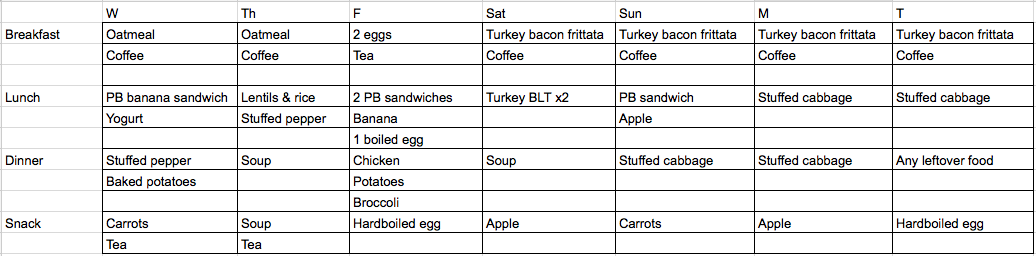
Here is a break-down of all the meals I ate this week:

Screen Shot 2014-09-22 at 7.57.01 PM

This ‘diet’ may actually have been for the better, as I was eating less meat and calories in general, and slowly cutting down on caffeine. I actually felt quite healthy throughout the majority of the week, though energy spikes and troughs as well as a growling tummy was more frequent.

LESSONS LEARNED

Overall, this week was not as difficult as I imagined it being, but I recognized some significant advantages:

1. I have a fully functional kitchen. This includes a microwave, stove-top, oven, refrigerator, and freezer. I have ample containers in which to store excess cooked food to be eaten again later. This all helps in stretching the food you do have.

2. I do not mind the process of cooking, eating leftovers, or the same meal multiple times. In fact I enjoy those things. There are tons of people who do not like one or all three. Being able to cook, even simple methods, is limitlessly helpful in stretching your food dollars versus convenience foods. And being willing to cook large batches and re-eat that meal later is also a huge money saver.

3. I have access to fresh, affordable produce and very reasonably priced staple food items. Many, too many, people do not have access to fresh produce, the ability to stop at four different stores to price-compare, or to pick up 2 cucumbers for $1 just because they’re on sale, they look fresh, and you want a snack.

4. I have been in the practice of planning, shopping, and cooking for myself on a very tight budget for a very long time. Many people who end up on SNAP due to unfortunate circumstances have no practice with coupons, budgeting, or meal planning. They may not know how to stretch a dollar because they never had to before. This just adds to the overall burden.

Over the next few posts I will be posting the recipes of meals I cooked during the challenge, so stay tuned!


Final Thoughts

I decided I am going to buy a duplicate of all the foods I had this week, and donate them to a local food pantry so others in my community can be fed. I am also hosting a food drive at my work place until the end of the month.

I hope you took something away from this, and if you’re not inspired to take on the challenge yourself, at least you’re more aware of the daily struggles millions of your fellow Americans face, and know more about how you can help.


**UPDATE: All SNAP Meal Recipes listed below:

SNAP Challenge – Tracking Week


If you don’t know what SNAP is, or why I’m talking about the SNAP Challenge, check out my earlier post about SNAP.

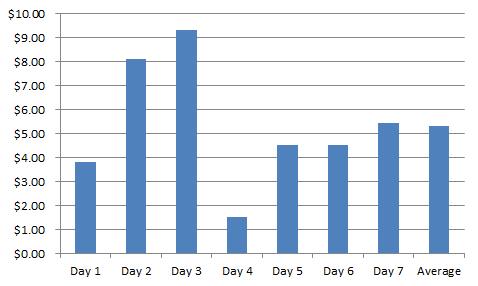
Wednesday ended my week of tracking for meal costs. I calculated every thing I ate each day, and used receipts and records to add up how much each day’s food and drink cost. You can see on the graph below that I averaged just over $5 per day.

SNAP track week

This does not include costs of food given to me by other sources, such as shared snacks at my work place, cupcakes a new neighbor baked for me (so sweet), or food and drinks at a party. I also cook and eat the majority of my meals at home.

Days 2 & 3 included half a Chipotle burrito and that is why the cost is significantly higher. Eating out is (almost always) more expensive than a home-cooked meal.

For the upcoming week, my challenge is to live off only $28.70 worth of food and drinks.

My strategy is always to make cost effective foods the center piece of the meal plan, supplemented by as much fresh and frozen produce as possible. I know I have a significant privilege and advantage over the average SNAP recipients in that I have access to no fewer than five different grocery stores, each offering rotating sales.

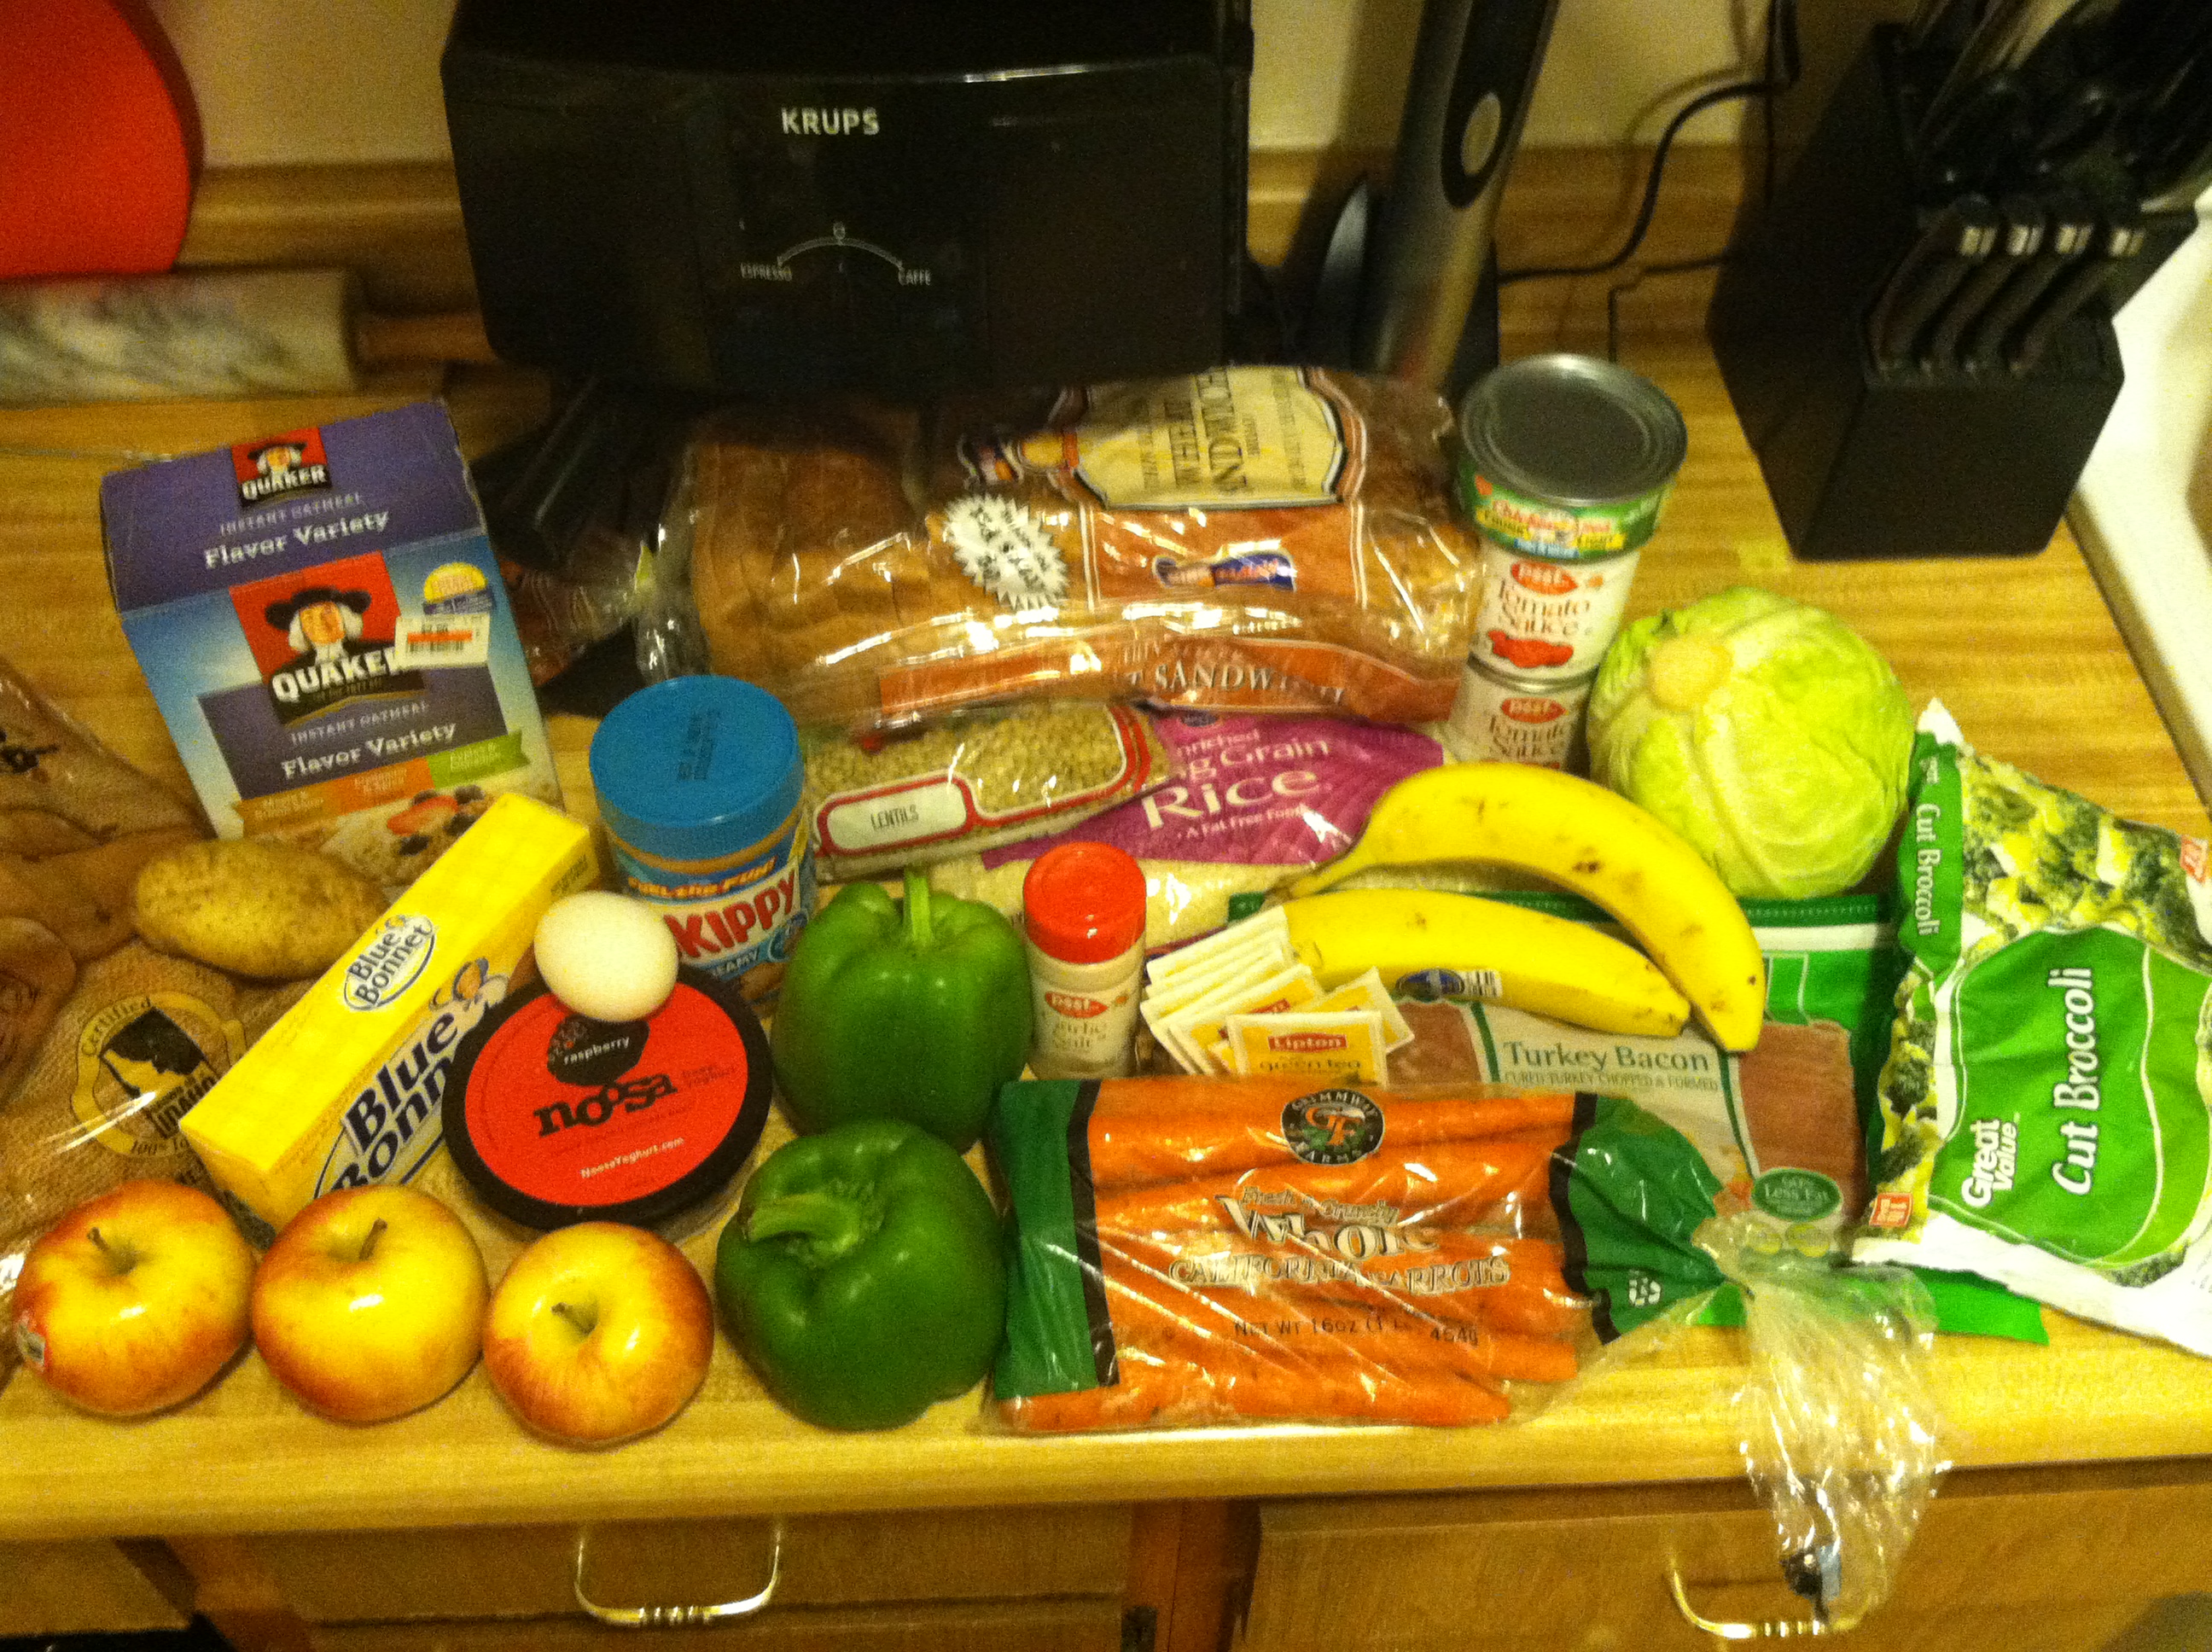
Sprouts Farmers Market is always my first stop for extremely reasonably priced fresh produce. I got a 5 pound bag of potatoes, and a few small amounts of fruits & veggies. With a rough idea of a meal plan, I headed to King Sooper with the change and rounded out the week. What you see below is what I will be eating.

IMG_5124

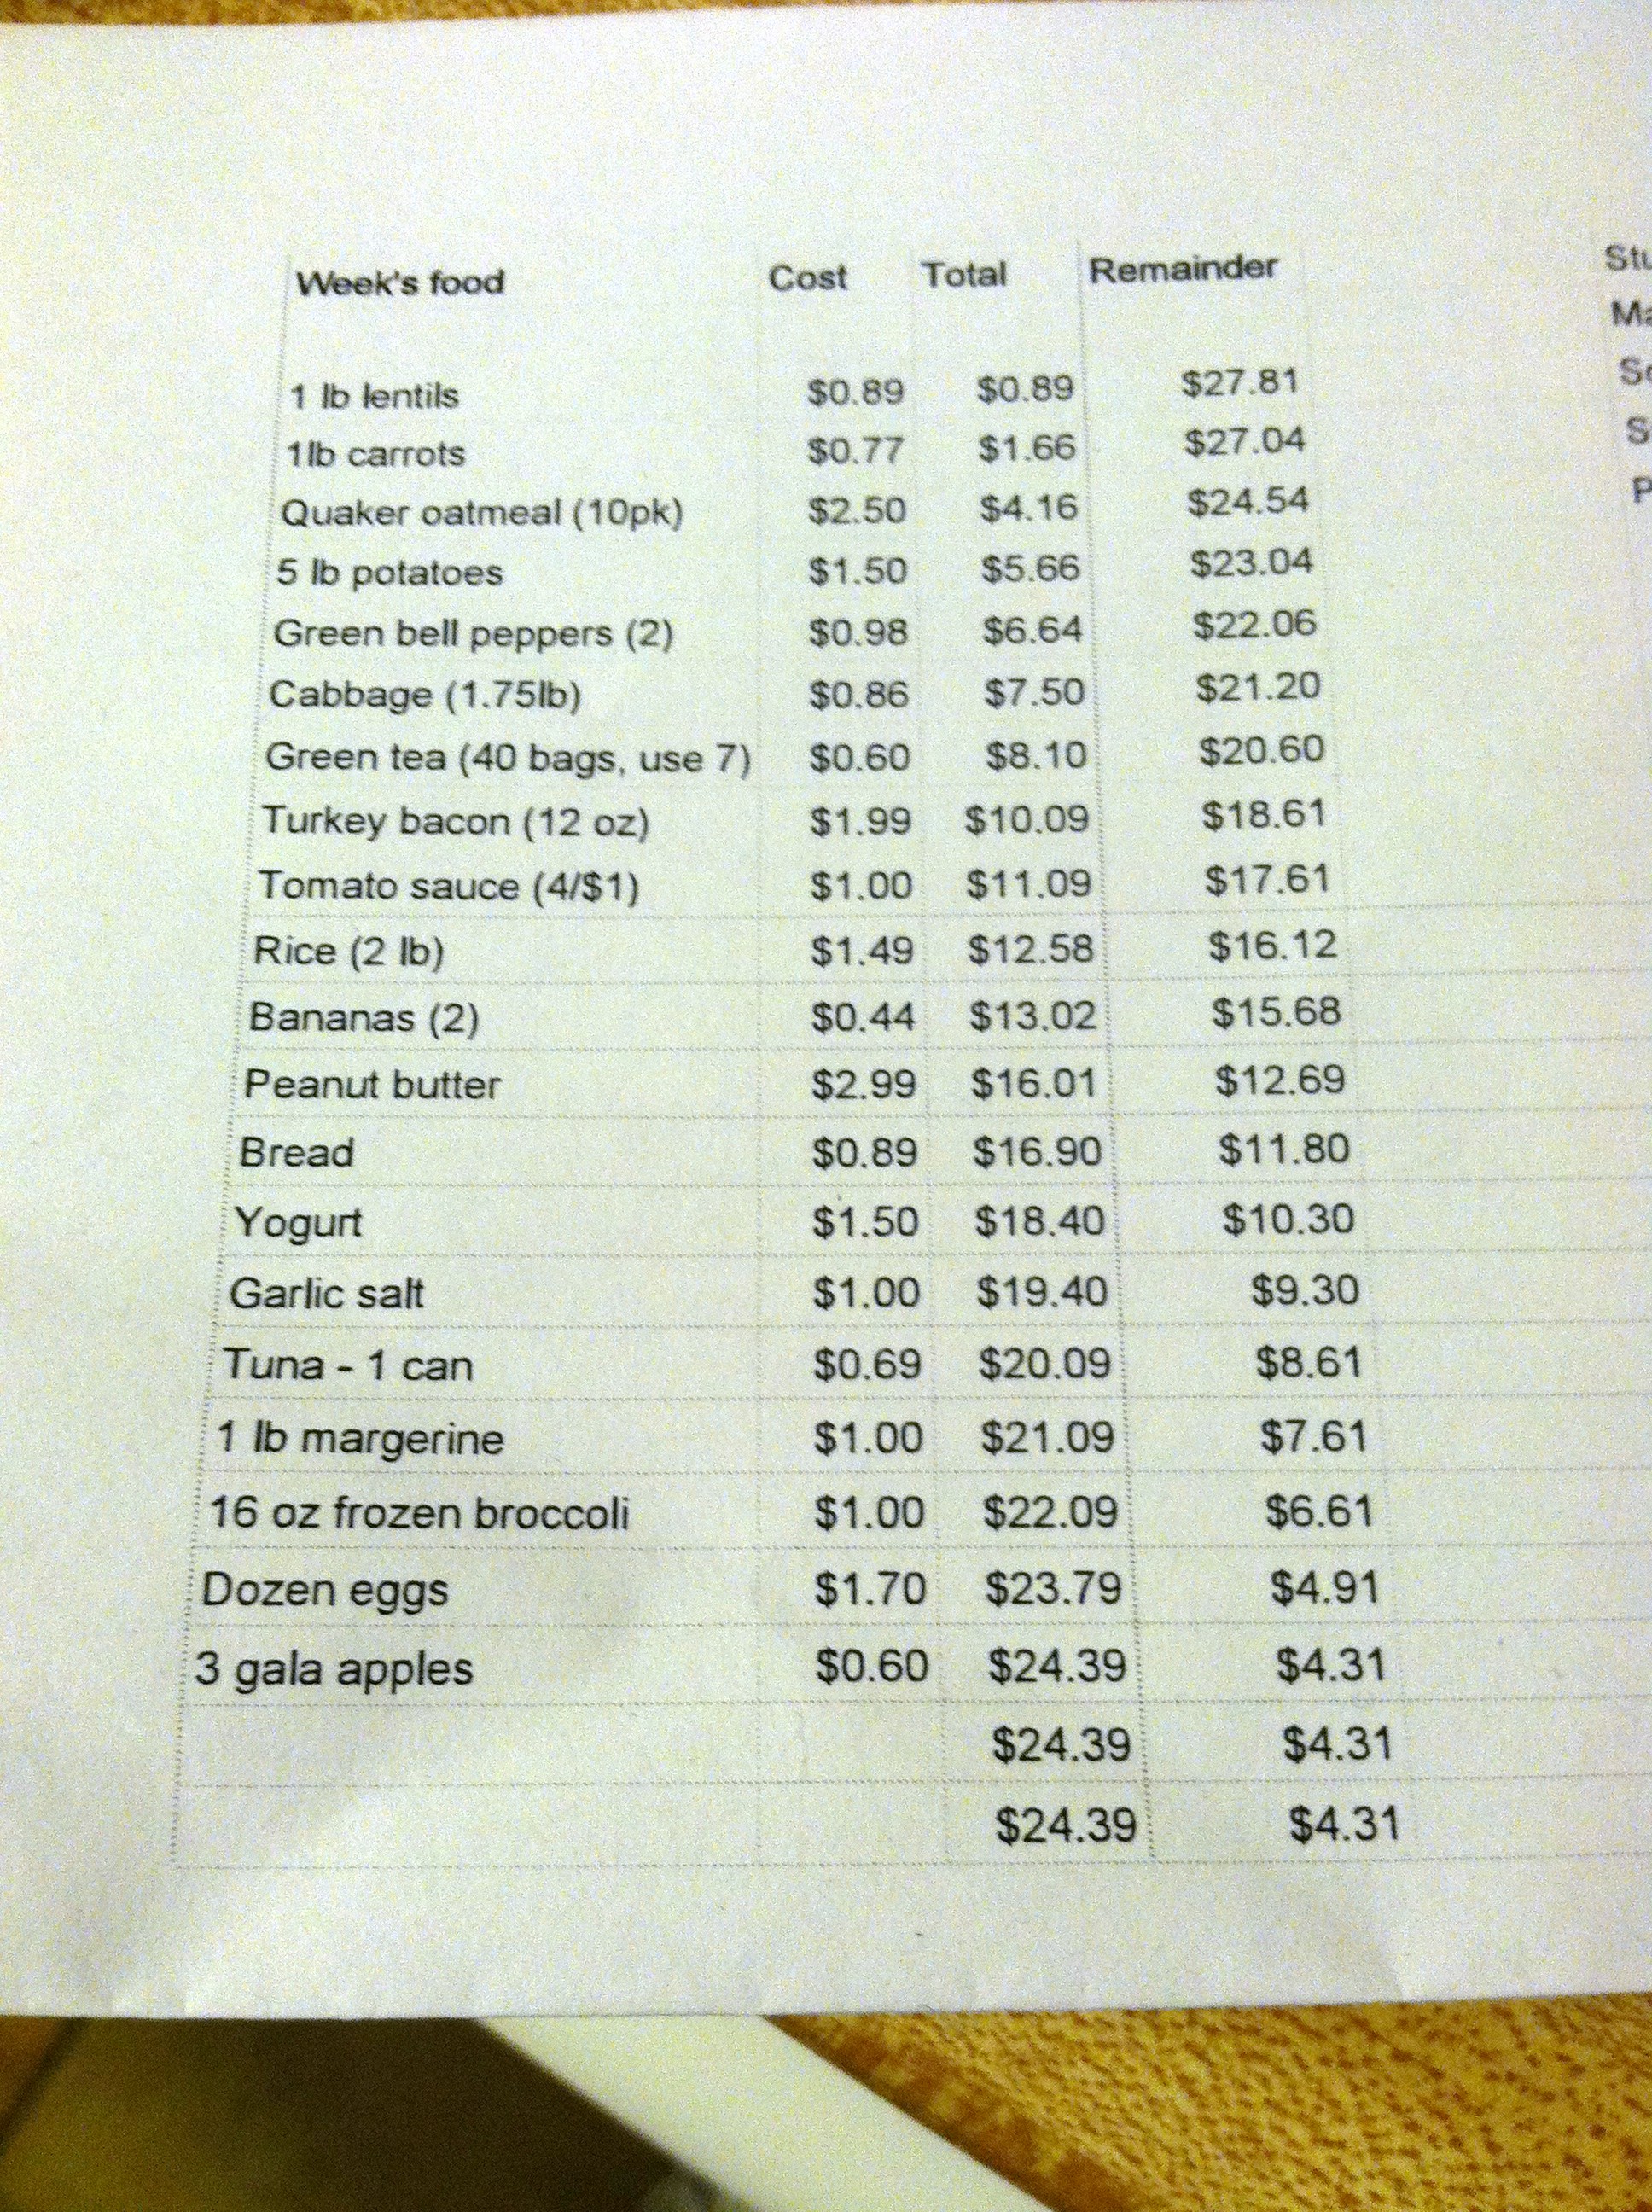
And to prove that I am still within budget, in fact with $4.31 to spare, here is the spread sheet where I figured out exactly how much each item cost and how much I had left to spend:

IMG_5126

I also calculated the cost of a cup of coffee (16oz is a cup for me…) with cream as $0.17, including the filter, so depending on how often I need coffee I will add that in at the end.

Wish me luck! (To participate in the challenge yourself, check out Feeding America).


**UPDATE: Challenge complete, with many lessons learned! All SNAP Meal Recipes listed below:

8 Ways to Work Out Without Whipping Out Your Credit Card


We all know that our health is our greatest asset. I hope. Health is one of two things you can never get back; that and time. We are only given one body and one life to live. Enjoy what your body can do, use it, and work it out.

“Working out” tends to become a bit of a curse word with some people. They hear that and immediately get exhausted. You think: ‘I don’t have time’ or ‘I don’t have energy’ or ‘I can’t afford a gym’. But all these excuses are just that: excuses. Working out doesn’t have to cost any money at all. And working out can be fun.

Think back to when you were a kid. You went outside and played with friends. Maybe you had bike races or foot races, played basketball or softball, rolled in leaves and climbed trees. Hopscotch, jump rope, kickball, four square. All of these things get you moving, in a way that is fun. As adults, we need to re-discover “play time“.

My friend in college and our box fort
My friend in college and the box fort we built in our apartment.

As a society, we have become more and more sedentary as life becomes full of conveniences. We get out of bed to go sit in the car to go sit at a desk to then sit in the car to come home to sit on the couch. There is no hunting and gathering, building our own houses, gardening, running from danger. This has lead to the greatest health threats and most dire health situation humanity has know. We hear every day about the ‘obesity epidemic’ and how diabetes is on the rise.

You have the power to change that. You have the power over your own body and your own life.

IMG_5880

There are tons of cheap-to-free ways to work out. I’ll list them in order of free to most expensive:

1. Walking: The simplest and easiest way to do wonders for your health. Walking takes no money at all, can be done at any time, anywhere, and you can start at any comfort level. If all you can manage is to the end of the driveway and back, great, start there. If you already walk a half hour after dinner, awesome! Walking has been shown scientifically to be so beneficial for all things health related, there is no reason not to start right now!

IMG_0076

2. Jogging: Only slightly more challenging than walking. Start with walking, then once you can comfortably walk for 30 minutes, pick up the pace for a minute or two. If you like jogging, increase it until you can run a 5K. Who knows how far you can go! The only costs will be a good pair of shoes if you start doing longer runs.

3. Body weight exercises: this includes things like yoga and pilates, push-ups, jumping jacks, planks, crunches, squats. You can drop a few bucks on a yoga mat or something like that. Look online for ideas and free videos to demonstrate. You can get a great full-body workout for free in your own home.

Yoga2-300x231
Image from the very informative website of Bret Contreras, the “Glute Guy”

4. Workout videos: This is borderline because you can find free videos online, or you can buy workout DVDs. Totally your choice. There is a HUGE amount of workout resources free online, just Google ‘videos’ and the type of workout you’re looking for, or check out one of the Top 30 YouTube channels for free workouts. These can be done on your own time in the comfort of your living room.

5. Bands/weights: This category can be very frugal if you pick up a used set of light free weights at a yard sale or Goodwill, or very pricey if you want to invest in a bench and full weights set. Again, your call. Make sure you consult an expert or at least look up information on proper form so you don’t injure yourself if you’re new to weights.

IMG_0074

6. Sports: Playing a club sport for fun or competition is a great way to have fun while working out, and as a bonus you can meet new people and make new friends. Check out the website of your local sports centers or Google sports that you enjoy in your area. This could be free or cheap, costing you just an application fee, or you could sink a few hundred dollars into new gear. Up to you.

IMG_2727

7. Classes: For this you can check Craigslist or Groupon for free or cheap classes offered near you. Or you can usually buy a single class or set of classes from a gym for a discount. Just look for fliers or ask around, you never know what neat new skill you might learn, and the friends you might make. Take a chance and try something new!

8. A gym membership: Typically the most expensive option, it does come with benefits. Most gyms do offer a free pass, or discounted first months membership if you want to just try it out. You will have access to weights, machines, and classes you otherwise might not. They usually have staff to help you use machines properly, or you could invest in personal training. Make sure you will get your moneys worth though, and actually show up.

In the end, it all comes down to the greatest exercise being one you enjoy and will consistently do. If you don’t move your body, you won’t get the benefits. Find ways to make it fun, buy a used bicycle, try kick-boxing, enlist some family or friends for a weekly stroll in the park. The options are endless once you really think about it and look.

And it all comes down to you. Why should you work out? Sure, it’s nice to look hot. Sure, it’s nice to have visible muscles. But the ultimate goal of health is just that: to be healthy. To have energy to play with your kids, to not get winded walking up stairs, to be able to lift boxes to help a friend move.

To live a longer, healthier, happier life.

IMG_0081

Now stop reading this and go move! =)