Category Archives: Main Dishes

Restaurant Review: The Cowfish, Raleigh NC


How often do you have the “what do you want for dinner?” conversation? Whether with friends or a significant other, it can be fraught with peril. Someone wants pizza, someone else is in the mood for burgers, I desperately want sushi, meanwhile this other guy is gluten-free and she’s vegetarian.

What to do?!

The Cowfish in Raleigh has struck a whimsical compromise: they offer not only both burgers and sushi, but also a menu full of confusing, creative fusion they call “burgooshi”. Now the fish eaters and the cow eaters can all be happy and fed together.

Obviously, as a sushi-aholic married to a die-hard beef lover, I knew as soon as I heard of this magical place that we must go there. I could literally eat sushi every other day and be happy about it, but my Mr tolerates it just often enough so that I don’t die from sushi deprivation. This seemed like a perfect compromise.

And The Cowfish did not disappoint! We went to the Raleigh location, one of four current locations (Charlotte, NC, Atlanta, GA, and Orlando, FL are the other two, with plans for future expansion. If you’re lucky enough to be near one do stop by and let me know what you think!). They had a nice outdoor seating space decorated with lights that I’m sure add a nice touch at night, as well as cornhole boards to occupy yourself while waiting to be seated.

We were smart, and showed up around 4pm, missing the lunch crowd and long before the Saturday dinner rush. Though as soon as we walked in, we noticed it was still pretty full with couples and groups sitting about, enjoying the wide array of music and goofy decor.

Impossible to miss, a gigantic fish tank shaped like a cocktail glass dominates the center of the spacious open dining room. All manner of brightly colored fish swim around, oblivious to their cousins being devoured nearby. And the walls are lined with cartoony paintings that riff off of many well-known pop culture icons & symbols.

You have your choice of seating, an outdoor covered patio, inside in the open floor, at the bar, or at the sushi bar. The sushi bar comes equipped with mounted in-table touch screens, which I can only assume are for ordering another round of Cheeseburgooshi. We sat elsewhere, but maybe next time.

The menu spans a wide range of tastes. They have typical Asian appetizers like gyoza and edamame, as well as classic American options like onion rings & nachos. They also have salads and sandwiches if someone in your party is not feeling very adventurous yet. There is definitely a seafood emphasis throughout.

The burgers range from lamb and bison, to mushroom and swiss, to an Elvis inspired peanut butter/banana/bacon concoction. Sushi rolls include classics like the California and Spicy Tuna roll, as well as some specialty rolls you won’t find anywhere else. And then the crowning achievement, the “Burgushi” menu, which is a unique fusion that involves bison sushi, southern style BBQshi,  the Turfin Surfer roll, and several types of sushi sandwiches.

Possibly their most famous fusion is the “All-American Bacon Double Cheeseburgooshi”. This little gem is like a bacon double cheeseburger, but with a twist: “Seasoned Certified Angus Beef, yellow cheddar cheese, white cheddar cheese, applewood bacon, and red onion, wrapped in soy paper and potato strings then flash fried. Topped with ketchup, mustard, dill pickle and Roma tomato. Served atop Cowfish sauce. Served with house seasoned fries”

But for your first culinary journey in this magical place, the staff recommends the “Fusion specialty bento box”, because it includes a little taste of it all. You get a mini slider, your choice of a 4-piece Fusion specialty roll, and sides: spicy cucumber, edamame, and the world’s most amazing sweet potato fries.

Yeah, I said it. In a place known for burgers and sushi, the sweet potato fries were the surprise sweep, both of us absolutely inhaled them. I loved the edamame, and the cucumber, though hubby pushed both my way. I wasn’t complaining one bit.

We chose the blackened tuna roll in our bento box, which was an awesome decision if I do say so myself. Crabcake and cream cheese inside, coated in tempura and topped with seared tuna, avocado salsa, and jalapeño slices, this was probably my second favorite part of the box. I could eat a dozen of these rolls!

We also got one Fusion specialty roll to split, the Doug’s Filet Roll. It boasts avocado, kani, and cream cheese filling, but the topping is what sold it. Thin slices of seared filet mignon, with spicy mayo, scallions, and masago (fish eggs).

The steak was delicious, and a very strange taste juxtaposed with the sushi to be sure. But very satisfying.

And of course, let’s not forget the restaurant’s namesake: the Cowfish. Yep, that’s an actual thing: an adorably weird fish of which each restaurant location boasts one.

Overall, I’d rate The Cowfish:

  • Taste: 10
  • Atmosphere: 10
  • Value: 9


Save

Save

Save

Nuts and Dark Chocolate Sea Salt “KIND” Bar Recipe


Sometimes, you don’t have time for breakfast or lunch and need something quick and portable. Maybe you need a before- or after-workout snack with protein. Or the kids are hungry and want a snack, but you don’t want them eating sugary fatty junk or ruining their appetite for dinner.

You’re at work, at 11am or 2pm, and hunger hits, but you can’t leave to get something and your next meal feels like hours away. Or you or your partner is hungry and staring into the refrigerator like a roast chicken may magically appear, but you can’t or don’t want to cook something right now.

This sounds like a job for the granola bar.

Granola has long been a popular breakfast food, differentiated from the similar muesli because it was sweetened and usually baked. To make granola, rolled oats, nuts, spices, honey or other sweeteners, and sometimes puffed rice are mixed together and baked into clusters of wholesome cereal.

The names Granula and Granola were trademarked in the 19th century in America by the Jackson Sanitarium, a prominent health spa near Danville, and John Harvey Kellogg (yes, that Kellogg). And then someone had the bright idea to take this loose granola, which is kind of messy, and press it into a bar shape. These can then be individually wrapped, and stuck in a purse, pocket, or backpack for later consumption.

Granola bar popularity took off, and continues to rise. According to theglobeandmail.com, “Granola bars, breakfast bars and cereal bars, which are referred to collectively as “snack bars,” are part of a food category that’s grown 5 per cent a year since 2005 and is worth an estimated $720-million in Canada, according to figures provided by PepsiCo Foods Canada, which owns the Quaker brand.” All across the Americas, New Zealand and Australia, Europe and China, people love the portability and growing options snack bars offer.

One of the many reasons people love snack bars so much is their perceived healthfulness. After all, they have oats in them, which are full of fiber, beneficial to heart and digestive health. Unfortunately, today’s granola bars’ nutrition facts don’t often match their health claims.

For example, Special K chocolaty crunch bars claim that each bar only contains 90 calories and that they can help reach and maintain a healthy weight. But the bars, which themselves weigh only 22 grams, contain eight grams (nearly two teaspoons) of sugar. Sugar is also listed as the first ingredient. Another popular All-Bran bar claims to be high in fiber, yet each bar contains only 4 grams of the daily recommended 25g (for women) or 38g (for men).

So what’s a health conscious adult looking for a perfect portable food to do? Make your own of course!

It is much easier than you may think. You could get very serious about it, purchase a candy thermometer, meticulously source and weigh ingredients in the pursuit of the perfect bar. But that’s not how we roll here. Soon you will see how simple making your own healthy homemade snack bars can be!

KIND bars have become a favorite of mine lately, because they have ingredients you can see and pronounce, with no preservatives, fillers, artificial flavorings, and each bar is held to high standards for a low calorie count and sugar content. I had no idea there were so many options now though! There are KIND fruit & nut bars, KIND Plus, KIND nuts & spices, KIND & STRONG… you get the idea.

And the best part is, this is a WAY healthier bar than a typical granola bar. There are no oats, just puffed rice, whole raw or roasted nuts, and some sweeteners that also keep everything sticking together. These are inherently gluten free. Obviously, if you or someone you know is allergic to nuts, please don’t make these. But if not, then dive on in!

I based my recipe loosely off of Kelly’s recipe from Eat Yourself Skinny. I personally most love the dark chocolate sea salt bar, so that’s what this recipe mimics. But you are free to add whatever you enjoy to create your own copycat, or a brand new kind of bar!

The general rule I follow is 1 cup nuts/dry fruit : 1 cup cereal : 1/4 cup sweetener. I would use organic plain puffed rice if I had it, but when I wanted to make these and went to the store, Kashi Go Lean puffed cereal was the closest thing I could find. It works.

I’ve tried peanuts, walnuts, almonds, and cashews so far. I’m sure you could use just about any type of nuts in these, but I would recommend always including almonds. And I have not tried any with dried fruits yet, but that is the next experiment in line.

This recipe makes enough for a 9×13 pan, for approximately 30 of the delicious 1 inch x 3 inch bars.

Ingredients:

  • 3 cups puffed rice cereal
  • 3 cups whole nuts (almonds + peanuts/cashews + walnuts)
  • 1/2 cup brown rice syrup
  • 2 tbsp honey
  • 4 tbsp ground flax seed
  • 1 tbsp vanilla flavoring

The dark chocolate drizzle is of course optional, but highly recommended. For that you will need:

  • 1/2 cup dark chocolate pieces
  • 1 tbsp coconut oil
  • Sea Salt

mixed nuts in a bowl

Step 1: In a large bowl, mix all your nuts, cereal, and ground flax.

Step 2: In a sauce pot, mix the brown rice syrup, honey, and vanilla. Bring to a boil, and then reduce to a simmer. Simmer for about 2 minutes. It is a balancing act, too short and you will get a syrupy bar, but the longer you boil, the more likely you will create a crunchy bark rather than pliant bars. But regardless, it will taste great in the end, I promise.

Step 3: Pour your syrup over the nuts and cereal, and mix well to combine.

Step 4: Line a pan with foil, and press the mixture into the pan. You can use a spatula, your hand, or a cup sprayed with cooking oil if you want to make it extra flat and compact. Put it in the refrigerator for about an hour to chill and harden.

If you don’t want to add the chocolate drizzle, you can stop here and cut the bars to the desired size. I cut it into 10 strips, then cut each strip into 3 bars so they are about 1x2ish inches. I then wrapped each bar individually in wax paper.

But if you’re a chocolate lover like me, I definitely recommend continuing on to steps 5 & 6 below…

Dark chocolate drizzle for KIND bars

Step 5: In a microwave safe bowl, combine the dark chocolate chips, coconut oil, and a sprinkle of sea salt. Microwave 30 seconds at a time, stirring each time, until melted.

Step 6: Drizzle the melted chocolate all over the granola. You could dip the bottoms in chocolate too, but I found the drizzle on top was the perfect amount. Chill in the refrigerator again for about an hour to harden. Cut into desired bar size.

These will keep well in the refrigerator for about 2 weeks, or you can freeze for handy snacks for months. I doubt they will last that long though…

According to MyFitnessPal.com, these bars only have about 100 calories each, and 8 grams of sugar*. Not too shabby!

Recipe Nutrition Calculator

: 30

Total: 3,119 334 176 107 580 227
Per Serving: 104 11 6 4 19 8

*This calculation is for the bar without adding the chocolate.

[amd-zlrecipe-recipe:70]

Save

Save

Save

Save

Spring Green Creamy Gnocchi


This recipe was inspired by one I saw on Hello Fresh (look for a review coming soon!). If you haven’t heard of Hello Fresh, it is a meal kit delivery company. There are many others, like Blue Apron, Plated, Home Chef, Sun Basket, and oodles more.

The whole idea is they deliver the ingredients, perfectly portioned, with a step by step recipe page. All you have to do is pull out a box of ingredients and some cookware and enjoy the process. A friend of mine gave me one of the “free trial” 3-meal deals, so of course I tested them out.

Overall, I enjoyed the experience, but would not purchase it again because of how food and cooking works in my house. But I can definitely see the appeal for many people. One of the best things about the trial run is that I have access to their recipes now though, and there are some great ideas there!

As I was just browsing through the vegetarian section, this recipe caught my eye, because I had just bought asparagus and happened to have half a pound left. I also had some gnocchi in the pantry (from the Dollar Tree no less!). Thus, this recipe seemed perfect.

I switched up the seasonings a bit and swapped plain Greek yogurt for sour cream (one of my many sneaky healthy food swaps!) and it came out so delicious, the meat-eater loved it and even asked for seconds!

If you don’t have or don’t like a specific herb, that’s fine, try a different one. Use basil instead of rosemary, or try thyme, tarragon, or parsley. If you don’t like walnuts, what about almonds, or cashews, or pecans? Not a fan of asparagus? Well, you’re wrong, but that’s okay try bell peppers, kale, or zucchini.

Spring Green Gnocchi Ingredients

Makes 4 ~1 cup servings.

Ingredients:

  • 1 tsp olive or coconut oil
  • 1/2 pound asparagus
  • 1 cup peas (fresh or frozen)
  • 1 tbsp crushed walnuts
  • 1 pound gnocchi
  • 1/3 cup chicken stock
  • 2 tbsp plain Greek yogurt
  • 2 garlic cloves, diced
  • Pinch of chopped rosemary
  • 1 green onion, diced

Step 1: Boil the gnocchi for 5-7 minutes, until they begin to float in the water. Meanwhile, dice the asparagus, garlic, and herbs. Add the asparagus and peas to the boiling pot about 2 minutes before draining.

Step 2: Add the oil, garlic and onion to a pan and fry for 1-2 minutes, until fragrant. Drain the gnocchi and vegetables, add to the pan. Add the stock and mix 1 minute, and then turn off the heat and add the yogurt and walnuts. Mix well to form a creamy sauce.

That’s all there is to it! You don’t need much to create a creamy, tasty sauce that clings to the noodles and vegetables. The walnuts add just a bit of crunch and texture, and you can sprinkle some sea salt on top if you like. (I like).


[amd-zlrecipe-recipe:69]

Save

Save

Save

Easiest Ever Crockpot Sweet and Sour Meatballs


Sometimes you need to bring a dish to a potluck or birthday party. Or there’s a big game on and you’re hosting. Or maybe you just want to try something different for dinner, but don’t have the energy or time for something complicated.

Allow me to help!

This recipe for sweet and sour meatballs is a longtime classic in my family. There are only three ingredients, though one of them may be surprising to you. Trust me, the finished product is delicious!

Using a slow cooker makes this as simple as: pour, mix, turn on. Done.

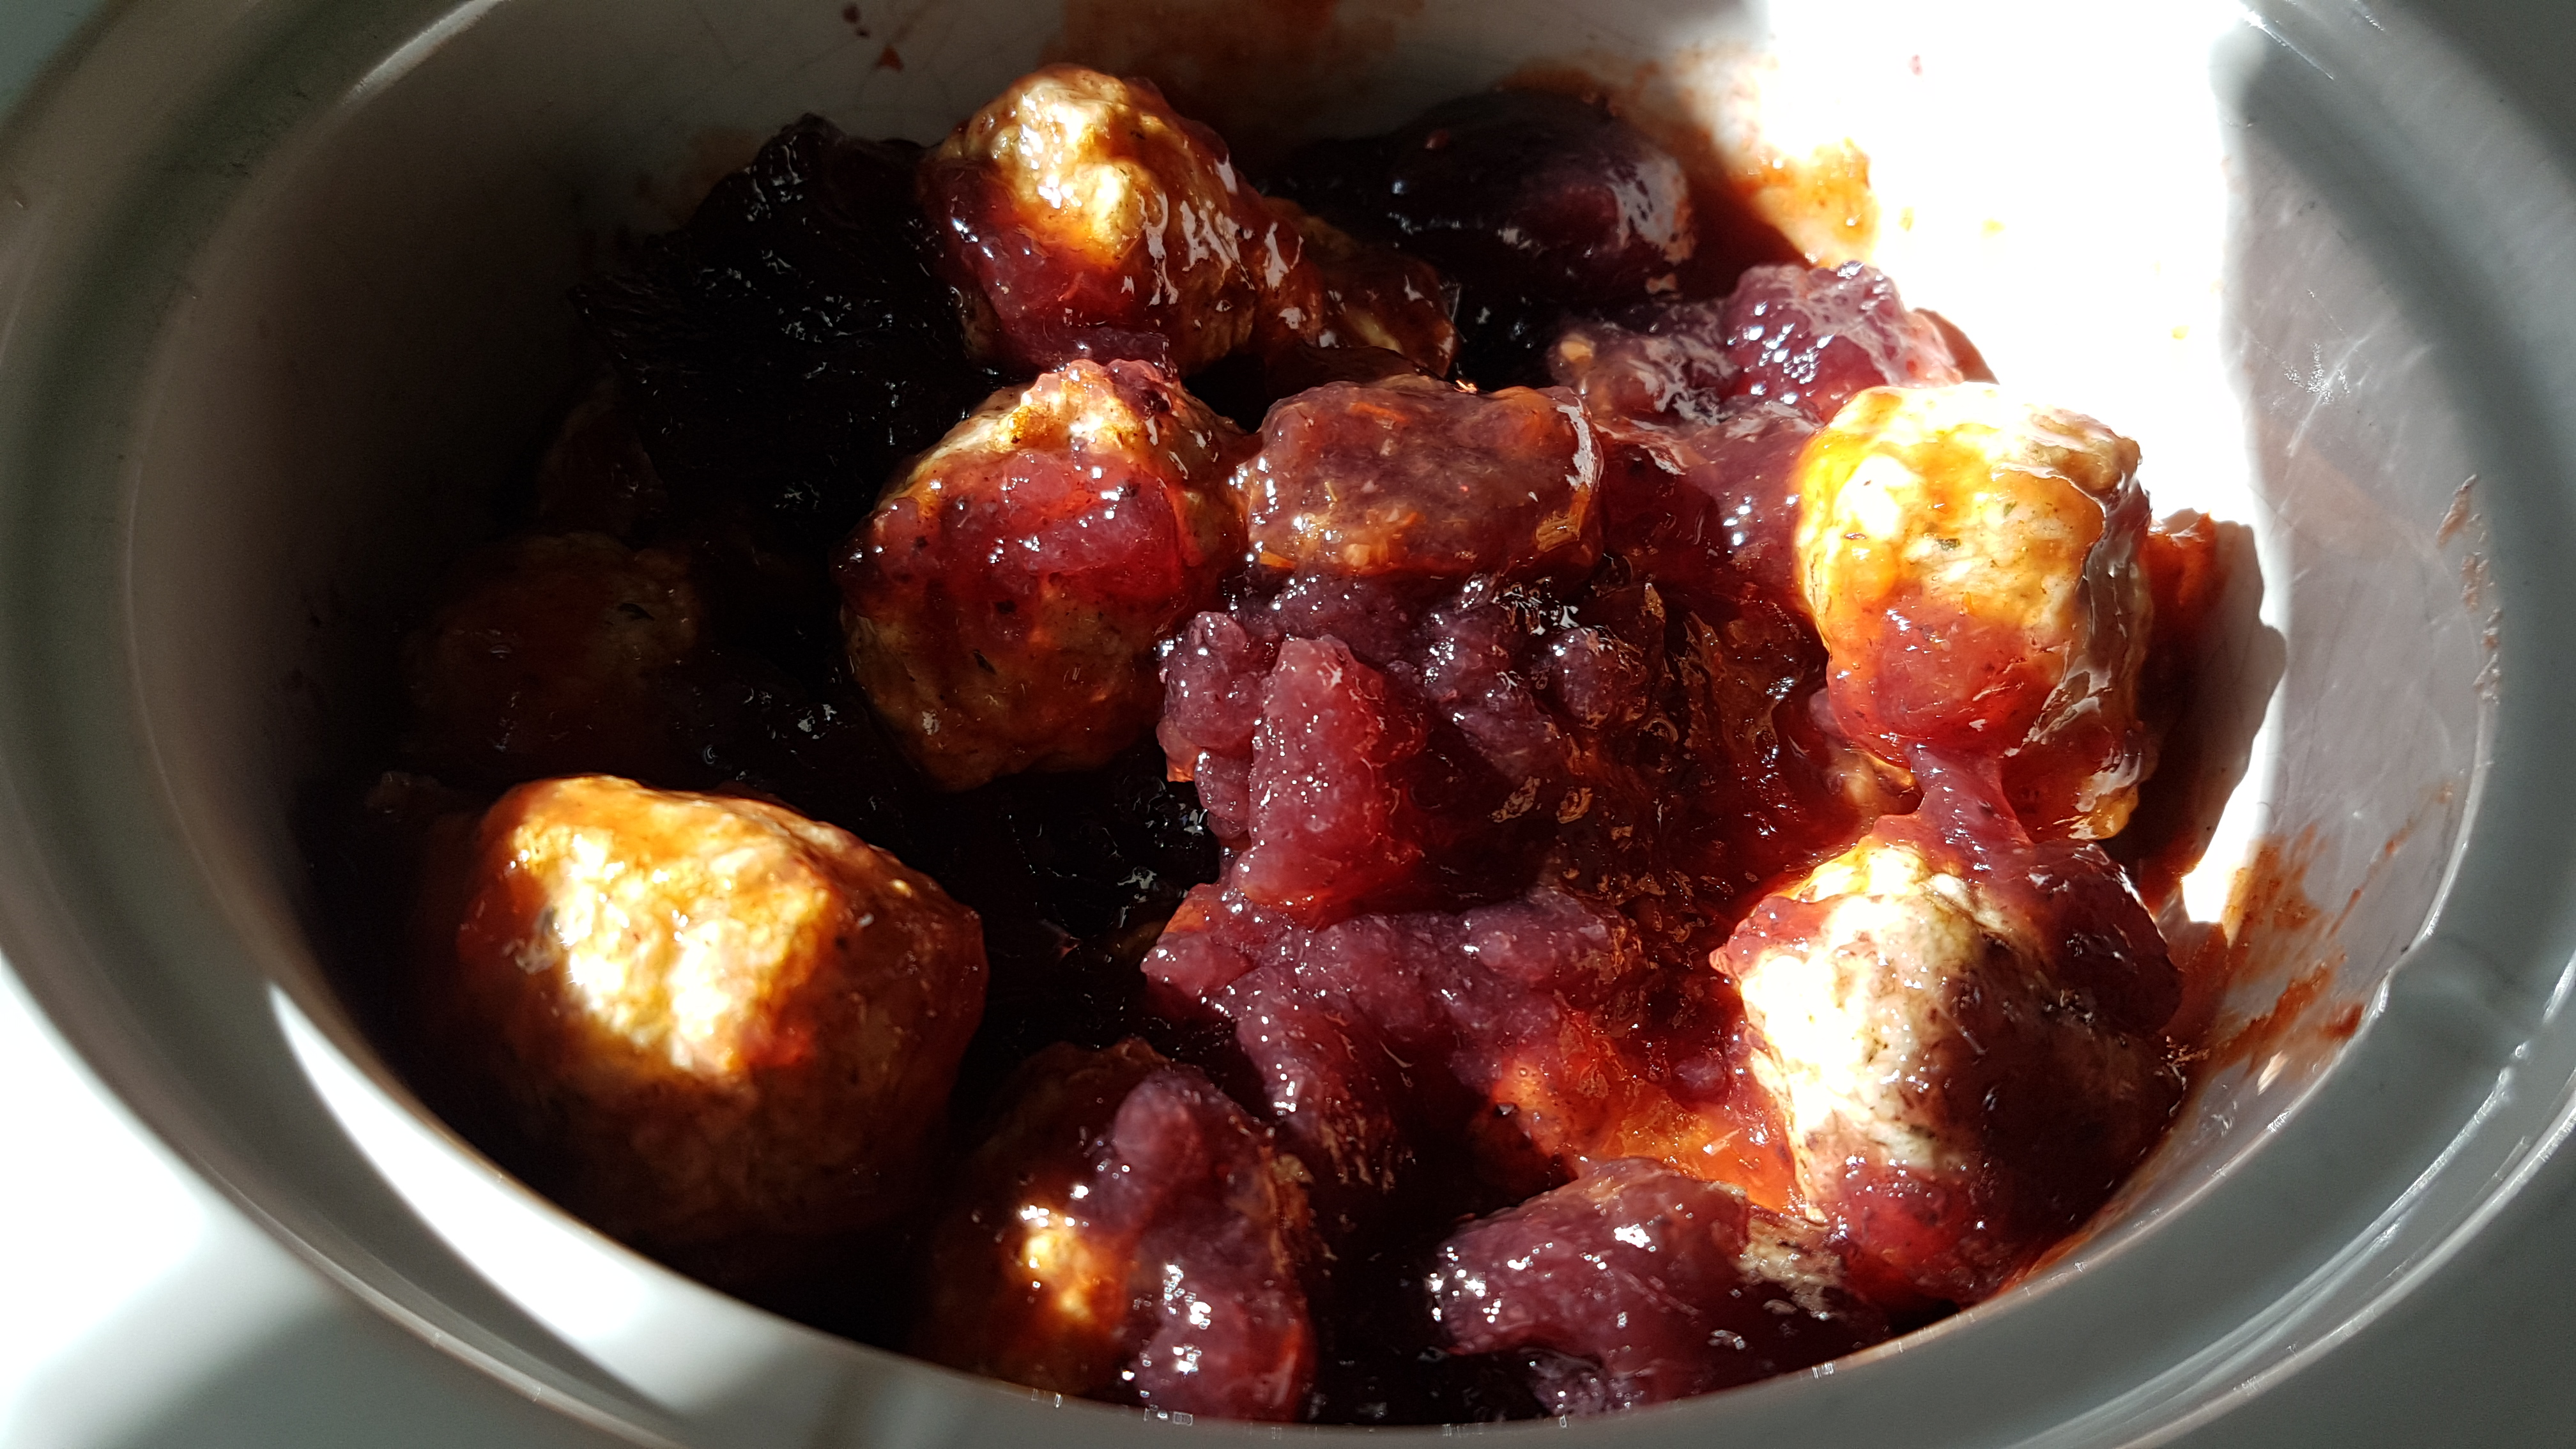
Three ingredients sweet and sour meatballs

Ingredients:

  • 1 jar cocktail sauce
  • 1 bag mini meatballs
  • 1 ~12oz jar jelly (grape or blackberry work best)

Optional: You could add some vinegar for more tang, or some cayenne or other red pepper for a bigger bite.

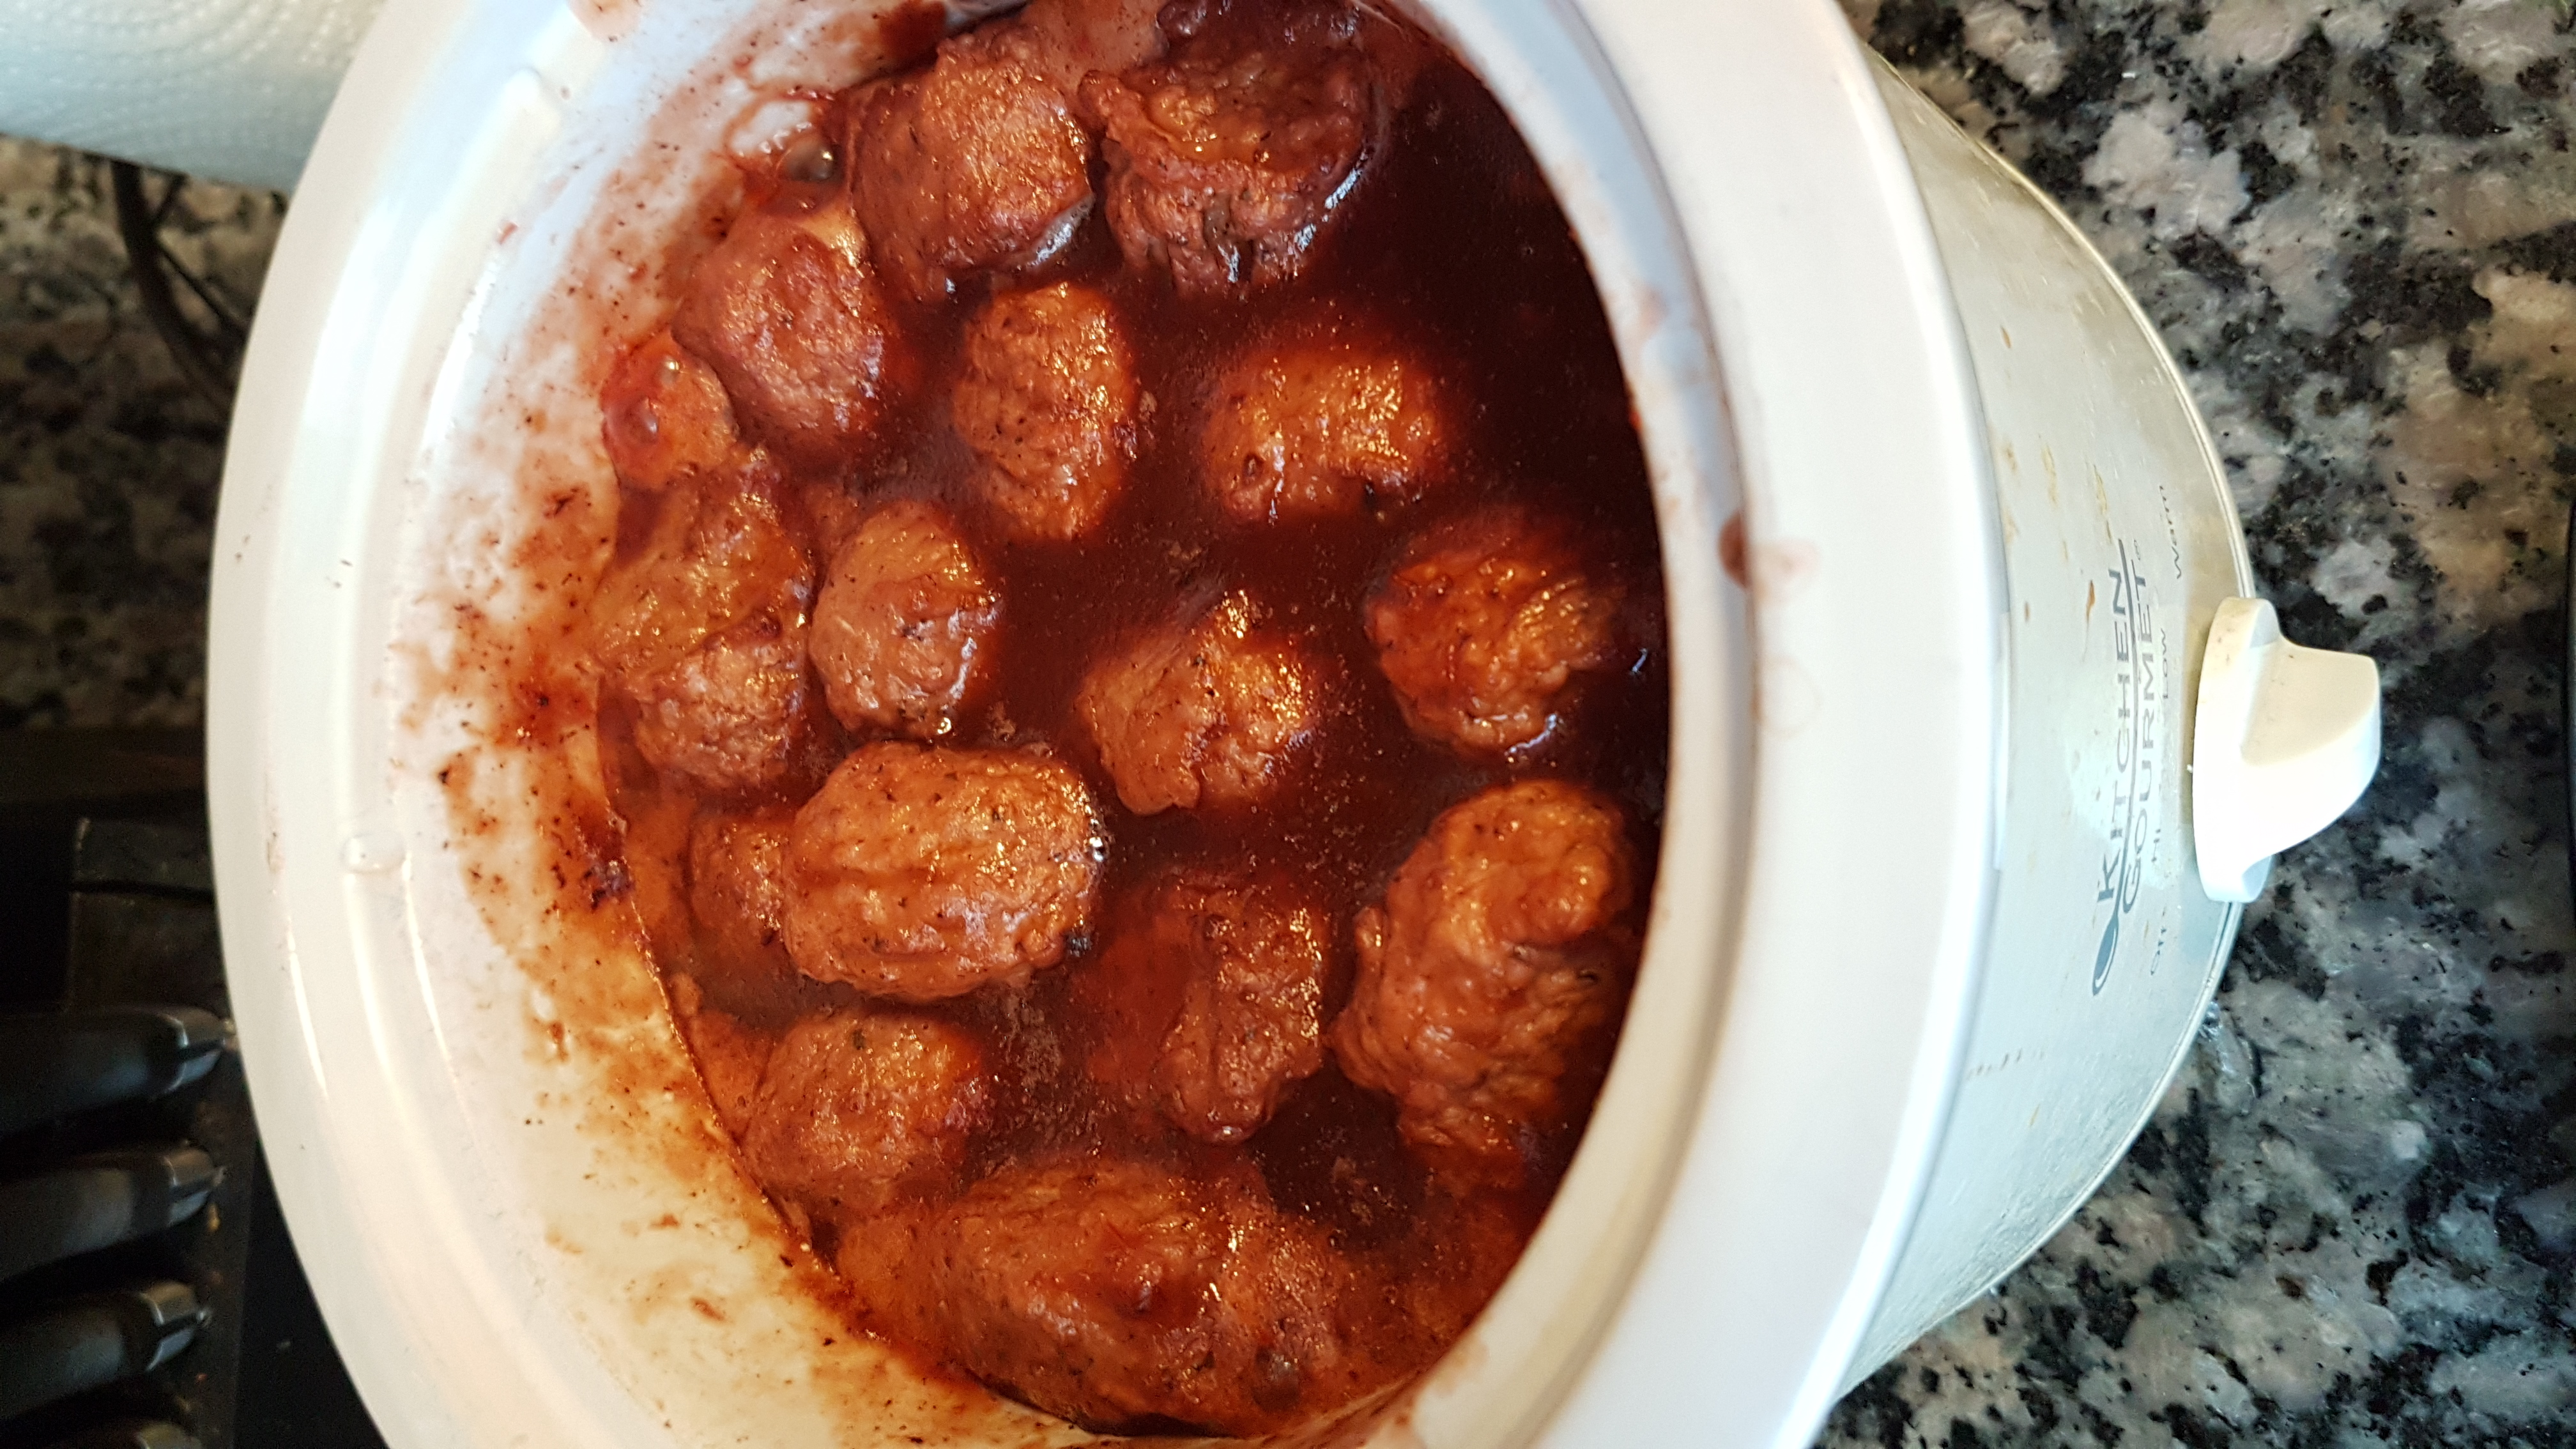
sweet and sour crock pot meatballs

Step 1: Pour the meatballs in the crock pot. I poured them in right from frozen and it works just fine.

Step 2: Pour in the cocktail sauce & jam, and mix well. Turn to low for at least 4 hours, up to 12 hours.

sweet & sour meatballs in a slow cooker

You could serve these on buns, or with toothpicks, or on skewers like a kebab. The flavor is surprisingly complex for just two ingredients!


Save

Save

Ahi Tuna Tacos


GUYS! I just found out my ALDI carries frozen Ahi Tuna steaks, 3 for $4.99.

While I love canned tuna and all it’s uses (tuna salad, tuna puffs, tuna noodle casserole…) this is a whole new level. A tuna steak is like, next-level-fancy tuna! It still has all the heart-healthy omega-3 fatty acids, tons of protein, and trace minerals like magnesium and selenium, with the added benefit of looking like you’re at a 5-star restaurant when you serve it.

grilled ahi tuna steak

Finding these culinary gems called for some fish tacos! I adore fish tacos when they are well done. The combination of delicate fish, tangy crunchy slaw, corn salsa and spicy ranch is just unbeatable in my opinion. And yes, you have to have all those pieces to make it truly complete. But I guess, if you must, you could do something different with the toppings… we can still be friends.

Grilled ahi tuna steak

I didn’t even marinate or spice the fish, letting it’s true flavor shine and balance out the other toppings. This recipe makes enough for 3 hearty tacos, adjust as needed based on how many tuna steaks and how many servings you have.

Ingredients:

  • 3 tuna steaks
  • 1/4 cabbage, shredded
  • 1 tbsp mayonnaise or Miracle Whip
  • 1 tsp lemon juice
  • Salt & black pepper
  • 1 avocado, diced
  • 1 cup corn
  • 3 tbsp ranch
  • Chili powder
  • 3 tortillas

Ahi tuna taco with slaw and corn and avocado salsa

Step 1: Combine the corn and the diced avocado. Slice the cabbage thinly or shred it. Mix with the mayo and lemon juice and spices. Let sit while you cook the tuna.

Step 2: Grill the tuna steaks on an actual grill, or use a panini press/George foreman, or just cook on the stove top by frying in a greased pan 3-4 minutes per side, until just browned on the outside and still slightly pink in the middle.

ahi tuna taco with black beans and rice

Step 3: Cut or flake the tuna and place on the tortilla. Add a scoop of the corn and avocado, a spoonful of slaw, and a tbsp of ranch. Sprinkle the chili powder on top, roll up, and enjoy!

This is such a fresh, flavorful combination, I could eat these every week! And thanks to ALDI I probably can now. Just take out however many fillets you need the night before, and let it defrost in the refrigerator. You could also split up the steak into 3 smaller corn taco shells. Serve with a salad, fries, or beans and rice.

These also make a great lunch, grilled and flaked over a big green salad. That’s exactly what I did with the 3rd fillet that we didn’t use for dinner.

20170131_185623


[amd-zlrecipe-recipe:66]

Save

Save

Save

Save

Save

Save

How to: Cook Dried Beans in a Slow Cooker


One of my all-time-favorite money-saving appliances is the handy dandy slow cooker. It is amazing at taking tough (cheap) cuts of meats and slow cooking them to tasty perfection. It is great for making wicked frugal soups and stews. It makes dinner a breeze on crazy weeknights, keeping me from just ordering a pizza or take out. And it allows me to make staple items, like beans, for literally pennies per serving.

Beans aren’t usually listed on “top 10s” of superfoods, but I think they should be. There are so many kinds, black, pinto, navy, chickpea, green… And they are a fantastic source of protein for a very pocketbook-friendly price, I can usually find them about $1 per pound. And since beans plump when you cook them, you get much more than one pound out of that bag. If you find a good sale or buy in bulk, that price drops even lower. You can’t beat that in a can!

However, you also can’t beat the convenience of canned beans. Just sitting on a shelf, ready and waiting for a taco Tuesday or a last-minute decision to make minestrone. All you need is a can opener and you’re in business.

But you’re paying a premium for that convenience.

Someone else took the time to soak and cook dried beans ahead of time, and stick them in that can. They also may have chemicals or preservatives or flavorings or way too much sodium in the can. When you cook your own, you are in control of all these things.

So here’s the big secret: You can cook your own dried beans at home, with just a few minutes of effort, and have delicious beans ready to toss into whatever any time! For, like, a dollar!

Enter the slow cooker.

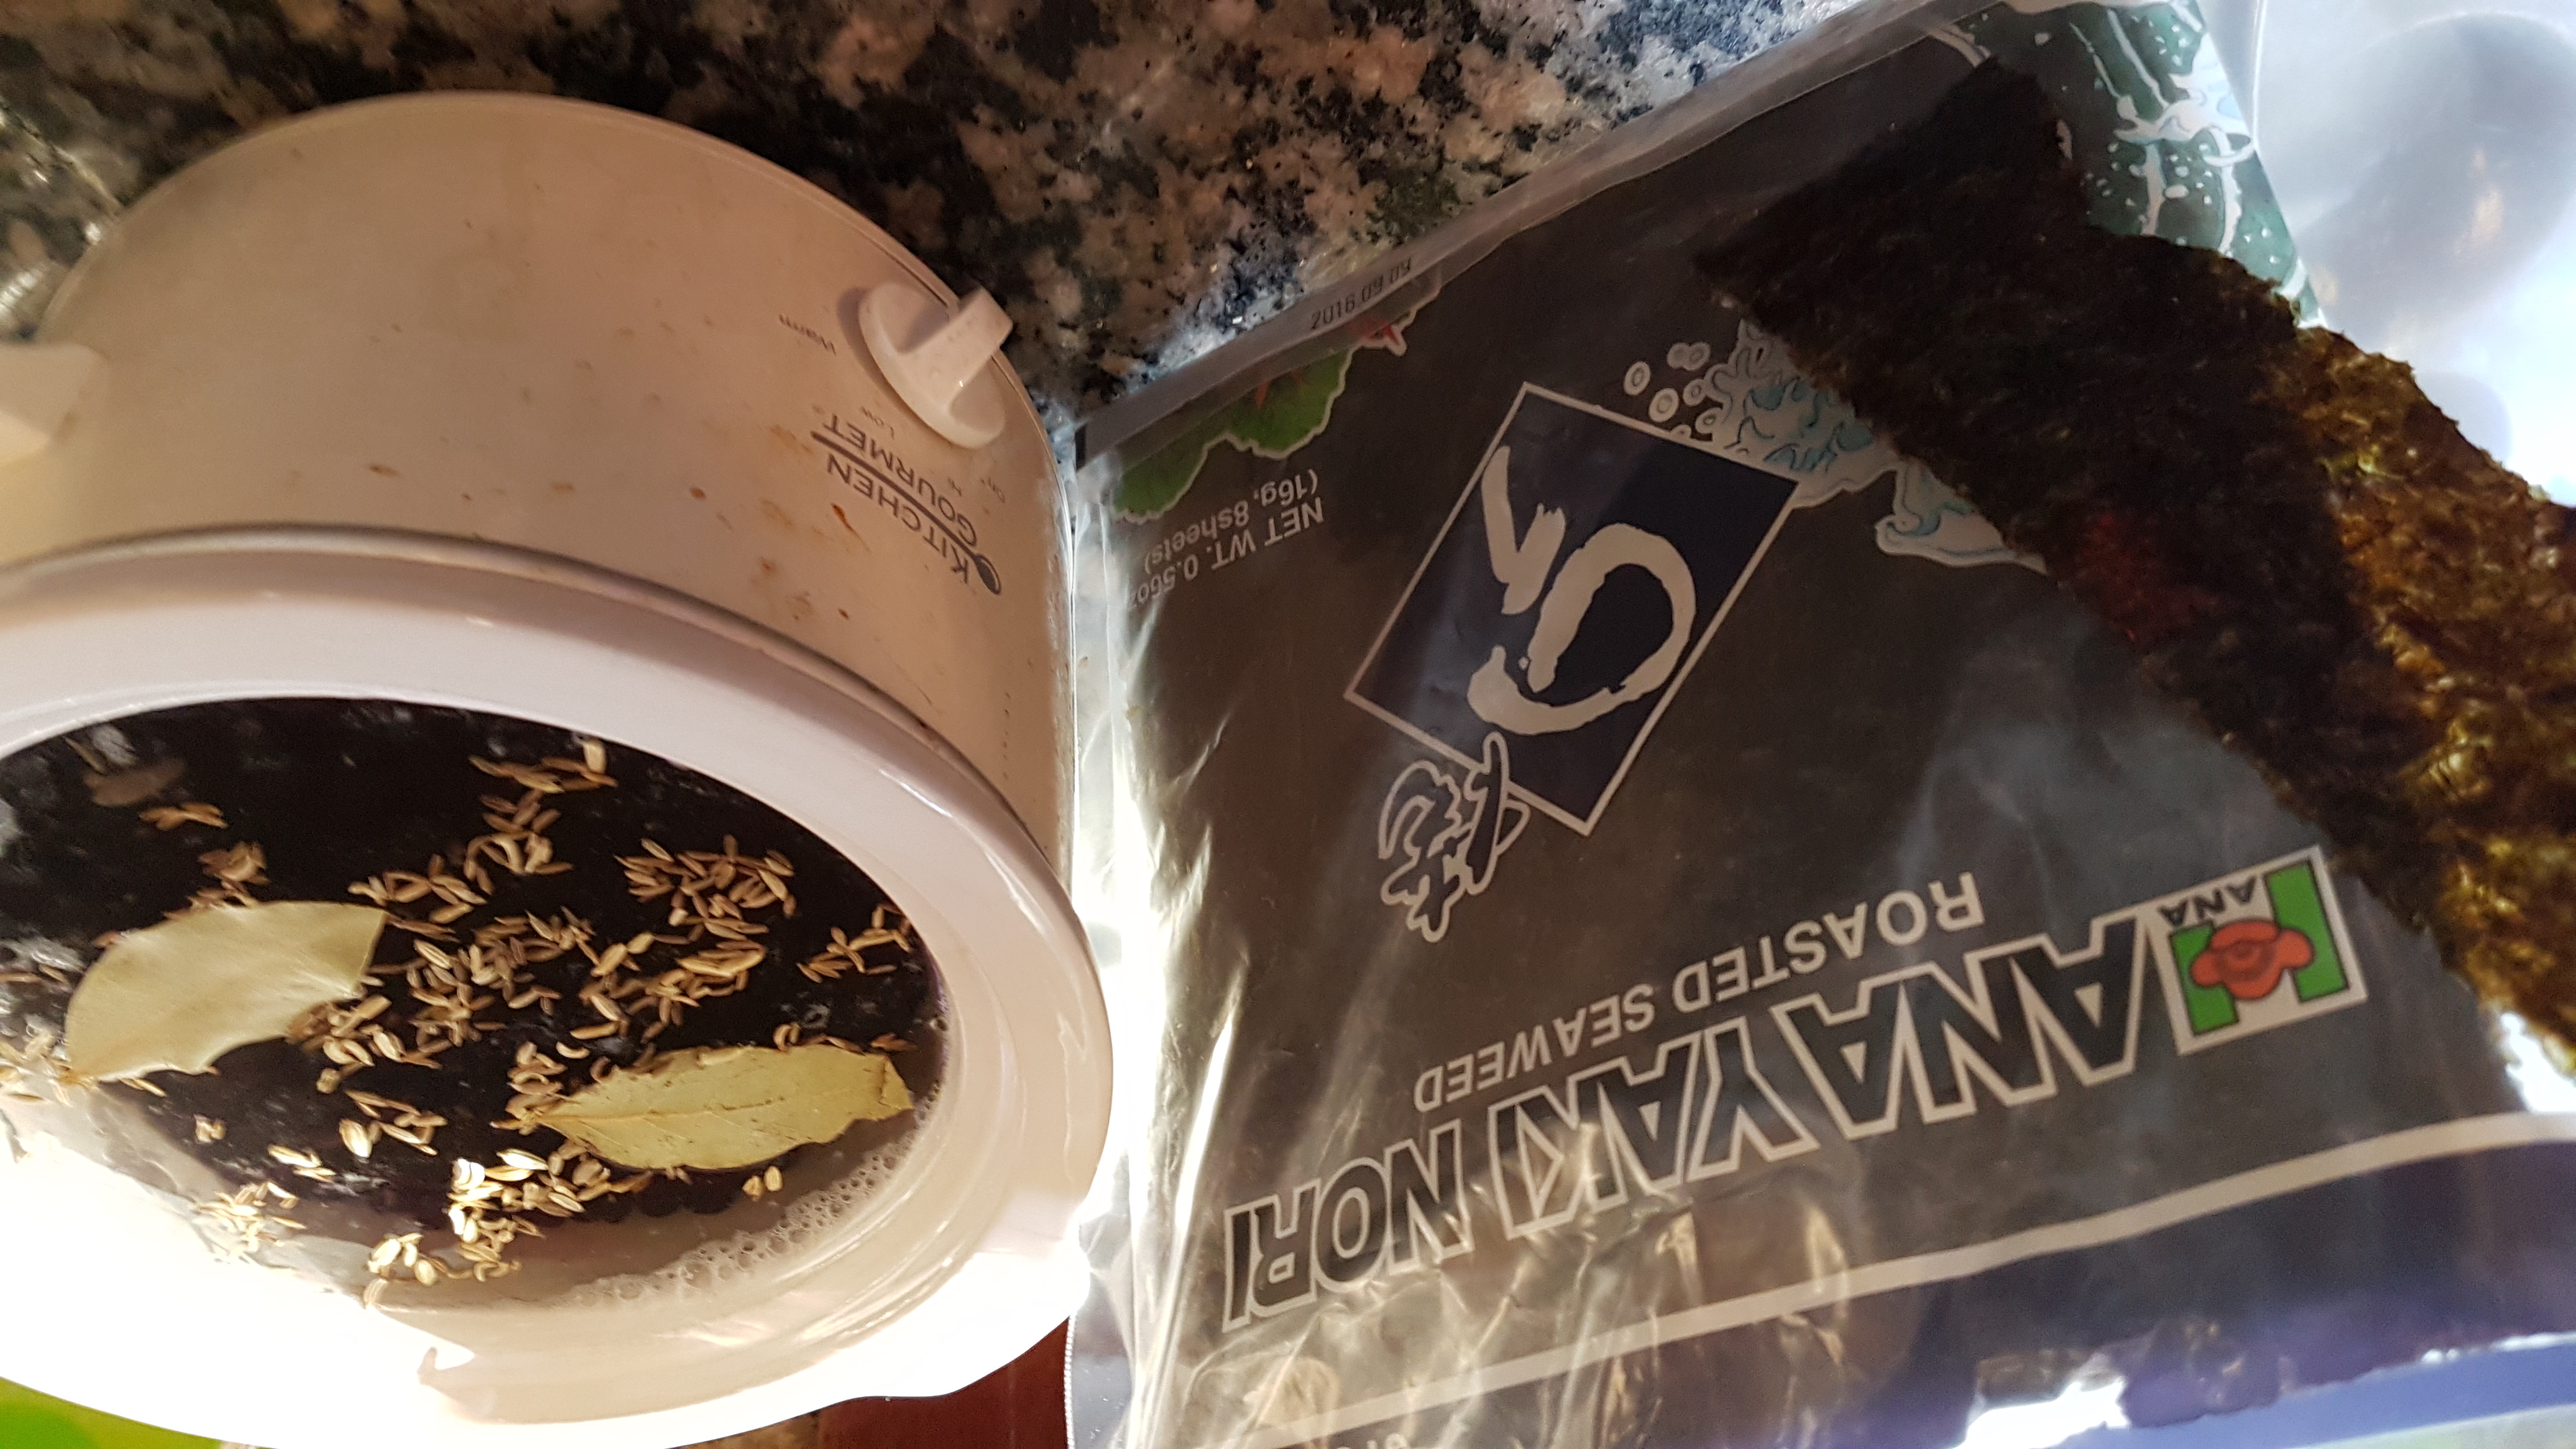
crock pot black beans with nori

Almost every Saturday, I toss a half pound or a pound of either black, navy, chickpeas, or pintos into a slow cooker with water to cover them, and let them soak overnight. Then on Sunday, I change the water and add some spices and let it simmer all day. The finished product gets canned, separated by cup into individual bags and frozen, or put in the refrigerator for use that week.

That way I have a stock of frozen beans ready at a moment’s notice, and fresh beans for recipes whenever I want! Hello, black bean and egg burritos, white chicken chili, tortilla soup, or red beans and rice anytime.

Ingredients:

  • 1 pound beans
  • Water to cover
  • ~2tbsp vinegar (any kind)
  • Spices recommended: 2 bay leaves, 1 tsp fennel seed, onion, chili powder, or oregano. Choose 1-2 you like and see what happens
  • Optional: 1 strip of seaweed

Step 1: Cover your beans with water, and let soak 6 hours or overnight. Drain, and cover again. Cook on high for about 4-6 hours, or low for 8-10.

Slow cooker pinto beans canned

Step 2: You can keep the cooking liquid, or discard, up to you. I usually keep it, especially when canning or freezing the beans, and then drain just before using in recipes.

The beautiful thing is that now you have this super-cheap base to use to make your own refried beans, hummus, (did you know you can make hummus with black beans too!), vegetarian burger patties, or you can can them for later. (By the way, do use a pressure canner, or keep them in the refrigerator. We don’t want botulism now do we?)


[amd-zlrecipe-recipe:65]

Save

Save

Save

Save

Save

Make Ahead Egg Muffins


Usually, my morning routine looks something like this:

6:10 – hit snooze
6:17 – hit snooze
6:24 – finally get up, go make coffee
6:25-7:15 – enter a black hole in space and time
7:16 – realize I’m gonna be late if I don’t move it
7:17-7:20 – pack lunch, maybe breakfast
7:21-7:30 – run out the door and pray for light traffic

Now, I don’t know what your mornings are like. But if you’re anything like me, you like your sleep and don’t have time for a long and leisurely brekkie every day. And if you do, good for you! You can still use this quick-and-easy make ahead recipe and then have more time for you in the AM.

Make ahead egg muffins in muffin tin

These egg muffins are so simple, and you make a dozen at once. That way you can put 2-3 in baggies and refrigerate or freeze. Then breakfast all week is only a push of the microwave button away! You can scale up to feed a big family, or even make just one serving by mixing 2 eggs and desired ingredients in a coffee mug and microwaving. (Didn’t know that little trick? Oh yeah, it’s the best.)

You can also customize it to your taste preferences. Anything you would normally eat with or in scrambled eggs you can probably adapt to this recipe. Try sausage, or bacon, or ham. Vegetarians, this is a blank canvas! Add zucchini, shredded carrots, sweet potato, broccoli or cauliflower. And cheese is optional, but highly recommended!

Butter mushrooms and onion

Ingredients (makes 12 egg muffins):

  • baker’s dozen (13) eggs
  • 1 med onion, diced
  • 1 pint mushrooms
  • 1/2 stick butter
  • 1 cup raw spinach
  • Optional: shredded cheese, breakfast meats, other veggies

butter and onions in pan

Step 1: In a pan over medium heat, add the butter and diced onion. Cook 10-12 minutes, stirring occasionally, until onion becomes soft and see-through. Pre-heat the oven to 350, and spray a muffin tin really well with cooking oil. (Stuck, baked-on egg is the worst.)

scrambled egg and greased muffin tin

Step 2: Add the diced mushrooms, and cook another 5-7 minutes, until softened. You can add a few tbsp water or chicken stock if they seem to be sticking or burning. Just before pouring into the muffin tin, add the spinach to wilt.

scrambled egg in muffin tin and eggs

Step 3: Break all the eggs into a bowl, and whisk violently for a minute or two. Mix in the cooked onion, mushroom, and spinach. Pour into the muffin tins until 2/3 full; leave a little room because the egg will puff up as it cooks.

make ahead egg muffins with cheddar cheese

Step 4: If desired, sprinkle with shredded sharp cheddar or whatever cheese you like. Bake at 350 for 25-30 minutes, until egg is fully cooked. Watch carefully at the end so that it doesn’t brown or burn.

I’d recommend letting these cool for a few minutes, then removing to a different plate or container quickly. You don’t want the egg to set and harden in the tin. It’s so easy to whip up a batch of these on the weekend, and you can even mix up the mix ins to have tons of options every day.

As for the cost? A dozen eggs is .99 – 1.29, or 4.50 for organic cage-free. Depends greatly on what you use to mix in, but the cost for an onion (~.50), mushrooms (.99 on sale), butter (maybe .50), and spinach (~.25 for 1 cup) for me comes to about 2.25. This makes 12 muffins, and I generally eat 2 for breakfast, so 6 servings. Let’s estimate high:

4.5 + 2.25 = 6.75 / 6 = basically just barely over a dollar per day, and that’s if I use the fancy eggs! For plain jane eggs, the cost drops to maybe 50 cents for an awesome breakfast that includes protein, fats, and a serving of vegetables! I can get behind that. I hope you can too!


Last-minute Valentine’s Day meal ideas


So, you want to have a romantic dinner but don’t want to shell out $20 and up? Me too!

With Valentine’s Day only 2 days away, you may be thinking about having a special meal with a special someone. It doesn’t matter if you’re cooking for yourself, some of your girlfriends or bros, your significant other, your parents, your dog, whatever, cooking a meal is always an act of love. An act of survival too, sure, but also you’re taking the trouble to turn raw ingredients into something edible.

Even if it’s a box of easy mac, or as fancy as a seven course meal, the person enjoying the finished product knows a little dash of love went into it.

And while a romantic dinner out on the town is nice every now and then, there are several advantages to cooking at home. One, you get to control the ingredients that go into your food. Restaurants use all kinds of ingredients you might not want to know about: stabilizers, emulsifiers, preservatives, MSG, salt and sugar by the tablespoon. At home, you know what is going into your food, and thus into your body.

Two, you can control portion sizes. There is a ton of research out there, not to mention if you’ve been around 2-3 decades or more you can see it for yourself, pointing fingers at ballooning portion sizes as a contributor to the obesity epidemic. When you eat out, you want to “get your money’s worth”, and restaurants know that giving you more food but with cheaper, less healthy ingredients, is good for their bottom lines. Terrible for your bottom, however, which will expand along with the size of the plate.

And finally, it is far cheaper per meal to cook at home. If you go out to a moderately priced chain, you are hard-pressed to find a full meal for less than $15 for dinner. Then add in tip, time, and gas money to get there. If you go out to a nicer restaurant or a place with a prixe-fixe menu, you are probably looking more into the $50 per person range. Restaurants know people want a special experience for Valentine’s Day, and take advantage by making fancy looking and sounding menus and tripling the prices.

Why not have just as special a meal, in a quiet place where you can actually hear each other talk, with no rush because the place wants to turn over your table? That’s right, I’m talking about your home!

Oh, and yes, you do have to do your dishes unlike at a restaurant. But you know what? That can be part of the experience if you know your dining partner well. Make it into an assembly line as you wash and dry together, laughing and maybe splashing each other throughout. Or tag-team dishwasher loading, then curl up on the couch with a good movie while it runs. You can make even chores fun if you try!


And now for the potential menu!

Below are a wide range of recipes, each will take you less than an hour, and I specialize in recipes that are affordable and simple. You won’t find more than 10 ingredients, and most of them you likely already have on hand.

Choose a few things that you know how to make, or know you will enjoy eating, and make some magic happen.


Appetizers – having multiple courses helps spread the meal out, giving you time to talk to your dining partner and bond. Appetizers don’t have to be complicated, give one of these a try.

Main course – even if you think you can’t cook, you should give it a try! Start with something very simple, and give it a test run today. Then you may find some ways to tweak it or make it better or easier. Or just jump in with both feet, what’s the worst that can happen, you order a pizza later?

Dessert – everyone loves dessert! You could even make your entire meal just a dessert buffet! But I’d recommend choosing just one thing you feel you can make, then sprinkle in an extra cup or two of love, and enjoy it.

Drinks – for adults and under-agers alike, a special drink makes a memorable addition to a special meal. You don’t have to get crazy with dozens of ingredients and multiple steps. Even something as simple as adding thinly sliced citrus to a glass of water can elevate the everyday to the special day.


Last Minute Apps & Snacks


So, rumor has it tonight is some big sportsball thing…

Just kidding, of course as an American I’m aware of what is basically a national holiday, the Super Bowl! This year we even get back Roman Numerals (remember those things from history class? dare you to remember what more than 3 letters stand for…)

SuperBowlLILogoThis is a little ironic for me this year, as I just moved from CT (New England) to NC (the South, like Atlanta). While I could root for either, I think I like the Falcons’ colors better TBH.

0

Whether you’re hosting or attending a party, you may not have had time to fully prepare, or you may have realized you have way more guests than you have chicken wings. In that case, you could panic and spend this week’s paycheck at the deli or getting a pizza…

OR you could try any of these super-simple app and snack ideas, each guaranteed to cost <$10 and take minutes to put together! I know which one I’d go with.

*Twice baked potato skins: Rinse and poke holes in a dozen medium potatoes. Bake at 350 for 45 min – 1 hour, until soft. Cut in half, scoop out the insides into a bowl and mash with some cheese or milk. Load back into skins, top however you want, and bake open-faced for another 15- 20 minutes. You could even build a “pick-your-own-toppings” bar, or let them keep warm in the oven until needed.

*White bean dip: Open a can of white beans, drain. Puree in a blender, and add garlic salt and lemon juice to taste, slowly pour in olive oil until you get your desired consistency. Serve with pita chips and fresh veggies.

*Bruschetta: Slice Italian bread thinly, top with diced tomatoes and a drizzle of olive oil and/or balsamic vinegar. Bake at 350 for 15ish minutes, sprinkle with basil, parsley, and/or garlic salt.

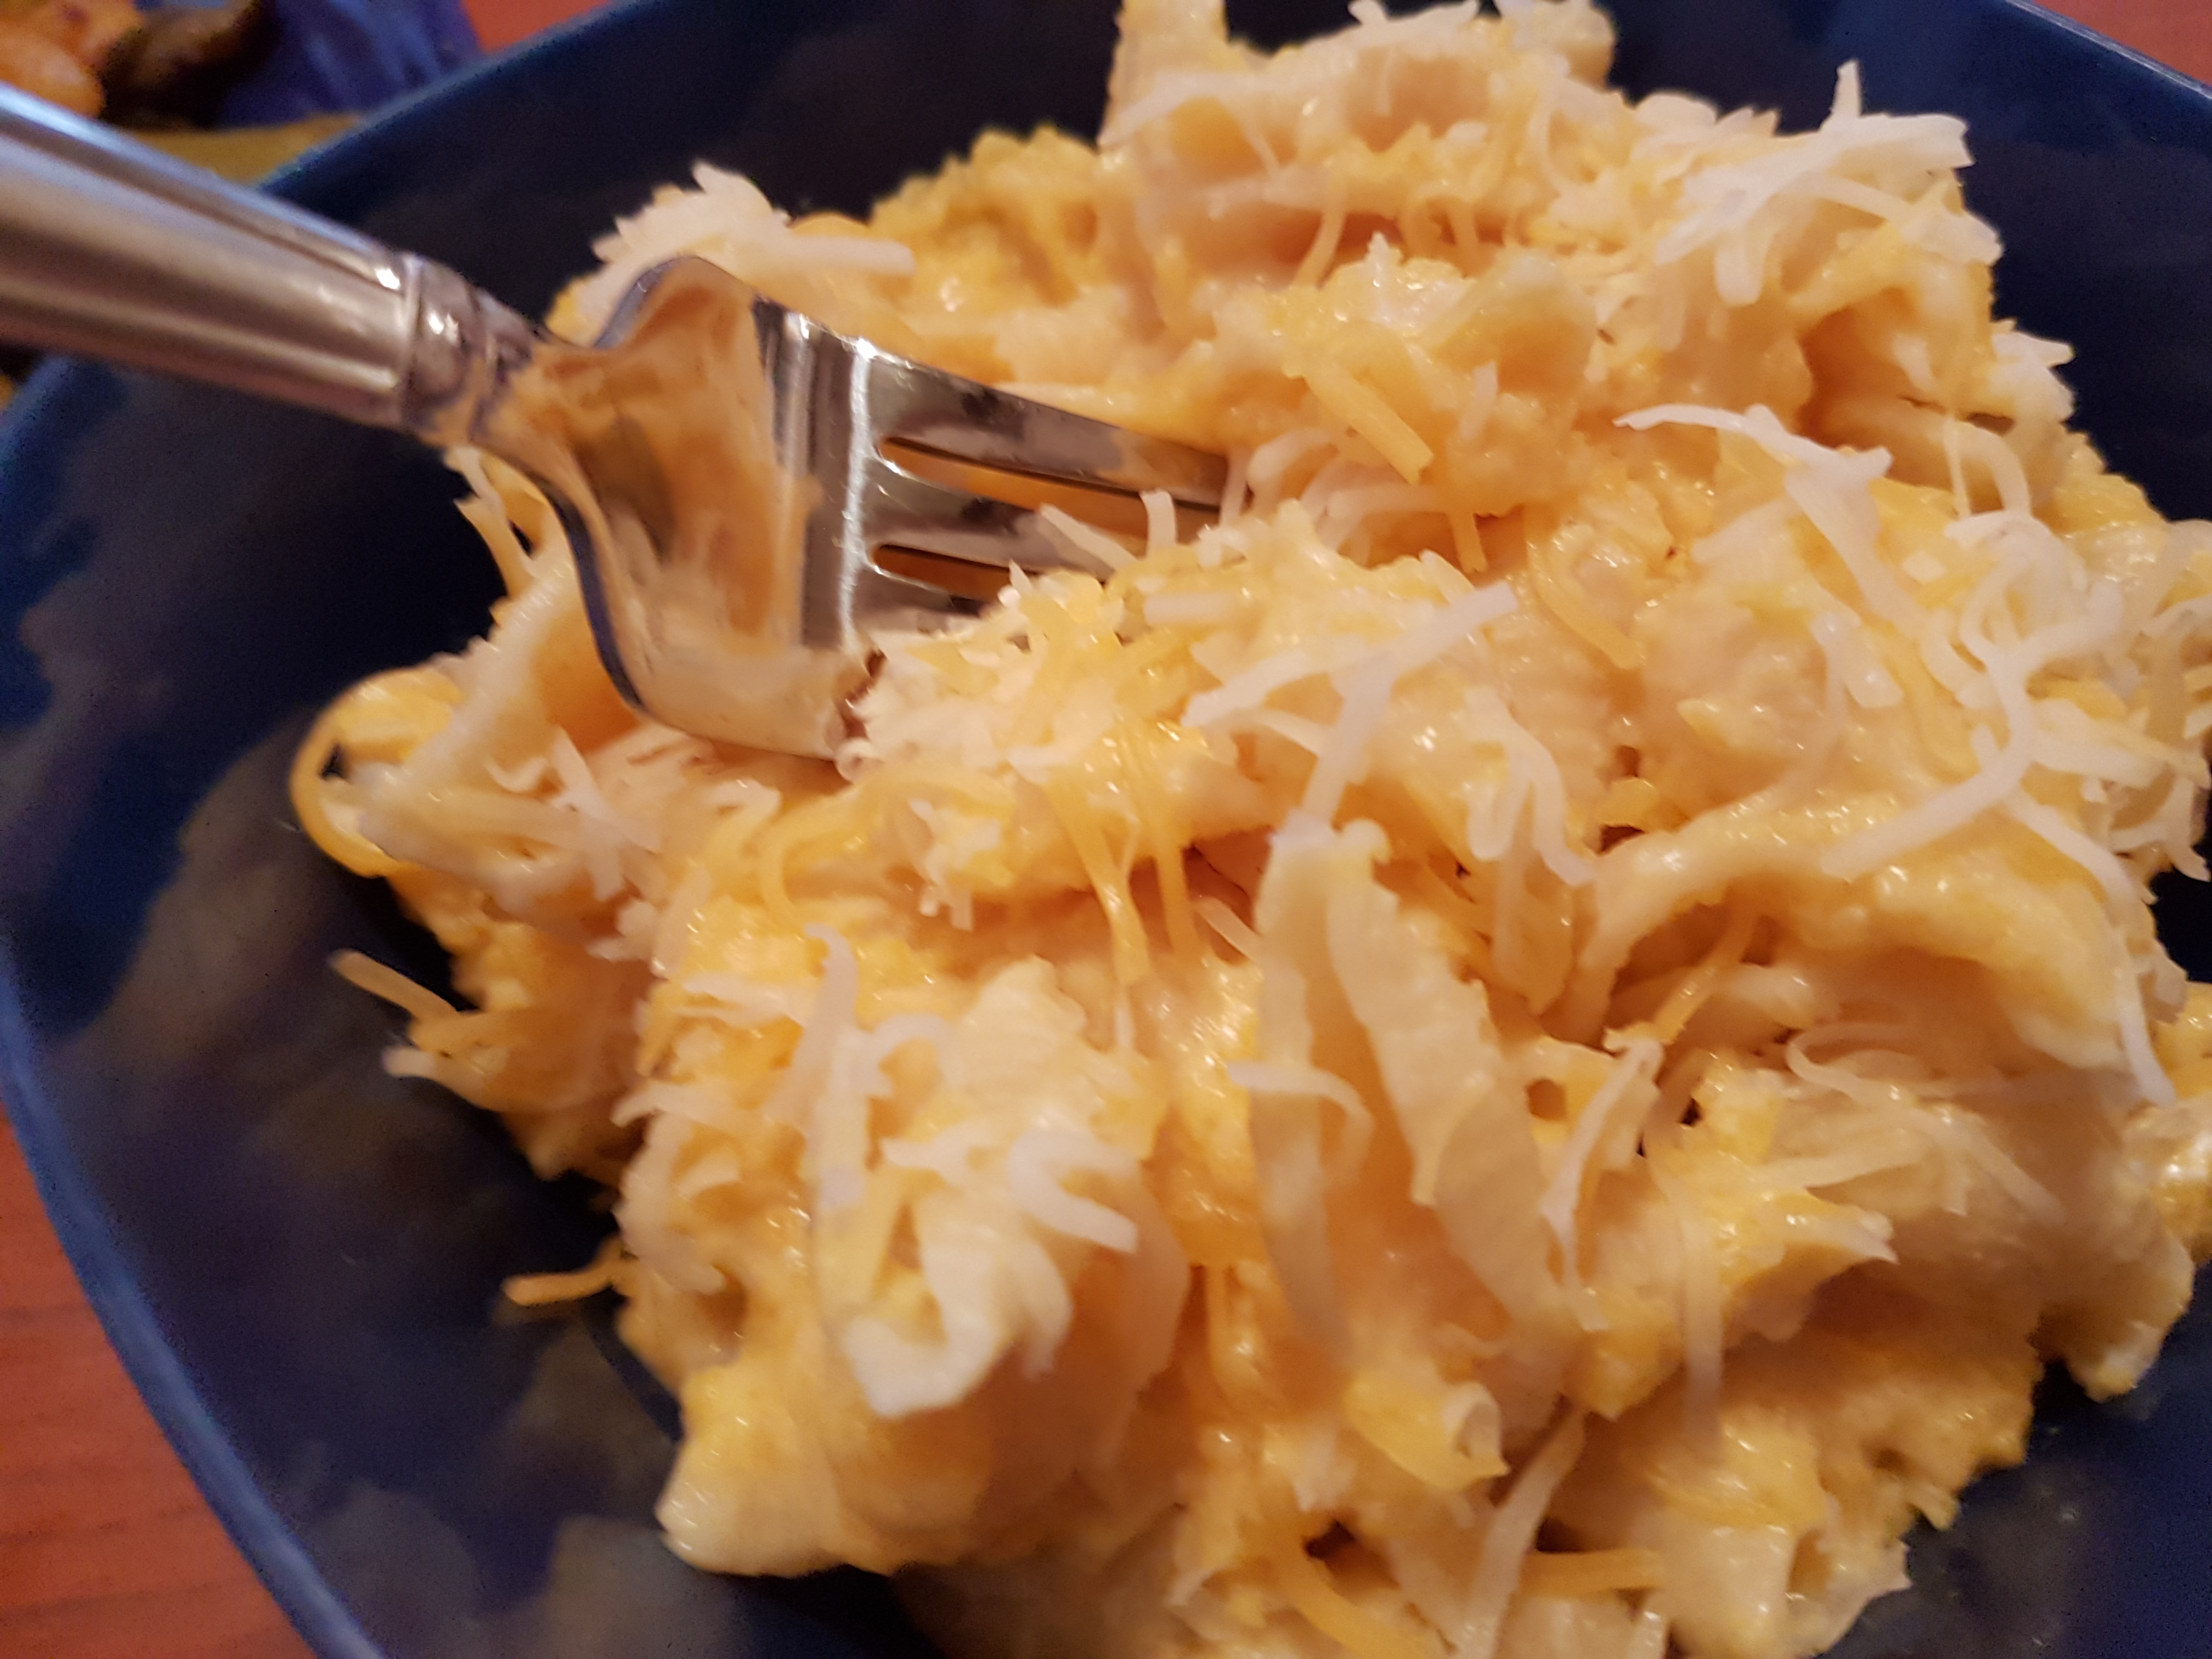
*Mac-n-cheese bites: Make a box of mac n cheese, then scoop into a greased muffin tin. Sprinkle with bread crumbs or crushed crackers, bake at 350 for 20-30 minutes. Portion control!

20160920_183456

*Bacon-wrapped asparagus: Take slices of bacon and wrap around 2-3 bunched asparagus spears. Lay on a pan and bake in the oven at 350 for 20-30 minutes, until bacon is crispy but asparagus is soft.

*Football deviled eggs: Make deviled eggs as normal (hard-boil a dozen, cut in half, take out the yellows. Mash with some mayo and mustard, fill back into the white halves) but then make them cute with football “laces” made from chives, black olives, etc.

*Caprese salad: Super simple, just layer sliced fresh mozzarella and tomato with some basil leaves, drizzle with olive oil. Bonus points if you get baby mozarella and grape tomatoes and put them on a skewer!

20160724_074011

*Quesadillas! Who doesn’t love quesadillas, they are a perfect hand-held food. Just take 2 tortillas, fill as you like with beans, avocado, guac, hummus, any kind of cheese, and fry on both sides until golden. Slice into quarters and serve with dips and toppers.

*Crock Pot Meatballs! There are so many options, but the best ones are just toss-it-in-and-wait. Swedish Meatballs are a classic, of course you could do regular tomato sauce and serve with thick hoagie buns, or try sweet and sour for an Asian twist.

IMG_2601

*Loaded nacho bar: Open a bag of chips and dump into a big bowl. Line a table with smaller bowls of beans, salsa, guac, sour cream, sliced olives, shredded lettuce, cheese, etc and let your guests customize to their heart’s content.

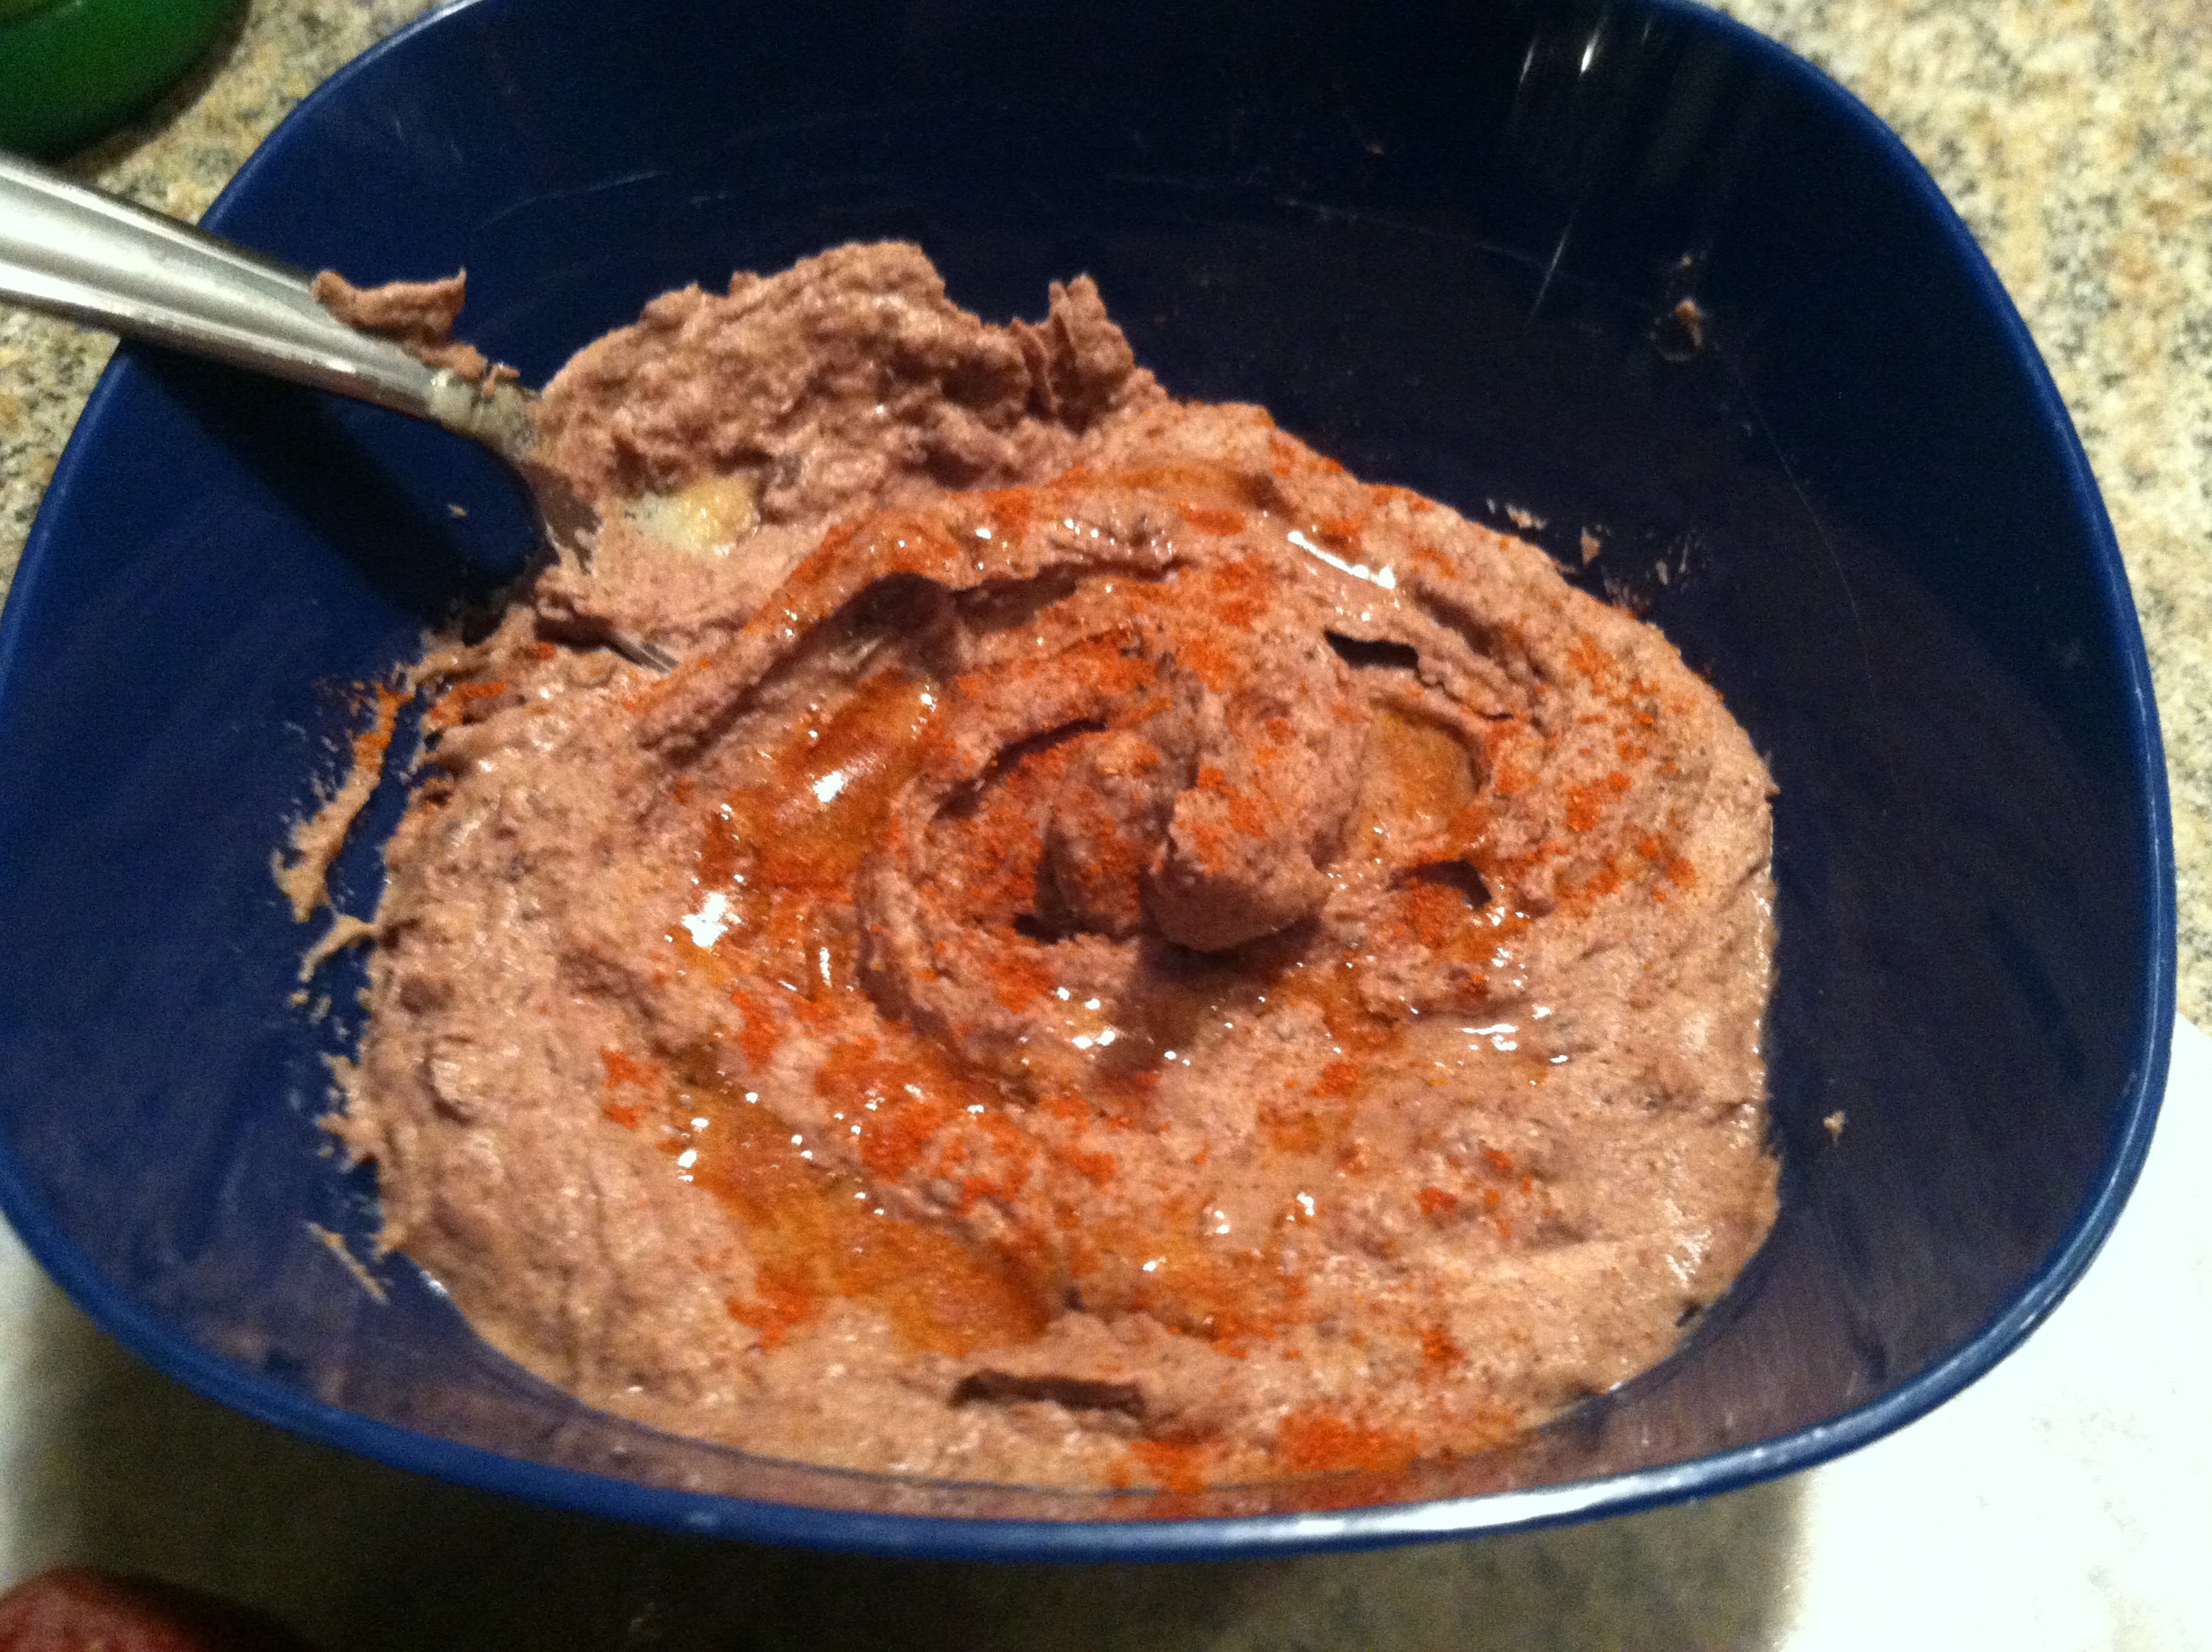
*Black bean hummus: open and drain a can of black beans. In a blender, combine with a clove or 2 of garlic, 2 tbsp peanut butter (yup you read that right), and olive oil. Whir until smooth!

IMG_9481

*Spinach Artichoke Dip: there are so many variations, but I’d go for any crock pot version. This way you can toss all the ingredients in, turn it on high when you arrive, then by halftime that dip is ready to keep the party rockin when all the wings are gone

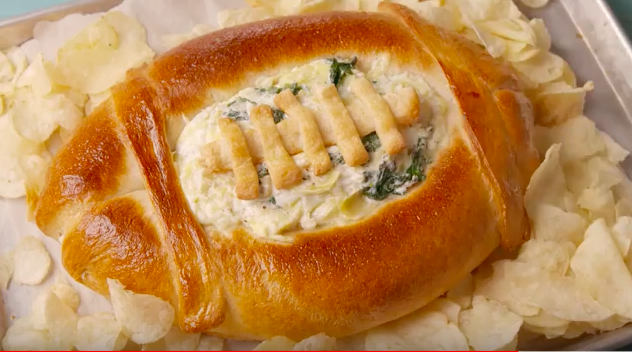
*Football pepperoni roll pinwheels: roll out a tortilla, cover with a thin layer of pizza sauce, mini pepperoni, and cheese. Roll tightly, press down to make an oval shape. Cut into slices, lay on the side, and draw football laces with mustard, sour cream or sliced pepperoni

*Football shaped fritter: these are the cutest darn things, and actually quite healthy! Don’t let the beer-chugging manic shushing everyone know there’s a serving of veggies in there

Vegetable-Pancake-Footballs-Super-Bowl-Recipes-Super-Bowl-Football-shaped-food-and-appetizers-

*Classic cheese or veggie tray: if you have some carrots, celery, broccoli, cauliflower, or radishes, just serve with some ranch dressing or any dip. And if you’ve a brick or chunks of random cheeses, now is a perfect excuse to lay them all out artfully and clean your fridge at the same time

Whatever you make or eat, make sure you enjoy the company. That’s what any party is really all about!

Slow Cooker Enchilada Casserole


Slow cookers are such a blessing to a busy cook! Whether you don’t like cooking, don’t want to spend hours in the kitchen, are feeding just one or an army, slow cookers can make healthy, quick meals a snap. With a small amount of planning, you can have dinner ready and cooking in 10 minutes or less before you run out the door, and come home to a hot, home-cooked meal at the end of the day.

Enchiladas are a favorite in my house, because they are customizable, economical, and delicious! Tortillas are cheap, and can even be made at home, corn or flour, for pennies. You can use chicken, beef, or keep it vegetarian with tofu or beans. And beans are great money savers! Especially if you buy dried, and cook them at home (another thing slow cookers are great at!).

Slow cooker enchiladas

In this recipe, I used burrito-sized flour tortillas, because they happen to be the exact size of my slow cooker. You can use smaller corn tortillas and layer them, or even roll individual enchiladas and pile them up in the sauce. Whatever makes you happy!

20160929_073504

Ingredients:

  • 1 pound ground beef or turkey
  • 1 bell pepper, diced
  • 1 onion, diced
  • 1 can diced tomatoes (or diced whole tomatoes)
  • 1 cup frozen corn (or canned)
  • 1 can black and/or pinto beans, drained
  • 3-4 tortillas
  • 1 jar enchilada sauce
  • Shredded cheese to taste

20160929_073542

Step 1: Brown your ground meat in a frying pan, and drain. Add the pepper and onion, saute until softened. You can add any spices you like here, such as cumin, taco seasoning, chili powder…

20160929_074032

Step 2: Spray the crock pot with cooking spray, if you like. Line the bottom with a tortilla.  Layer on the meat, tomatoes, corn, and beans. Top with sauce, cheese, and another tortilla.

20160929_184954

Step 3: Continue layering 2-3 times, until the crock is full. Top with some more cheese, and the enchilada sauce.

20160929_185000

Step 4: Set to low for 4-6 hours, or high for 1-2 hours. A programmable crock pot is best to ensure you don’t burn it. Cut yourself a nice slice, and enjoy!


Sidenote: If you don’t have a slow cooker, or just want to try something different, do the same thing but in a pie pan or 8×8 pan. Layer all the ingredients, cover with foil, and then bake at 350 for 1 – 1.5 hours. Still an enchilada casserole! You can also then freeze this for re-heating easily later.