All posts by BudgetEpicurean

Long-time student turned young adult with varied interests, mostly food and frugality. Pursuing wealth so I can help others pursue health.

Can you can beans?


As I’ve mentioned in previous posts, I enjoy everything about canning. It is an easy way to save extra seasonal produce before it spoils. It keeps for a very long time with proper storage, so you can be sure you always have food available. It looks pretty on your pantry shelves. It teaches self-sufficiency. And assuming you keep it up all your life and re-use the jars, it can be extremely frugal!

Combine a very frugal hobby/life skill with one of the most frugal foods on the planet, beans, and you have a very happy budget epicurean! Canned beans at my store typically run 50-90 cents for store brand to over $2 per can for fancy organics. When you buy dried beans in bulk, and re-use cans over the years, you can easily get the price per can down to mere pennies.

I love having canned beans in my pantry so I can whip up a quick chili, tortilla soup, or refried beans for tacos or tostadas without having to pre-soak for hours. Though some sources say that not only is pre-soaking not required, but it actually hurts the taste and quality of the final product.

Most vegetables or fruits are safe to can and store. Typically you need to add sugar (for fruit) or acids like vinegar (for vegetables) in order to ensure their shelf-safety. But are beans safe to can at home? And there is also debate over the worthiness of canning beans, since dried take up much less space. But you can’t beat ready-to-go cans for last minute recipes.

Most resources say a pressure canner is an absolute must to kill everything. No one wants botulism. The pressure canner causes high heat and pressure much higher than could normally be achieved inside the canner. This is the only sure way to kill spores, which are able to resist the heat of normal boiling water.

However, what can one do if you don’t have a pressure cooker? Can you still can beans the usual way, with a large pot of water?

Sorta.

Disclaimer: I am not a doctor, health professional of any kind, or nutritionist. I am not encouraging anyone to try this. I am simply relating my own experience.

I had bought a 5 pound bag of pinto beans, but am bad at pre-planning my meals when I get busy. So I would want to make tacos for dinner or something, and be out of canned pintos. I had not soaked the beans, and wanted to eat within the next hour or two, so cooking up the dried ones was not really an option.

I decided to try canning some beans. I do not have a pressure cooker. The reasons I took the chance included: 1) I stored the processed cans in the refrigerator until I used them 2) I used all the cans within a month, presumably too short a time for anything too dangerous.

This site says there are several factors that contribute to growth, including salinity, acidity, moisture level, and temperature. Some strains of botulism cannot grow at low temperatures, while others are able to, if slowly. So, for science.

Ingredients:

  • 1 pound dried beans
  • Lots of water
  • 2 tbsp salt
  • 4 tbsp vinegar

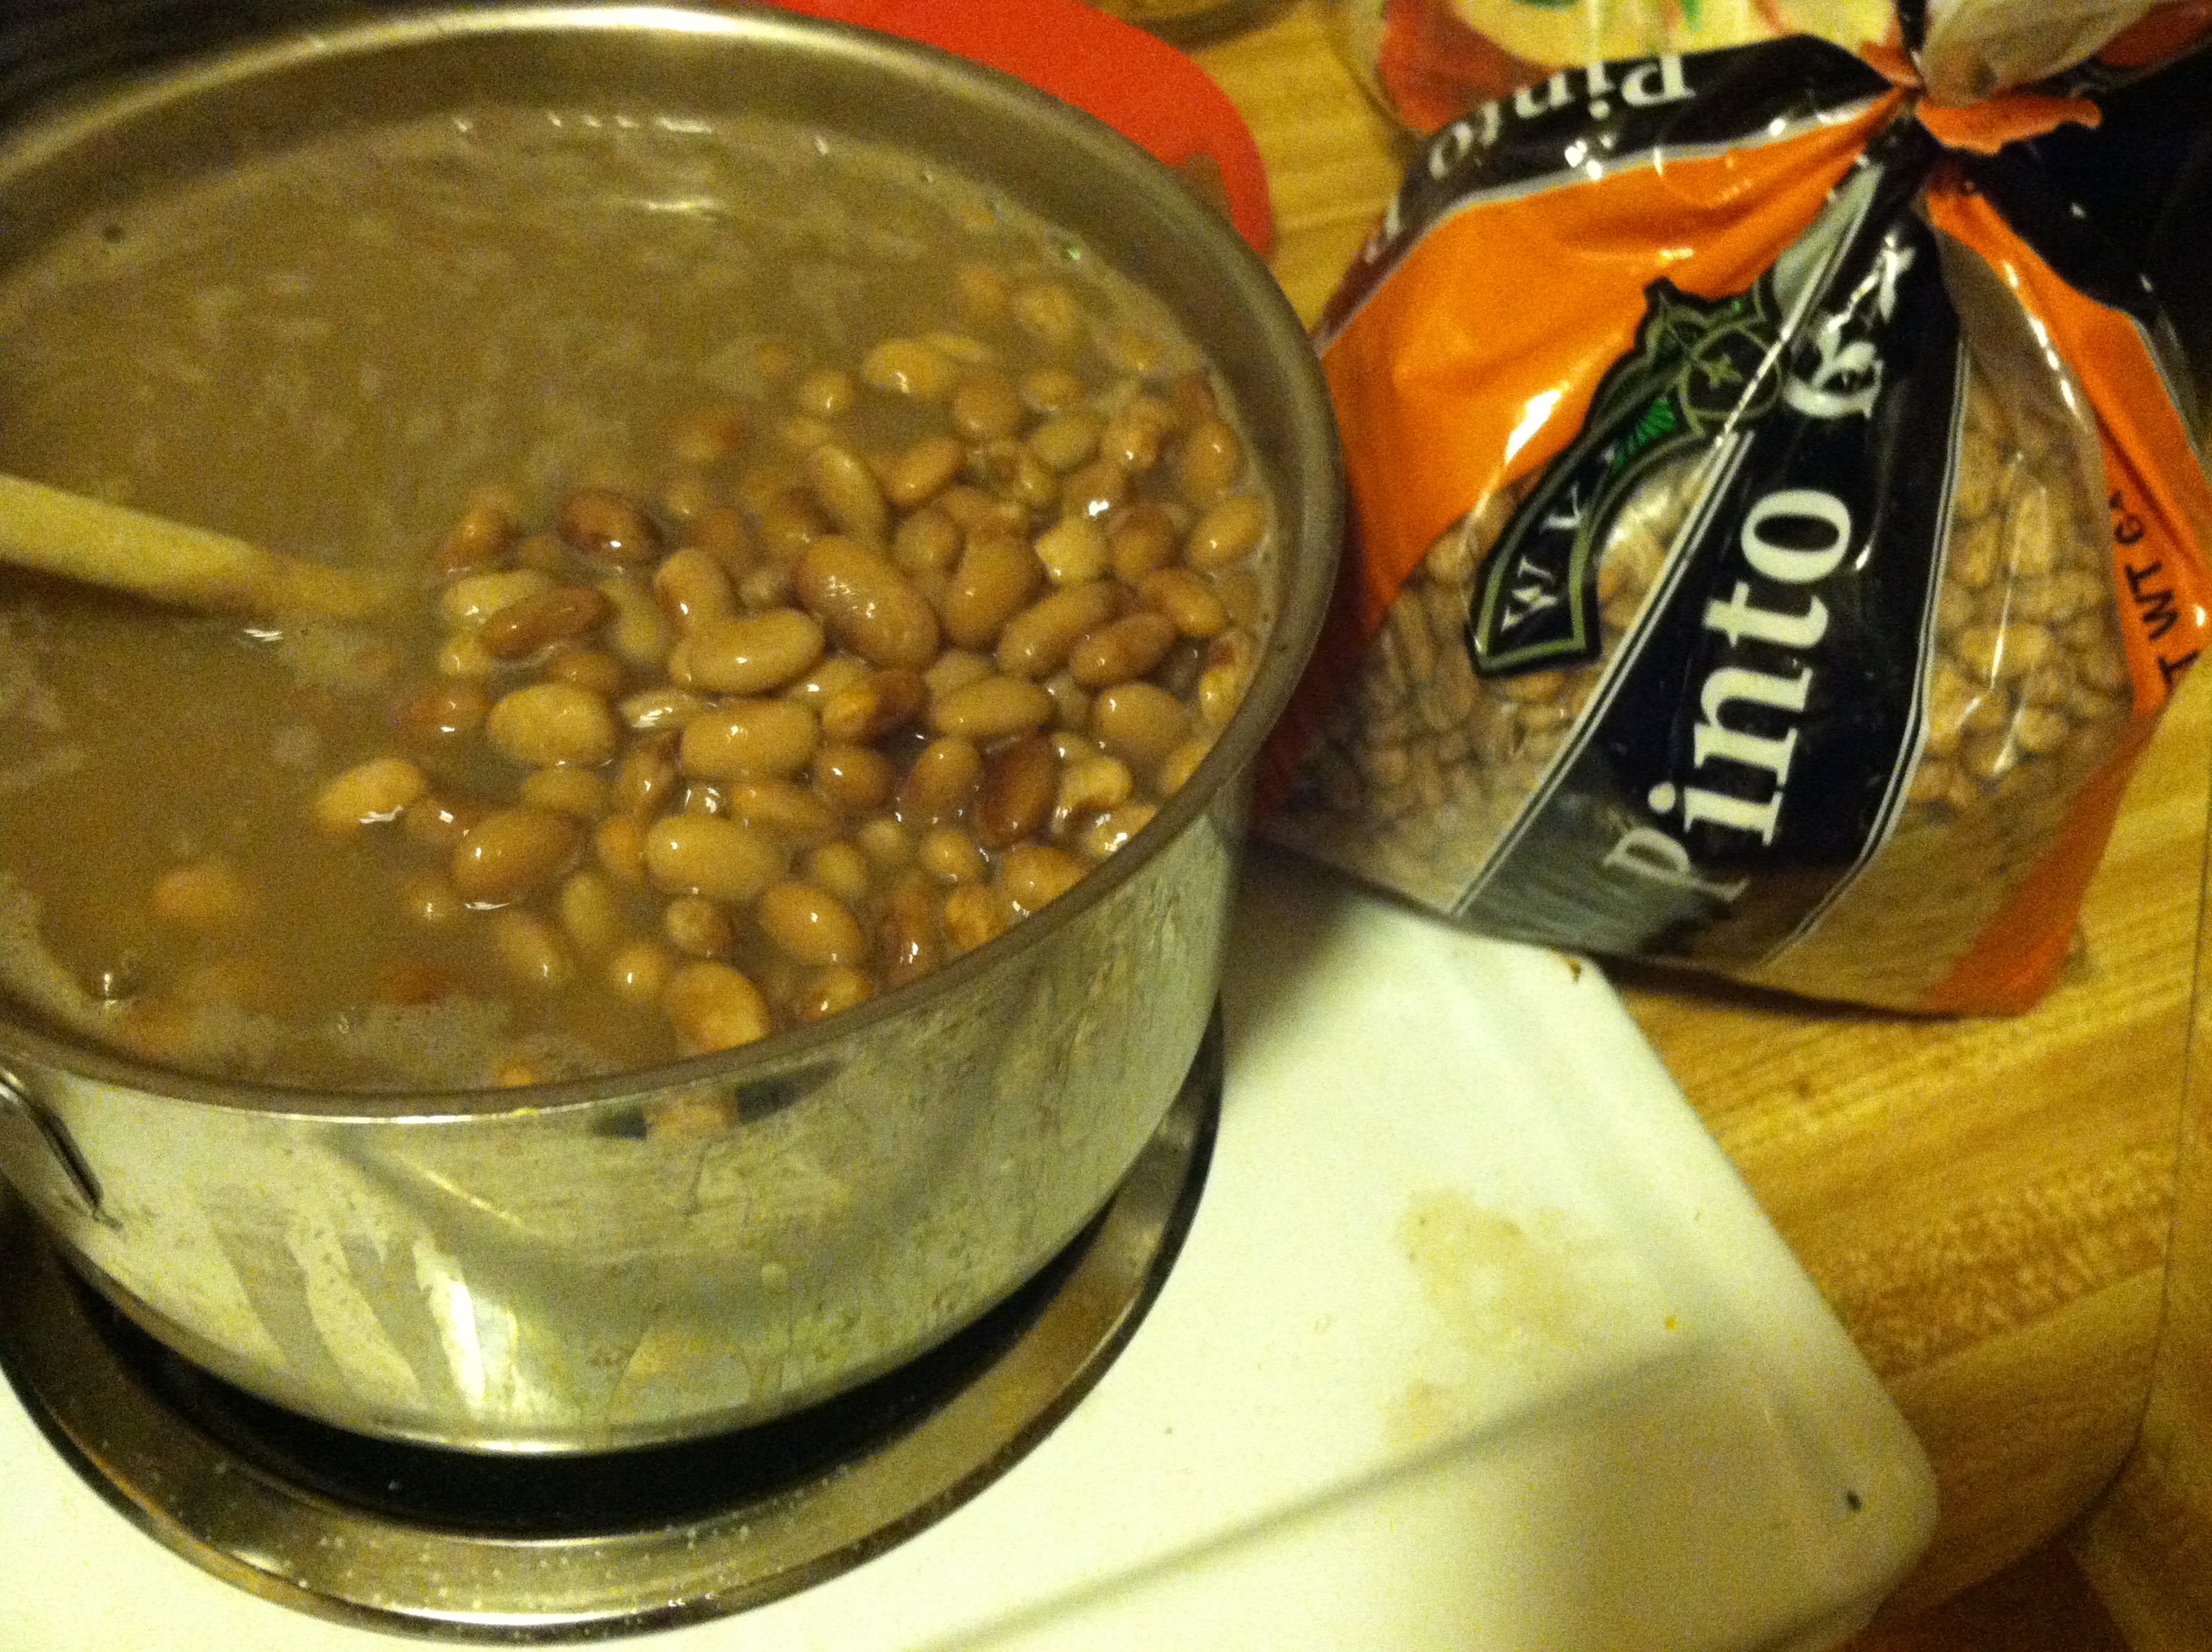
Step 1: In a large pot, you can soak your beans overnight if you want. I just went ahead and cooked them. Cover the beans in water, bring to a boil, and simmer for 2-6 hours, depending on how soft you want your finished product and how much time you have. Add the salt and vinegar.

IMG_6327

Step 2: Either boil your jars and lids, or run through the dishwasher to sterilize. You will need about four pint jars for one pound of cooked beans.

IMG_6326

Step 3: Fill each jar up to the top, leaving 1-2 inches of space. Cover with the cooking liquid. You should have a faint scent of vinegar, and the liquid becomes cloudy after cooking the beans. Wipe the rim, seal, and place the entire jars in a large pot of rapidly boiling water. Process the jars for 45-60 minutes.

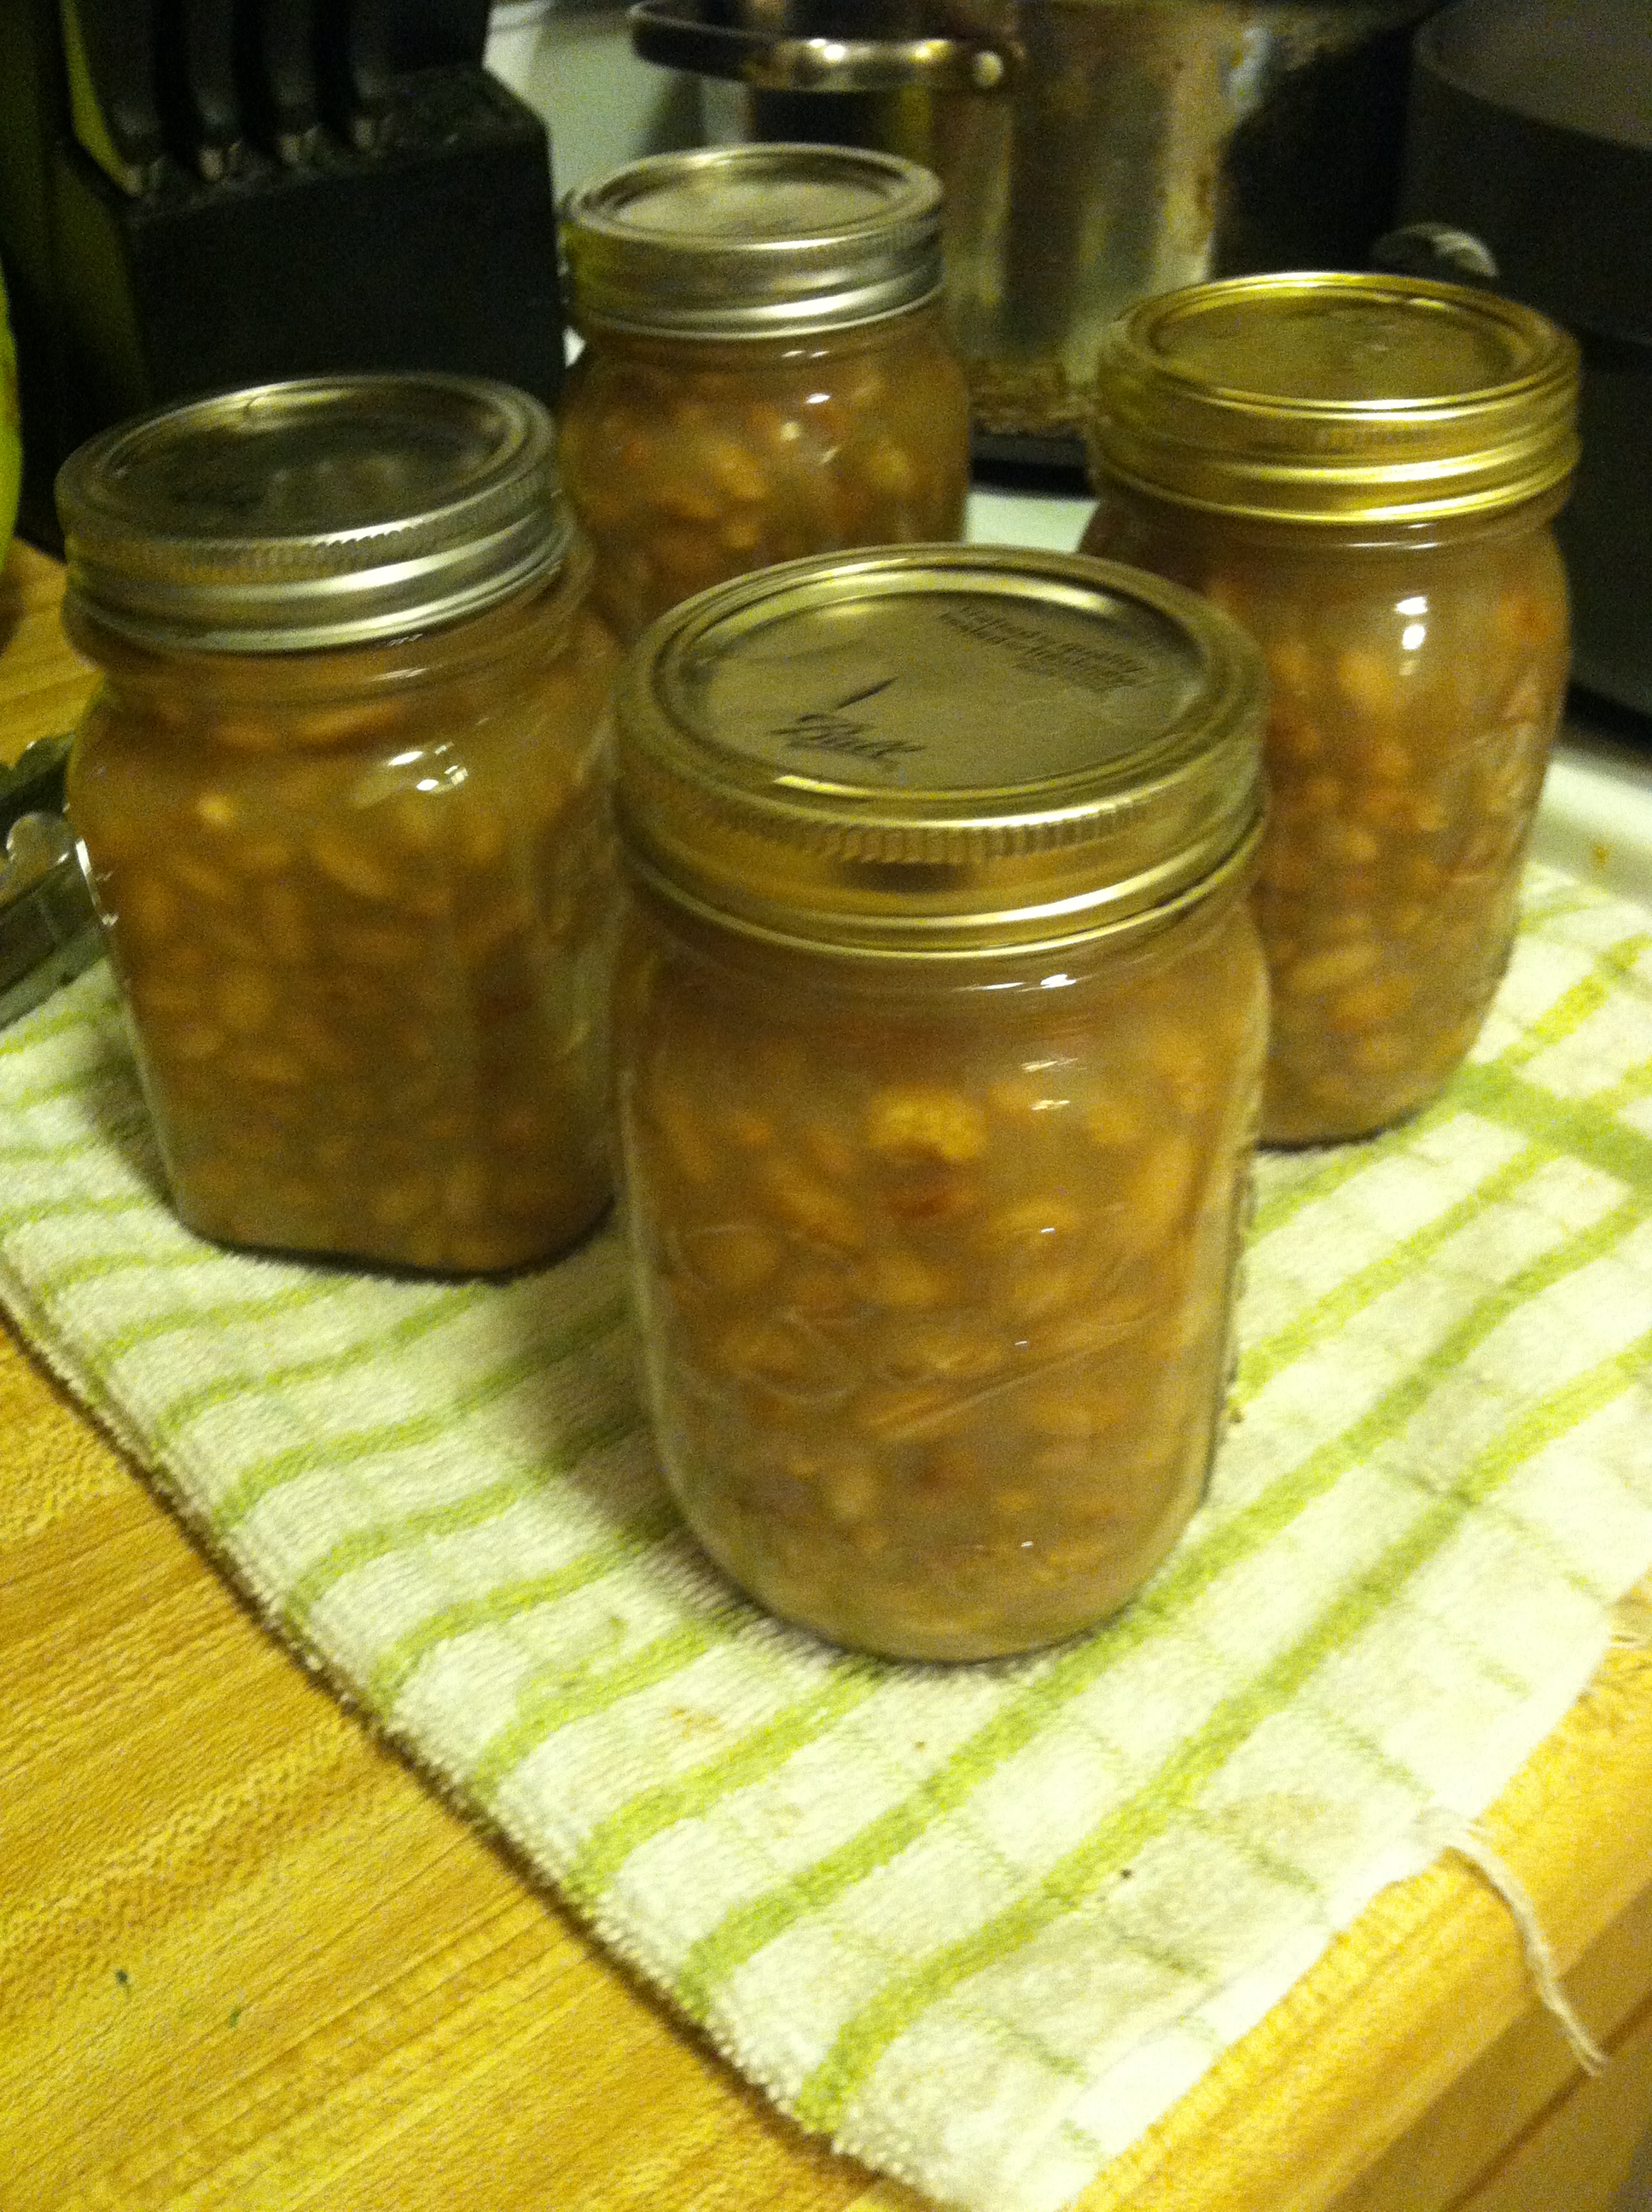
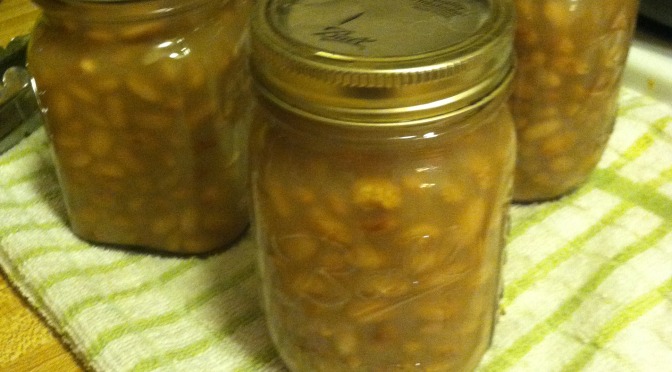
IMG_6329

Step 4: Remove the jars from the hot water with tongs, and place on a towel on a solid surface. Let them cool without moving them for at least 6-8 hours. You should hear the “pop” of the lids sealing. If any do not seal, put in the fridge and use within a week.

Now you have your own crazy-cheap supply of canned beans to turn into chilis, spreads, soups, or any number of recipes.


Top Dozen Recipes of 2014


Hope all of you are off to a great start for 2015!

If you are among those making health-based resolutions, congratulations! I sincerely hope you are choosing to make positive lifestyle changes for yourself, and see them through. If you want ideas here are a few that can truly change your life for the better:

  • Drink more water – 1 8oz glass every hour if you can
  • Eat more vegetables – have a salad or soup pre-meal, add frozen veggies into soups or casseroles
  • Get 7-8 hours of sleep every night – go to bed 15 minutes earlier every day until it happens
  • Move more – exercise, go for a walk, do household chores
  • Cook at home – as often as possible!

In looking back on 2014, I have been very blessed. So many good memories with family and friends. Leaving academia for full time work in a clinic. Blogging successes. Kitchen successes, and failures. Moving, a birthday, adopting two puppies. Quite the year! And I am hoping that 2015 will be even better.

Also, looking back at last year’s resolutions, I did quite well on keeping most of them. Except the working out three times per week. This is the most common struggle, tied with eating healthier. So that is the goal I will focus on most this year.

In honor of the ending of one year and beginning of a new one, I put together the best recipe from each month in a top dozen recipes for 2014. Revisit some favorites and discover new ones! May 2015 be brighter, happier, and healthier than ever.

January – Cinnamon Raisin Soft Pretzels

These warm, chewy pretzels have the perfect harmony of cinnamon and raisins, coupled with a sticky sweet glaze. Perfect during cold winter nights, date nights, or any time.

February – Red Velvet PokeBall Cupcakes

For a birthday party or a Valentine’s Day surprise for your nerdy love, these cannot be beat in wow and cuteness factor.

March – Fruit-Filled Banana Bread

As a quick breakfast or on-the-go snack, this bread is delightful. Moist and delicious, it is packed with several servings of fruit from blueberries, blackberries, and bananas. You can amp it up even further by using applesauce instead of eggs and/or butter.

April – Ethiopian Series

In this series I shared recipes I made for an Ethiopian dinner party, including beef, pork, chicken, fish, greens, potatoes, lentils, cheese, and that addictively different bread, injera!

May – Meal Planning Made Easy

Meal Planning Made Easy

This was a tough call, since May had several stellar posts! May is also when the Budget Epicurean moved over to WordPress from Google and got its own home. But the most popular post was definitely the meal planning post. It is what got me invited onto the podcast “Stacking Benjamins” to talk about how meal planning can be so easy, and improve your finances so much.

June – Taste of Austin

IMG_1438

In this two-post series I shared eight different food locales I visited on a trip to Austin, TX. From taco trucks to the fanciest waterside restaurant, Austin has so much to offer in foodie culture. June was also a successful month for blogging, as I was invited to enter a strawberry shortcake baking competition (which I sadly did not win), and a post about iced coffee netted me a business relationship with Keurig.

July – Lemon Pollock with Olive Tapenade

IMG_2686

This super-quick salty topping is perfect on any kind of fish, or as a bruschetta like topping on crusty bread. I bet you can come up with more uses too. I also got to take a nice vacation in July, which we all need from time to time.

August – Mediterranean Stuffed Mushroom Caps

IMG_3628

These little guys are perfect party appetizers, or you could use larger mushrooms and make it a full meal.

September – Jambalaya

IMG_4728

Not gonna lie, this is probably one of my favorite recipes I’ve ever made. Packed with sausage, chicken, and shrimp, as well as fresh celery, tomatoes, onion, and peppers, served over steaming white rice. This was also the month when I took the one-week SNAP Challenge.

October – Barley & Kale Salad

IMG_5443

A beautiful cacophony of colors and flavors, this salad is hearty enough to satisfy but light enough to not weigh you down. With chewy whole grain barley, power green kale, and multiple other fresh veggies, this will keep you full long past lunch time, and you can feel good about seconds.

November – Acorn Squash Mac n Cheese

Easily adaptable to any type of squash you have, this recipe pumps up the fiber and vitamins of your typical comfort food. It adds a sweet depth of taste and creamy feel. You can sub in any other veggie you like more than spinach as well, such as tomato, onions, peppers, or asparagus.

December – Last Minute Gift Ideas

IMG_5110

When you didn’t know a birthday was today, or got distracted and realized Mother’s Day is today, or somehow Christmas just snuck right up on you. This list of crafts and cooking ideas are all fairly simple, quick to make, and frugal to boot. All of them I have ether tried or am saving to try at some point.


There you have it, 2014 year-in-review of the best of this blog. If you have anything you’d like to see in 2015, or have a different post that was a favorite than one mentioned here, please comment below! Thanks for contributing to this blog’s success in 2014, and I hope to entertain and educate you all this year.

Homemade Energy Drink Mix


Want to start 2015 with plenty of energy?!

As someone dating a programmer, I know that Mountain Dew can be considered a food group. It seems we have an insomnia problem in America, with a new energy drink on the market every day.

Red Bull, Monster, Rock Star, Full Throttle, Amp, Boost.

Sure they give you a huge jolt of energy to get through the next final exam study session, afternoon slump, or laundry marathon. The problem is the added acids, chemicals, preservatives, and excessive amounts of sugar.

If you are trying to slowly rid your life of these things, but still love the energy rush, you can try making your own energy mix. I decided to take matters into my own hands and mix up something that would taste great and also serve the purpose of an energy drink without all the added extras.

You will need to invest in some bulk ingredients to make your own mix, but once you have them you can make your own energy drink mix for pennies per serving. That beats $1 or more per can by a long shot!

A really great site I’ve found for bulk powders, vitamins, and supplements is Bridge City Bulk. They have all types of vitamins, supplements, caffeine, match powder, and tons of organic teas I’m dying to try! Wherever you get yours from, make sure to carefully measure it and try to use a responsibly sourced dealer.

***A Very Important Disclaimer***
Caffeine is very dangerous in powdered form. You would need to drink hundreds of espressos to overdose naturally, but in powdered form it is far too easy to ingest way more than is safe. Generally it is recommended that you don’t consume more than 400 mg per day.

If you continue with this recipe, be very careful with measurements so that you are sure to not overdose, and do not drink more than 2 per day, or a total of 400 mg.

Ingredients:

IMG_5521

Step 1: Measure your ingredients. I measured out 3 grams of caffeine, and calculated the percent daily value of B vitamins in the final serving to determine how many vitamins to crush up and use. This will change depending on what type of vitamins and which source of caffeine you use. Be very careful when calculating measurements.

IMG_5522

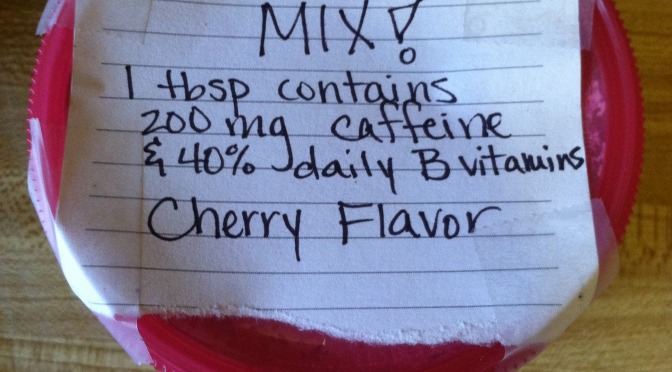
This recipe was designed to make 15 servings, so I then added enough drink mix to the vitamins & caffeine to equal 15 tablespoons. Thus the three grams of caffeine becomes 200 mg per serving. Add 1 tbsp of the mix to 16 oz of water and mix well.

You can customize this drink mix to whatever flavor you like, but because caffeine is extremely bitter alone, I wouldn’t recommend making this without some sort of flavored mix. Again, be sure to calculate and measure your ingredients and figure out your final serving sizes before trying this at home.


This post contains affiliate links. Buying products through these links does not change the price you pay, but a small portion of the profits helps maintain this blog. Thank you.

Vanilla White Russians


In anticipation of the upcoming New Year, I wanted to share this recipe for a twist on the classic White Russian.

“Common knowledge” dictates that one not ever drink milk with alcoholic beverages. That extends to pretty much any dairy product. I believe this is due to fear of it curdling in one’s stomach? Or perhaps the extra unpleasantness should it find its way back up.

Whatever the reason, the White Russian looks at that rule and laughs. Milk and alcohol dance a lively jig together on your taste buds, with sugar and coffee joining in. I highly recommend this uber-simple yet totally classy beverage for your bell-dropping soiree!

Made infamous by “the Dude” in the movie “The Big Lebowski“, this three-ingredient hard-hitting cocktail is like dessert in a glass.  Classically only three ingredients: vodka, Khalua, and heavy cream. Variations include different types of liquor, addition of chocolate, or as the Dude uses, powdered creamer (not recommending that route).

This particular variation I made because I happened to have Patron cafe rather than Khalua. Since Khalua is a coffee-flavored rum-based liquor, I figured a different coffee-flavored liquor would work just as well! And I do love the smooth taste of Patron, so I figured why not go for it?

And I also do not buy heavy cream, but did have some french vanilla coffee creamer. What a perfect cherry on top! (Speaking of, I bet something cherry, like amaretto or Disaronno, would also make a phenomenal addition!)

Ingredients:

  • 1/2 cup creamer
  • 1 oz Patron cafe
  • 1 oz vodka
  • 3-5 ice cubes

IMG_3908

Step 1: Fill a glass with a few ice cubes.

IMG_3909

Step 2: Pour about half a cup of creamer (or milk, or heavy cream) into the glass.

IMG_3910

Step 3: Add in one shot each of the Patron cafe and vodka.

IMG_3911

Stir it and and sip! This lightly coffee, hint of vanilla, just a tingle of liquor beverage goes down smooth. Watch yourself, just like real Russians these can be dangerous!


If you do choose to indulge in adult beverages, please have a designated driver and get home safely. Happy 2015 everyone!

Ham & Veggie Burrito


Guess what!? It’s my birthday today! That’s right, a few years ago, three days after Christmas and three days before New Years, a doctor handed my mommy and daddy their little tax break. I will be celebrating this day with family, probably with a home-cooked meal and/or some sort of excursion. Maybe swinging by Starbucks to pick up my birthday freebie. Maybe even crazier and beginning my day with a Denny’s Grand Slam! Who knows. YOLO.

In honor of my birthday, I’m writing about one of my favorite things: burritos! Burritos are basically the king of all food types, because there really isn’t much you can’t put into one. Breakfast burritos, vegetarian burritos, dessert burritos. Anything you got leftover, heat it and wrap it up and dinner is served.

Leftover ham lends itself to oh-so-many possibilities! You can check out my article about uses for leftover ham and eggs from a previous Easter for more ideas. Ham is delightful on its own, but there are so many more ways to use it than in sandwiches. The bones and meat make amazing soups, you can put it in stir fry, or make a mean grilled ham and cheese.

This particular inspiration happened when I had a windfall of deli meat leftover, along with some olives and veggies in the fridge. I cooked it all up with some eggs, and made an amazing hot breakfast in under 10 minutes. You could also just wrap all this up with some hummus and/or greens for lunch.

Ingredients:

  • 1/3 cup diced ham
  • 3-5 olives
  • 1/3 cup bell pepper slices
  • 1/4 onion, sliced thin
  • 2 green onion, diced
  • 2 garlic cloves
  • 1/3 cup cherry tomatoes
  • 2 large eggs
  • 2 tbsp crumbly cheese
  • 1 tortilla
  • 1 tbsp olive oil

IMG_6218

Step 1: In a frying pan, cook the ham, stirring often, until it begins to lightly brown. Cut the tomatoes and olives in half, and slice the bell pepper and onion thinly. Add all veggies and garlic cloves to the pan, and stir fry for 5-10 minutes, until softened and fragrant.

IMG_6219

Step 2: Scramble the two eggs in a bowl, and add to the pan. Add the cheese (I used feta here). Cook, stirring often, until done.

IMG_6220

Step 3: Scoop onto a warm tortilla. Fold up one end of the tortilla, then roll it up one side to the other.

IMG_6221

That’s all there is to it! The soft warm veggies go great with the salty ham and cheese, and the eggs bring everything together. You can add in other veggies, like spinach, kale, cauliflower, or avocado. Try some sriracha, cooked beans, or hummus too.

Happy Holidays from BE!


Hello dear readers,

I hope you are enjoying the holiday season and all the delicious treats it brings! But even better than sugary cookies, pepperminty beverages, warm honey hams, and classic family recipes is the memories we make this time of year. Time off from classes and work combined with holiday cheer should lead to hours of talking, bonding, and laughs with friends and family.

Whether you have a manger scene on your hearth and sing in your church choir, save all year to go all-out on a giant pile of pretty boxes, or choose to ignore the consumerist culture demanding you splurge because baby Jesus was supposedly born, this should be a warm and happy time of year. We all have so many things and people in our lives to be thankful for. A warm bed at night, a meal shared with people you love, reliable transportation, a job or career, a tiny bundle of your genetics, or not-so-little offspring making their own way in the world.

Wherever you are, whatever you do today, whoever you spend your time with, I wish you warm thoughts and happiness.

Merry Christmas!

Recipe Review: Food Babe’s “Ravishing Red Juice”


For those of you who don’t know, the “Food Babe” aka Vani Hari, is a food activist, passionate foodie and educator, and creator of fabulous health-promoting recipes. Any questions you have about your food, or questions you didn’t even know you should have asked, check her out.

You may know that I have a juicer, and am trying to incorporate more fresh juice into my diet, if only as an easy way to get more veggie goodness. I love me some vitamins and phytonutrients! So one day I was reading through some of Food Babe’s writings, and found her juicing advice and recipes. There was one in particular that intrigued me: The Ravishing Red Juice.

Getting its ravishing red color mainly from beets, this juice has blood-cleansing capabilities, immune-boosting ginger, and hair/skin/nail magic from carrots. Toss in some cooling cucumber and power greens, this baby is the complete package! And for those who don’t like juices because of the bitterness, SUGAR is made from BEETS! So yeah, this juice basically has all the ingredients to totally rock.

I altered Vani’s recipe slightly by throwing in half a lemon because I had a bag and I love citrus in everything, and leaving out the apple since I had none of those and the beet sweetened it enough for me. If you want your juice even more palatable throw in the apple, sure. Other than that, let the good times roll!

IMG_6342

Ingredients:
  • 2 thick carrots
  • 1 big red beet
  • 2 stalks celery
  • 1 cucumber
  • 2 inches of fresh ginger root
  • 3 full kale leaves
  • Handful of parsley

IMG_6344

Step 1: Wash all your veggies well and shake off excess water. Cut up the veggies, and get your juicer and two glasses ready.

IMG_6345

There are two ways to do this. You can either juice everything into one big cup then split it up (or drink a mega-juice!) or you can split up all the ingredients into two even piles.

IMG_6348

Step 2: Alternating between hard ingredients (like carrots, cucumber, lemon) and softer ingredients (kale, parsley), juice all your veggies. The beets give up this glorious, deep magenta-red juice that gives the drink its name.

IMG_6350

Step 3: Mix your drink to ensure no pulpy chunks, and enjoy! The slight tang of ginger and lemon effectively erases any bitterness from the palate. The beet juice is delightfully sweet, but not overpowering. And if you want it overly sweet, like I said add in some apples or even berries.


To health, wealth, and vitality.

<3 BE


Frugal Last-Minute Gift Ideas


So the clock is ticking down, and you realize you only have a few days (or hours) until it’s present time. What are you to do?! Shipping won’t get here in time, and going to the store to fight crowds sounds like your idea of torture.

Not to worry! I have put together a list of clever last-minute ideas you can make yourself, using things you likely already have around the house. Don’t panic, you don’t even need to be that crafty.

First up are “Craft” ideas, with directions and occasional pictures. All these things are things I’ve made before, or would make now. After that are the “Cooking” ideas, which are edibles of course.

Frugal Craft Ideas:

  • Seed Bombs
  • Letter wine cork board
  • Door snake – if you have a sewing machine
  • Personalized mug
  • Body scrub
  • Picture Frame Pin Cushion
  • Scrabble letter ornaments
  • Bonus: Survival Altoids Tin (opens in new window)


Seed Bombs – for the green thumb

This is an idea I saw somewhere one year when I myself was looking for ideas. They are perfect for any time of year, Christmas works because you have plenty of time until spring to plan where you will plant these adorable little gems!

You will need:

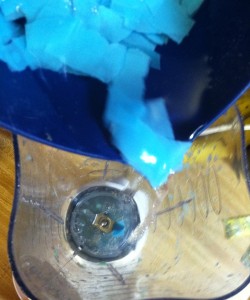
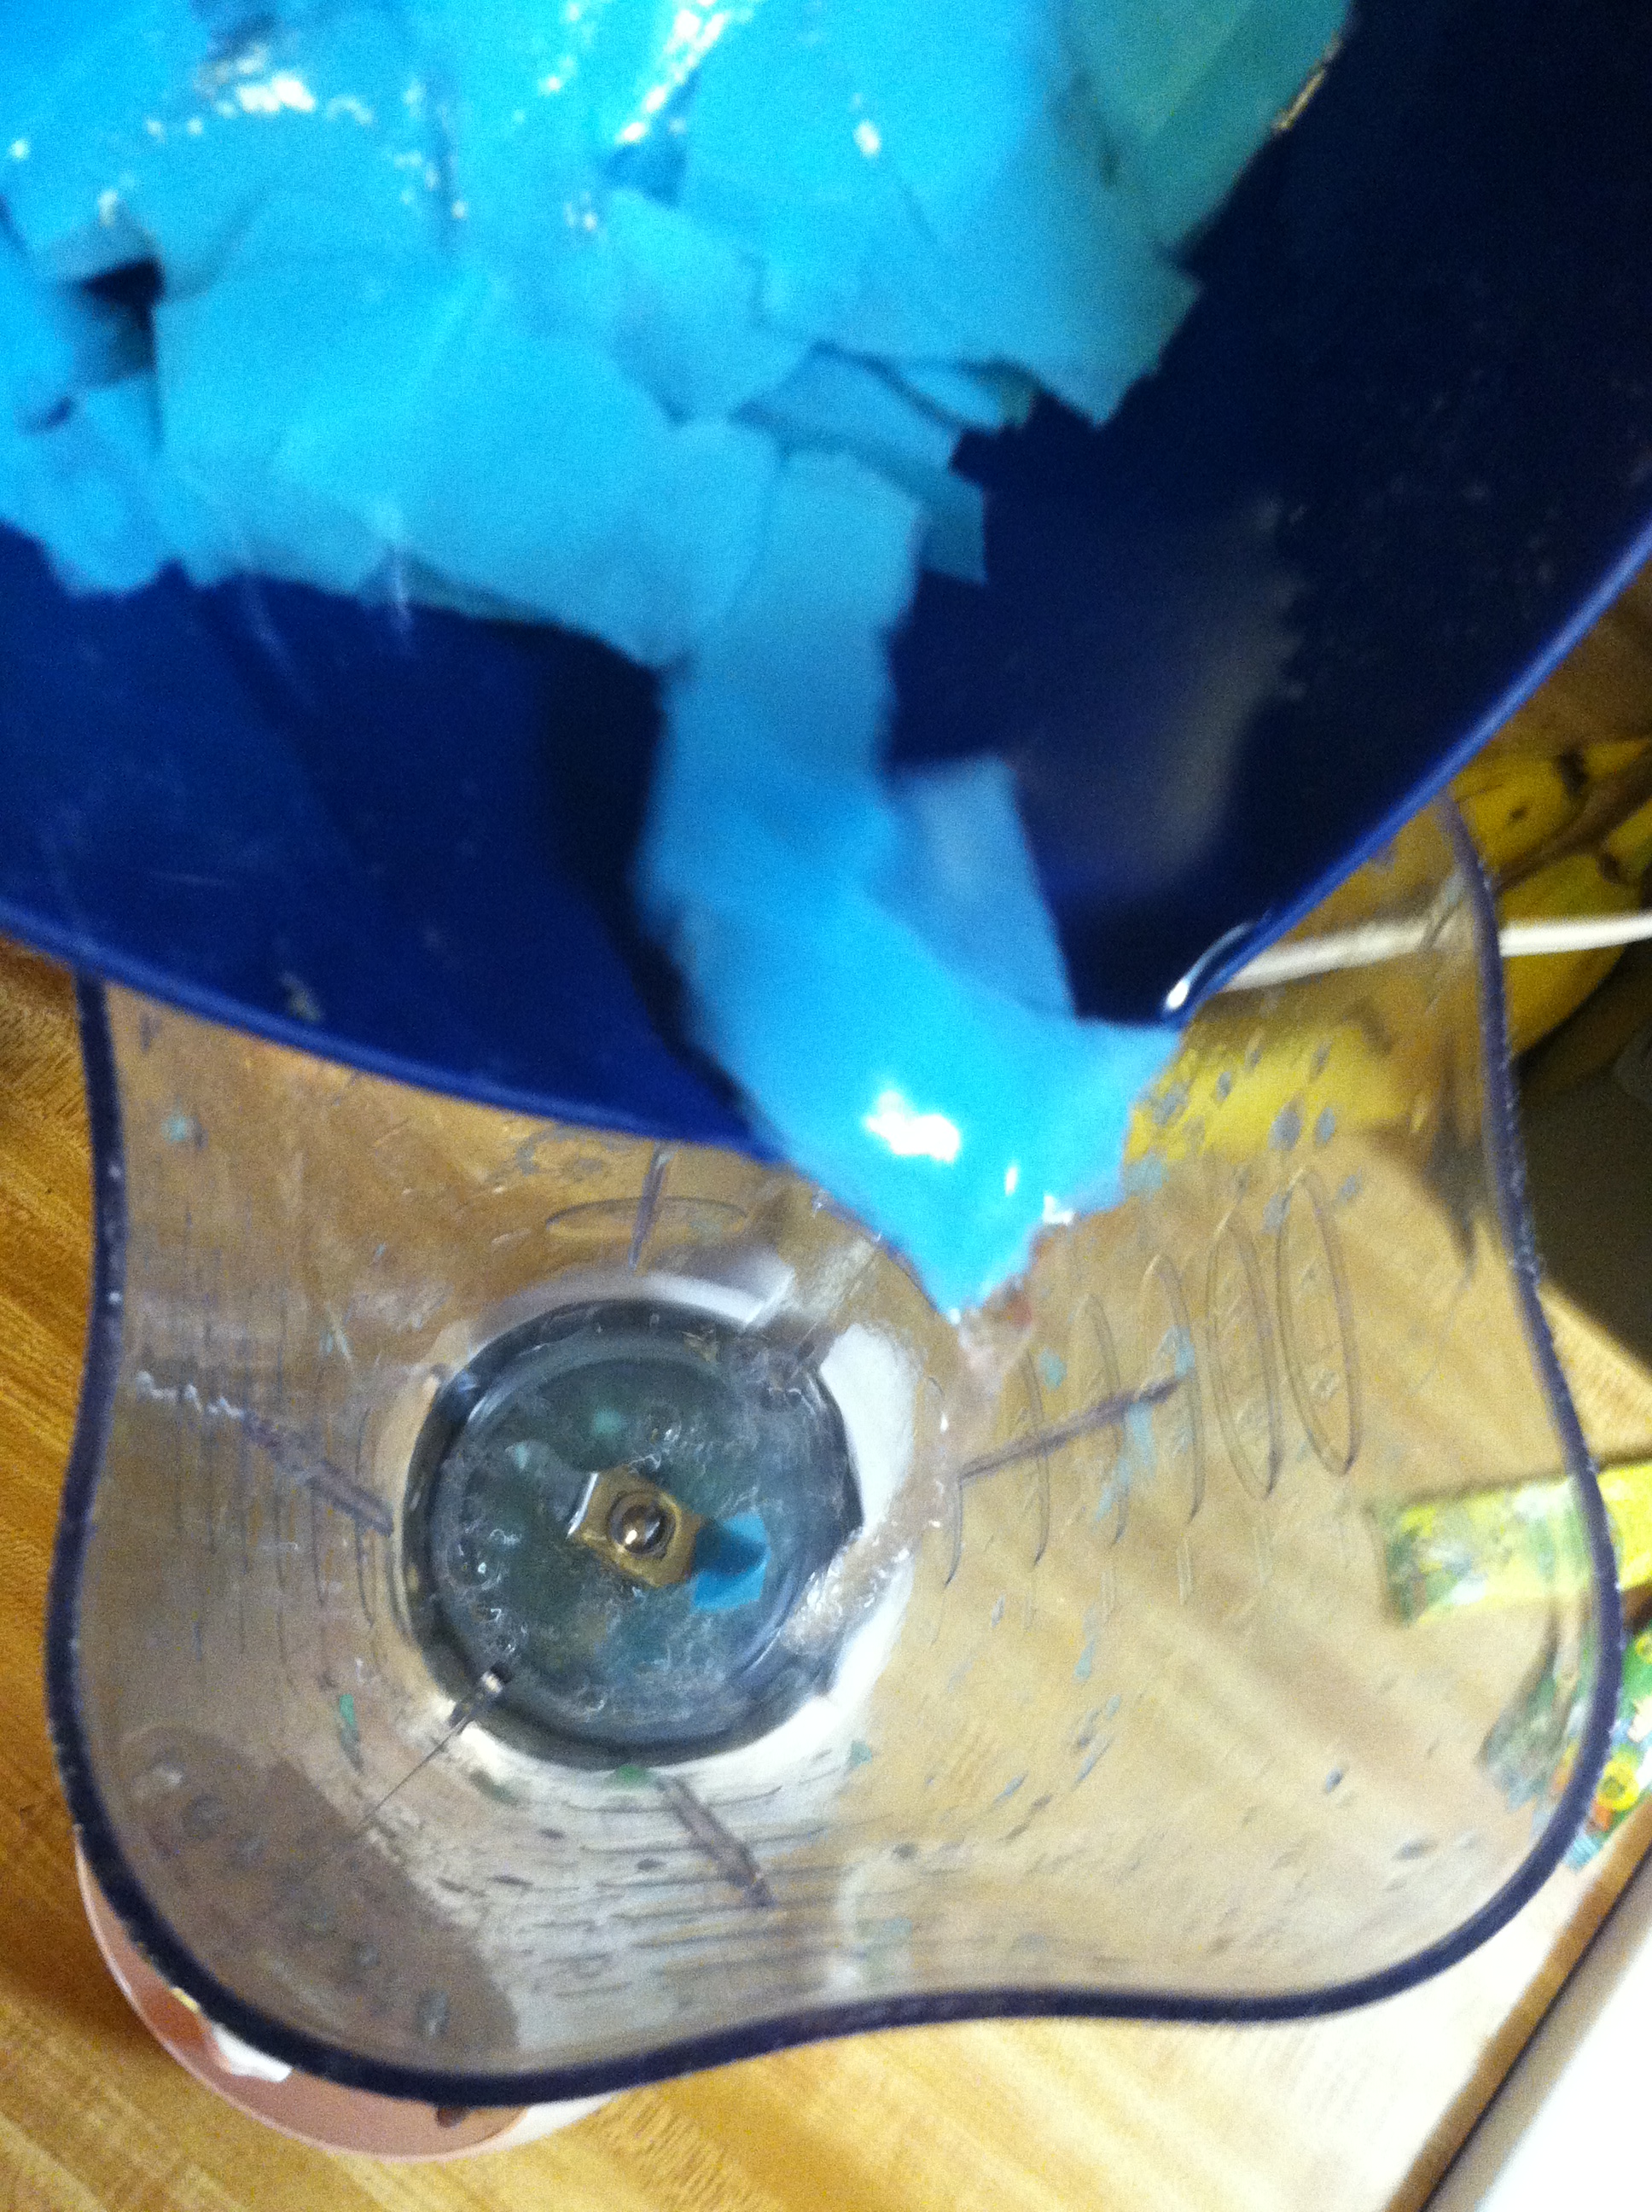
Step 1: Shred one sheet of paper in whatever color you like. Cover with water for 2-3 minutes. Put the paper and water in a blender and pulse until it becomes pulp.
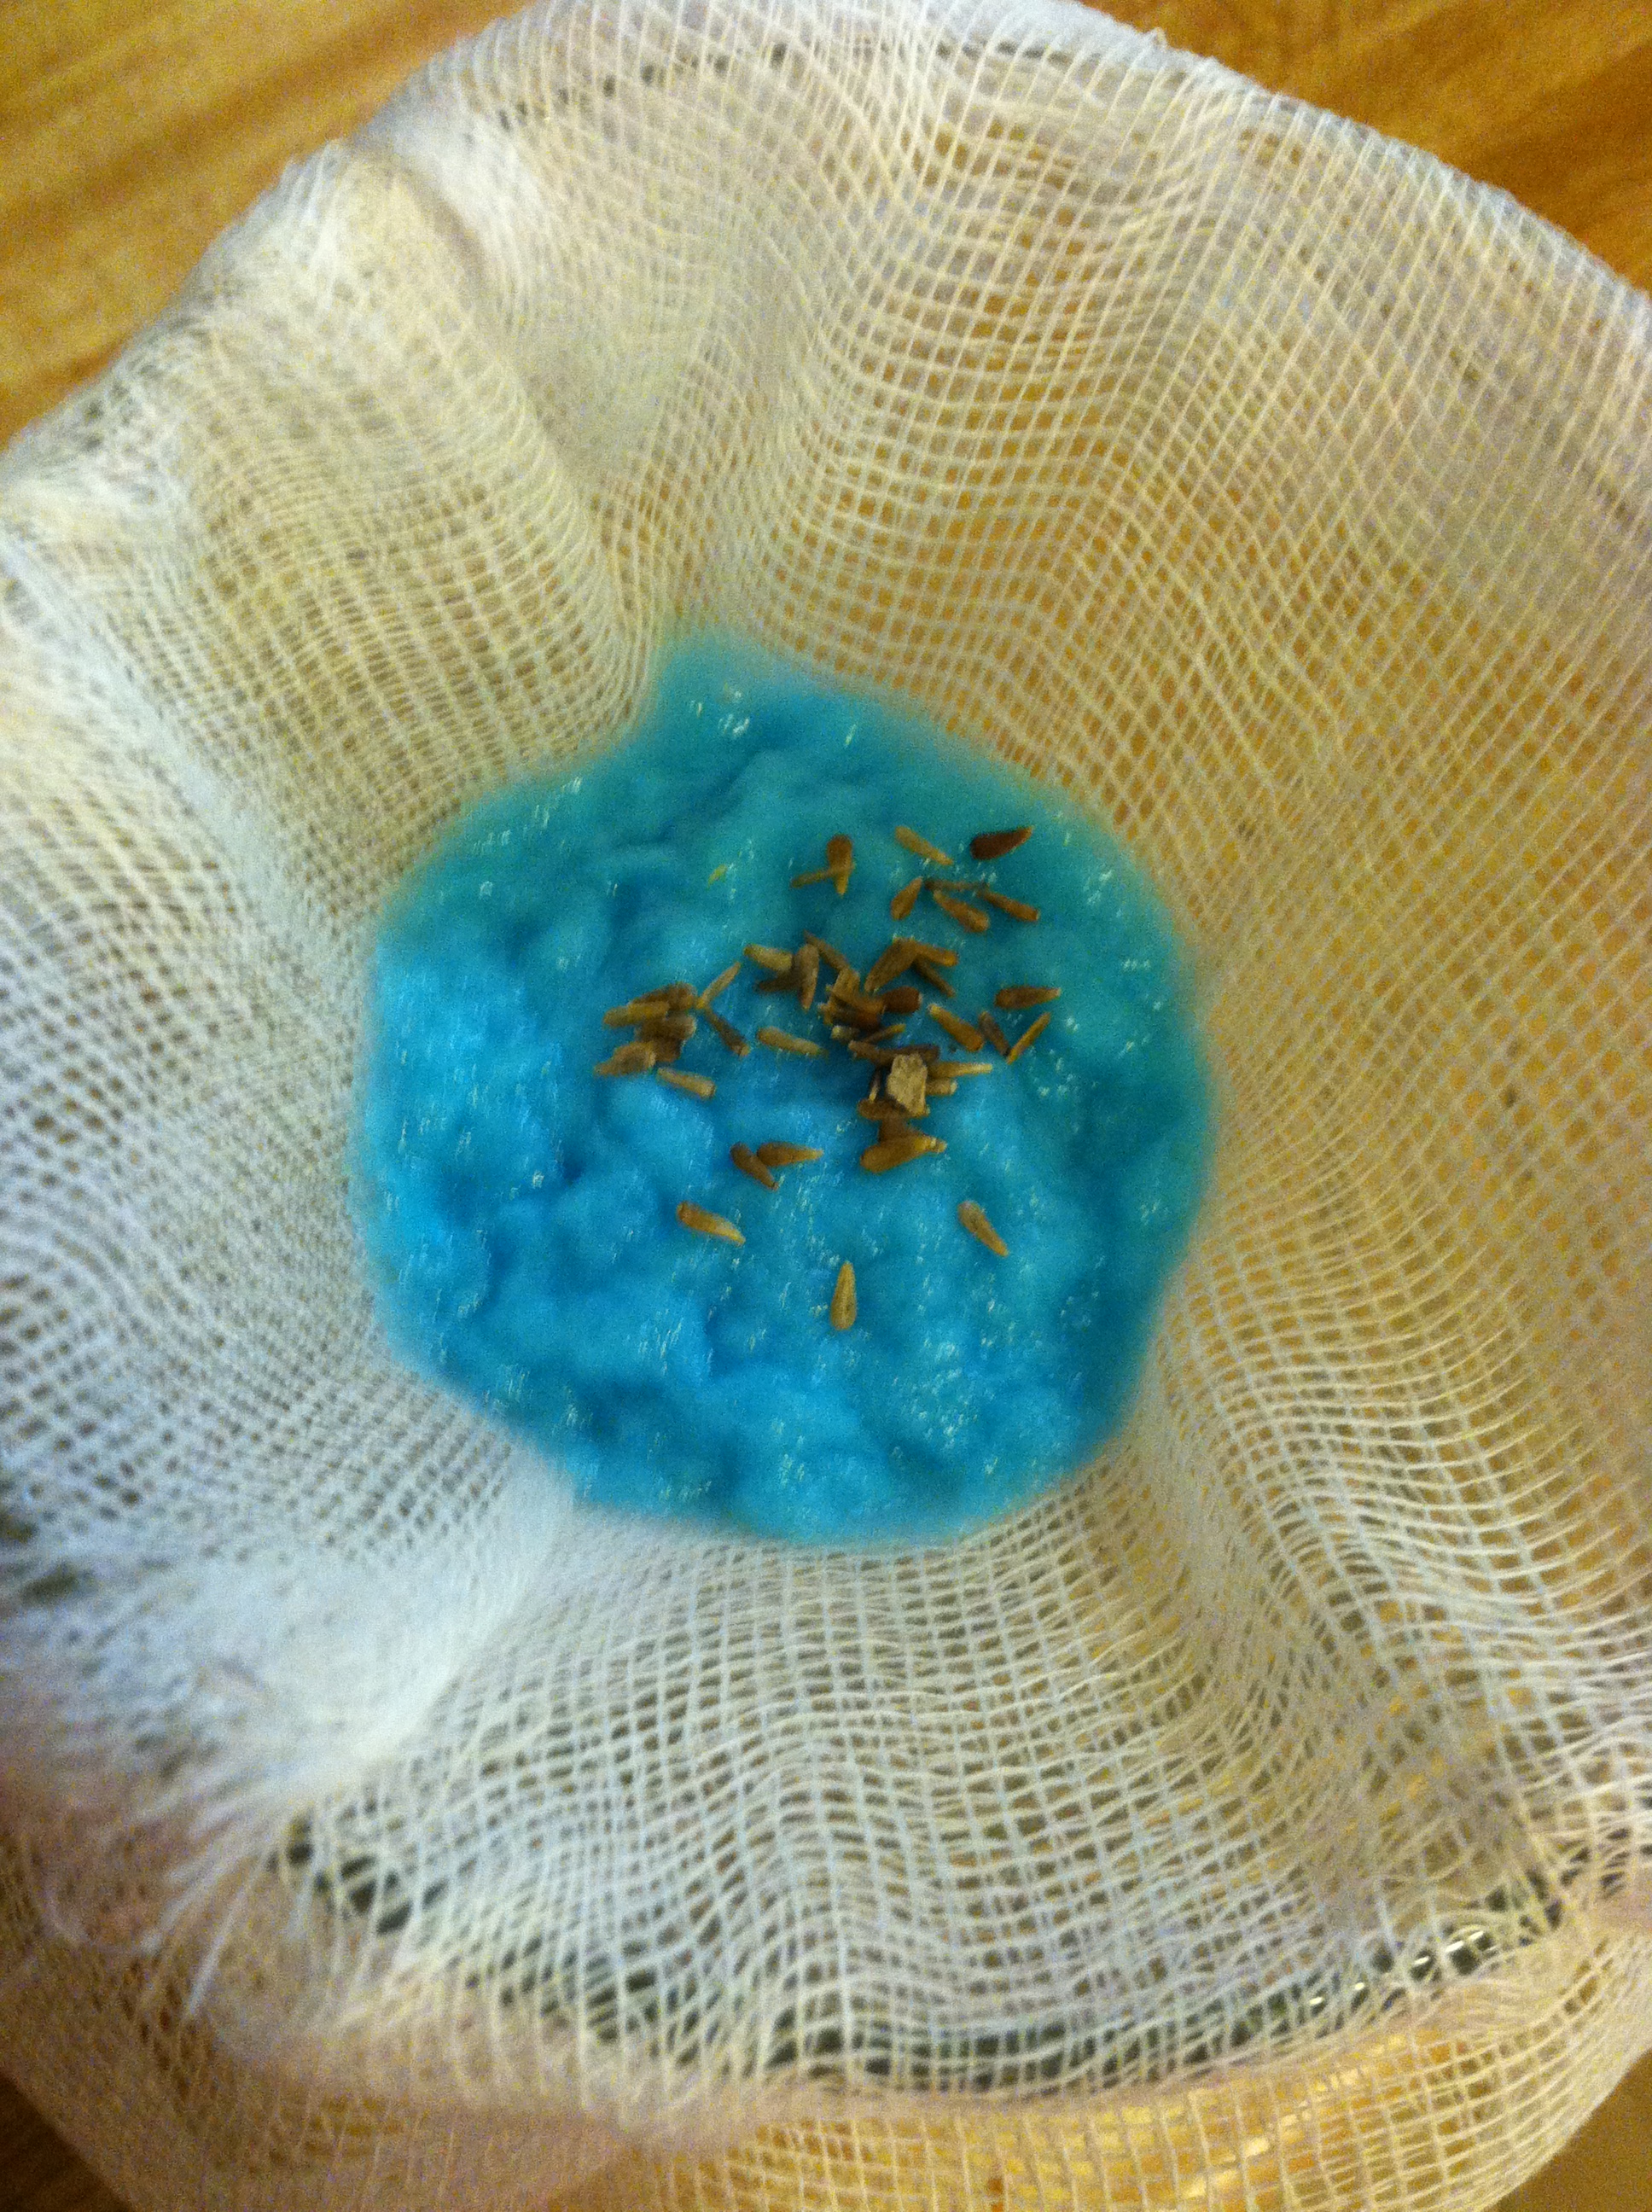
IMG_6412Step 2: Pour the paper and pulp through a piece of cheesecloth to drain. Put a few seeds of your choice in the center. You can make each one a different color flower seed, or use vegetables, whatever you have and whatever your recipient would enjoy.

IMG_6416Step 3: Put some more pulp over the seeds, and squeeze out the excess water.

IMG_6418Step 4: Let the seed bombs dry, and now you have an adorable gift for someone special! You can make as many different colors as you like, the size of the paper sheet will determine how big a bomb you can make.

IMG_6425

Letter Wine Cork Boards – for anyone really

The gift recipient doesn’t need to be a drinker for this project, just you do! Kidding. But you will need to obtain 10-50 wine bottle corks. How many will depend on the letter you want to make, and how big you want the letter to be.

You will need:

  • Wine corks
  • Craft wire
  • Super glue
  • Optional – paint, pretty ribbon, tacks, photos or mementos of you and the gift recipient

Step 1: Arrange the corks into the shape of the letter you want to make. This will help you decide how big you want to make it. Then, using the craft wire, wrap around the corks, weaving in and out. Use super glue every few corks to hold them together. And that’s it! Let your masterpiece dry.

Bonus points if you used corks with varying colors of red on them, and grade the color across the letter. Or you can paint over the end to make the letter all one color. Add a pretty ribbon to the top to hang it, and tack on some fun photos. If you are unsure of your artistic abilities, you can buy a wooden letter at a craft store to use as a guide, and glue the corks to that instead.

Another option: place the corks flat onto a picture frame or serving tray in a fun pattern. Paint over the whole thing with glue. Now you have a flat, fun patterned cork board!


Draft Stopper or Door Snake – for anyone who has a door in their home

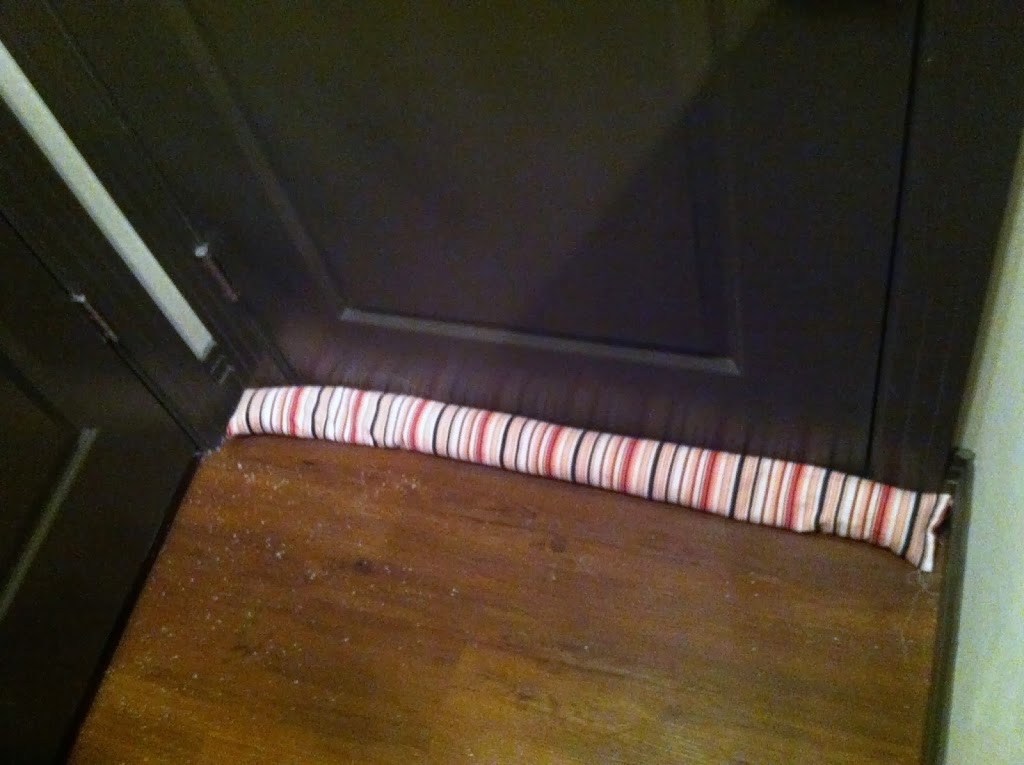
These little guys are awesome to put under your doors to stop cold drafts from coming in. You can help a friend be more comfortable this winter and even lower their energy costs! *This craft does require a sewing machine*

You will need:
  • 1 sewing machine (or needle, thread, time, and patience)
  • Material approximately 1 yard by 1 foot (use thicker cloth to stand up to more wear)
  • Approximately 6-10 cups filler (rice, beans, sand, salt, kitty litter, etc)

Step 1: Lay your fabric pattern side up, then flip it over onto itself so the “inside” faces out and pin along the open side. Measure your doorway, and using a basic stitch sew along the pins to that length plus about 4 inches, trimming the excess. This creates a tube.

Step 2: Sew up one end of the tube, making sure that it is fully closed. You don’t want any kitty litter leaking out onto your clean floors later. Now flip the tube inside-out so that the pattern is on the outside.

Step 3: Fill the tube with your filler, rice or kitty litter is best. You can hold it up to your doorway to make sure it is long enough but not too long, and trim as needed. Leave 2 inches on the un-sewn end.

Step 4: Fold the cut ends into the tube, so you now have four layers. This looks cleaner. Then sew up the other end of the tube, going over it a few times to make sure it is sealed well. There you have it. A cute, cheap way to save some money on heating bills for years to come. If you are super crafty, you can even sew some washable covers for the stopper itself so that it can be used for decades to come.
 

Personalized mug – for the coffee or tea drinker

These mugs are infinitely customizable and completely adorable. No one has even been mad about a cute coffee mug as a gift. And when tailored to the recipient they are even more special.

You will need:

  • A white ceramic mug
  • A Sharpie pen
  • An oven
  • Optional: creativity, coffee, tea, hot cocoa mix, etc.

Step 1: Take a white (or other light color) ceramic mug and a Sharpie marker. Using a stencil, or your own talents, draw on your desired picture, phrase, word, etc. Some ideas include: “Good morning”, “For him  & For her”, a quote from a favorite person or book, initials, the person’s home state.

Step 2: Place the mug in the oven at 350 degrees for 30 minutes to set the ink. Now your mug can be used, washed, run through the dishwasher, and not smudge! To fancy up the gift even more, fill the mug with the receiver’s favorite tea or coffee, a peppermint swizzle stick, a bag of cocoa mix and marshmallows, or whatever else fits.


Picture Frame Pin Cushion – for the crafty sewer

This idea from Love Grows Wild. You don’t need to be able to sew to make this gift either! Do be cautious when working with hot glue.

You will need:

Step 1: Take the glass and anything else out of the frame. Trace around the glass onto a piece of cardboard to make the back of your pin cushion. Use the glass to trace the shape onto your fabric, centering the design if there is one. Cut it out, leaving plenty of extra, and make sure it still fits into the frame with the added fabric. Trim anything necessary to make it fit.

How to Make a Picture Frame Pin Cushion - a simple project to help keep your pins in check while you sew! via www.LoveGrowsWild.com #diy #tutorial

Step 2: Flip the fabric over and place a handful of batting in the center. Place the cardboard on top, and begin hot gluing the fabric along the edges. It will bunch up, that is ok. Leave a 1 inch space open on one side. Keep checking to make sure it fits in the frame, adding or taking out batting as needed.
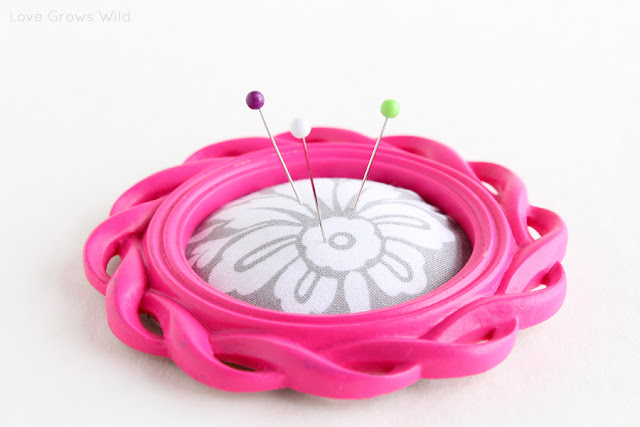
How to Make a Picture Frame Pin Cushion - a simple project to help keep your pins in check while you sew! via www.LoveGrowsWild.com #diy #tutorial

Step 3: Finish hot gluing the edges, and put inside the frame. Close it or hot glue the cardboard all around the edges. Now your frame can sit or stand up, and will look totally adorable on your crafty friend’s table or sewing machine!

To take it up yet another notch, use these steps but on a small pint-size mason jar. Hot glue the fabric to the lid, then fill the jar with small sewing accessories. You can get a mini kit at most dollar stores, and add in anything else you think your crafty friend would need. Then you have a hand-crafted mini sewing kit!


Body Scrub – for anyone who likes soft, nice smelling skin

This is a great idea not only for the holidays but year round. There are so many scent combinations you could try, like peppermint, grapefruit, lemon, green tea, chocolate, coffee, and brown sugar vanilla. You can also use epsom salt in place of the sugar if you like. I will keep this recipe in my back pocket for anytime I need a quick, cute gift for a girlfriend or relative!

You can also get a little creative here. The basic recipe below is just an outline, experiment with types of oils and amounts until you find what works for you. And the packaging is also key. A clear glass jar will show off layers of different colors, or pieces of crushed candy cane. Make sure to use a wide-mouth lid however, so your recipient can reach in and get a handful of skin-softening goodness out.

You will need:

  • 1 cup sugar (white or brown)
  • 1/4 cup oil (coconut, olive, vegetable)
  • Scent of your choice
  • Optional: food coloring, crushed candies, zested citrus

Step 1: In a large bowl, mix the sugar and scent of your choosing. If you have something liquid like lemon juice, factor that in when deciding how much oil to add. Then mix in oil, a little at a time, until you have the consistency of packing snow. Depending on how many gifts you are making, you can do a large batch or a single jar.

For the jar, if you don’t want to or can’t spend the money on new jars, simply save glass jars from foods throughout the year. Things such as empty Frappuccino cans, salsa jars, or spaghetti sauce can be washed, labels removed, and new pretty labels printed and added. These make an extremely inexpensive, yet uniquely thoughtful gift for mother’s day, teacher appreciation day, birthdays, or holidays!


Scrabble Ornaments – for anyone with a tree

This super-simple, super-cute idea comes from I Heart Naptime. You can pick up a game of Scrabble very cheaply from any thrift store or scout garage sales. Or if you are really crafty you can purchase thin strips of wood, cut into squares, and burn or paint your own tiles.

You will need:

Step 1: Decide what you want your ornament to say. Ideas include: peace, love, joy, Christmas, believe, noel, or the name of the gift recipient. Hot glue the letters together one at a time, letting dry fully. Then hot glue a piece of ribbon to the back and let dry.

scrabble-letter.jpg

These make an absolutely adorable tree accent. You can make as many or few as you like. For other times of the year, you could switch this up by taking mini magnets from a craft store and hot gluing to the back instead of ribbon for a cutely customizable magnet gift.


And now for those who are less crafty and more cook-y, gifts from my favorite place: the kitchen! Most of these take very little time and effort, and you likely have the ingredients in your cupboards already. All look adorable when packaged up into clear containers or holiday tins with a bow on top.

Your recipient is bound to love eating your homemade treats, knowing you put the time and effort in to making them happy.

Frugal Cooking Ideas:


Peppermint Meringues – for those who like crunchy sweet treats

Meringues seem hard but they are honestly super simple. The only requirements are the time put in to make the egg whites fluffy, and making sure there is no fat in the bowl at any time.

It is amazing how much four egg whites can fluff up into. You can use fewer, or double or triple the batch to make simple gifts for teachers, relatives, coworkers, friends, or neighbors.

You will need:

  • 4 egg whites
  • 1 cup sugar
  • 1 tbsp peppermint oil
  • Sprinkle of sea salt
  • Optional: few drops food coloring

Step 1: Separate the eggs into whites and yolks. If you want to be super cautious, break each egg into one bowl, then combine them all in a separate bowl. This ensures absolutely no yolk gets in. The fats in the yolk will ruin the meringue and cause it to not rise.

IMG_6257

Step 2: Beat the crap out of the egg whites. Seriously, let it go for about 20 minutes. The eggs should bubble, then begin to “fluff” up. Continue until soft peaks form. That means if you dip a spoon in, it can pull up a peak, but it flops over when you remove the spoon.
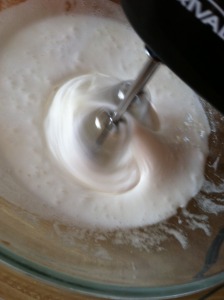
IMG_6261Step 3: Add in the sugar and the peppermint flavoring. You could also try anise, vanilla, lemon, almond… let your imagination run wild. Sprinkle in about 1/4 tsp of salt, and continue to beat until stiff peaks form. If you stick in a spoon, you can pull up peaks that then hold their shape.

IMG_6262

Step 4:You can either put it into ziplock bags with a hole snipped in the corner and pipe it onto cookie sheets, or just use a tablespoon to plop dollops on.

Bake in the oven at 250 for 1 1/2 to 2 hours, or until fully hardened. You can also prop the door open and leave them overnight. I use a foil sheet so they are easier to remove. Also, you can add in a drop of food coloring at step 3 for fun holiday swirls!


Peppermint or Almond Bark – for anyone with a sweet tooth

Barks are a family tradition at my house. They are incredibly simple to make, mostly just requiring time and that you not eat it all! You can customize them however you like with combinations of different types of chocolate, candies, nuts, or caramel. These are great gifts year-round!

You will need:

  • 1-2 cups baking chocolate
  • 1/4 cup crushed candies, chopped dried fruit, or nuts
  • Optional: flavoring such as peppermint extract

Step 1: Melt the chocolate(s). Pour onto a sprayed baking pan and let cool. If using two colors, pour second layer on and let cool. Just before completely cooled, sprinkle on your crushed candy or almonds.

Step 2: Once cool, cut into squares or break into rough pieces. Wrap up and give as gifts, or scarf down the whole tray, I won’t tell.

It really is that simple. You can get creative with this and layer white and dark chocolate together, add almonds to one layer with something different on top, whatever you like.

This can be tailored to whatever event is happening such as birthdays, Halloween, Easter, St. Patrick’s Day, anything.


Cookie in a Jar – for those who also bake

This is an inexpensive gift that can be tailored to your recipient. Basically it entails layering the dry ingredients of a recipe in a clear jar, and usually includes the recipe which tells them what other ingredients to add and how to complete the recipe.

As an example, I’ll use the Dark Chocolate Andes Mint idea from The Frugal Girls.

You’ll need:

  • 1 box Dark Chocolate Cake Mix
  • 1 bag Andes mints or baking chips
  • 1 quart sized glass jar with lid
  • Optional: Ribbon, pretty scrapbook paper

Step 1: Pour the cake mix into the jar and pat down. Pour the baking chips on top. Put the lid on, and wrap a pretty ribbon around it. Attach labels to the front and the lid, or write on the front in Sharpie.

Andes Mint Dark Chocolate Cake Mix Cookies

Add a recipe card that says:

Beat 2 eggs and 1/2 cup vegetable oil in a bowl. Pour in entire contents of jar, and stir well. Drop by tablespoon onto an ungreased cookie sheet. Bake at 350 degrees for 8-9 minutes or until done.

You can use this basic idea to make any kind of cookie or cake mix you want to give. If you are a true baker yourself, or have a favorite family recipe, you can also layer individual ingredients like sugar, flour, baking soda, etc. Just be sure to add in the recipe so the recipient knows what else is needed.

soup_mix

This can also be transferred as an idea to soup recipes. Simply layer in beans, rice, spices, dehydrated veggies, etc. and attach a recipe stating how much water to add and any other ingredients to complete your favorite soup. Tie up with a pretty bow or ribbon and your recipient has a thoughtful, easy future meal.


Peanut butter fudge – for when you seriously have 3 minutes

This is my mom’s super secret, ridiculously easy fudge recipe. With only two ingredients (YEAH, TWO) anyone can make this, even if the doorbell literally just rang with unexpected guests.

Obviously you can find much more involved recipes all over the internet, and no one has ever been angry about fudge as a gift. But for times when you really need a sweet treat pronto, this is a good go-to.

You will need:

Step 1: Mix both room-temperature ingredients well. Microwave 2 minutes, in 30-second bursts, and mix again. Refrigerate until solid and cut into squares.

You can get fancy and top with chocolate chips, or melt chocolate and layer the chocolate and peanut butter. Or just stick with simple and classic. Wrap in cellophane or put into cute tins and watch their faces light up when they bite into a piece.


Canned Jam/Jelly/Salsa/Fruits – for friends who appreciate handmade foods

Really the only things you need for wonderful handmade food items is the jars, some time, and the particular recipe’s ingredients. Canning is not at all intimidating once you try it a few times. The initial investment is $10-20, but you can make plenty of foods without a pressure canner at first, including jam, salsa, green tomato salsa, and canned fruit such as peaches.

You will need:

Step 1: For salsa: Chop up 2 cups tomatoes, 4 tbsp onion, and if you want to add 1 clove garlic, black pepper, hot sauce, jalapeno, and/or cilantro. For jam: Put 2 cups berry of choice in a sauce pan, and add 1/4 cup sugar and 2-4 tbsp water and bring to a simmer. Cook for 20-30 minutes, until berries are completely liquid. Most berries will gel on their own, but you could also add 1 tsp of pectin.

IMG_5160

Step 2: Bring the large pot of water to boil, and add your jars to sterilize for 10 minutes. You can also run them through the dishwasher. Use the funnel to fill your jars, and a wet towel to wipe off the rims. Screw on the cap & lids, and submerge in boiling water for 45-60 minutes.

IMG_5110

Step 3: Remove the jars from boiling water with tongs and set on a counter top. Make sure they are not disturbed as they cool. You should hear the “pop” of the jars sealing. Let cool overnight, then check in the morning that all have sealed. If not, re-process or put in the refrigerator and use within a month.


Candy Cane Popcorn – for anyone who likes sweet holiday snacks

As a total popcorn addict, I am super stoked about this recipe from I Heart Naptime! Like a combination of rice krispies and kettle corn, this gift from the heart is sure to please. As they mention, some recipes use white chocolate so you could try that instead of the marshmallow, or something uniquely you.

You will need:

Step 1: Pop a big batch of popcorn, microwave or stove top. Melt the butter and marshmallows together, and crush the candy canes.

Candy Cane Popcorn

Step 2: Add peppermint extract to the butter, then slowly stir in the popcorn, being sure to remove all kernels. Sprinkle in the crushed candy canes while stirring. Transfer to your desired gift bag or tin. This can be eaten warm or cooled, and likely all in one sitting!


Compound butter – for the savory foodie

A compound butter is just a fancy name for butter with something else added to it. This extra something can be garlic, herbs, berries, or honey. It adds a little extra something special when spread over crackers or fresh bread. Heather from WhipperBerry has three delightful recipe ideas to share.

You will need:

  • 4 sticks of unsalted butter
  • Approx. 1 cup of add-ins
  • 4-ounce glass jars with lids
  • Optional: Adorable labels and gift tags; fresh bread or crackers

Step 1: In a large mixing bowl, combine one pound unsalted, room temperature butter and your desired add-ins (such as 1 cup honey, 1 cup fruit preserves, or 1 cup roasted garlic). Whip well. Spoon into sterilized 4 ounce jars, and store in the refrigerator or freezer until ready to use.

Sweet and Savory Compound Butter with Free Printable

That’s all there is to it friends! And you thought baking up a gorgeous, unique, and tasty treat would take you a lot of time and effort. Now get out there and gift some memories this Christmas.


Of course these are only a few ideas of many. Think about your gift recipient, and your particular talent.

Can you craft your own jewelry? Maybe a cute, unique pair of earrings would be just the ticket. Does your person love to read? Create a one-of-a-kind book marker for them. Photos are always well-received, and there are infinite ways to customize them. A dozen homemade cookies of any kind are always a sure crowd pleaser.

Whatever you do, the gift recipient will know you were thinking of them this holiday season!


Do you have any frugal last-minute gift ideas to share??
Letter Pancakes with Apple Topping


This is an awesome idea for pancakes that I read in a magazine somewhere. You could make just about any shape you are capable of, but I think letters are super cute. It is a nice way to make breakfast fun for kids, or surprise a significant other and let them know you’re thinking about them.

The basic pancake batter recipe is simple, I “health-ified” it a bit with some ground flax. You could also use almond meal or whole wheat flour. Extra bits of apple and cinnamon give them a fall flavor. Then top with a homemade apple syrup for a home run.

Ingredients:

  • 1 1/2 cups flour
  • 1 tbsp baking powder
  • 2 tbsp sugar
  • 1 tsp salt
  • 1/4 cup ground flax
  • 1 cups milk
  • 1 whole egg
  • 3 tbsp melted butter
  • 1 tsp cinnamon
  • 1 tsp nutmeg
  • 1 apple, diced
  • 1/2 cup syrup

IMG_5468

Step 1: In a large bowl, combine all dry ingredients, followed by all wet ingredients except the apple and syrup. Mix well until combined. Take 1/3 cup diced apple, and microwave with 1 tbsp water for 2 minutes. Add to the batter.

IMG_5469

Step 2: Spray a frying pan with cooking oil, and heat it to medium. Using a tablespoon, make the shape you want in your pancake and let it cook 3-5 minutes, just until bubbles start to form.

IMG_5471

Step 3: Pour more batter over top of your shape, and cook another 3-5 minutes. Once bubbles form, flip and cook on the other side for 3-5 minutes, until golden brown. You can see I made my “J” backwards… clearly I have a graduate degree.

IMG_5473

Step 4: Microwave the syrup with the remaining chopped apples for 4 minutes, or heat in a pan on the stove until just simmering. Pour warm syrup over pancakes and enjoy!

Super simple peppermint meringues


As a holiday or any day treat, meringues are so simple to make if you follow one simple rule: beat the crap outta the egg whites. Oh, and don’t let ANY fats touch the mix. Easy right?
And with less than 5 ingredients, and only 20 calories per meringue, these are an awesome holiday treat to have out at your party or give as homemade gifts.

I’ve made meringues before, with vanilla and a peppermint candy crushed and sprinkled on top. These take mint to a whole new level. I made a big batch, to give out to coworkers and neighbors. The swirl of color makes them cheery, and the peppermint flavor is very strong, so feel free to cut it down if you don’t want that.

Recipe makes about 4 dozen.

Ingredients:

  • 4 egg whites
  • 1 cup sugar
  • 1 tbsp peppermint oil
  • Sprinkle of sea salt
  • Optional: few drops food coloring

IMG_6253

Step 1: Separate the eggs into whites and yolks. If you want to be super cautious, break each egg into one bowl, then combine them all in a separate bowl. This ensures absolutely no yolk gets in. The fats in the yolk will ruin the meringue and cause it to not rise.

IMG_6257

Step 2: Beat the crap out of the egg whites. Seriously, let it go for about 20 minutes. The eggs should bubble, then begin to “fluff” up. Continue until soft peaks form. That means if you dip a spoon in, it can pull up a peak, but it flops over when you remove the spoon.

IMG_6261

Step 3: Add in the sugar and the peppermint flavoring. You could also try anise, vanilla, lemon, almond… let your imagination run wild. Sprinkle in about 1/4 tsp of salt, and continue to beat until stiff peaks form. If you stick in a spoon, you can pull up peaks that then hold their shape.

IMG_6262

Step 4:You can either put it into ziplock bags with a hole snipped in the corner and pipe it onto cookie sheets, or just use a tablespoon to plop dollops on.

Bake in the oven at 250 for 1 1/2 to 2 hours, or until fully hardened. You can also prop the door open and leave them overnight. I use a foil sheet so they are easier to remove. Also, you can add in a drop of food coloring at step 3 for fun holiday swirls!

IMG_6256

Bonus tip: If you put the yolks in a container with 1/4 tsp of salt or sugar per 4 yolks, you can freeze them for later use. The salt or sugar will keep them from becoming “gummy” for longer. Just mark if you added salt or sugar so you know which recipe to use them in.