Category Archives: Holidays

Recipes specifically for or about any American holiday

Another chapter in my life


To all the readers who are in the New England praying fervently for spring to finally be here, so the snow mountains can begin melting and we can reclaim half the roads, I am one of you now!

Yes, that’s right, the Budget Epicurean has physically relocated across the country from Denver, Colorado to New Haven, Connecticut.

I question my sanity too, join the club.

Jobs brought us out here, but I already have a sneaking suspicion the beauty and ocean may make us happy about the change. Of course, driving a UHaul with a car being trailered behind it and two dogs in the cab for 32 hours, the final 12 of which are a force-you-to-do-20-on-the-highway blizzard isn’t exactly a picnic. But we made it!

I am quite excited to try all that the New Haven area has to offer, and it seems there is so much here! Of course, you may experience an uptick in seafood-related reviews and recipes. Cannot tell you how excited I am that the ocean is only 30 minutes away! And NYC only 2 hours by train. Lots of exploring to be done this year.

So dear readers, that’s the scoop. Hope you stick around for whatever comes next.


I’ll leave you with some ideas for St. Patrick’s Day this Tuesday. These recipes also work great for St. Patrick’s Day leftovers like leftover mashed potatoes, or leftover cabbage.

Top Dozen Recipes of 2014


Hope all of you are off to a great start for 2015!

If you are among those making health-based resolutions, congratulations! I sincerely hope you are choosing to make positive lifestyle changes for yourself, and see them through. If you want ideas here are a few that can truly change your life for the better:

  • Drink more water – 1 8oz glass every hour if you can
  • Eat more vegetables – have a salad or soup pre-meal, add frozen veggies into soups or casseroles
  • Get 7-8 hours of sleep every night – go to bed 15 minutes earlier every day until it happens
  • Move more – exercise, go for a walk, do household chores
  • Cook at home – as often as possible!

In looking back on 2014, I have been very blessed. So many good memories with family and friends. Leaving academia for full time work in a clinic. Blogging successes. Kitchen successes, and failures. Moving, a birthday, adopting two puppies. Quite the year! And I am hoping that 2015 will be even better.

Also, looking back at last year’s resolutions, I did quite well on keeping most of them. Except the working out three times per week. This is the most common struggle, tied with eating healthier. So that is the goal I will focus on most this year.

In honor of the ending of one year and beginning of a new one, I put together the best recipe from each month in a top dozen recipes for 2014. Revisit some favorites and discover new ones! May 2015 be brighter, happier, and healthier than ever.

January – Cinnamon Raisin Soft Pretzels

These warm, chewy pretzels have the perfect harmony of cinnamon and raisins, coupled with a sticky sweet glaze. Perfect during cold winter nights, date nights, or any time.

February – Red Velvet PokeBall Cupcakes

For a birthday party or a Valentine’s Day surprise for your nerdy love, these cannot be beat in wow and cuteness factor.

March – Fruit-Filled Banana Bread

As a quick breakfast or on-the-go snack, this bread is delightful. Moist and delicious, it is packed with several servings of fruit from blueberries, blackberries, and bananas. You can amp it up even further by using applesauce instead of eggs and/or butter.

April – Ethiopian Series

In this series I shared recipes I made for an Ethiopian dinner party, including beef, pork, chicken, fish, greens, potatoes, lentils, cheese, and that addictively different bread, injera!

May – Meal Planning Made Easy

Meal Planning Made Easy

This was a tough call, since May had several stellar posts! May is also when the Budget Epicurean moved over to WordPress from Google and got its own home. But the most popular post was definitely the meal planning post. It is what got me invited onto the podcast “Stacking Benjamins” to talk about how meal planning can be so easy, and improve your finances so much.

June – Taste of Austin

IMG_1438

In this two-post series I shared eight different food locales I visited on a trip to Austin, TX. From taco trucks to the fanciest waterside restaurant, Austin has so much to offer in foodie culture. June was also a successful month for blogging, as I was invited to enter a strawberry shortcake baking competition (which I sadly did not win), and a post about iced coffee netted me a business relationship with Keurig.

July – Lemon Pollock with Olive Tapenade

IMG_2686

This super-quick salty topping is perfect on any kind of fish, or as a bruschetta like topping on crusty bread. I bet you can come up with more uses too. I also got to take a nice vacation in July, which we all need from time to time.

August – Mediterranean Stuffed Mushroom Caps

IMG_3628

These little guys are perfect party appetizers, or you could use larger mushrooms and make it a full meal.

September – Jambalaya

IMG_4728

Not gonna lie, this is probably one of my favorite recipes I’ve ever made. Packed with sausage, chicken, and shrimp, as well as fresh celery, tomatoes, onion, and peppers, served over steaming white rice. This was also the month when I took the one-week SNAP Challenge.

October – Barley & Kale Salad

IMG_5443

A beautiful cacophony of colors and flavors, this salad is hearty enough to satisfy but light enough to not weigh you down. With chewy whole grain barley, power green kale, and multiple other fresh veggies, this will keep you full long past lunch time, and you can feel good about seconds.

November – Acorn Squash Mac n Cheese

Easily adaptable to any type of squash you have, this recipe pumps up the fiber and vitamins of your typical comfort food. It adds a sweet depth of taste and creamy feel. You can sub in any other veggie you like more than spinach as well, such as tomato, onions, peppers, or asparagus.

December – Last Minute Gift Ideas

IMG_5110

When you didn’t know a birthday was today, or got distracted and realized Mother’s Day is today, or somehow Christmas just snuck right up on you. This list of crafts and cooking ideas are all fairly simple, quick to make, and frugal to boot. All of them I have ether tried or am saving to try at some point.


There you have it, 2014 year-in-review of the best of this blog. If you have anything you’d like to see in 2015, or have a different post that was a favorite than one mentioned here, please comment below! Thanks for contributing to this blog’s success in 2014, and I hope to entertain and educate you all this year.

Vanilla White Russians


In anticipation of the upcoming New Year, I wanted to share this recipe for a twist on the classic White Russian.

“Common knowledge” dictates that one not ever drink milk with alcoholic beverages. That extends to pretty much any dairy product. I believe this is due to fear of it curdling in one’s stomach? Or perhaps the extra unpleasantness should it find its way back up.

Whatever the reason, the White Russian looks at that rule and laughs. Milk and alcohol dance a lively jig together on your taste buds, with sugar and coffee joining in. I highly recommend this uber-simple yet totally classy beverage for your bell-dropping soiree!

Made infamous by “the Dude” in the movie “The Big Lebowski“, this three-ingredient hard-hitting cocktail is like dessert in a glass.  Classically only three ingredients: vodka, Khalua, and heavy cream. Variations include different types of liquor, addition of chocolate, or as the Dude uses, powdered creamer (not recommending that route).

This particular variation I made because I happened to have Patron cafe rather than Khalua. Since Khalua is a coffee-flavored rum-based liquor, I figured a different coffee-flavored liquor would work just as well! And I do love the smooth taste of Patron, so I figured why not go for it?

And I also do not buy heavy cream, but did have some french vanilla coffee creamer. What a perfect cherry on top! (Speaking of, I bet something cherry, like amaretto or Disaronno, would also make a phenomenal addition!)

Ingredients:

  • 1/2 cup creamer
  • 1 oz Patron cafe
  • 1 oz vodka
  • 3-5 ice cubes

IMG_3908

Step 1: Fill a glass with a few ice cubes.

IMG_3909

Step 2: Pour about half a cup of creamer (or milk, or heavy cream) into the glass.

IMG_3910

Step 3: Add in one shot each of the Patron cafe and vodka.

IMG_3911

Stir it and and sip! This lightly coffee, hint of vanilla, just a tingle of liquor beverage goes down smooth. Watch yourself, just like real Russians these can be dangerous!


If you do choose to indulge in adult beverages, please have a designated driver and get home safely. Happy 2015 everyone!

Frugal Last-Minute Gift Ideas


So the clock is ticking down, and you realize you only have a few days (or hours) until it’s present time. What are you to do?! Shipping won’t get here in time, and going to the store to fight crowds sounds like your idea of torture.

Not to worry! I have put together a list of clever last-minute ideas you can make yourself, using things you likely already have around the house. Don’t panic, you don’t even need to be that crafty.

First up are “Craft” ideas, with directions and occasional pictures. All these things are things I’ve made before, or would make now. After that are the “Cooking” ideas, which are edibles of course.

Frugal Craft Ideas:

  • Seed Bombs
  • Letter wine cork board
  • Door snake – if you have a sewing machine
  • Personalized mug
  • Body scrub
  • Picture Frame Pin Cushion
  • Scrabble letter ornaments
  • Bonus: Survival Altoids Tin (opens in new window)


Seed Bombs – for the green thumb

This is an idea I saw somewhere one year when I myself was looking for ideas. They are perfect for any time of year, Christmas works because you have plenty of time until spring to plan where you will plant these adorable little gems!

You will need:

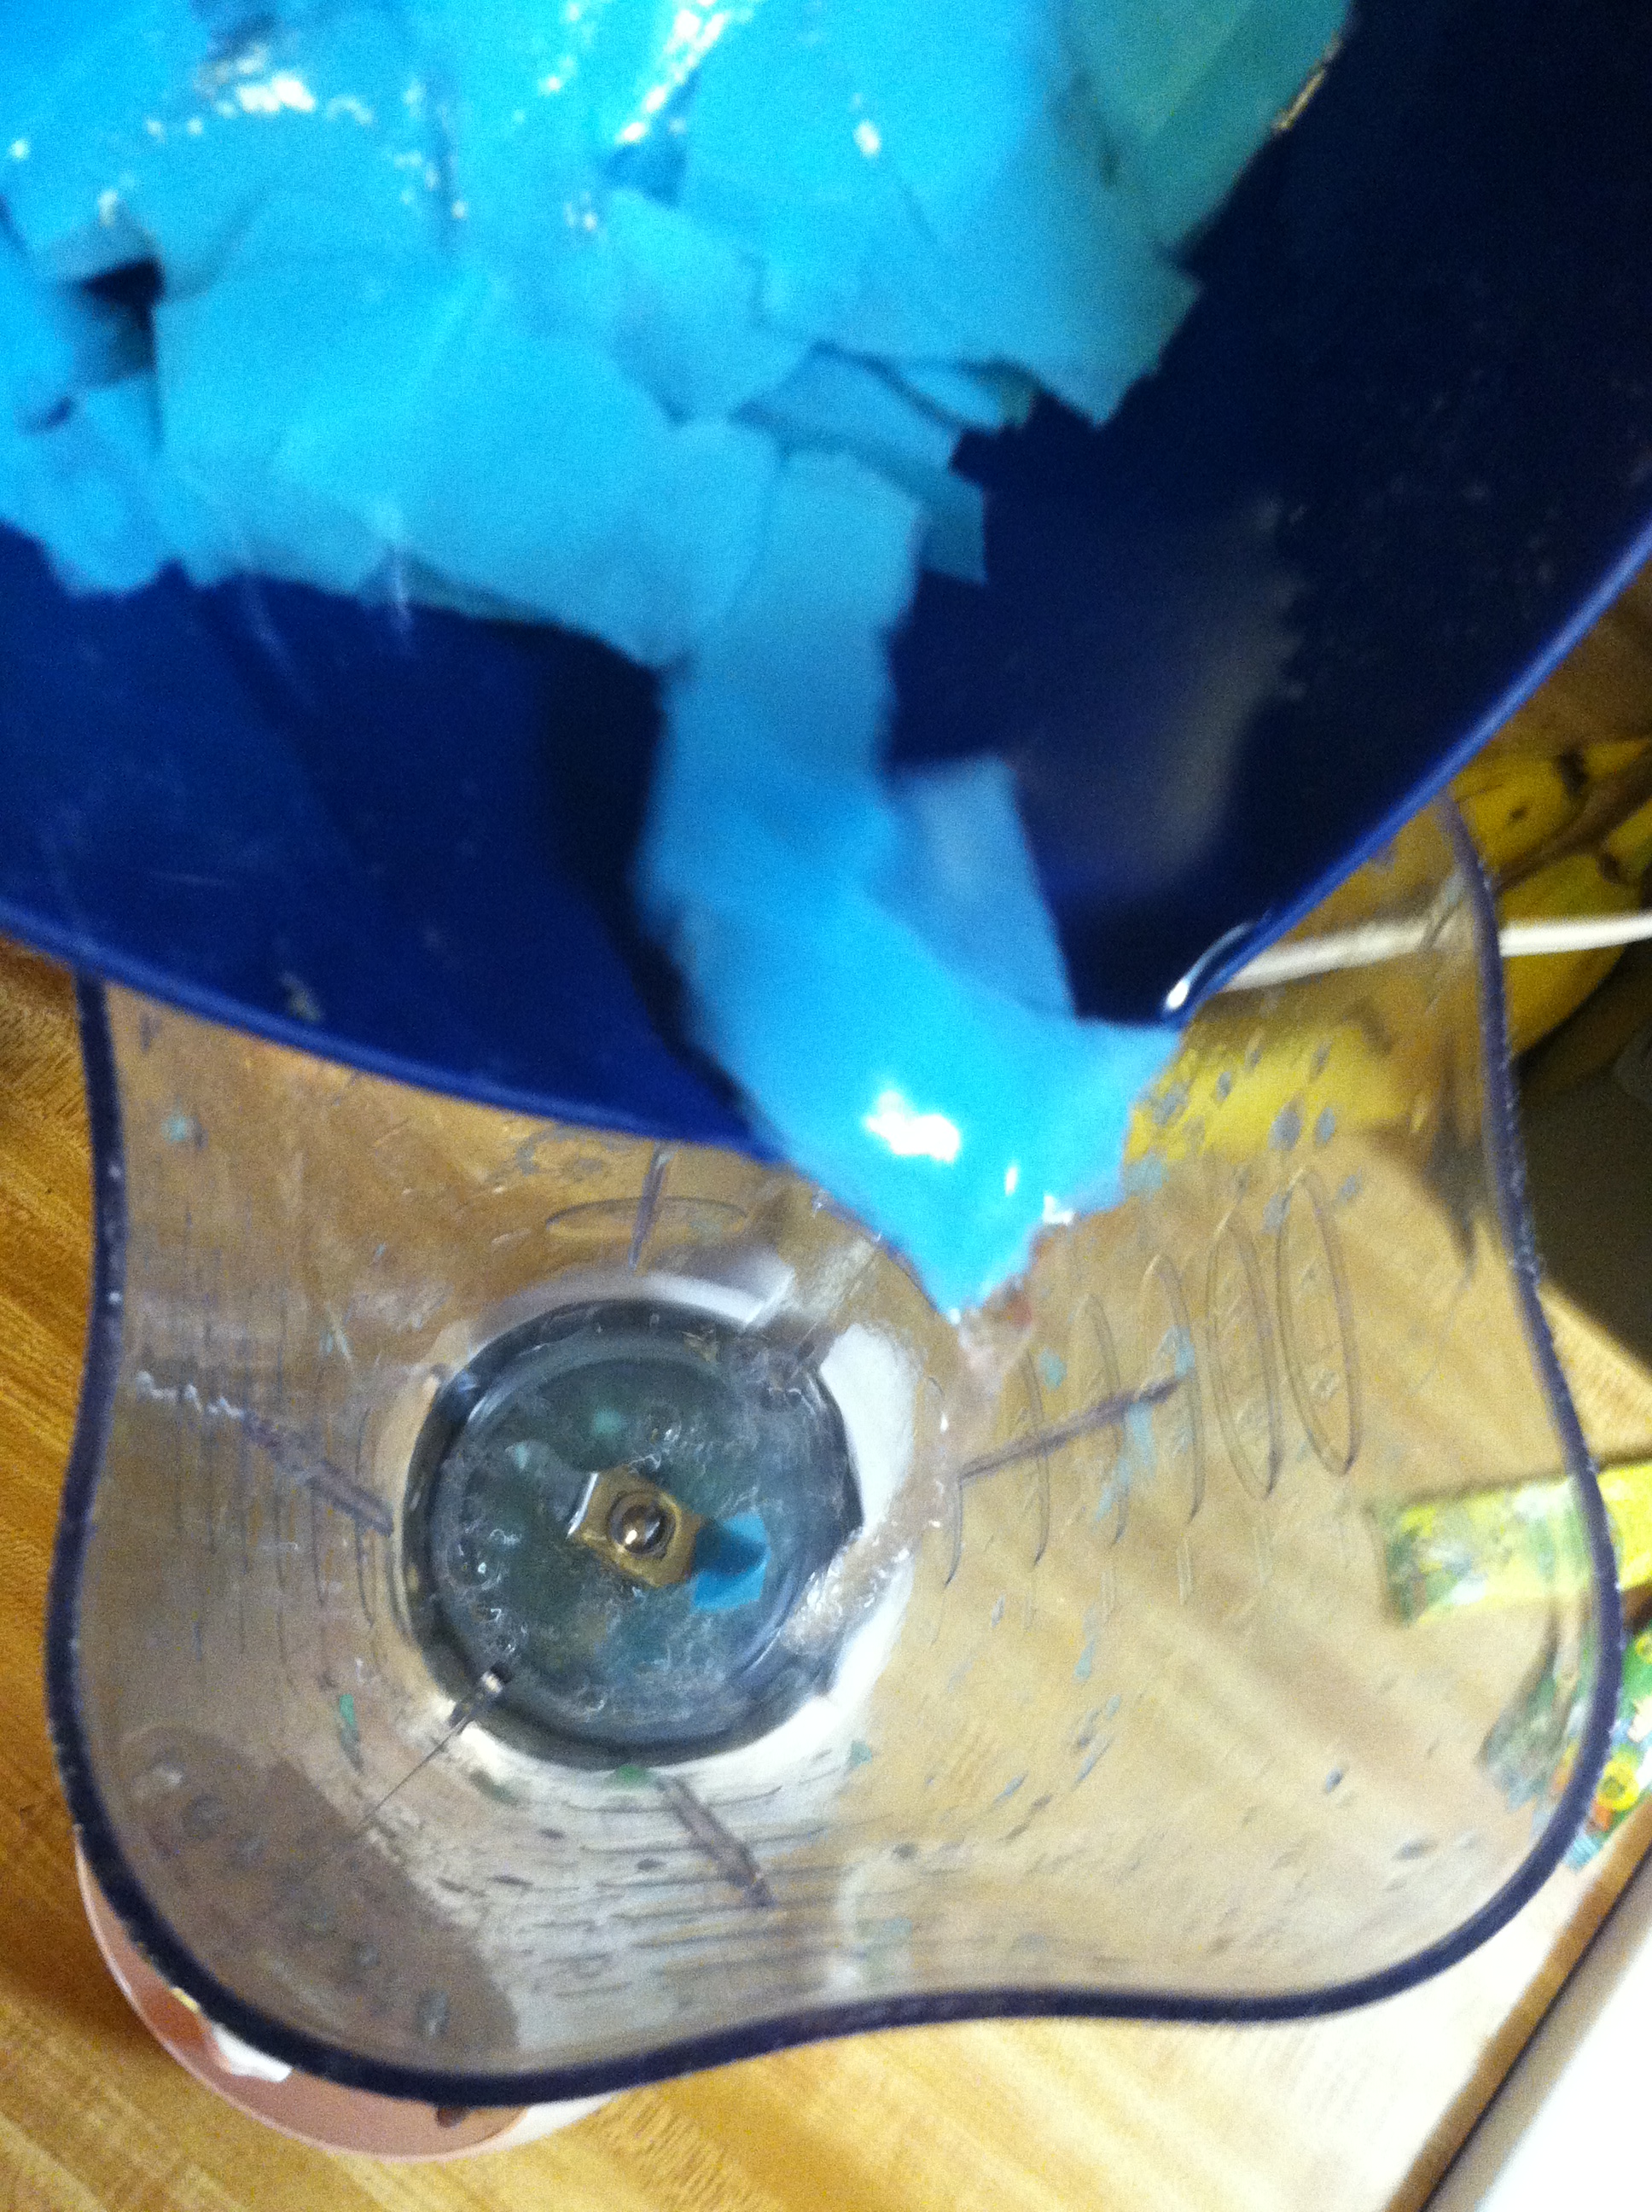
Step 1: Shred one sheet of paper in whatever color you like. Cover with water for 2-3 minutes. Put the paper and water in a blender and pulse until it becomes pulp.
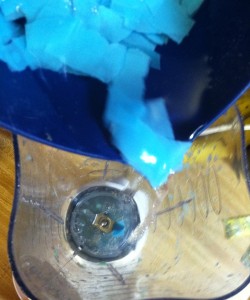
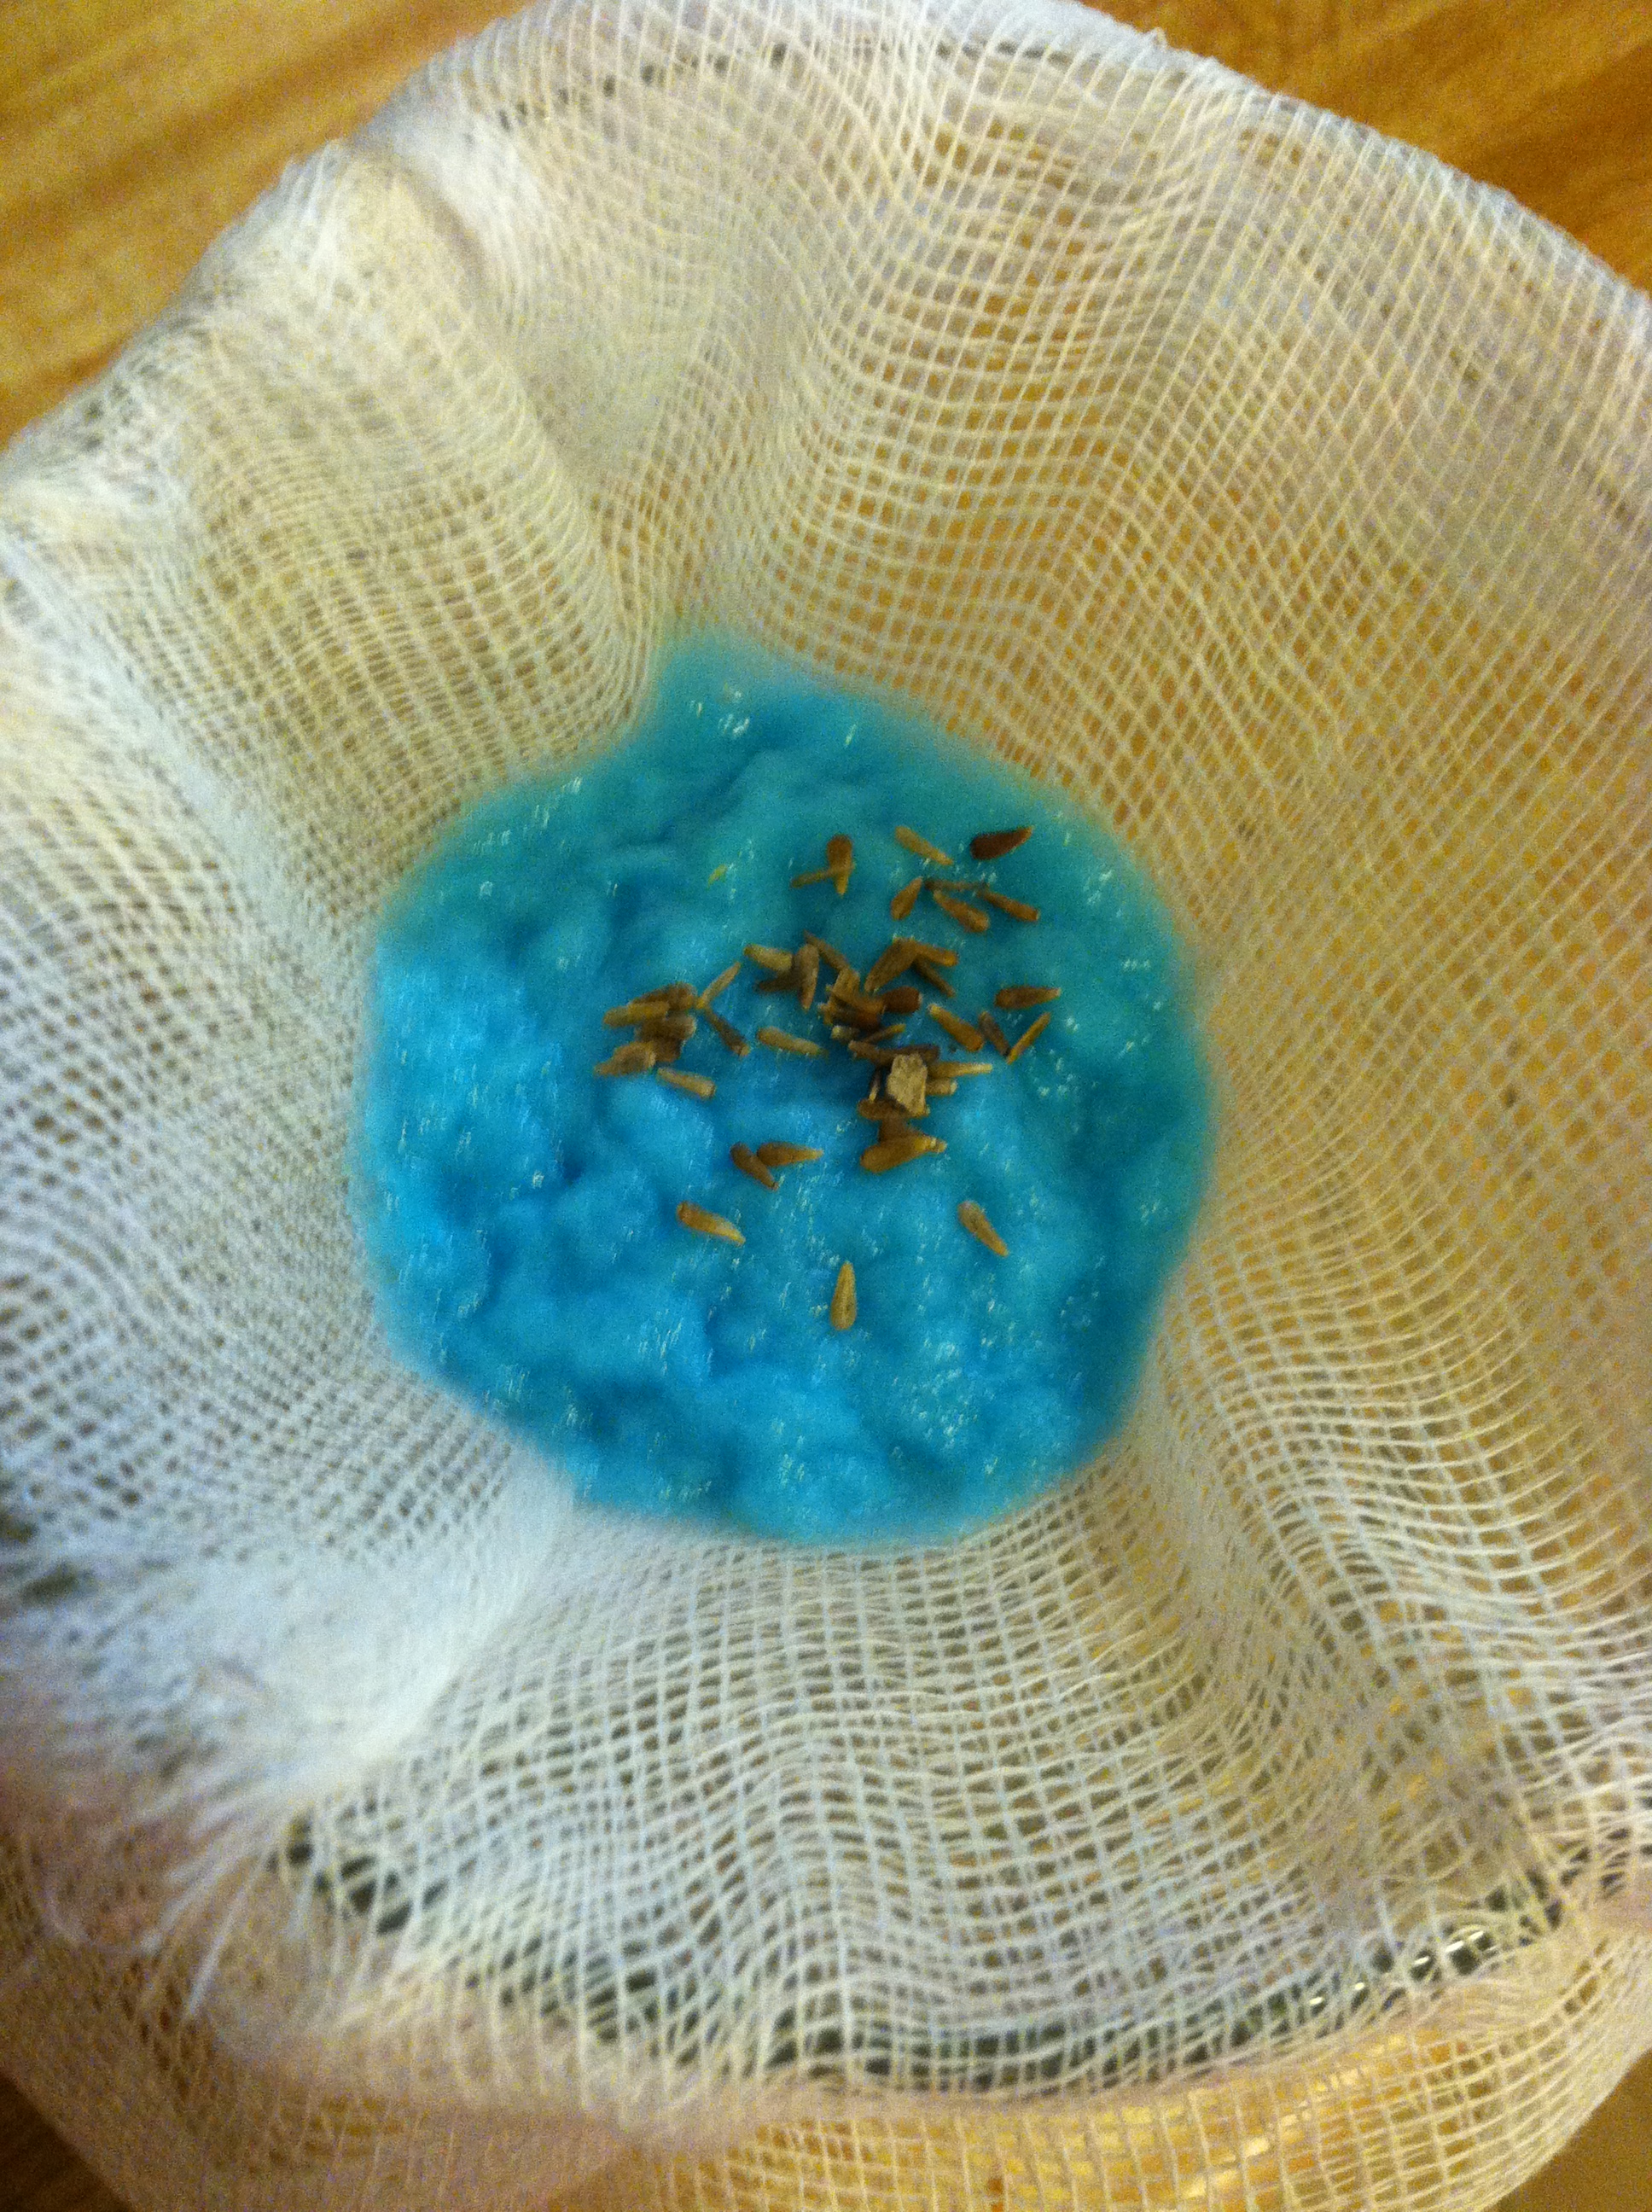
IMG_6412Step 2: Pour the paper and pulp through a piece of cheesecloth to drain. Put a few seeds of your choice in the center. You can make each one a different color flower seed, or use vegetables, whatever you have and whatever your recipient would enjoy.

IMG_6416Step 3: Put some more pulp over the seeds, and squeeze out the excess water.

IMG_6418Step 4: Let the seed bombs dry, and now you have an adorable gift for someone special! You can make as many different colors as you like, the size of the paper sheet will determine how big a bomb you can make.

IMG_6425

Letter Wine Cork Boards – for anyone really

The gift recipient doesn’t need to be a drinker for this project, just you do! Kidding. But you will need to obtain 10-50 wine bottle corks. How many will depend on the letter you want to make, and how big you want the letter to be.

You will need:

  • Wine corks
  • Craft wire
  • Super glue
  • Optional – paint, pretty ribbon, tacks, photos or mementos of you and the gift recipient

Step 1: Arrange the corks into the shape of the letter you want to make. This will help you decide how big you want to make it. Then, using the craft wire, wrap around the corks, weaving in and out. Use super glue every few corks to hold them together. And that’s it! Let your masterpiece dry.

Bonus points if you used corks with varying colors of red on them, and grade the color across the letter. Or you can paint over the end to make the letter all one color. Add a pretty ribbon to the top to hang it, and tack on some fun photos. If you are unsure of your artistic abilities, you can buy a wooden letter at a craft store to use as a guide, and glue the corks to that instead.

Another option: place the corks flat onto a picture frame or serving tray in a fun pattern. Paint over the whole thing with glue. Now you have a flat, fun patterned cork board!


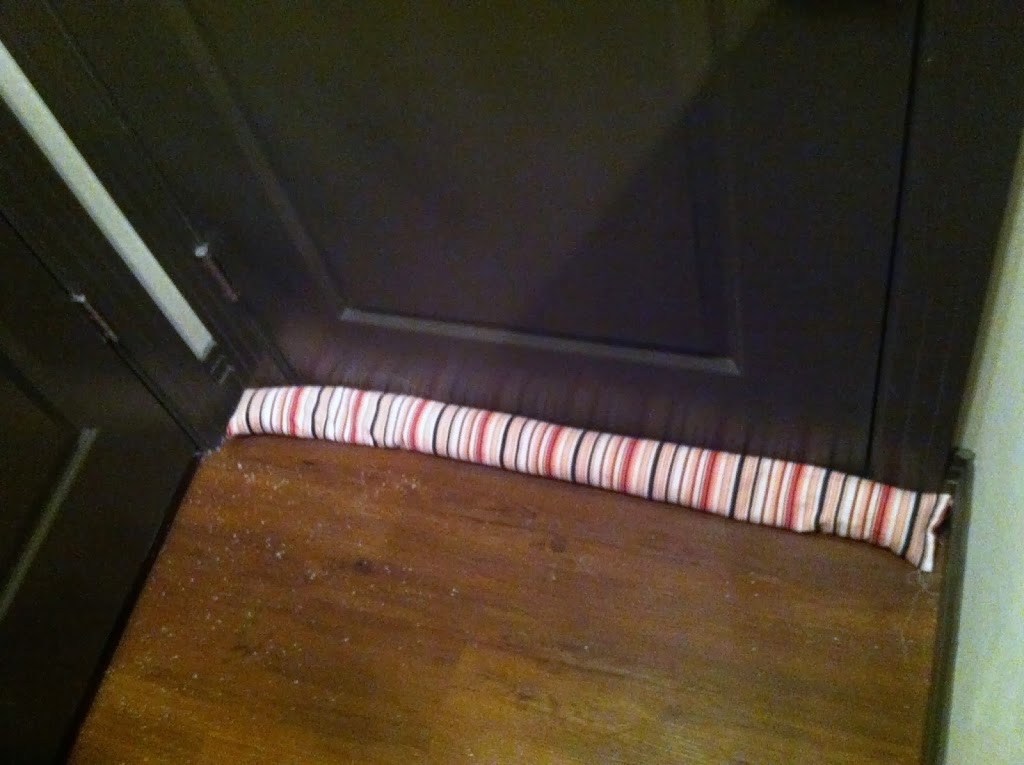
Draft Stopper or Door Snake – for anyone who has a door in their home

These little guys are awesome to put under your doors to stop cold drafts from coming in. You can help a friend be more comfortable this winter and even lower their energy costs! *This craft does require a sewing machine*

You will need:
  • 1 sewing machine (or needle, thread, time, and patience)
  • Material approximately 1 yard by 1 foot (use thicker cloth to stand up to more wear)
  • Approximately 6-10 cups filler (rice, beans, sand, salt, kitty litter, etc)

Step 1: Lay your fabric pattern side up, then flip it over onto itself so the “inside” faces out and pin along the open side. Measure your doorway, and using a basic stitch sew along the pins to that length plus about 4 inches, trimming the excess. This creates a tube.

Step 2: Sew up one end of the tube, making sure that it is fully closed. You don’t want any kitty litter leaking out onto your clean floors later. Now flip the tube inside-out so that the pattern is on the outside.

Step 3: Fill the tube with your filler, rice or kitty litter is best. You can hold it up to your doorway to make sure it is long enough but not too long, and trim as needed. Leave 2 inches on the un-sewn end.

Step 4: Fold the cut ends into the tube, so you now have four layers. This looks cleaner. Then sew up the other end of the tube, going over it a few times to make sure it is sealed well. There you have it. A cute, cheap way to save some money on heating bills for years to come. If you are super crafty, you can even sew some washable covers for the stopper itself so that it can be used for decades to come.
 

Personalized mug – for the coffee or tea drinker

These mugs are infinitely customizable and completely adorable. No one has even been mad about a cute coffee mug as a gift. And when tailored to the recipient they are even more special.

You will need:

  • A white ceramic mug
  • A Sharpie pen
  • An oven
  • Optional: creativity, coffee, tea, hot cocoa mix, etc.

Step 1: Take a white (or other light color) ceramic mug and a Sharpie marker. Using a stencil, or your own talents, draw on your desired picture, phrase, word, etc. Some ideas include: “Good morning”, “For him  & For her”, a quote from a favorite person or book, initials, the person’s home state.

Step 2: Place the mug in the oven at 350 degrees for 30 minutes to set the ink. Now your mug can be used, washed, run through the dishwasher, and not smudge! To fancy up the gift even more, fill the mug with the receiver’s favorite tea or coffee, a peppermint swizzle stick, a bag of cocoa mix and marshmallows, or whatever else fits.


Picture Frame Pin Cushion – for the crafty sewer

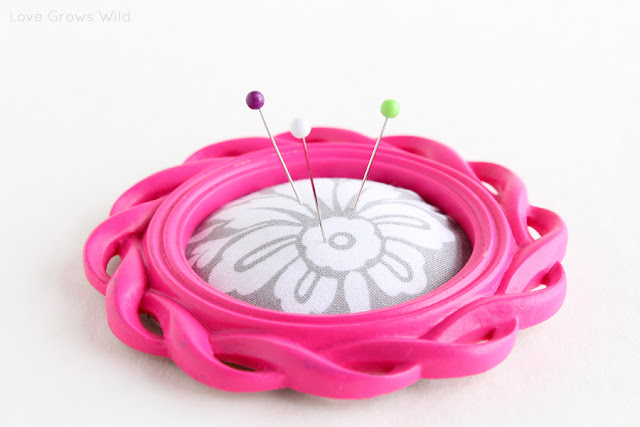
This idea from Love Grows Wild. You don’t need to be able to sew to make this gift either! Do be cautious when working with hot glue.

You will need:

Step 1: Take the glass and anything else out of the frame. Trace around the glass onto a piece of cardboard to make the back of your pin cushion. Use the glass to trace the shape onto your fabric, centering the design if there is one. Cut it out, leaving plenty of extra, and make sure it still fits into the frame with the added fabric. Trim anything necessary to make it fit.

How to Make a Picture Frame Pin Cushion - a simple project to help keep your pins in check while you sew! via www.LoveGrowsWild.com #diy #tutorial

Step 2: Flip the fabric over and place a handful of batting in the center. Place the cardboard on top, and begin hot gluing the fabric along the edges. It will bunch up, that is ok. Leave a 1 inch space open on one side. Keep checking to make sure it fits in the frame, adding or taking out batting as needed.
How to Make a Picture Frame Pin Cushion - a simple project to help keep your pins in check while you sew! via www.LoveGrowsWild.com #diy #tutorial

Step 3: Finish hot gluing the edges, and put inside the frame. Close it or hot glue the cardboard all around the edges. Now your frame can sit or stand up, and will look totally adorable on your crafty friend’s table or sewing machine!

To take it up yet another notch, use these steps but on a small pint-size mason jar. Hot glue the fabric to the lid, then fill the jar with small sewing accessories. You can get a mini kit at most dollar stores, and add in anything else you think your crafty friend would need. Then you have a hand-crafted mini sewing kit!


Body Scrub – for anyone who likes soft, nice smelling skin

This is a great idea not only for the holidays but year round. There are so many scent combinations you could try, like peppermint, grapefruit, lemon, green tea, chocolate, coffee, and brown sugar vanilla. You can also use epsom salt in place of the sugar if you like. I will keep this recipe in my back pocket for anytime I need a quick, cute gift for a girlfriend or relative!

You can also get a little creative here. The basic recipe below is just an outline, experiment with types of oils and amounts until you find what works for you. And the packaging is also key. A clear glass jar will show off layers of different colors, or pieces of crushed candy cane. Make sure to use a wide-mouth lid however, so your recipient can reach in and get a handful of skin-softening goodness out.

You will need:

  • 1 cup sugar (white or brown)
  • 1/4 cup oil (coconut, olive, vegetable)
  • Scent of your choice
  • Optional: food coloring, crushed candies, zested citrus

Step 1: In a large bowl, mix the sugar and scent of your choosing. If you have something liquid like lemon juice, factor that in when deciding how much oil to add. Then mix in oil, a little at a time, until you have the consistency of packing snow. Depending on how many gifts you are making, you can do a large batch or a single jar.

For the jar, if you don’t want to or can’t spend the money on new jars, simply save glass jars from foods throughout the year. Things such as empty Frappuccino cans, salsa jars, or spaghetti sauce can be washed, labels removed, and new pretty labels printed and added. These make an extremely inexpensive, yet uniquely thoughtful gift for mother’s day, teacher appreciation day, birthdays, or holidays!


Scrabble Ornaments – for anyone with a tree

This super-simple, super-cute idea comes from I Heart Naptime. You can pick up a game of Scrabble very cheaply from any thrift store or scout garage sales. Or if you are really crafty you can purchase thin strips of wood, cut into squares, and burn or paint your own tiles.

You will need:

Step 1: Decide what you want your ornament to say. Ideas include: peace, love, joy, Christmas, believe, noel, or the name of the gift recipient. Hot glue the letters together one at a time, letting dry fully. Then hot glue a piece of ribbon to the back and let dry.

scrabble-letter.jpg

These make an absolutely adorable tree accent. You can make as many or few as you like. For other times of the year, you could switch this up by taking mini magnets from a craft store and hot gluing to the back instead of ribbon for a cutely customizable magnet gift.


And now for those who are less crafty and more cook-y, gifts from my favorite place: the kitchen! Most of these take very little time and effort, and you likely have the ingredients in your cupboards already. All look adorable when packaged up into clear containers or holiday tins with a bow on top.

Your recipient is bound to love eating your homemade treats, knowing you put the time and effort in to making them happy.

Frugal Cooking Ideas:


Peppermint Meringues – for those who like crunchy sweet treats

Meringues seem hard but they are honestly super simple. The only requirements are the time put in to make the egg whites fluffy, and making sure there is no fat in the bowl at any time.

It is amazing how much four egg whites can fluff up into. You can use fewer, or double or triple the batch to make simple gifts for teachers, relatives, coworkers, friends, or neighbors.

You will need:

  • 4 egg whites
  • 1 cup sugar
  • 1 tbsp peppermint oil
  • Sprinkle of sea salt
  • Optional: few drops food coloring

Step 1: Separate the eggs into whites and yolks. If you want to be super cautious, break each egg into one bowl, then combine them all in a separate bowl. This ensures absolutely no yolk gets in. The fats in the yolk will ruin the meringue and cause it to not rise.

IMG_6257

Step 2: Beat the crap out of the egg whites. Seriously, let it go for about 20 minutes. The eggs should bubble, then begin to “fluff” up. Continue until soft peaks form. That means if you dip a spoon in, it can pull up a peak, but it flops over when you remove the spoon.
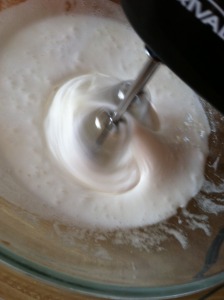
IMG_6261Step 3: Add in the sugar and the peppermint flavoring. You could also try anise, vanilla, lemon, almond… let your imagination run wild. Sprinkle in about 1/4 tsp of salt, and continue to beat until stiff peaks form. If you stick in a spoon, you can pull up peaks that then hold their shape.

IMG_6262

Step 4:You can either put it into ziplock bags with a hole snipped in the corner and pipe it onto cookie sheets, or just use a tablespoon to plop dollops on.

Bake in the oven at 250 for 1 1/2 to 2 hours, or until fully hardened. You can also prop the door open and leave them overnight. I use a foil sheet so they are easier to remove. Also, you can add in a drop of food coloring at step 3 for fun holiday swirls!


Peppermint or Almond Bark – for anyone with a sweet tooth

Barks are a family tradition at my house. They are incredibly simple to make, mostly just requiring time and that you not eat it all! You can customize them however you like with combinations of different types of chocolate, candies, nuts, or caramel. These are great gifts year-round!

You will need:

  • 1-2 cups baking chocolate
  • 1/4 cup crushed candies, chopped dried fruit, or nuts
  • Optional: flavoring such as peppermint extract

Step 1: Melt the chocolate(s). Pour onto a sprayed baking pan and let cool. If using two colors, pour second layer on and let cool. Just before completely cooled, sprinkle on your crushed candy or almonds.

Step 2: Once cool, cut into squares or break into rough pieces. Wrap up and give as gifts, or scarf down the whole tray, I won’t tell.

It really is that simple. You can get creative with this and layer white and dark chocolate together, add almonds to one layer with something different on top, whatever you like.

This can be tailored to whatever event is happening such as birthdays, Halloween, Easter, St. Patrick’s Day, anything.


Cookie in a Jar – for those who also bake

This is an inexpensive gift that can be tailored to your recipient. Basically it entails layering the dry ingredients of a recipe in a clear jar, and usually includes the recipe which tells them what other ingredients to add and how to complete the recipe.

As an example, I’ll use the Dark Chocolate Andes Mint idea from The Frugal Girls.

You’ll need:

  • 1 box Dark Chocolate Cake Mix
  • 1 bag Andes mints or baking chips
  • 1 quart sized glass jar with lid
  • Optional: Ribbon, pretty scrapbook paper

Step 1: Pour the cake mix into the jar and pat down. Pour the baking chips on top. Put the lid on, and wrap a pretty ribbon around it. Attach labels to the front and the lid, or write on the front in Sharpie.

Andes Mint Dark Chocolate Cake Mix Cookies

Add a recipe card that says:

Beat 2 eggs and 1/2 cup vegetable oil in a bowl. Pour in entire contents of jar, and stir well. Drop by tablespoon onto an ungreased cookie sheet. Bake at 350 degrees for 8-9 minutes or until done.

You can use this basic idea to make any kind of cookie or cake mix you want to give. If you are a true baker yourself, or have a favorite family recipe, you can also layer individual ingredients like sugar, flour, baking soda, etc. Just be sure to add in the recipe so the recipient knows what else is needed.

soup_mix

This can also be transferred as an idea to soup recipes. Simply layer in beans, rice, spices, dehydrated veggies, etc. and attach a recipe stating how much water to add and any other ingredients to complete your favorite soup. Tie up with a pretty bow or ribbon and your recipient has a thoughtful, easy future meal.


Peanut butter fudge – for when you seriously have 3 minutes

This is my mom’s super secret, ridiculously easy fudge recipe. With only two ingredients (YEAH, TWO) anyone can make this, even if the doorbell literally just rang with unexpected guests.

Obviously you can find much more involved recipes all over the internet, and no one has ever been angry about fudge as a gift. But for times when you really need a sweet treat pronto, this is a good go-to.

You will need:

Step 1: Mix both room-temperature ingredients well. Microwave 2 minutes, in 30-second bursts, and mix again. Refrigerate until solid and cut into squares.

You can get fancy and top with chocolate chips, or melt chocolate and layer the chocolate and peanut butter. Or just stick with simple and classic. Wrap in cellophane or put into cute tins and watch their faces light up when they bite into a piece.


Canned Jam/Jelly/Salsa/Fruits – for friends who appreciate handmade foods

Really the only things you need for wonderful handmade food items is the jars, some time, and the particular recipe’s ingredients. Canning is not at all intimidating once you try it a few times. The initial investment is $10-20, but you can make plenty of foods without a pressure canner at first, including jam, salsa, green tomato salsa, and canned fruit such as peaches.

You will need:

Step 1: For salsa: Chop up 2 cups tomatoes, 4 tbsp onion, and if you want to add 1 clove garlic, black pepper, hot sauce, jalapeno, and/or cilantro. For jam: Put 2 cups berry of choice in a sauce pan, and add 1/4 cup sugar and 2-4 tbsp water and bring to a simmer. Cook for 20-30 minutes, until berries are completely liquid. Most berries will gel on their own, but you could also add 1 tsp of pectin.

IMG_5160

Step 2: Bring the large pot of water to boil, and add your jars to sterilize for 10 minutes. You can also run them through the dishwasher. Use the funnel to fill your jars, and a wet towel to wipe off the rims. Screw on the cap & lids, and submerge in boiling water for 45-60 minutes.

IMG_5110

Step 3: Remove the jars from boiling water with tongs and set on a counter top. Make sure they are not disturbed as they cool. You should hear the “pop” of the jars sealing. Let cool overnight, then check in the morning that all have sealed. If not, re-process or put in the refrigerator and use within a month.


Candy Cane Popcorn – for anyone who likes sweet holiday snacks

As a total popcorn addict, I am super stoked about this recipe from I Heart Naptime! Like a combination of rice krispies and kettle corn, this gift from the heart is sure to please. As they mention, some recipes use white chocolate so you could try that instead of the marshmallow, or something uniquely you.

You will need:

Step 1: Pop a big batch of popcorn, microwave or stove top. Melt the butter and marshmallows together, and crush the candy canes.

Candy Cane Popcorn

Step 2: Add peppermint extract to the butter, then slowly stir in the popcorn, being sure to remove all kernels. Sprinkle in the crushed candy canes while stirring. Transfer to your desired gift bag or tin. This can be eaten warm or cooled, and likely all in one sitting!


Compound butter – for the savory foodie

A compound butter is just a fancy name for butter with something else added to it. This extra something can be garlic, herbs, berries, or honey. It adds a little extra something special when spread over crackers or fresh bread. Heather from WhipperBerry has three delightful recipe ideas to share.

You will need:

  • 4 sticks of unsalted butter
  • Approx. 1 cup of add-ins
  • 4-ounce glass jars with lids
  • Optional: Adorable labels and gift tags; fresh bread or crackers

Step 1: In a large mixing bowl, combine one pound unsalted, room temperature butter and your desired add-ins (such as 1 cup honey, 1 cup fruit preserves, or 1 cup roasted garlic). Whip well. Spoon into sterilized 4 ounce jars, and store in the refrigerator or freezer until ready to use.

Sweet and Savory Compound Butter with Free Printable

That’s all there is to it friends! And you thought baking up a gorgeous, unique, and tasty treat would take you a lot of time and effort. Now get out there and gift some memories this Christmas.


Of course these are only a few ideas of many. Think about your gift recipient, and your particular talent.

Can you craft your own jewelry? Maybe a cute, unique pair of earrings would be just the ticket. Does your person love to read? Create a one-of-a-kind book marker for them. Photos are always well-received, and there are infinite ways to customize them. A dozen homemade cookies of any kind are always a sure crowd pleaser.

Whatever you do, the gift recipient will know you were thinking of them this holiday season!


Do you have any frugal last-minute gift ideas to share??

Super simple peppermint meringues


As a holiday or any day treat, meringues are so simple to make if you follow one simple rule: beat the crap outta the egg whites. Oh, and don’t let ANY fats touch the mix. Easy right?

And with less than 5 ingredients, and only 20 calories per meringue, these are an awesome holiday treat to have out at your party or give as homemade gifts.

I’ve made meringues before, with vanilla and a peppermint candy crushed and sprinkled on top. These take mint to a whole new level. I made a big batch, to give out to coworkers and neighbors. The swirl of color makes them cheery, and the peppermint flavor is very strong, so feel free to cut it down if you don’t want that.

Recipe makes about 4 dozen.

Ingredients:

  • 4 egg whites
  • 1 cup sugar
  • 1 tbsp peppermint oil
  • Sprinkle of sea salt
  • Optional: few drops food coloring

IMG_6253

Step 1: Separate the eggs into whites and yolks. If you want to be super cautious, break each egg into one bowl, then combine them all in a separate bowl. This ensures absolutely no yolk gets in. The fats in the yolk will ruin the meringue and cause it to not rise.

IMG_6257

Step 2: Beat the crap out of the egg whites. Seriously, let it go for about 20 minutes. The eggs should bubble, then begin to “fluff” up. Continue until soft peaks form. That means if you dip a spoon in, it can pull up a peak, but it flops over when you remove the spoon.

IMG_6261

Step 3: Add in the sugar and the peppermint flavoring. You could also try anise, vanilla, lemon, almond… let your imagination run wild. Sprinkle in about 1/4 tsp of salt, and continue to beat until stiff peaks form. If you stick in a spoon, you can pull up peaks that then hold their shape.

IMG_6262

Step 4:You can either put it into ziplock bags with a hole snipped in the corner and pipe it onto cookie sheets, or just use a tablespoon to plop dollops on.

Bake in the oven at 250 for 1 1/2 to 2 hours, or until fully hardened. You can also prop the door open and leave them overnight. I use a foil sheet so they are easier to remove. Also, you can add in a drop of food coloring at step 3 for fun holiday swirls!

IMG_6256

Bonus tip: If you put the yolks in a container with 1/4 tsp of salt or sugar per 4 yolks, you can freeze them for later use. The salt or sugar will keep them from becoming “gummy” for longer. Just mark if you added salt or sugar so you know which recipe to use them in.

Post 300! — Walmart Party To Go


WOW how time flies! This is my 300th published post on this blog.

I am amazed that it has kept up, and even gotten better over time. Thanks to all you wonderful people who continue to read, comment, ask questions, and make suggestions. I am always looking for ways to better serve my readers, so if you ever have something you want to see here or know about, please shoot me an email (budget epicurean (at) gmail (dot) com). Again, thank you!

In other news…

A while ago I was contacted by media representatives for Walmart. The company offers a delivery service for anything you order online, called Walmart To Go. Now they are expanding it to the Denver area, and wanted some locals to try out the service and see if it was a good fit for their lives.

I decided to throw a dinner party. Some friends of mine I hadn’t seen in a long while had had a baby, another had just successfully defended his thesis and was awarded a PhD, and another was the only remaining member of our first year class who stayed in PhD school.

Not to mention it is the holiday season, when we want to surround ourselves with joy and make happy memories with people we care about. All these reasons are reasons to party!

Disclaimer: The food and decorations for this party were provided by Walmart.

Walmart to go truck

I was given a set budget, and challenged myself to come up with the nicest-looking decor and spread as I could on that budget. If you have followed my blog at all, you know that is kind of my thing. I usually am a bargain-hunter with food, but for all other items this would be a challenge.

After I placed my order, I simply waited. The delivery person gave me a call 15 minutes ahead of time to let me know he was on the way. I appreciate that in case you were just about to shower, on the phone with a parent, taking the dogs for a walk, whatever, you know when to expect a knock on the door.

He showed up right on time, with several bags full of goodies. I did not know that the delivery persons are not allowed to enter your home. They must hand your bags through the door to you. That makes sense for everyone, safety first, and they don’t want to accidentally break anything inside the house by knocking it over with a full bag.

IMG_6928

So Thursday night, my kitchen floor covered in food and decorations, I had about 20 hours until the party, and felt mostly prepared already.

You can see that a $100 budget gets you quite a lot of food! I shopped smart, and chose non-name-brand items mostly. The ravioli were $2.79 per bag, all salad fixings were about $6 total, garlic bread for just over $1 per piece.

The large olive oil, beans, and rice cost about $10, but will make tons of meals! A simple beans and rice for a side, or with the frozen broccoli thrown in to make it a meal, and that $10 can turn into 50 cents or less per serving.

IMG_6931

The decoration budget netted: 5 strings of lights, 5 light-up candy canes, light hooks, a rope light, a big red bow for the front door, a wax melter, and a nice tablecloth. The original plan was one light-up reindeer and 2 light-up trees, but I think we ended up with a lot more bang for our buck this way.

photo 2 copy 3

The light-up candy canes were adorable, but they do have a limited stretch of wire between them. If you want more than a foot between each one, you will also need some small extension cords.

photo 1 copy 3

My boyfriend is nuts, and thinks climbing around on roofs is a fun hobby. He didn’t use a ladder, just jumped right up there and started clipping lights to the gutters. All told, it probably took about 2 hours of work the morning of the party to decorate, inside and out. We did run out of lights, and had to go get one more strand.

photo 4

The finished product came out really well, I’m very happy with how it looks! You can see our two terriers in the door there wanting to come outside with me.

The food budget covered: cheese and beef ravioli, tomato and alfredo sauce, 2 loaves of garlic bread, spinach, romaine, broccoli slaw mix, ranch and Italian dressings, fruit dip, apples, bananas, strawberries, an apple pie, green tea, beans, frozen broccoli, olive oil, and rice.

I also added in paper plates, napkins, utensils, and wet wipes and spray cleaner for after the party. (You can see in the corner of the photo my homemade draft stopper! This thing is awesome in the winter to keep the chill from the garage out)

photo 1 copy 2

This is proof that you can eat healthy foods on a budget as well. The two apples, strawberries, one pear, raspberries, and dip all cost less than $10 and made a lovely platter with more left over.

photo 4 copy

I took the black silverware and wrapped them in white napkins. Then cut 1 inch strips of crepe paper and wrapped it around the bundle for color. Red, green, and white to go with our holiday theme. Boyfriend asked, are we saluting Italy?  =)

photo 3 copy 3

The smaller red plates I put on top of larger white plates, which matched the beige tablecloth on top of a red one. The table has extra leaves, and when stretched out it is too long to fit just one tablecloth. Good thing we had the extra-long red one too!

photo 3 copy

The wax melter in the background made the room smell like cinnamon, and the red candles on the table were a nice centerpiece for now. On to the cooking part!

photo 3 copy 2

I boiled all the pasta ahead of time, and then kept it warm in the oven on low. We had beef ravioli and five-cheese ravioli. I also made a box of penne because we had several kids coming and I wanted to be sure there would be something everyone would eat. Sauteed asparagus with Italian dressing was a nice hot side dish.

photo 1

Everyone fit just perfectly in this cozy dining room, and there was plenty of food to go around. People loved having the choice of beef or cheese, and which sauce to use. I was proud of my friends for how much of the salad was eaten too!

We actually had so much food that the rice and the bean salad were not needed. And I totally forgot about the garlic bread! No one seemed to mind, and now I have that for a future party.

photo 2

We did have one bad experience, halfway through the meal one friend of mine was cutting her ravioli and the fork broke right in half! Luckily the box has more than enough extras so it wasn’t a huge deal. But just know these plastic utensils have a breaking point, and it’s pretty low.

All in all it was a lovely night. We had a great time catching up with each others’ lives, and everyone said the meal was delicious. I ended up with plenty left over too! The delivery eased the stress of having to go to the store, though I ended up having to run out once anyways (for penne and extra lights) but that happens. You can’t plan for everything all the time.

I think I would use this service again, especially for big parties which are planned ahead of time so I know the menu. For everyday cooking, I like physically going to the store, seeing what is on sale, and creating meals in my mind. I’m going to plan another party in a few weeks, for my birthday, and we will see how that goes!

If you want to try Walmart Grocery To Go yourself, click on this referral link: Walmart Grocery To Go.

Creative Recipes for Thanksgiving Leftovers


Since Thanksgiving was already a few days ago, you readers may be tired of turkey sandwiches by now. Or perhaps you went to a potluck and didn’t get saddled with 10 pounds of leftovers, but want to take advantage of steeply discounted holiday foods at the store. Either way, this list of leftover options is sure to help empty that fridge to make room for more culinary masterpieces!

table

First of all, Peter at Feed Your Soul 2 has already made a handy list for his Friday Five collection all about Thanksgiving Leftovers. And if you’d like a super simple casserole recipe to use up all the leftovers in one delicious swoop, try Jeanette’s Layered Thanksgiving Leftovers Casserole.

The Turkey

turkey

The golden centerpiece of the Thanksgiving table, the turkey is a classic. And with the deals offered this time of year (0.50 per pound, what?!) you can’t pass that up. Even if you just scooped up an extra on sale and now it’s in your freezer, these recipes are great for using up that extra fowl.

From Gina’s Skinny Recipes, we start our day with a Turkey & Sweet Potato Frittata. You know I’m a huge fan of frittatas for their adaptability and ease. See the ham section.

If you shred up the turkey meat, you can easily replace chicken for this south-of-the-border Meat & Cheese Enchiladas

Likewise, just replace the shredded chicken with shredded turkey in this White Bean Chicken Chili for a new twist

From Southern Living, try some Turkey Tostadas with Cranberry Chipotle Sauce for a double whammy

For a long list of 16 more amazing turkey recipes from around the food blog-o-sphere, check out This List Here.

The Ham

Ham_Color_adjusted_2

A classic for a reason, Scalloped Ham & Potatoes is a delightful comfort food great for using up both ham and extra potatoes that didn’t get mashed.

As the turkey frittata above mentioned, I love putting anything into scrambled eggs, like this Ham & Greens Frittata

Your Home Based Mom has a great list of tried and true recipes her family loves for using leftover ham

On a chilly winter day, try this comfort food classic of Ham & Potato Soup from All She Cooks. You might even be able to sneak in some leftover mashed potatoes to score a double

The Potatoes

IMG_4644

For adorable, portable snacks little ones and grown-ups alike will love, make these Cheesy Mashed Potato Puffs from The Kitchn

This is a simply brilliant recipe from the One Ingredient Chef: Vegan Lentil & Sweet Potato Shepherd’s Pie

Try whipping up a loaf of easier-than-you-think Sweet Potato Bread

Potatoes are a great base for latkes, and you could use any other filler in there, including turkey meat. Or switch it up from fowl and pork and try my Salmon Latkes

Stuffing/Dressing

stuffing

Whether you call it stuffing or dressing, made by hand or from a Stove-Top box, Thanksgiving is incomplete without the starchy side dish. If you have a bowl or three in your fridge, try some of the recipes below to revamp your bread bits.

While there are ten great leftover recipes in this post by Trisha, the Stuffing Waffles are by far the most intriguing to me!

Pull off a dinner-party worthy main dish with little effort with my Stuffing-Stuffed Pork Chops

Try this triple-threat of Turkey, Mashed Potato & Stuffing Patties from the Pocket Change Gourmet

Half Hour Meals has a great list of 7 ways to use stuffing ranging from stuffed mushrooms to meatloaf

Cranberry sauce

cranberry

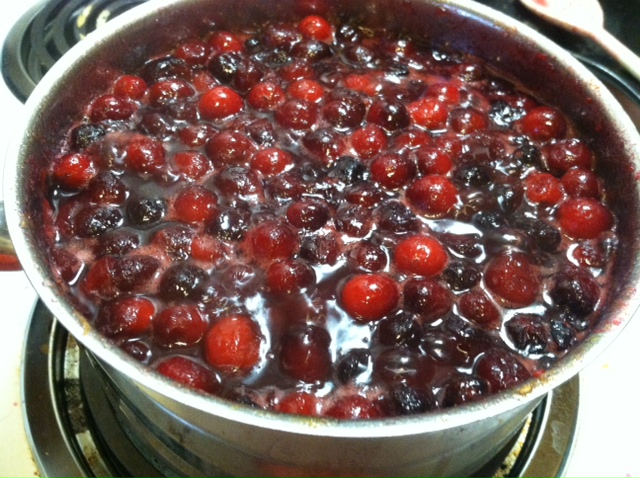
There are tons of ideas out there, I’ve been seeing lots of versions of the Cranberry-Grilled Cheese this year. Here’s a great list of 9 different cranberry ideas, I particularly like mixing it into plain cream cheese as a different and delicious bagel topping!

Brittany Angell has a gigantic list of 35 Ways to Use Leftover Cranberry Sauce with a plethora of ideas that might inspire you to use cranberry sauce year-round

Green Bean Casserole

fresh-from-the-oven-green-bean-casserole

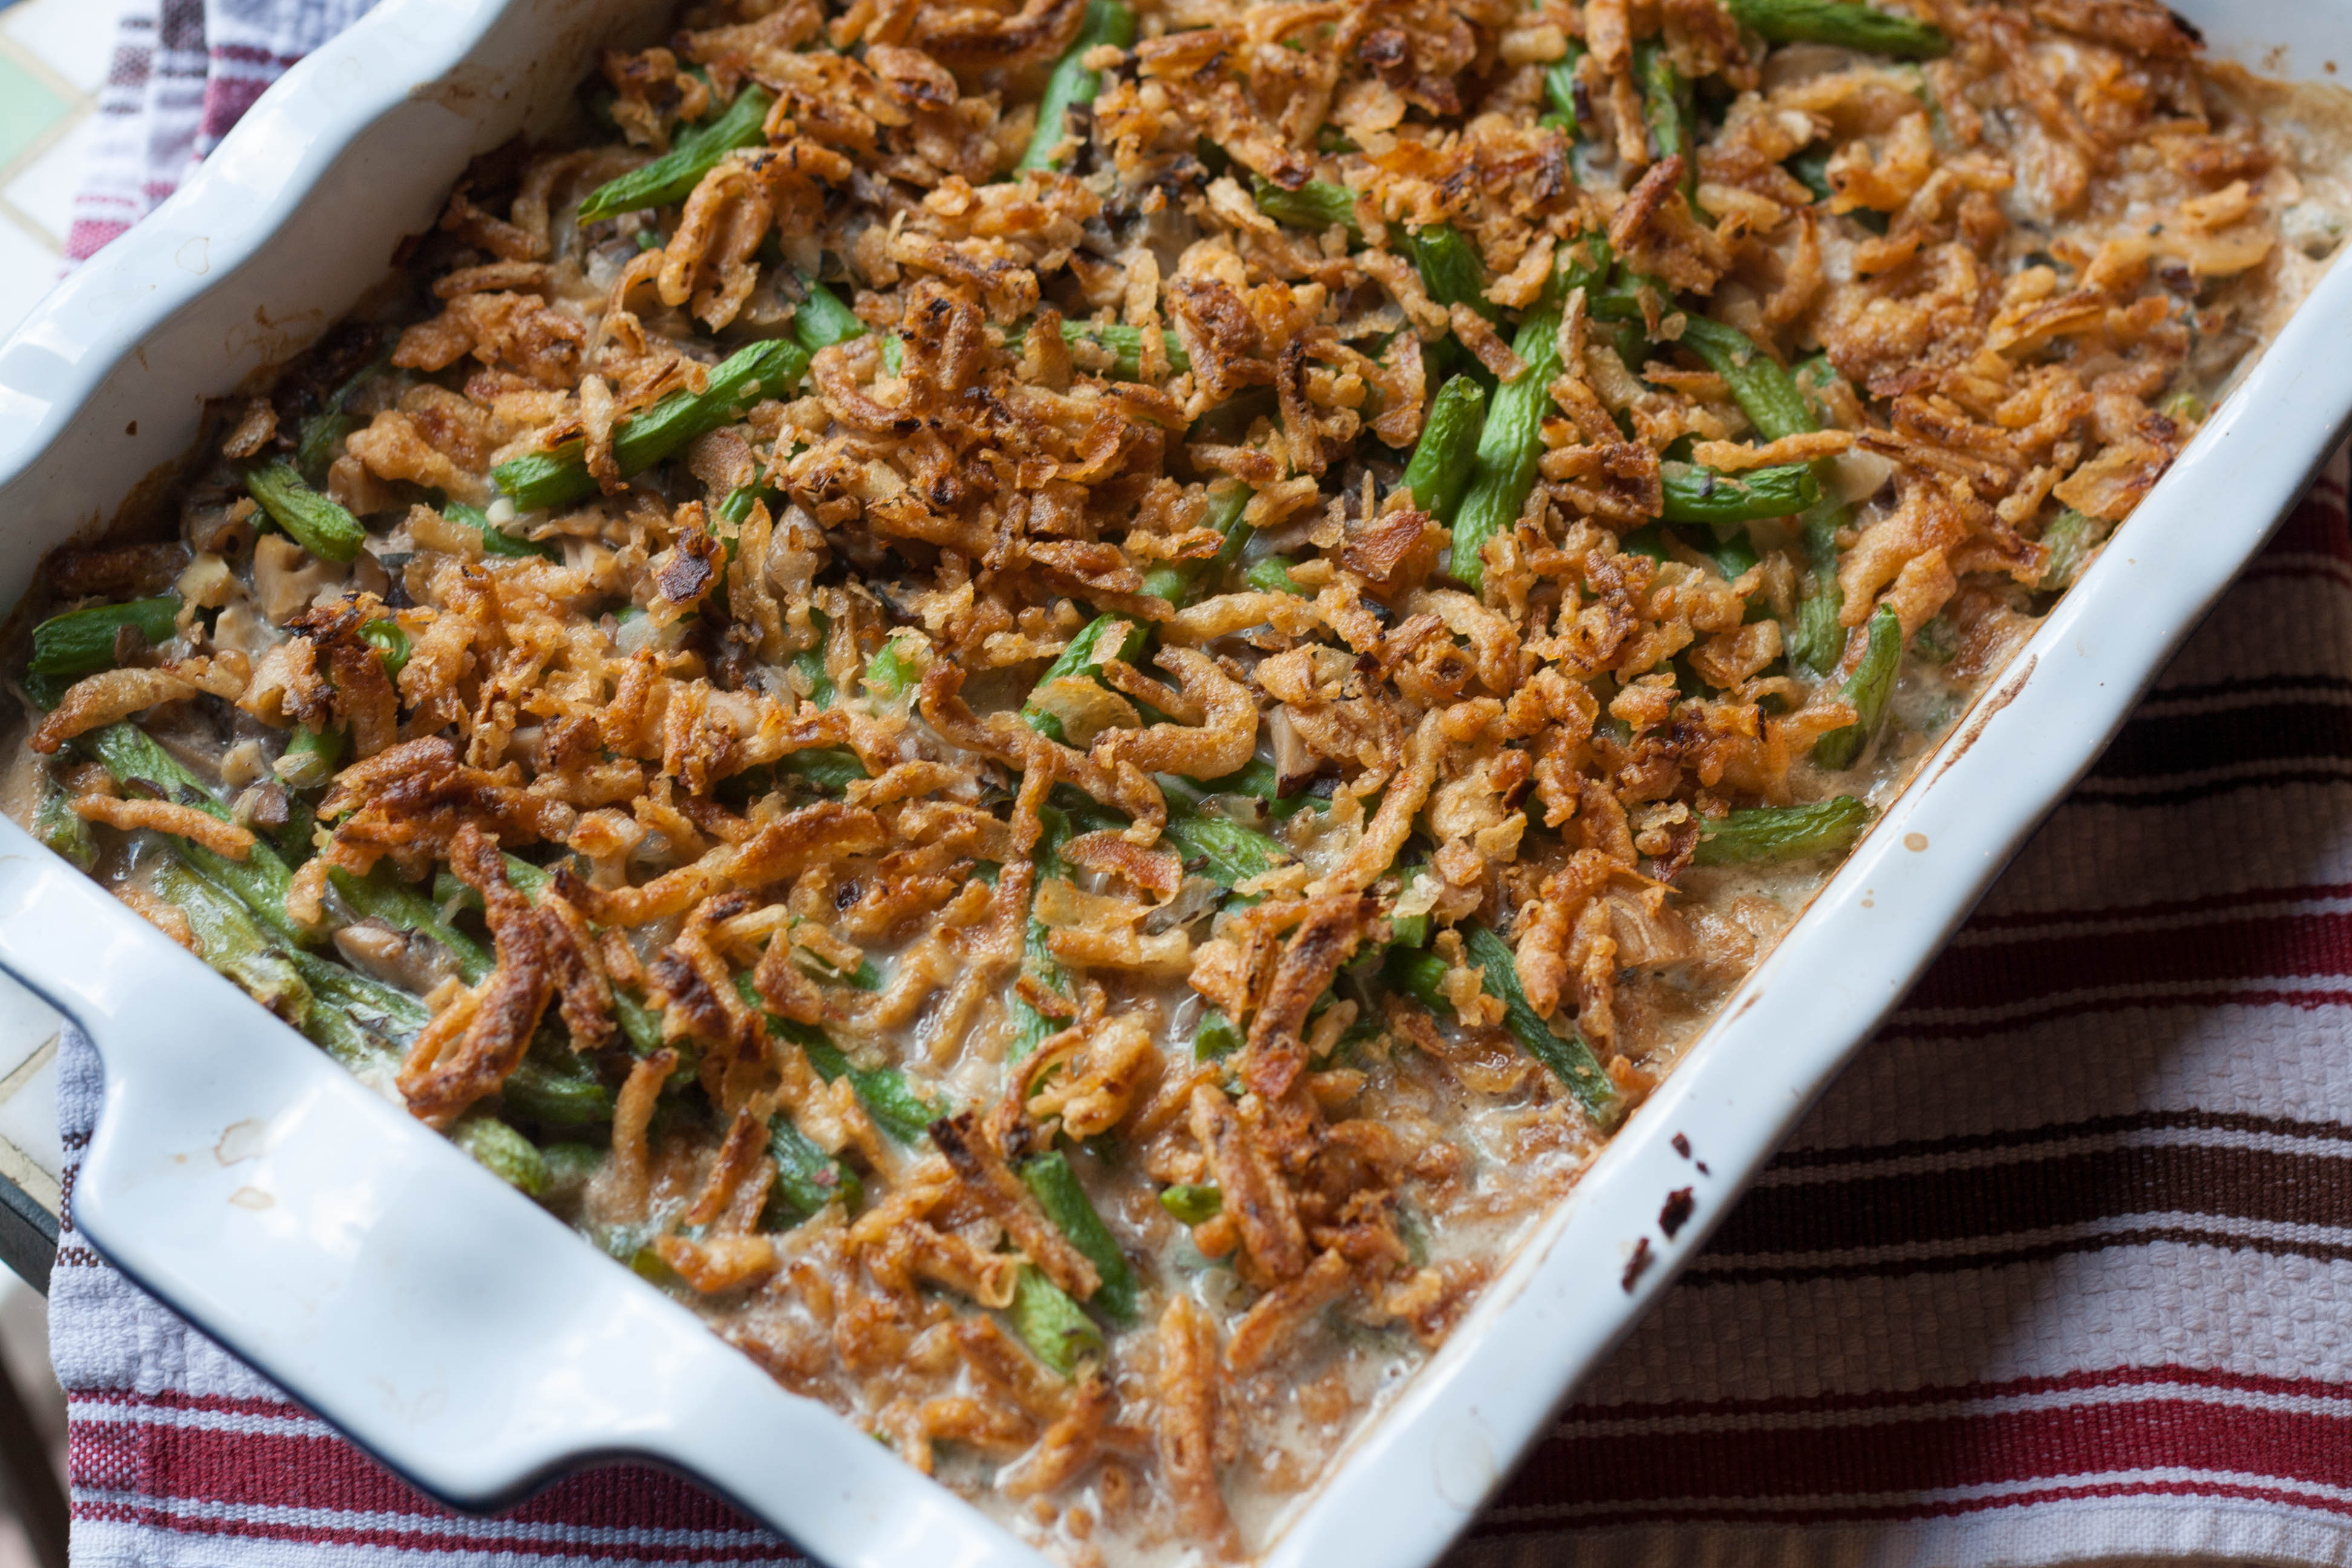
Kevin here put together this Green Bean Casserole Pasta on the fly, but it is brilliant and the cream sauce just kind of works. Must try.

Similarly Greta puts leftover roasted Brussels sprouts in pasta and claims even kids will eat it!

Chef Pete brings us a Turkey, Green Bean & Stuffing Strudel, as well as a “Thanksgiving Cosmo” drink recipe for excess Cranberry Sauce

plate

Of course, if you are tired of cooking at this point and just can’t summon the energy to re-purpose those leftovers, the classic Thanksgiving Leftover Sandwich will do.

Keep in mind that many of these freeze well, so if you just can’t face the gallon of cranberry sauce or two pounds of turkey breast, stick it in a freezer safe plastic bag or container and wait out the holidays. Perhaps a cranberry brownie will sound better in February, or by Easter you can use up those ham chunks.

Hope all my readers had a delicious and thankful Thanksgiving this year!


What do you do with leftovers?

Giving Thanks


Happy Thanksgiving dear readers! I am so thankful for each and every one of you.

I sincerely hope that your Thanksgiving day is filled with good food, friends, family, and stories. Laughter and hugs and sore stomachs from wayyyyy too much to eat.

For some light reading to avoid the football madness or post-turkey nap, see my post from last year on how to do Thanksgiving under $20 , or read about the history of Thanksgiving and why it should be “thanks-giving”.

Or check out some more awesome food bloggers’ Thanksgiving ideas and leftover uses:

Chewingthefat Thanksgiving daily
TheSimpleDollar leftovers roundup
FeedYourSoul2 dessert roundup

(This is not permission to ignore your family in favor of your smart phone or tablet! Pay attention to what your Aunt Edna is saying, you never know how many more holidays you have.)

In honor of that train of thought, some things I am thankful for this year:

  • My amazing, supportive family, who love me from far away
  • My amazing, supportive S.O. who keeps me going daily
  • Finally getting a house & a yard! (renting. but still.)
  • Puppies!
  • Friends who keep in touch through big life changes
  • H Mart. Y’all not from Denver, you just don’t know.
  • Flowers
  • A car that keeps working, despite my lack of attention
  • Jobs that are mostly rewarding and fun
  • Cool people with good stories
  • Board games
  • All the lovely people who have read, shared, supported this blog!

1957692_10102311011621190_4353835963171798343_o

What are you thankful for?

Lingonberry-Pear Shots


This is something that sounds exotic, but if you live anywhere near an IKEA you can obtain delicious lingonberry extract for about $5. I bet you could find it online or at a local grocery store too, if you look. Or substitute in whatever berry you enjoy instead. Apple, raspberry, pumpkin, cherry, blueberry…

I recommend something red, because the red juice and pear layered is very festive. This would be adorable at a holiday party or get-together.

Ingredients:

  • 1/2 oz lingonberry extract
  • 1/2 oz rum
  • 2 tbsp pear juice
  • Small piece of pear

IMG_4538

Step 1: Pour in the juice concentrate. This should be the heaviest, so if you pour the other layers carefully they shouldn’t mix.

IMG_4539

Step 2: Splash in 2 tbsp pear juice. I opened a can of pears and used the juice in there, plus the fruit as garnish.

IMG_4540

Step 3: Carefully pour on the rum, cut a slit in the pear and wedge it onto the glass.

And there you have it! Totally adorable lingonberry-pear shooters. You could also make this into a full-out beverage by using 1-2 cups sparkling flavored water and adding rum, berry, and pear juice.

How to: Make a simple wreath for under $10

.
This is a fun holiday craft I took on last year with really impressive results. You will be amazed by how gorgeous a piece you can make in just a little time with things you can find in your neighborhood. Could be a good kids craft or bonding time for couples. Just be careful if using real pine, the needles of some can really be sharp.
.
Since you can use real pine branches, this wreath is super cheap. Just make sure you are collecting from a tree you own or are allowed to use… Then embellish with other things from nature, or some cute colorful things you can pick up at a craft store or Goodwill.
.
You will need:
  • Several pine branches (real or fake)
  • Super glue/hot glue
  • Craft wire
  • Pine cones or other forest accessories
  • Embellishments, preferably in pretty colors like red, silver, green, or gold. You could go with any color theme you like.
  • Optional: Glitter, ribbons, etc.
Step 1: Begin forming the branches into a circular shape. Just move the branches around and piece it together into what looks best. Use the wire to hold pieces together once you like the look
Step 2: Once the branches are held together well, you can also hot glue them. Then start strategically placing your accessories. Intersperse colors with neutrals, like I did with the red fake berries and the pine cones.
Step 3: Spread glue around, and sprinkle with glitter for a little extra shine. If you don’t have a nail or hanger on your door, you can also now hot glue a thick ribbon onto the wreath to hang it.
.
And now you can enjoy your unique, homemade holiday decoration. This would also be a great frugal Christmas gift.