All posts by BudgetEpicurean

Grapefruit juice: Miracle or killer?

History of the Grapefruit

A grapefruit is indeed a fruit, but is definitely not like a grape. Nor is it purple. So how did it get its name? People who dedicate their lives to studying fruits are a subset of botanists called “pomologists”. According to the Library of Congress website, most pomologists agree that the grapefruit is a hybrid between a sweet orange and a pummelo.

The largest citrus fruit, the pummelo is native to Southeast Asia and it has white, pink, or red flesh and a thick pith. Learn more here. The original orange was likely crossed with a pummelo having pink flesh, as most grapefruit varieties are pink inside, though there are white and red varieties as well.

All citrus fruit are what is called “Hesperidum”, a large, modified berry with a thick outer skin called a rind. The rind is what you ‘zest’ on lemons and limes. 

Grapefruit. From the National Center for Chronic Disease
Prevention and Health Promotion Web site.

Grapefruit trees usually grow 16-20 feet tall, though they can reach up to 50 feet. The fruits tend to grow in clusters, which has been suggested look like a bunch of grapes, leading to the name grape-fruit. The rind is yellowy-orange and the fruit is largely a sphere, with segmented flesh. The redder varieties are typically sweeter, but all varieties have that acidic tartness for which the fruit is known. 

In the USA, Texas is the state most known for producing commercial grapefruit. TexaSweet Citrus Marketing, Inc. has a page dedicated to the history of the grapefruit industry in Texas. In it they state that the first reported planting of a grove (large group of similar, fruit-bearing trees) in Texas was 1893. Those first trees were of the white varieties, followed soon after by the pink varieties. A developer from Omaha, Nebraska felt that these crops were the future of the state, and thus John H. Shary began combining his knowledge of the latest irrigation techniques with a determination to produce citrus commercially. Now known as the “Father of the Citrus Industry”, he shipped his first commercial crop in 1920. 

Right around the Great Stock Market Crash of 1929 the first red grapefruit was accidentally discovered. In 1929 the first grapefruit patent was issued for the “US Ruby Red” of the Redblush variety. Many new mutations were found producing varying degrees of redness and sweetness, causing confusion in the market. Further laboratory breeding and experimentation lead to even more varieties. Finally Texas decided that to differentiate its red, sweeter fruit from others on the market, they would market crops under only two trademarked names, the Ruby-Sweet and the Rio Star. 

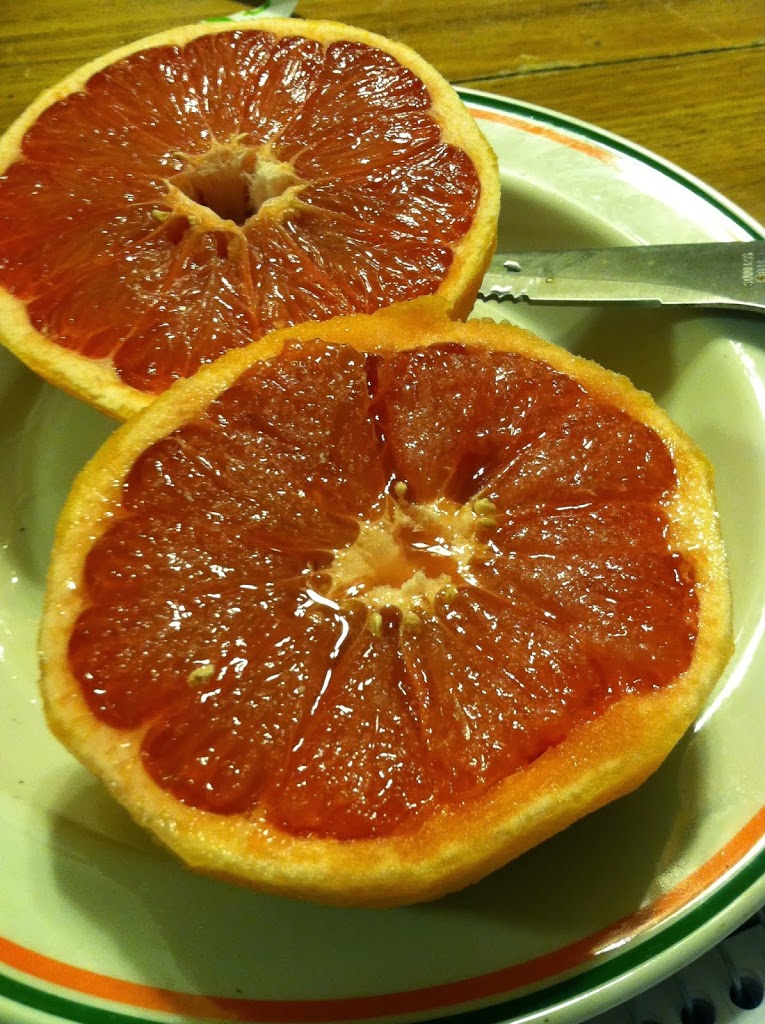
My favorite way to eat grapefruit is just slice it in half, and sprinkle some sugar or sweetener over the halves. Cut along the white part to separate each chunk of flesh. Then dig each piece out with a spoon and enjoy! It’s an interactive healthy breakfast. You can use the peels to make Grapefruitcello, a super easy infused alcohol, too!

Benefits and dangers of grapefruit

Benefits

As grapefruit became more popular, pop culture obsession with dieting created many grapefruit juice cleanses, grapefruit concentrate pills, and of course diets in which your main food is the grapefruit. WedMD has a breakdown of the classic grapefruit diet and considerations if you’re thinking of trying it. The benefits of grapefruit include:

  • Vitamin C – grapefruit, like all citrus fruits, is rich in Vitamin C. This vitamin, also known as ascorbic acid, is required for growth and repair, is an anti-oxidant, meaning it helps get rid of damaging free radicals in your body, and is reputed to help fight off or prevent the common cold. (Source: MedLine Plus)
  • Lycopene – a bright red carotenoid phytopigment, this is a product of photosynthesis. Found only in the pink and red grapefruits, it is suggested to have anti-inflammatory, anti-tumor growth, and age-related eye protective properties. Other foods rich in lycopene include tomatoes, apricots, pink grapefruit, watermelon, papaya, and guava. (Source: Mayo Clinic)
  • Flavonoids – liminoids, glucarates, and naringenin are other chemicals found in grapefruits which may have health benefits. Limonoids promotes formation of glutathione-S-transferase, a detoxifying enzyme which benefits the liver. Glucarates are found in citrus fruits and may help prevent breast cancer. And naringenin has been shown to help repair DNA in a human prostate cancer cell line by inducing formation of two DNA-repair enzymes. Grapefruit juice has been purported to help men lower their risk of prostate cancer. (Source: World’s Healthiest Foods)
Dangers

While grapefruit may be a nutritional powerhouse, it can also cause health problems. Certain types of drugs become more potent when combined with grapefruit juice. Depending on the type of interaction, the drugs can become more or less bioavailable, accumulate in the blood or organs, or fail to metabolize. Certain compounds in grapefruit juice slow the body’s normal detoxification and metabolism processes in the liver and intestine. Grapefruit may inhibit cytochrome P450 enzyme, an important metabolizing enzyme, or P-glycoprotein, a drug transporter which shuttles chemicals into and out of the intestines. 

Interactions may include:

  • statins
  • immunosuppressants
  • calcium channel blockers
  • antivirals
  • hormones

Currently at least 85 drugs are known to interact with grapefruit compounds. Statins in particular can build up to toxic levels, which may result in the serious statin-associated disease rhabdomyolysis. This disease affects muscle tissue, and can cause temporary weakness or paralysis. These interactions may also be more severe in elderly patients. Doctors should be aware of these interactions and education patients about their particular risk, as each individual patients’ situation is variable. Check with a healthcare provider before starting a diet which regularly incorporates large amounts of grapefruit and/or juice.

Additional Resources


For many other facts about grapefruit, including history, ways to use it in cooking, drug interactions, and nutritional facts, check out Vegetarians in Paradise, the Kitchn blog, 3 fat chicks on a diet, Wikipedia, ABCNews, or Health.com.

For a PDF of the Review article
Medicinal importance of grapefruit juice and its interaction with various drugs by Jawad Kiani and Sardar Imam.

Click if you’d like to read this article: The grapefruit: an old wine in a new glass? Metabolic and cardiovascular perspectives by Peter Owira and John Ojewole. 
 

What’s your favorite way to eat grapefruit?
 

Homemade Cinnamon Raisin Soft Pretzels

.
I’ve had a love affair with everything you can make homemade for quite some time now. From homemade oven-baked bread (that didn’t work very well… I need to try that again), to perfect pancakes, applesauce muffins, and even infused liquor, I love when I can take a few simple ingredients and make a whole lot of something I otherwise would have to buy at the store. Someday soon I will foray into making my own yogurt, bagels, kombucha, and sauerkraut too. 
.
One thing I’ve had in the back of my mind to try was soft pretzels. They seemed like an easy enough task, though I wasn’t sure. History claims that a very long time ago, AD 610 according to TLC Cooking, a monk was frustrated with his class and had some leftover bread dough. He rolled the dough out into rolls and made the iconic pretzel shape to resemble hands crossed in prayer. Originally called “pretiola”, Latin for “little reward”, they were quickly re-named “brachiola” which means “little arms”. They reached Germany, where they became a huge hit and were known as bretzels. This translated in America to pretzels, and so the famous street/fair/and sports event food took its place in our history.
.
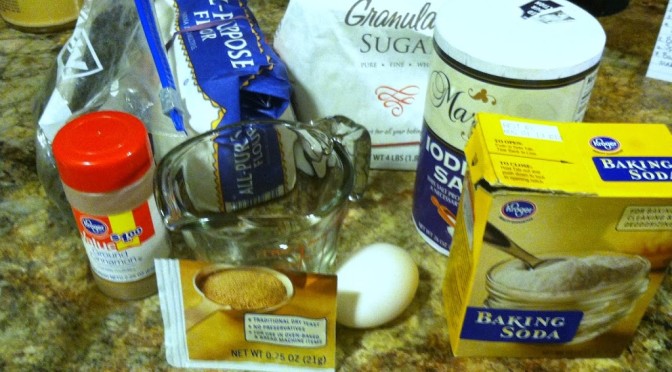
So when I found on Sally’s Baking Addiction a 30 Minute Pretzel recipe, I knew I had to try it. However, my favorite soft pretzel is the Auntie Anne’s cinnamon raisin with glaze, so rather than a plain salt that’s what I was after. With a few tweaks, I was sure I could re-create that $6 treat for far less. This recipe ended up making 8 medium-sized pretzels. I’m sure you could cut it in half for one, or make smaller ones for young-uns. You can also omit the cinnamon and use less sugar and just roll in sea salt for regular soft pretzels and dip in mustard or cheese. In fact, I think I’ll need to make another batch of plain this weekend…
.
Ingredients:
1.5 cups water
1 packet yeast
1 cup sugar or brown sugar
2 tsp salt
2 tbsp cinnamon
1/4 cup raisins
4 cups flour plus extra
2 eggs, beaten
.
Step 1: Pour the yeast into 1 1/2 cups warm-ish water and stir. You don’t have to wait for anything to rise, just mix it well.
Step 2: Mix all dry ingredients in a large bowl. (Flour, sugar, salt, cinnamon, and raisins). Add in the yeasty water and mix with your hands. Add more flour if needed. Once you have a fairly rubbery dough, break off a fist-sized chunk and place on a floured surface.

Step 3: Roll the dough out into a long strand, then cross it over into the pretzel shape. I’m actually going to try making letters and other shapes next time.

The next step is optional. Rumor has it boiling in baking soda water gives pretzels that chewy texture and browned color. Boil 1 cup baking soda in 9-10 cups water. Dunk the pretzels, and let boil for 5 minutes, then dry on a rack before baking. **Oh wait… it said 30 seconds. That could explain a lot. Only leave them in the boiling soda water for 30 seconds if you do this step**

A little hint: putting a wooden spoon across the top of a pot keeps it from boiling over. At least up to a certain point.

My post-baking conclusion was that while the boiling did cause a different color and taste, I like the pretzels without the baking soda step better, so I won’t be doing that in the future. However feel free to experiment yourself, maybe the altitude has something to do with it… #ColoradoBakingProblems

Step 4: Beat the eggs in a flat bowl/plate and coat the pretzels fully.

Step 5: Brush on some butter and cinnamon/sugar if you want extra sweetness. Bake the pretzels at 425 for 10-15 minutes, until nicely browned. Make sure to watch for burning.

Step 6: To make the glaze, take 1 cup powdered sugar and mix in 2 tbsp melted butter, 1 tsp vanilla flavoring, and 1-3 tbsp milk (depending on the consistency you want).

Drizzle the glaze over your pretzels and enjoy!

Warm and chewy right out of the oven, these pretzels were fantastic! Just as good, if not better, than anything I’ve had from a mall or baseball field. Will definitely be making these regularly, they are so easy and take less than a half hour total time.
.
National Pretzel Day is April 26, so you have plenty of time to practice and perfect your favorite recipe!
.
80% of all pretzels in the United States are made in Pennsylvania, where the hard pretzel originated. Unfortunately the Pretzel Museum in Philadelphia has closed, but they leave behind some fun facts:
.
bullet Pretzels without salt are called baldies.
bullet An 1859 parade in New Orleans featured a float carrying a pretzel-baking machine.
bullet An average pretzel has 3.5 grams of fat and 260 calories.
bullet German kids wear pretzels around their neck for good luck on New Year’s. 
bullet Pretzels top some Christmas trees in Austria.
bulletA page in the prayer book used by Catharine of Cleves depicts St. Bartholomew surrounded by pretzels which were thought to bring good luck, prosperity and spiritual wholeness.
.
For lots more fun facts on pretzels check out the TLC website.


What’s your favorite type of pretzel or topping?


Vegetarian Pepper Pizza with Acorn Squash Sauce

Pizza is popular in nearly every country and among all age groups. Who can resist a chewy doughy crust, tangy or creamy sauce, and toppings to make your mouth water? With infinite variations, pizza can range the gamut from a whole-grain & veggie-packed near-health-food to an unapologetic grease-laden diet disaster. Everyone has their own favorite topping and style.
Of course most people know that pizza is native to Italy. The History Channel website wrote up a nice article about the history of pizza you should check out for more information. The city of Naples, founded in 600 B.C., was home in the 18th & 19th centuries to a large working-class poor population. As such, they needed food which was cheap and easy to eat quickly. Flat bread baked with various toppings such as tomatoes, garlic, olive oil, and cheese, met this need. However, pizza did not catch on worldwide until the late 1940s.

Italian immigrants to America brought these recipes with them when they immigrated in search of jobs. Quickly, the smells and tastes of these flat breads began to grow in popularity, and local custom varieties began springing up. Toppings branched out from the typical tomato, basil, cheese, or anchovies and grew to include things like pineapple, BBQ chicken, bacon, and even dessert pizzas. Chicago became known for its “deep-dish” pizza with inches-thick crust, while New York City style meant thin crust pies with a slice bigger than your face. Chains spring up and now popular American-founded brands are represented in over 60 countries worldwide. 

This pizza I came up with was made with a bare minimum of ingredients, the dough does not need time to rise, and I packed in the veggies. The acorn squash hidden in the sauce makes it a bit sweeter than I’m used to, which I didn’t mind. But if it’s too much, try adding tomato paste and olive oil rather than diced tomatoes. And as always, don’t be afraid to experiment! Have some asparagus left in the fridge? Ran out of mozzarella but have some blue cheese? Want to spice it up with jalapenos? Go for it!
Ingredients:
DOUGH
2 1/2 cups flour
1/2 tbsp sugar
1 tbsp salt
1 1/2 cup warm water
SAUCE
1 can diced tomatoes
1 acorn squash
Dash Italian seasonings
Dash garlic salt
TOPPINGS
1/2 cup spinach
1/2 jar roasted red peppers
Handful banana pepper rings
~2/3 cup mozzarella cheese

Step 1: Cut the squash in half and microwave 5 minutes, cut side up, with water in it. Flip and microwave another 5 minutes. Repeat until the squash is fork-tender and peels easily.
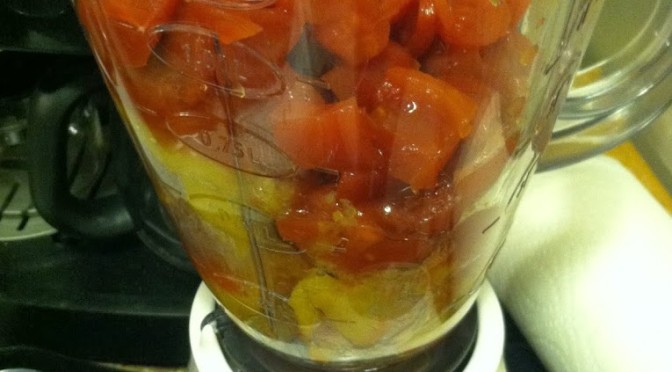
Step 2: In a blender, combine the can of tomatoes (with juice) and squash. Blend until it makes a smooth puree. Add spices here.

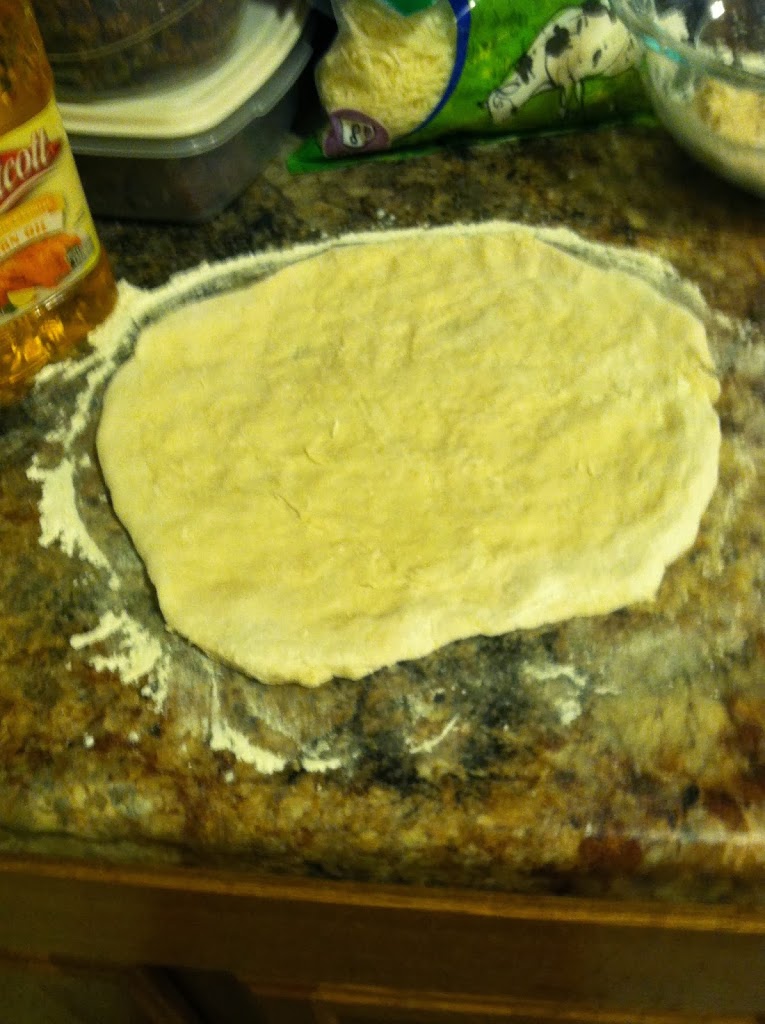
Step 3: In a large bowl, mix the dough ingredients. If too stiff, add more water or olive oil. If too wet or sticky, add extra flour. Sprinkle some flour on a flat surface and roll the dough out. Use your hands to shape it into a circle.

Step 4: Spread the sauce over the dough, leaving about 1 inch around the edges for crust. Layer on the toppings.

Step 5: Cover it all in cheese. You can substitute vegan cheese or just leave it off for a vegan pie.

Step 6: Bake on a pizza pan or cookie sheet at 350 for about 40 minutes, or until golden brown and bubbly.

Let it cool on a rack if you can wait that long!

Thanks Italy! 
What’s your favorite kind of pizza?


How to: Make a “Door Snake” or “Draft Stopper”

Want to know a great way to help your budget in the colder months? Winter-proofing your house or apartment.

If you live somewhere that experiences temperatures below 60 degrees (which is much of the world) your skin and wallet will thank you for taking some simple steps. Winter-proofing is beneficial because it can help your heater work less hard (due to plugging up drafts and beefing up insulation), keep your living areas warmer, decrease your energy needs, and decrease your energy bills. All good things.

Some tips will not apply to you depending on what type of structure you live in and how much space you have to heat. A quick Google search brings up Yahoo’s list of 12 Ways to Winter-Proof Your Home, Women’s Day’s Guide to Winter-Proofing Your House,  and UK Money’s How to Winter-Proof Your Home and Beat the Big Freeze. 

A common thing among all winter-proofing lists is insulation.

Regardless of whether you have a 5-bedroom home in the suburbs or a one-bedroom apartment in the city, insulating your doors and windows will keep drafts at bay and heating bills manageable.

One way to insulate windows is to use plastic window cling or bubble wrap. I mashed several layers of bubble wrap over the bedroom window and duct taped it in place. There is definitely a noticeable difference in how much cold gets through the window now.

This guide is to show you another simple way to avoid under-door drafts: by making a door snake!

It may seem intimidating, but my friend B and I made two gorgeous draft stoppers in under 20 minutes.


You will need:

  • 1 sewing machine (or needle, thread, time, and patience)
  • Material approximately 1 yard by 1 foot (use thicker cloths to stand up to more wear)
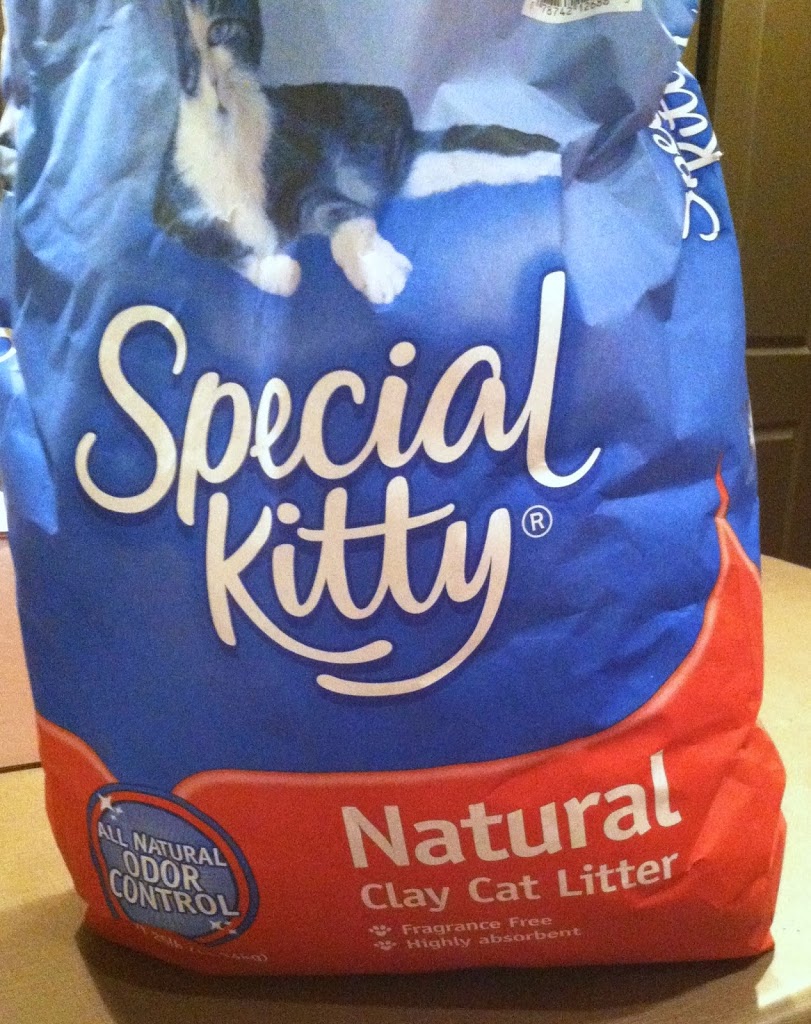
  • Approximately 6-10 cups filler (rice, beans, sand, salt, kitty litter, etc)

Step 1: Lay your fabric pattern-side up, and flip it over onto itself so the ‘inside’ faces out. Pin along a straight line.

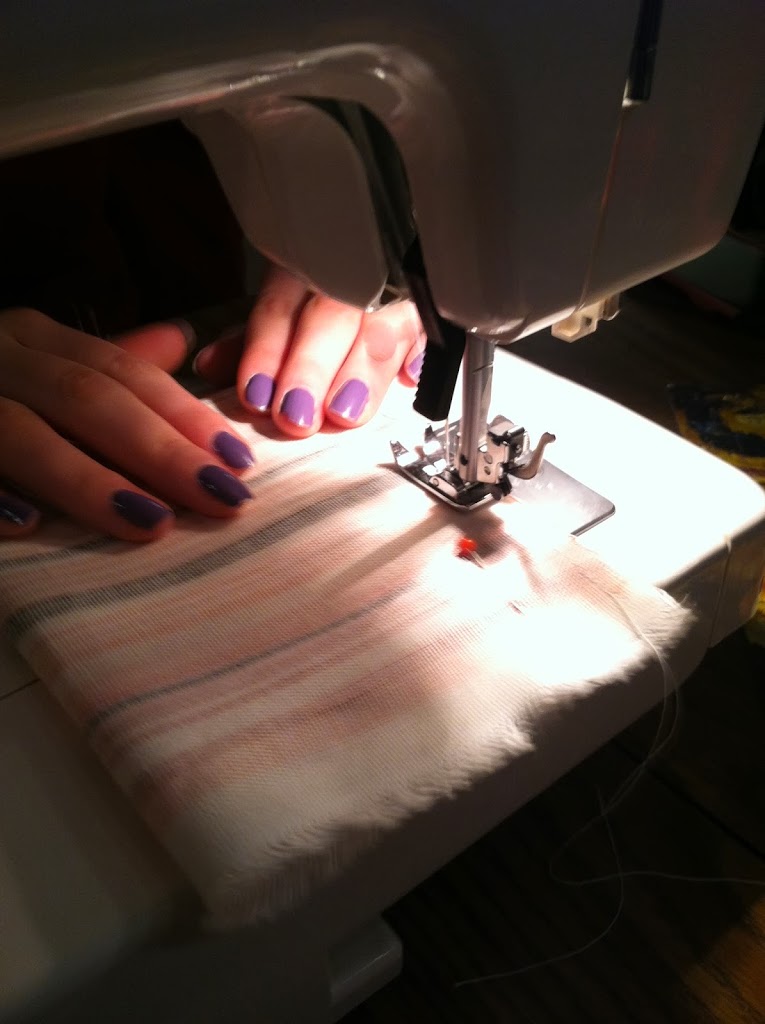
Step 2: Use a basic stitch to sew along the pins from end to end. You can measure the length of your doorway, leave an extra 2 inches per end. This doesn’t have to be super exact.

Sew all the way along the length. This will create a tube with open ends on both sides.

Step 3: Sew up one end of the tube. Make sure the two sets of stitches overlap to fully close that end.

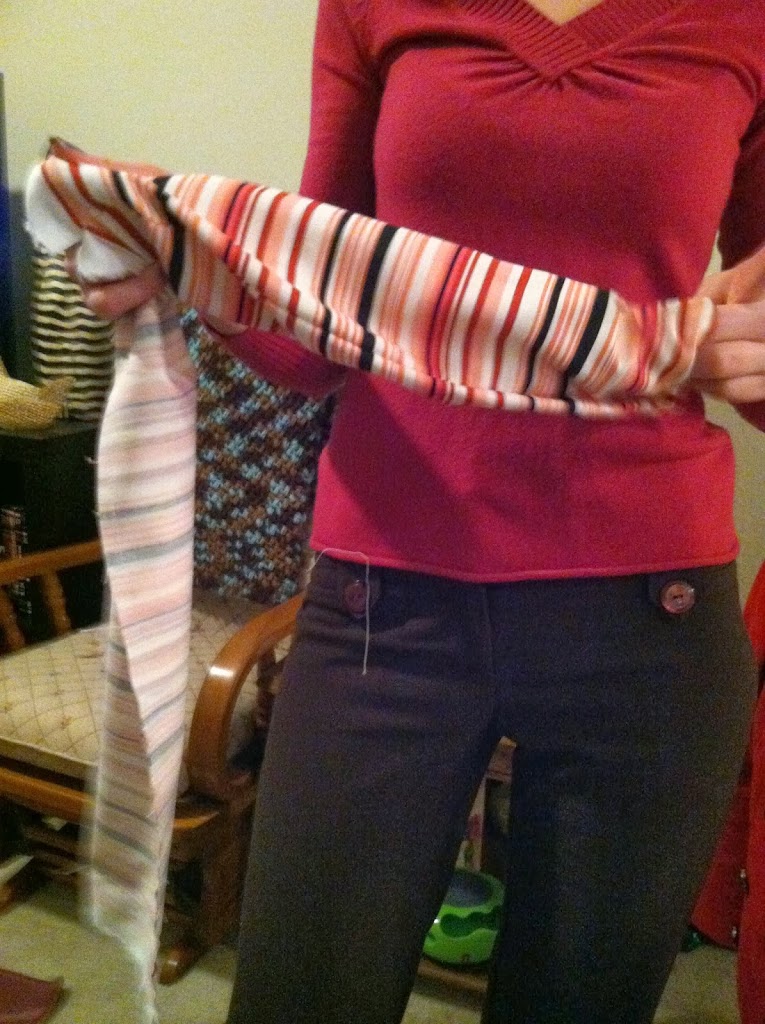
Step 4: Now flip the tube inside-out so that the stitches are on the inside and the pattern is on the outside.

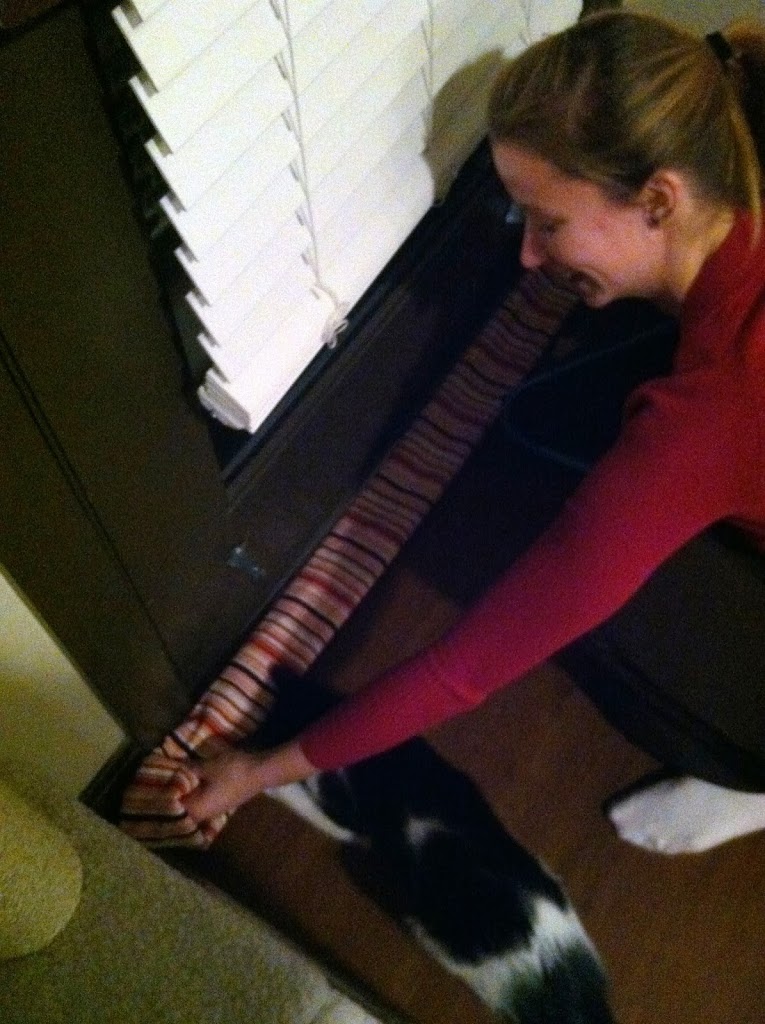
This is one of B’s 2 cats, she was very interested in what we were doing. Mostly the parts involving string.

Step 5: Measure against your door frame to make sure you fill the tube to the right length. Cut off the extra, leaving a few inches on the un-sewn end.

Step 6: Take the filler material, and hold open one end. Fill the tube up until the length of your door frame.

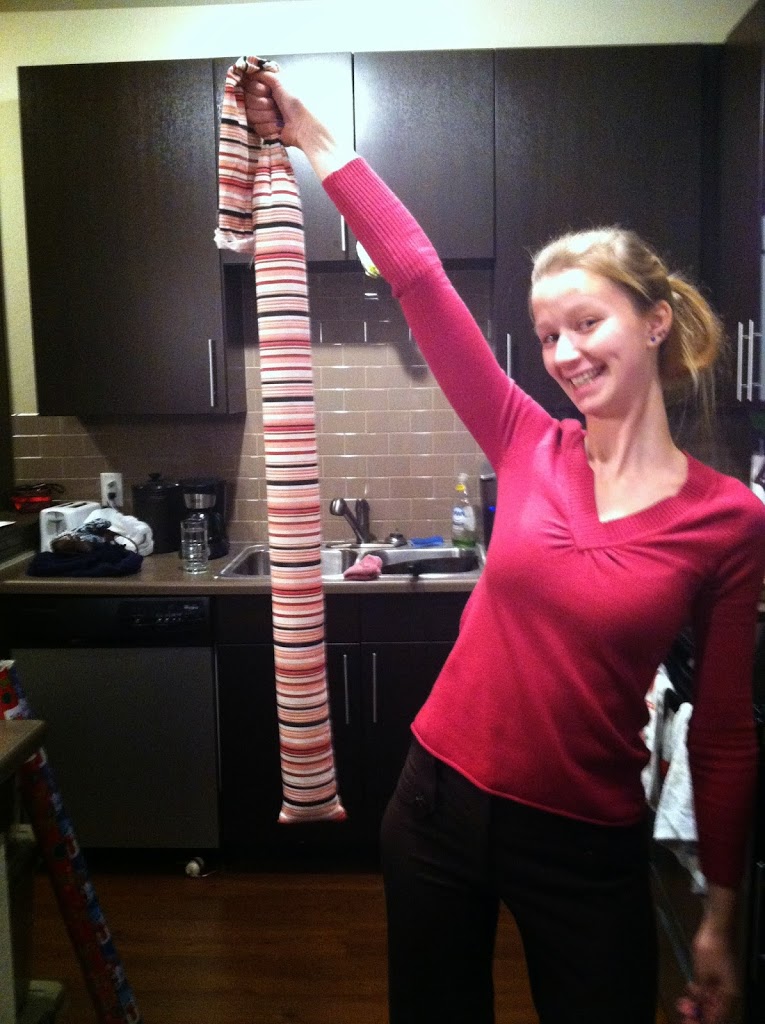
B proudly holding our first filled door snake. =) This is before cutting off the extra end material and sewing up the open end. Also of note, kitty litter is cheap but very dusty. Maybe try rice in yours.

Step 7: Fold the ends in by about 1/4 inch so that you have 4 layers of material. This puts the frayed, cut ends on the inside and creates a cleaner look & hemline.


Step 8: Sew along the double fold at the end. Make sure it is nice and tight, and goes all the way to both sides of material. You don’t want filler bits leaking out on your floor.

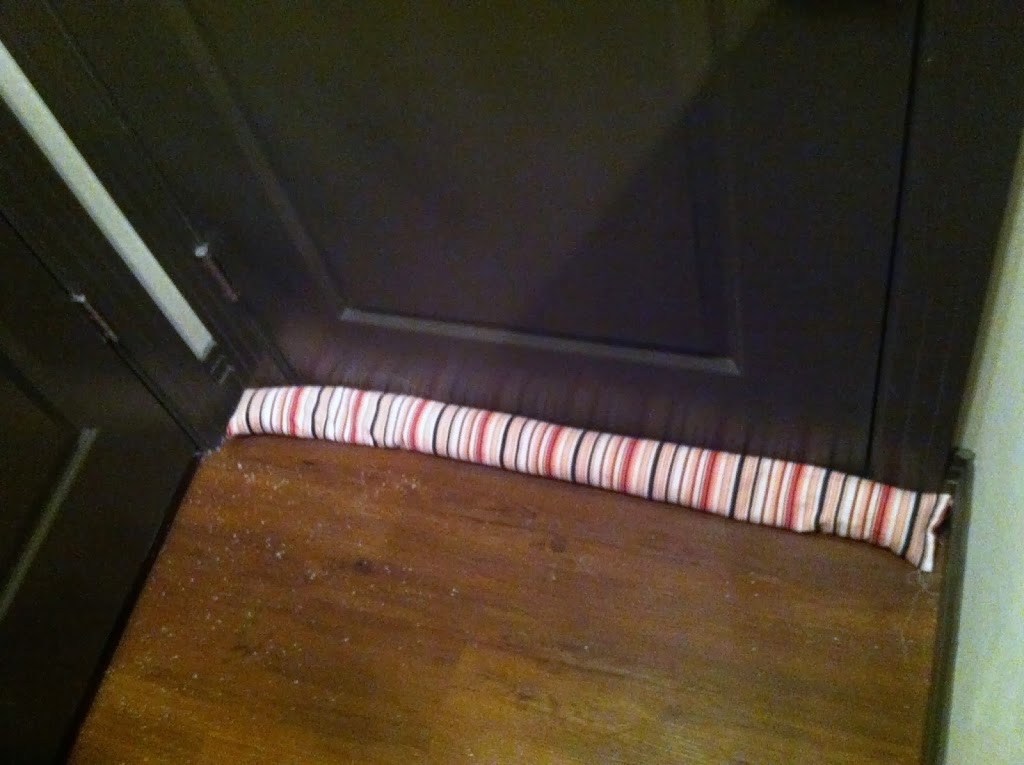
Step 9: Make sure your door snake is the right size for your door frame, and admire your hard work.


There you have it. A simple solution to cold wintry drafts that saves you from needing to double-sock and saves you some cash. You can re-use these for years, depending on the type of material and your level of sewing prowess. I’ve even heard of people sewing extra washable covers for these so they can wash the cover when it gets dusty/muddy/gross.

What’s your favorite money-saving craft idea?


Vegetarian Breakfast Strata

I’ve said many times, and I’ll say it again, breakfast is the most important meal of the day.
I’ve also said many times that I love easy, make-ahead meals. This breakfast strata could be put together or baked the day before and stored in the fridge if needed. It is super simple and could incorporate any type of veggie or bean you prefer. You can make it completely vegan by using egg substitute and no cheese too.
 
Ingredients:
3 slices bread
1 can beans, slightly mashed
1/2-1 cup vegetable (spinach here)
8-10 eggs, beaten
sprinkle of cheese

Step 1: Lay the bread in an oven-safe pan sprayed with oil. Layer on the mashed beans, cheese and spinach.

Step 2: Add the egg mixture.

Step 3: I sprinkled more cheese on top. Bake at 350 for 45-50 minutes, until eggs are fully cooked.

Mmmmmmm! Hot, healthy, and protein packed breakfast. Actually this doesn’t necessarily have to be for breakfast, you could have this any time of the day.

 
What are your favorite strata ingredients?

Bacon & Egg Breakfast Biscuits

.
We all have heard how breakfast is the most important meal of the day. Yet busy mornings, waking up late, or a lack of energy in the a.m. can stymie any attempts to be culinarily courageous before noon. This recipe is an easy weekend project which can make a few dozen little bacon-wrapped breakfast packages you can store and re-heat for a quick breakfast on the go all week long. If you can keep yourself from eating them all at once.
.
Ingredients:
1 pound bacon 
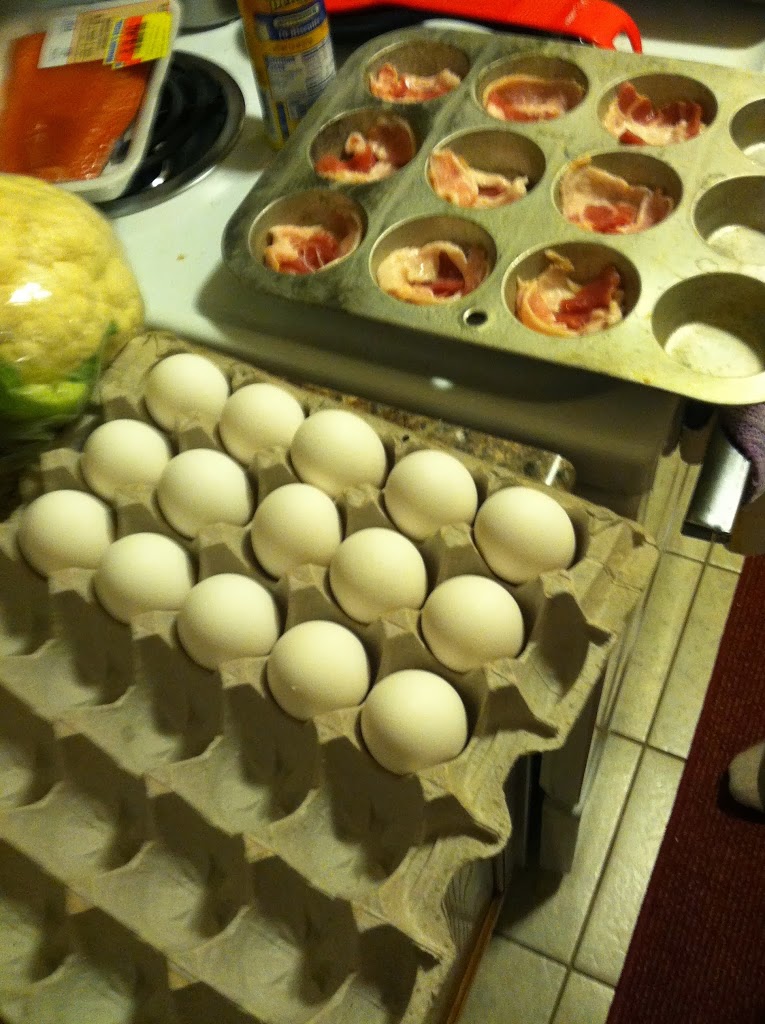
1 1/2 dozen eggs
2 packages biscuits
Shredded cheese (optional)

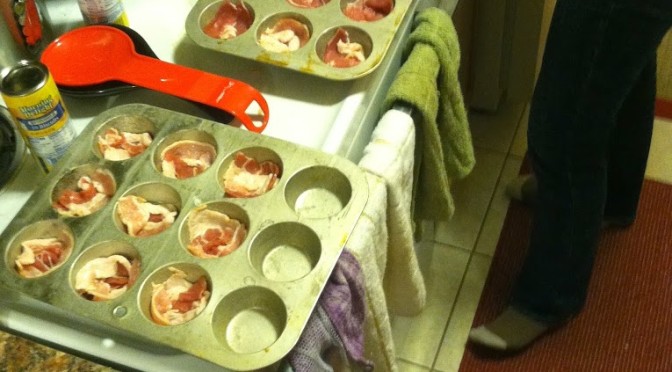
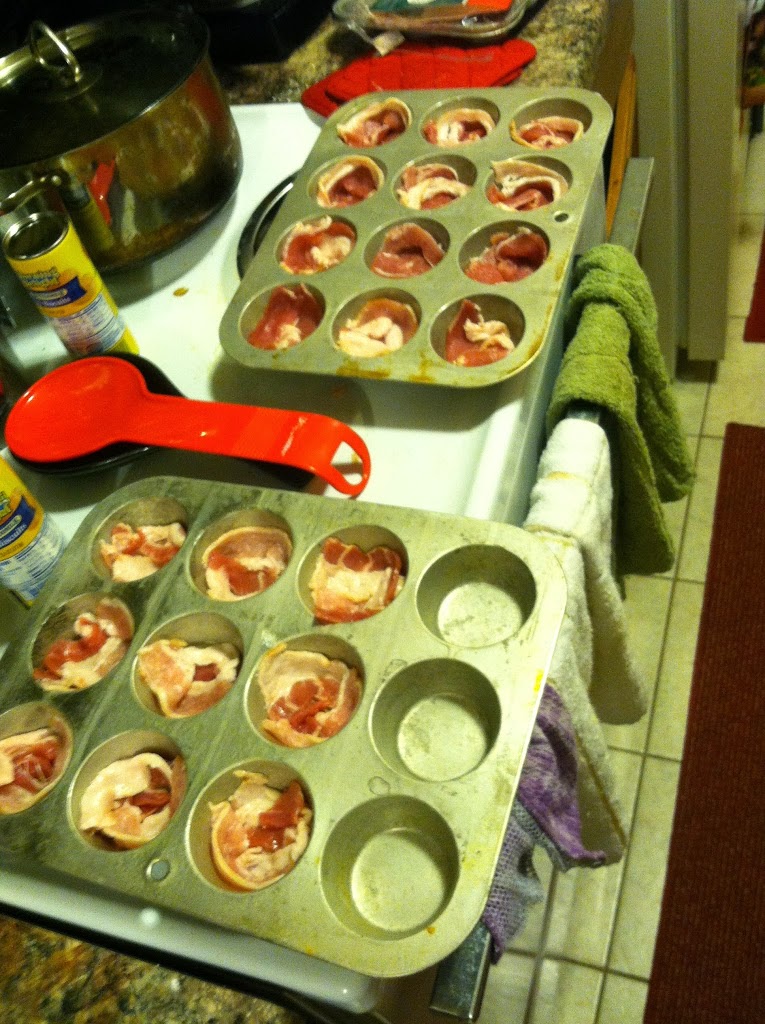
Step 1: Line some muffin tins with a strip of bacon.

Curl it around so the bacon makes a little cup.

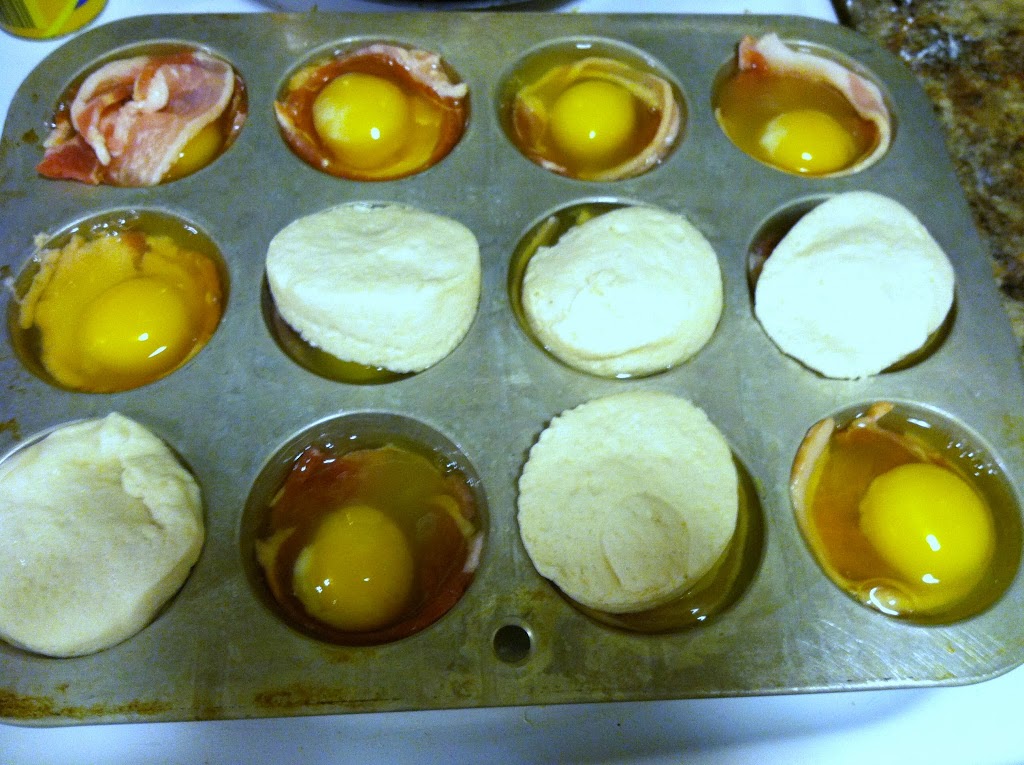
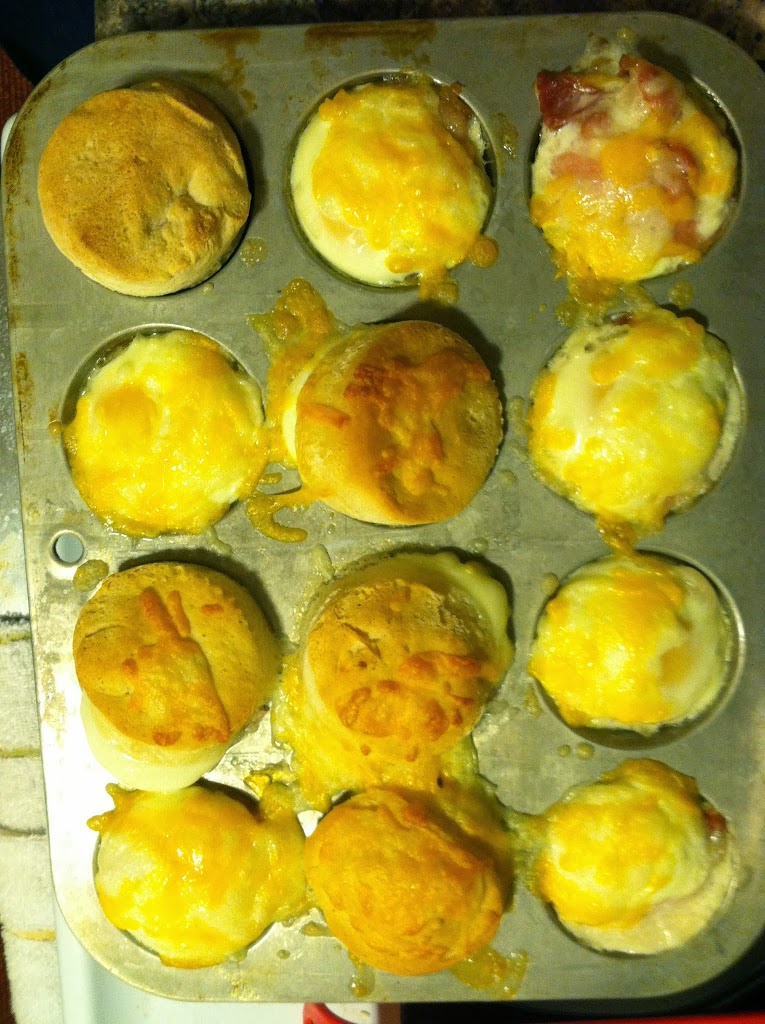
Step 2: Crack an egg into each bacon cup. Cover with the biscuits. Add cheese if you want.

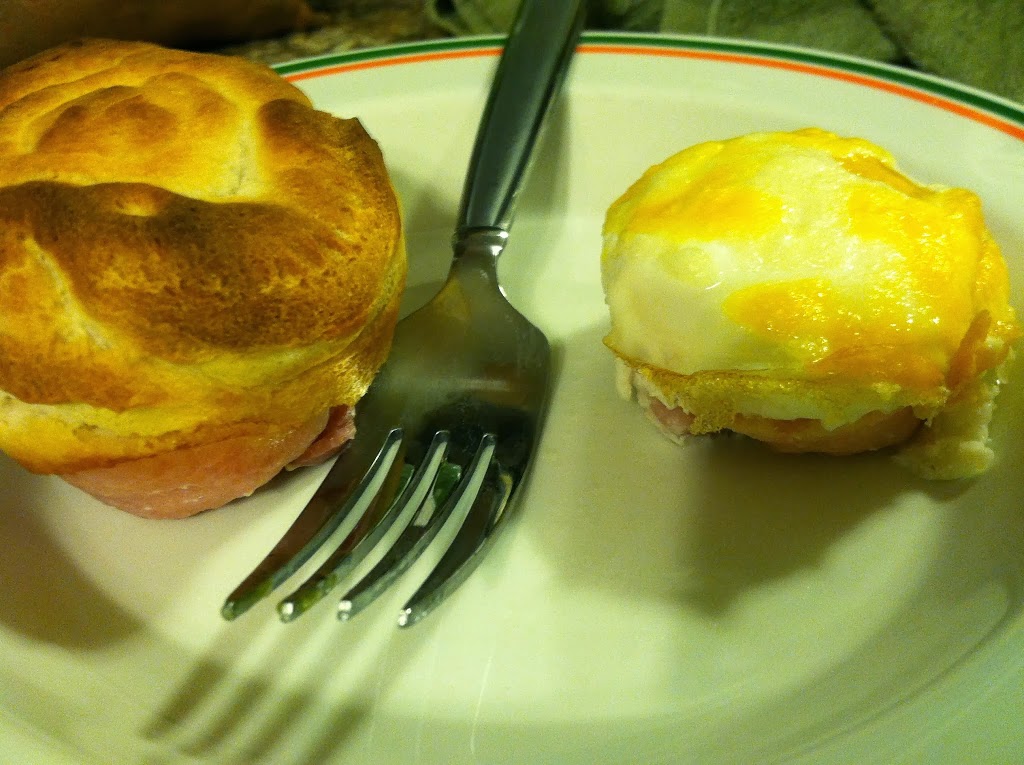
Step 3: Bake at 350 for ~40 minutes, until egg is cooked fully and biscuit is crispy and golden brown.


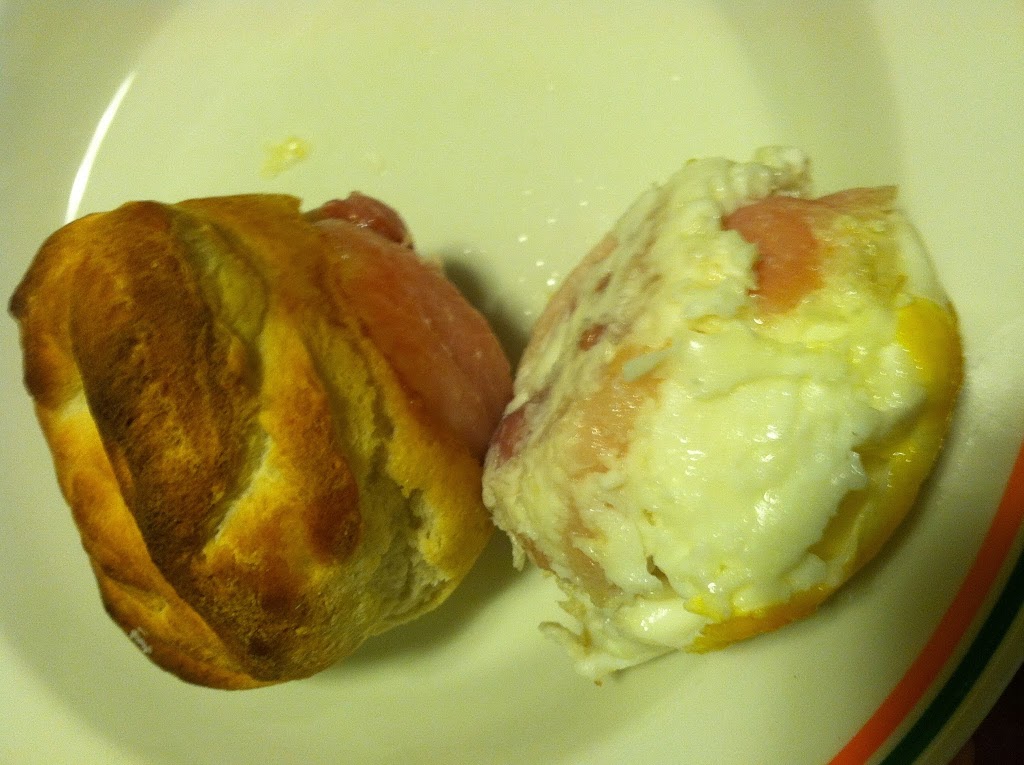
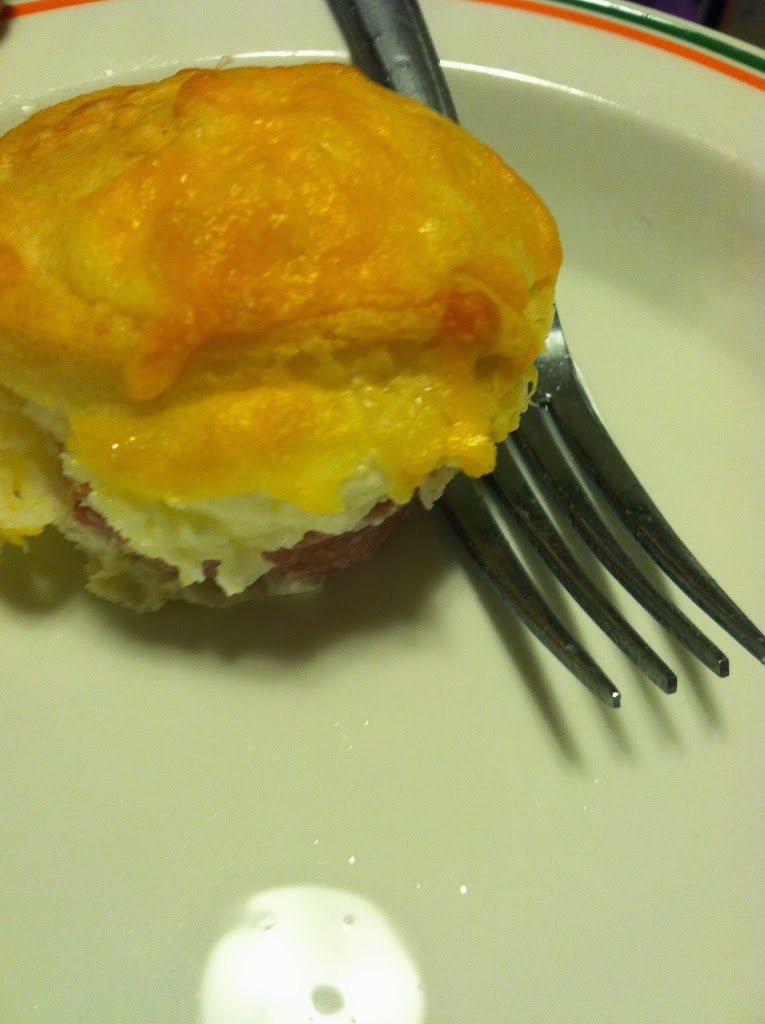
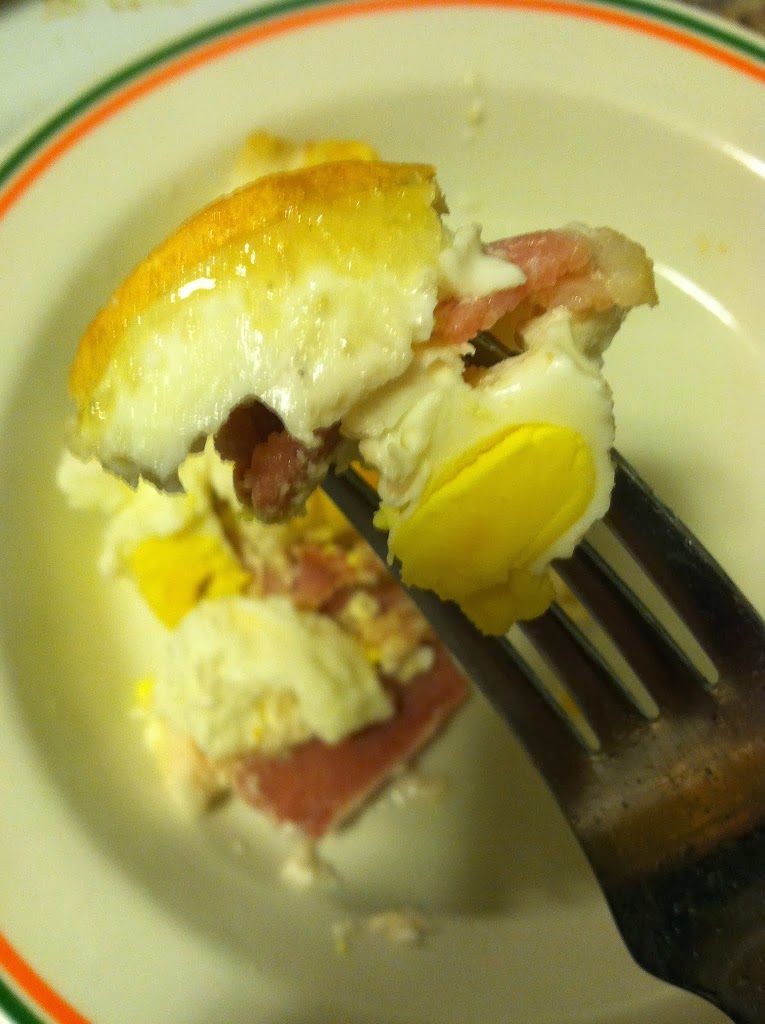
These little biscuits are absolutely perfect. The biscuits are buttery and crispy, the bacon is of course bacon, and it all comes together for a handheld protein powerhouse. The bacon does make it a little greasy so beware of that.

 How do you get breakfast on busy mornings?


‘Merican fish and chips

Fish and chips is a beloved dish in many countires, most notably Britain. As most common and popular dishes do, it has a long and debated-over history. The potato was said to have been brought over to England from the New World in the 17th century. It quickly became a cheap staple food. It is believed that frying the potato into chips originated in France. Obviously potatoes were hugely popular in Ireland as well. Being near a coast, fish was a popular poor fisherman’s food. Fried fish was introduced in London’s East End in the 1800s. The Charles Dickens novel Oliver Twist even refers to a ‘fried fish warehouse’. The Historic UK website says that both Lancashire and London claim to be the first to put these two together into the iconic meal. For a more thorough history of the dish check out the BBC’s history of fish & chips article one and article two.

The “chips” referred to in this dish are what Americans would call “French fries”, not the flat Lay’s type chips we know. Typically the fish is a white fish such as cod or haddock, coated in a thick batter and deep fried. Not the most healthful of meals, it nonetheless meets all working class requirements: it’s cheap, filling, easy to eat out of a newspaper while walking home from the pub, and warms you on a chilly night. Common ways to eat it include sprinkling with salt and/or vinegar, mayonnaise, tartar sauce, ketchup, or plain naked. About.com’s page for British Food gives statistics on nutrition as well as the claim that fish & chips is the nation’s most popular take-away food, four times more popular than Indian curry. I think in America, nothing can overtake the pizza, but who am I to say?

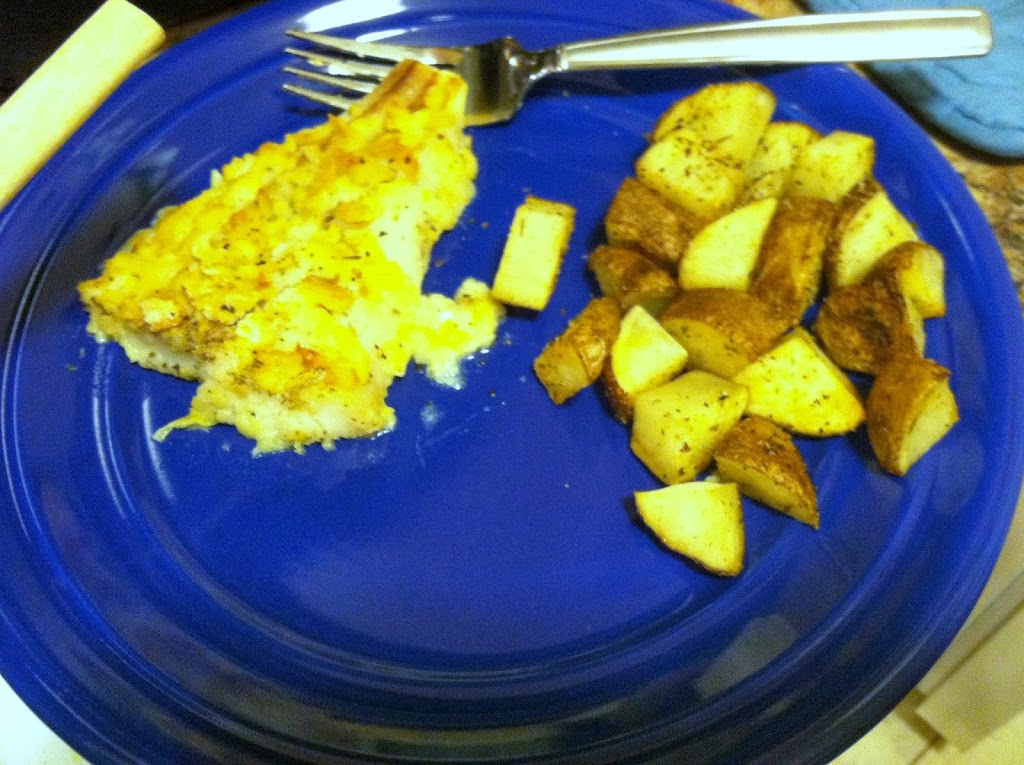
My version of fish & chips is baked rather than deep fried, making it more waistline friendly. It takes minutes to prepare, then you must be patient while it cooks. Go read a book, do some laundry, take a bath, whatever. Then sit down to a hot and crispy meal you can feel good about.

Ingredients:
2-3 large potatoes, diced
2-3 fillets white fish
1 egg, lightly beaten
1/2 cup crackers, crushed
Italian spices, garlic salt
Spray oil

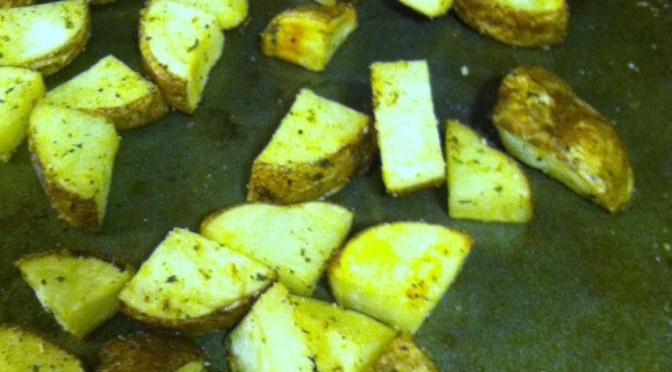
Step 1: Spray a pan with oil, spread out the potatoes, and spray them. Sprinkle the spices over them. Put in the oven at 350 for ~35 minutes. Make sure to mix them up once or twice to cook on all sides.

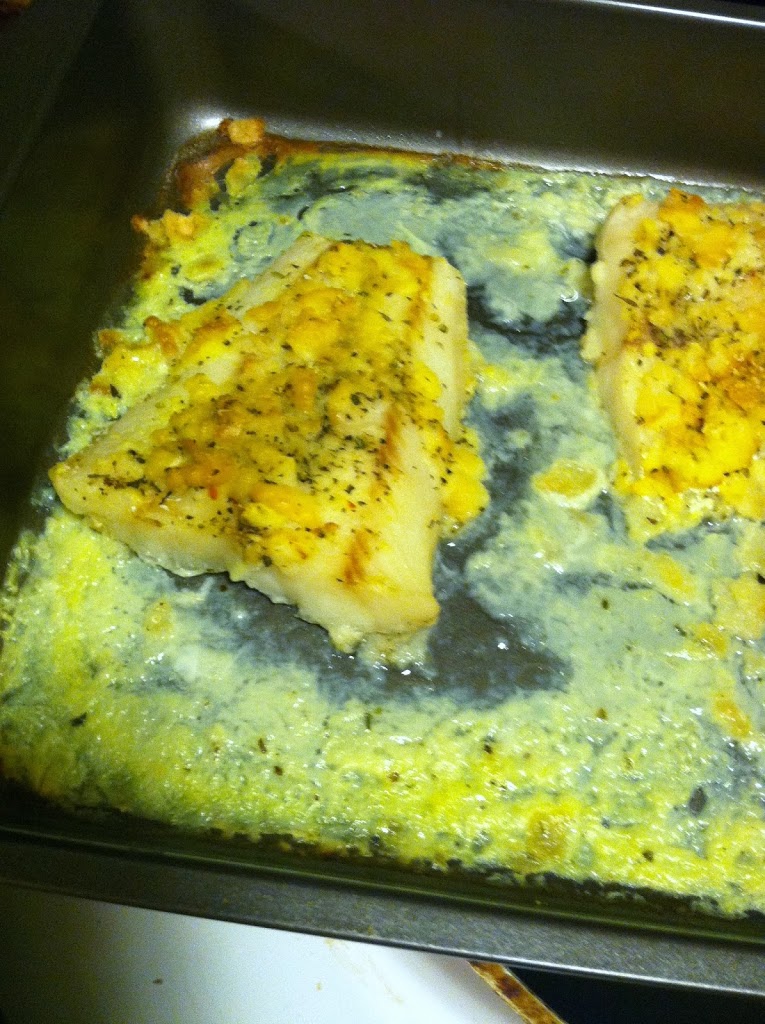
Step 2: In a shallow bowl beat the egg. Coat the fish on both sides, then roll in the crushed crackers. Sprinkle with spices and place on a sprayed pan. Bake at 350 for 20-25 minutes, turning once.

Once the fish flakes easily and the potatoes are soft when poked with a fork, remove and place on a plate. Because this is not fried there is far less fat content, if you eat the equivalent of one whole potato (these little cubes are seriously addictive, I know I could!) there are about 10 grams of fat. The fish and chips combined have about 480 calories, 47 g carbohydrate, and 48 g protein per serving. Not to mention tons of vitamins and trace minerals. {Nutrition info calculated on SparkRecipes recipe calculator}. Add a baked veggie if you like to round out the meal.

What’s you favorite way to eat fish?

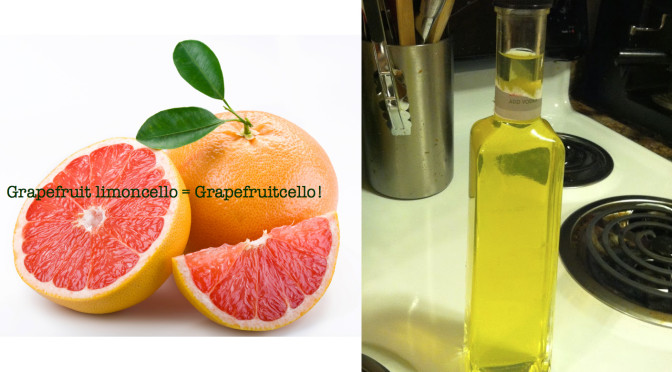
Grapefruitcello

History of Limoncello

Limoncello is a traditional liquor of Italy, with competing areas laying claim to its origin, including Sorrentini, Amalfitani, and Capresi. Production began sometime in the 1900s, but the businessman Massimo Canale first trademarked the name “Limoncello” in 1988 (source: Taste of Sorrento).

There are many other competing stories, such as limoncello being used in coastal towns to fight the morning chill, or its use among monks in monasteries to keep them cheerful between prayers. 

Limoncello has been growing in popularity as people begin trying their hands at home-brewing all types of alcohols, from wine and beer to whiskey and kahlua. The beauty of this type is that there are only four ingredients: citrus peels, alcohol, sugar, and water.

It does not depend on a specific type of alcohol, rum will work just as well as vodka. It also can vary between which type of citrus peel you use. The steeping time is typically at minimum one month, but I’ve read up to a year. 

By soaking the peels in the alcohol, you are sucking out all the depth of flavor and aroma from the peel’s essential oils into the liquid. This infusion is what can then bring flavor to other beverages. It is claimed that limoncello as an aperitif before or after a meal is a great digestive aid, and it is also sometimes enjoyed when mixed with champagne.

Typical Recipes

Limoncello is made by soaking the peel only of citrus fruits, most often lemons, in liquor for an amount of time. It is then strained and to it is added sugar dissolved in water. The liquid is then cured a little longer. It is then ready to be drunk as an aperitif or added to cocktails.

According to Discover Italian Foods, the traditional recipe calls for: 13 Sorrento or Amalfi lemons, 2 L good quality alcohol (type not specified), 650 g sugar (2 & 3/4 cups), and 1 L pure water. Soak the peels in the alcohol in a cool, dark place for one month. Filter, then make the syrup by boiling the sugar and water. Mix and store in the freezer.

Keep in mind that all of these recipes calling for limoncello can also use any steeped liquor using citrus peels. You can make this with oranges, lemons, limes, tangelos, or grapefruit. As long as you make sure to only take the peel and not the pithy white inside, you’re good to go!

I decided to start small, and as I only had one gigantic grapefruit, that is what I started with. I scaled back the average recipe and made just one bottle of grapefruitcello.

Ingredients:

  • 1 large grapefruit
  • 1 cup plain vodka
  • 1 cup sugar
  • 1 cup water
  • ~time~

Step 1: Peel 1 large grapefruit and place peels in a glass jar. Pour the vodka over it and cover. Let sit in a cool, dark place. Mine only sat for 2 weeks rather than the traditional month or longer.

Step 2: Prepare the simple syrup by mixing the sugar and water and bring to a boil. Strain the liquor to remove the peels. Let syrup cool, then add to the filtered infusion.

Step 3: I’m storing this is the refrigerator for now. It probably won’t last too long!

This made about 150 mL of grapefruitcello. The taster shots were darn good, I can’t wait to mix up some tangy cocktails using this!

Limoncello cocktails

Limoncello can be drunk cold by itself between courses or after meals, you can use it in baking, or it can be added into cocktails for depth of flavor. This post from The Vintage Mixer is right up my alley in determining how to mix a cocktail.

Simply take 1 ounce limoncello, add 2-3 oz any complimentary liquid (juices, club soda, tea), add an additional liquor if you desire (1 oz gin, whiskey, rum), and garnish with something pretty! The website Limoncello Quest also has a massive list of creative drinks which use limoncello. 

I’m going to try a variation on a vodka cranberry and a lemon drop martini. Since I used grapefruit to make the grapefruitcello, I don’t need grapefruit juice. 

Ingredients:

  • 1 oz grapefruitcello
  • 1 oz vanilla vodka
  • 2 tbsp lime juice
  • 1/2 cup cran-cherry juice (or whatever kind you like & have)
  • Top off with sparkling water

Step 1: I had frozen lime juice cubes so I threw one of those in, as well as some re-freezable ice cubes so it didn’t get watered down. Add 1 shot (1 oz) of the grapefruitcello and 1 shot of vanilla vodka (bought pre-flavored or make your own by adding vanilla beans to plain vodka). Add in about 1/2 cup juice, and top it off with sparkling water.

I added a slice of lime wedge and a pretty stir stick, and my new signature cocktail is complete! Pretty and delicious. And with under 200 calories, about 15 g of sugar, and no fat, you can justify another one!
  

Have you made any homemade liquors? 

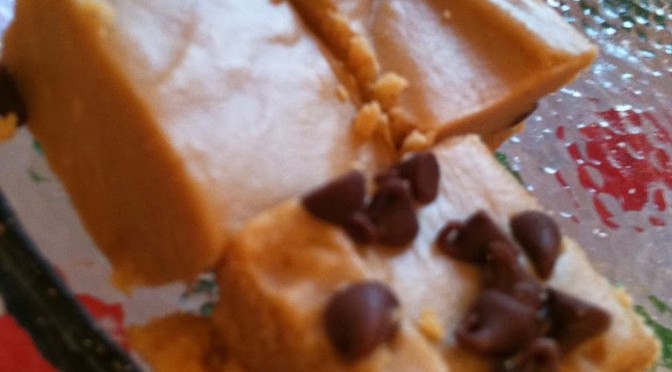
World’s Easiest Peanut Butter Fudge

History

The exact origins and first creator of the confection known today as fudge is widely debated, though by most accounts it was invented in the U.S. over 100 years ago. The most popular theory is that it resulted from a batch of caramels gone wrong, or “fudged”, hence the name and the grandmotherly curse “Oh, fudge!”. For two possible stories of how this came about check out the BBGees “History of Fudge Explained“. 


Ingredients

For most candies and caramel, you do not cause crystallization. However, for fudge crystallization is required. The crystals are small enough that there is no grainy texture. Original recipes call for boiling mixtures of milk, cream, and sugar. They were also famously touchy; one had to use precise measuring, accurate temperatures, and constant stirring to achieve that perfect soft texture. Since not everyone has a candy thermometer, the recipes were adapted for home cooking to make the results easier and more reliable. Corn syrup, marshmallows, marshmallow cream, peanut butter, nuts, and sweetened condensed milk, among other ingredients, are included in various fudge recipes. The Nibble has a great article on the history and original fudge recipes.

Process

Almost all fudge recipes call for sugar, cream, and butter to be heated to the “soft ball” stage. This term, according to Exploratorium: The Science of Cooking, refers to how the mixture reacts when dropped into cold water, it will form a soft ball. This happens at 235-240F (110-116C) degrees. Other stages, determined by the highest heat the liquid reaches before cooling, include the Thread, Firm Ball, Hard Ball, Soft Crack, and Hard Crack stages.

In case you haven’t had enough sweets during December, I discovered the world’s easiest fudge recipe while at home. Now when you have that irresistible craving for the creamy sweet stuff, you don’t have to run out to a store. Just pull two simple ingredients from the pantry and within minutes you have a gooey batch of the sweet stuff.

Recipe

Ready?
Ingredients:

1 jar peanut butter
1 jar icing (vanilla is best, but what the heck, go wild and try chocolate, or cream cheese)

Mix well. Microwave 2 minutes. Refrigerate until solid and cut into squares. 

Bacon-wrapped pork roast

Does that title say what I think it says? Firstly, BACON. So that’s a magic word in its own right. Then, pork roast. Those are fantastic. Combined? *Cue fireworks*

This happened because bacon was on sale, and that’s the kind of thing you just don’t pass up, regardless if there’s a plan for it yet, because there soon will be. So I had a pound of bacon in the refrigerator. After thinking a long time about the endless possibilities, I decided that bacon-wrapped other meats is always delicious. (I apologize, any vegetarian or vegan readers. I’ll have a vegetarian lasagna post or something for you soon, I promise). If you’re interested in knowing more about what you can do with a part of a pig, see my New Year’s Eve post.

Ingredients:
1 2-3 pound roast
1 head garlic
1 pound bacon

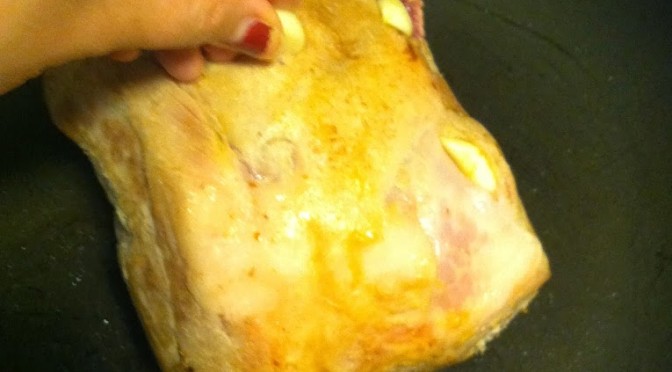
 Step 1: Brown the roast on all sides, just to char it. Slice slits in it and insert garlic cloves randomly. This will infuse the meat with garlic flavor, yum!

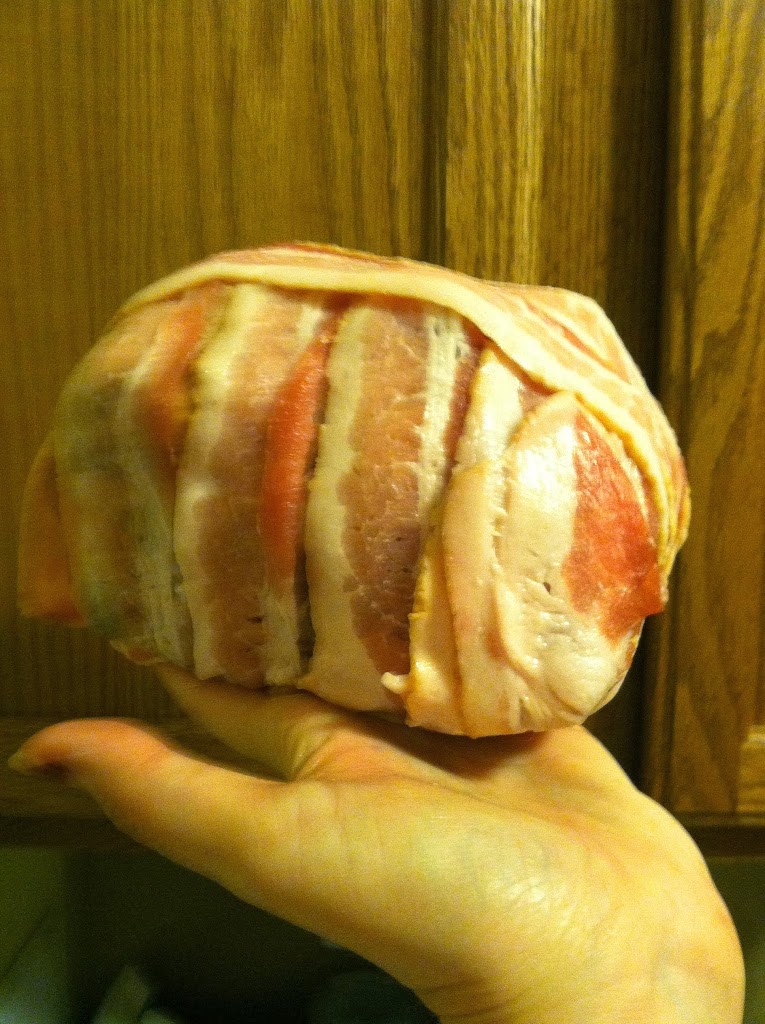
Step 2: Wrap the roast in bacon. I used four pieces width-wise then three pieces length-wise overtop. Oh yes. I took a piece of a pig, and wrapped it in another piece of pig. The rest of the pound of bacon became part of breakfast.

 It’s like a little bacon-wrapped-pork football.

 Men of the world, behold its splendor.

Step 3: Place in a crock pot on low ~6 hours or high 4-5. Mine was still partly frozen so I left it in there on high for about 7 hours to make sure everything cooked fully.


Serve with whatever carb you like or just eat it alone with your hands, whatever suits you. No judgment.


What’s your favorite way to use bacon?